It makes sense that Apple stops iTunes if you think iTunes is too thick and full of bugs. In fact, iPhone users don't panic when they hear the news, partly because they are more comfortable using iCloud for data management, transfer and backup.
Now, iCloud is available on Windows 10 and earlier systems. This is great news for people who have an iOS device and a computer. In this article, we will show you a specific guide on iCloud Control Panel for PC.
- Part 1: What is iCloud for Windows
- Part 2: How to Set Up and Use iCloud on Windows 10
- Part 3: What can you do if iCloud is not working on Windows 10
What is iCloud for?
iCloud is the official cloud storage application from Apple. With its help, every owner of an Apple device can save any files: photos, videos, audio, dates and calendar events, backup data, mail, favorite browser tabs in his personal cloud.
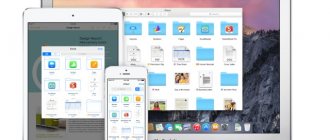
In addition, these files can be accessed from any of your devices: phone, tablet or computer, since all data is synchronized. Computers based on MAC OS already have a built-in version of the program, but for Windows you need to download iCloud separately for free.
Authorization features
The account has been created. Which option to use is up to each user to decide for himself.
But to log into iCloud from a computer, you will still need mandatory authorization.
As in the previous case, there are several ways to access your own dedicated iCloud storage using a computer.
When registering your ID for iCloud and other Apple services, you needed to go to your email from your computer, confirm the specified data, and then the procedure was completed. That's it, now the user has an identifier that he can use.
The next step is to log into iCloud cloud storage itself, receiving your free 5 GB limit, or expanding it for an additional fee. Photos, videos and other files are usually uploaded there, which allows you to avoid clogging up your computer’s memory, or to have backup copies of important data at your disposal.
There are 2 ways to access iCloud from your computer:
- via browser;
- using the program.
Each option should be considered separately.
Login via browser
The easiest way to log into iCloud is through the browser. Here you can launch any web browser convenient for you.
The instructions look like this:
- make sure you have an Internet connection;
- open a browser (preferably with the latest updates);
- go to the official website of apple cloud storage;
- press the login button;
- indicate your details for the created identifier.
That's it, the login is completed, access to the cloud storage is open.
What’s most interesting is that using the created Apple ID, you can log into iCloud through a browser on various versions of operating systems. It doesn't have to be Mac OS or Windows. Currently, login through a browser with an ID is possible even through smart TVs. The main thing is that you have access to the Internet.
After completing the authorization procedure, the user will have access to cloud storage, settings, etc.
But the problem with this method is its vulnerability to phishing. That is, unauthorized people can get access to your data if they wish.
Login through the program
Authorization through the utility is much more secure. This is an official program created by Apple.
It can be downloaded from the official website for various versions of operating systems. The program is installed on the computer and launched. If you have access to the Internet, you will need to provide your Apple ID information in a special window and log into your own iCloud account.
Authorizing and working with iCloud through the program can cause several problems. Namely:
- Some antiviruses, especially older ones, sometimes block sending data through the official utility. This happens rarely, but such cases have occurred. It is recommended to update your antivirus or replace an outdated program with something more recent.
- When you remove the official utility from your computer, all data downloaded from the storage will also be erased. Therefore, it is necessary to save everything in advance so as not to accidentally lose important documents and files.
- If this is a personal computer or laptop running Windows, it will not appear in the list of my devices. After all, we are talking about Apple’s cloud storage program, tailored for Mac OS. The functionality for Windows is more limited.
Computer users should not have any particular difficulties creating an account and logging into the iCloud cloud storage service.
Just follow the instructions and choose the fact that is more convenient and beneficial for you.
Installing and setting up iCloud
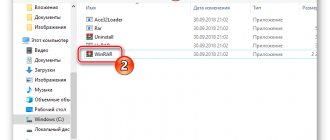
- If your computer uses the Windows operating system, then first of all you need to download and install iCloud;
- You'll then need to sign in to your account using your unique Apple ID as well as your password;
- Now that it's enabled, you can now select the services you want to use, such as: Drive, Photo, Mail, Favorites, etc;
- Initially, iCloud provides 5 GB of free free space , but you can increase it by choosing a convenient plan.
iCloud on your computer, tablet and phone"
Part 3: What can you do if iCloud doesn't work on Windows 10
Some people reported that iCloud does not work on Windows 10. Apeaksoft iOS Data Backup and Restore is the best alternative.
- Backup all or selected data from iOS to PC quickly.
- Supports a wide range of data types.
- Available for all devices running iOS 14/13/12/11 or earlier.
- Recover lost files from iOS backup easily.
How to Use the Best iCloud Alternative for Windows
Step 1. Get the best iCloud alternative
Launch iOS Data Backup & Restore after you have installed it on your computer.
Once you connect your iPhone to your computer, it will detect your device.
Step 2. Backup your iPhone
To download files from iPhone to PC, please click the iOS Data Backup button on the main interface. Select the types of data you want to download and click the Next button. Here you will be presented with two options, Standard Backup and Encrypted Backup. Select one based on your needs and click the Start button to begin the backup.
Tip: To back up your entire iPhone, check the box next to Select all in the data type window.
Step 3. Recover lost files from backup
If you want to get back lost files from iPhone, select iOS Data Recovery, select the backup file you want and click View Now to open it. You can then view all the data in your iOS backup by category. Check all the files you want to retrieve and click the Recover to Device or Recover to PC button to start the process.
Advantages and disadvantages
pros
- The ability to share files with friends or colleagues;
- Photos, videos or audio do not lose their quality;
- Storing all versions of a file, i.e. you can restore the desired file;
- Full data synchronization between Apple devices and computer;
- Russian language support;
- Back up important data.
Minuses
- Quite a small amount of free space;
- No support for Windows XP and Vista.
Selecting Services
How to upload photos?
After installing the iCloud application, a special utility will appear on your device for convenient work with photos. It will make it more convenient to synchronize files between your devices.
Photos: iCloud Photos folder
- Go to "My Computer".
- "Icloud Photos" should appear on devices and drives."
- If you open it, you will see your photos in your uploads.
- If you want to upload files from your computer to the cloud, you just need to drag and drop them into your Downloads folder. This operation may take some time depending on the connection speed and the quality of the files.
Did you like the article? Subscribe to our Telegram channel. News comes out faster there!
How to Access iCloud Drive on Your iPhone or iPad
Before the release of iOS 11 in 2022, accessing your iCloud Drive was a bit difficult, but with iOS 11 comes the Files app, which is a bit like Finder on the Mac.
The Files app should be the default on your iPhone or iPad (if you're using iOS 11 or later). If you don't see it, you may have uninstalled the app, in which case you can download it again from the App Store.
Tap the Files app on your iPhone or iPad to open iCloud Drive. There are two tabs: Recent and Review. You'll find documents and files you've worked on recently in the Recent section. Or tap Browse to see everything on your iCloud Drive.
If you create a document in an app that uses iCloud, such as Pages, any new document will be automatically saved to iCloud Drive.
If you click on a document and it doesn't open, check to see if you've set the app to open documents stored in iCloud:
- Go to settings.
- Mobile data.
- Scroll down to iCloud Drive and make sure the slider is green.
If you can't see your files in iCloud Drive on your iPhone, try these steps:
- Go to settings and click on iCloud.
- Select iCloud Drive and turn it off.
- Restart your iPhone/iPad.
- Open Settings and click on iCloud again.
- Go back to iCloud Drive and turn it back on.
- Open Settings and click on iCloud again.
- Sign out of iCloud. restart your iPhone or iPad.
- Sign in to iCloud again.
- Wait for the iCloud Drive documents to sync.
If the files are stored on your iPhone or iPad rather than iCloud, follow these steps:
- Open setting. Highlight an application (for example, Pages) and click on it.
- Click on document storage and select iCloud Drive.
How to synchronize iPhone with computer via Wi-Fi?
To synchronize your iPhone and computer, you don’t have to connect the devices to each other using a USB cable every time. Just like sharing data wirelessly via iCloud, setting up the same method for transferring files to iTunes can be done in a few steps.
The user should:
- Using the cord, connect the phone as described earlier, then go to the “Settings” of the program and in the “Options” section, check the “Synchronize with this iPhone via Wi-Fi” checkbox.
- In the “Settings” of the phone, move the “Sync over Wi-Fi” slider to the “yes” position.
Now data can be exchanged throughout the entire coverage area of your home network; you just need to remember that such synchronization leads to a much faster discharge of the iPhone or iPad.
System requirements
Before installing iCloud, you need to make sure that the browser version is at least MSIE 11, Chrome 50 and above, and Firefox version is at least 45. You will need an Internet connection, iTunes 12.7, an IMAP-enabled email address, and an email client with a calendar, reminders, and contacts, Outlook 2007–2016 (with the exception of the 2010 edition intended for personal use).
The minimum system requirements for individual Aicloud functions can be found on the developer’s technical support website. For example, to share bookmarks, the browser version must be at least Firefox 22, IE 9 and Chrome 28.
Functional
iCloud provides:
- accessing the cloud of all gadgets that you have connected to it,
- use for storing information on an Apple server. Moreover, the size of this content can be within 5 GB,
- performing backups,
- playback of multimedia files,
- synchronization of gadgets released by Apple.
If you have lost your gadget, then using the utility and the “Find iPhone” function you can find it.
How to increase iCloud storage
It is quite possible to increase the amount of memory in iCloud - buy space or use one of the free methods:
- Student tariff. If you are studying and have confirmation of this, you have the option of receiving additional space up to 200 GB. It's absolutely free and can be activated in the settings.
- To invite a friend. For each invited friend who registers in iCloud using your link, you receive an additional 1 GB of disk space.
- Subscribe to Apple news. With current discounts you can get more disk space.
How to Use iCloud Drive on iPhone or iPad
Any files located on your iCloud Drive will be available to you not only on your Mac (or Mac), but also on any of your iOS devices. You might open the same Pages document you were working on in the office and finish it on your iPad during the train ride home, or you might make last-minute changes to a Keynote presentation on your iPhone while commuting to a meeting. Of course, it's useful to have access to your files on all your devices, especially if you suddenly have to work from home.
First of all, you need to set up iCloud Drive on your iOS devices. Here's how to do it:
- Click on settings.
- Click on your Apple ID at the top of the screen.
- Click on iCloud. Here you will see various applications that use iCloud. Scroll down to iCloud Drive and turn it on (so the slider is green).
Two-factor authentication
It is recommended to use two-factor authentication whenever possible. True, it can cause problems on older versions of iOS and macOS, but there are no difficulties with modern ones. The first time you are asked to enter your Apple ID on your device, a code is sent to the selected phone number. Enter this code and two-factor authentication will be enabled. You need to enable it on all devices that use iCloud.
If you forget your Apple ID password, you can reset it. You can also use account recovery.
Downloading from the site
How to deal with such operations? Deleting information in iCloud is not popular, so we will not pay attention to it. Instead, you should take the time to download the pictures.
If the user is using the iCloud web interface, they will have to:
- Open the “Photos” section in the cloud service on your computer through any browser.
- Press Alt on your keyboard.
- Select the required images using LMB.
- Click on the button with the image of a cloud with an arrow.
After these steps, the downloading of information will begin. You can find pictures in the root folder of the browser. Where data from the Internet is downloaded by default.