This instruction details what to do if you see blurry fonts in Windows 10 or individual programs and applications, which can happen both after changing the scaling in the screen settings, and without these actions. We'll first talk about ways to fix screen resolution issues that are obvious to most users but may be overlooked by novice users, followed by other ways to fix blurry text in Windows 10.
Note: if the fonts have become blurry after recently changing the scaling parameters (125%, 150%) in the display settings (item “Change the size of text, applications, and other elements”), try simply restarting your computer first (even if this has already happened more than once before it was turned off and on, since turning off in 10 is not the same as rebooting).
Automatically remove blurred fonts in Windows 10 1803
The Windows 10 1803 April Update introduced an additional option to fix blurry fonts for apps that don't support scaling (or do it incorrectly). You can find the option by going to Settings - System - Display - Advanced scaling options, "Allow Windows to correct blur in applications."
If it turns out that the setting is enabled and the problem persists, try, on the contrary, disabling it.
Causes of the problem
The error manifests itself in the fact that on the lock screen a person sees a blurry image instead of a clear picture. Of course, this fact can hardly be called a big inconvenience, but it is still much nicer when the interface looks the way the user wants to see it.
A blurry picture at the entrance is a consequence of the following reasons:
- the resolution is set to a value that does not correspond to the actual screen size (for example, 1366x768 instead of 1920x1080);
- The setting to remove blur in applications is not activated;
- blurry fonts are used;
- In Windows settings, the “soap” image option is activated.
None of the known reasons should scare the user. A blurry picture is a consequence of incorrect settings that can be changed at any time. This is how the problem will be solved.
Checking screen resolution
This item is for those users who do not fully understand what the physical resolution of a monitor screen is and why the resolution set in the system should correspond to the physical one.
So, modern monitors have such a parameter as physical resolution, which is the number of horizontal and vertical pixels on the screen matrix, for example, 1920x1080. Moreover, if you have any resolution set on your system that is not much different from the physical one, you will see distortion and blurriness of the fonts.
Therefore: if you are not sure, make sure that the screen resolution set in Windows 10 matches the actual screen resolution (this may in some cases cause the font to appear too small, but this can be corrected by scaling options).
- To find out the physical resolution of your screen, you can simply search the technical specifications on the Internet by entering the make and model of your monitor.
- To set the screen resolution in Windows 10, right-click on any empty space on the desktop and select “Display Settings”, then click on “Advanced Display Settings” (bottom right) and set the desired resolution. If the required resolution is not in the list, then you probably need to install the official drivers for your video card; for an example, see Installing NVIDIA drivers in Windows 10 (the same will be true for AMD and Intel).
Read more on the topic: How to change screen resolution in Windows 10.
- Disable background blur effect on Windows 10 login screen.
Note: if you use several monitors (or a monitor + TV) and the image is duplicated on them, then Windows, when duplicating, uses the same resolution on both screens, and for some of them it may not be “native”. There is only one solution here - change the operation mode of two monitors to “Expand screens” (by pressing the Win + P keys) and set the correct resolution for each monitor.
Reduce screen resolution
Some apps appear blurry because you are using a high screen resolution. In this case, you can reduce the resolution and see if that solves the problem.
If this doesn't solve the problem, you can easily revert to the old resolution.
To do this, open the Start menu, search for Settings, and click the first result. Another way to open Settings is to press Ctrl + i on your keyboard.
Click "System" on the next screen.
Select "Display" on the left and look towards "Display Resolution" on the right. From the drop-down menu, select a resolution lower than your current one. You can start by selecting the second option from the top. Note. Please note your current resolution and you can select it if you want to undo the change.
A prompt will appear asking if you want to save the new resolution. Click the "Save Changes" button.
There is no need to restart your computer. You can immediately open the vulnerable application.
Removing text blur when zooming
If the problem with blurry fonts occurred after changing the sizes of elements in “Right click on the desktop” - “Display settings” - “Change the size of text, applications and other elements” by 125% or more, and restarting the computer or laptop did not fix the problem, try next option.
- Press the Win+R keys and enter dpiscaling (or go to the control panel - screen).
- Click on "Set custom zoom level".
- Make sure it is set to 100%. If not, change it to 100, apply, and restart the computer.
And the second option of the same method:
- Right-click on the desktop - display options.
- Return the scaling to 100%.
- Go to Control Panel - Display, click "Set custom scaling level", and set the required Windows 10 scaling.
After applying the settings, you will be asked to log out, and after logging in you should see the changed sizes of fonts and elements, but without blurring (using this option applies a different scaling than in Windows 10 display options).
Removing blurry screen
This problem occurs mainly due to incorrect resolution, incorrect scaling, or a glitch in the video card or monitor driver. Therefore, the methods for eliminating it depend on the cause of its occurrence.
Method 1: Set the correct resolution
Most often, this problem occurs due to an incorrectly selected resolution - for example, 1366x768 when the “native” 1920x1080. You can check this and set the correct indicators through “Screen Options”.
If a resolution is set in this list, next to the indicators there is no inscription “(recommended)”, expand the menu and set the correct one.
Accept the changes and check the result - the problem will be solved if that was the source of the problem.
Method 2: Scaling Options
If changing the resolution does not bring any results, then the problem may be due to incorrectly configured scaling. You can fix it as follows:
How to fix blurry fonts in programs
Not all Windows programs support correct scaling and, as a result, you may see blurry fonts in some applications, while the rest of the system does not experience such problems.
In this case, you can fix the problem as follows:
- Right-click on the program's shortcut or executable file and select "Properties".
- On the Compatibility tab, install o and apply the settings. In newer versions of Windows 10, click Change High DPI Settings, then o and select Application.
The next time you run the program, the problem with blurry fonts should not appear (however, they may appear small on high-resolution screens).
How to fix blurry interface of some programs when zoomed in on Windows 10
Most modern monitors, starting with a 21" diagonal and sometimes even 18", come with Full HD (1920x1080). However, working with such a resolution, at least if the monitor has a diagonal of up to 24", is not easy. In order not to strain your eyes by looking closely at excessively small interface elements, it is advisable to set the operating system interface to a larger scale. However, this feature in the Windows 10 version is not so simple.
The content of the article:
How to scale up your system
Any version of Windows is always installed with the default 100% interface scale. In the Tens environment, you can change it by calling the context menu on the desktop and clicking “Display settings” .
Next, you need to select the appropriate scale from the proposed list of standard values.
If the standard values are not suitable, you can click the “Custom scaling” .
And set an individual increase percentage.
When changing the scale in Windows 10, it is not necessary, but it is advisable to re-login to the system so that the settings can be changed as correctly as possible.
However, even after logging into the system again, we will find that the scale has not increased correctly for all contents of the operating system. In the windows of old desktop and portable programs we will see blurry fonts and interface elements. Why is this and what to do about it?
Windows 10 scaling issues
Windows 10 initially introduced a new scaling algorithm. It replaced the old algorithm that Microsoft used in versions of the operating system starting with Vista. When developing a new algorithm, the company pursued the best goals: scaling was supposed to ensure the adaptation of the program interface to any device screen size. In particular, for small tablet screens, the market of which Microsoft has been rapidly trying to conquer for several years. But one thing was planned, but in reality something else happened.
Windows 10 itself has made good friends with the new scaling algorithm in terms of its modern functionality, its modern content (UWP applications from the Windows Store, later the Microsoft Store) and those desktop programs whose developers have provided for adaptation to the new algorithm. The classic part of the Tens functionality (control panel, administration tools, etc.) and most third-party programs remained an unresolved problem in this regard for some time. When zoomed in on the monitor screens, they looked blurry, like a picture stretched to large sizes with an initially low resolution.
Over time, the problem was somehow resolved. Developers of third-party software gradually adapted their products to the new scaling algorithm of Windows 10. The major Creators Update, released in March 2017, introduced adaptation to the increased scale for classic functionality into the operating system itself. It fixed the problem of a vague interface in the classic part of the standard functionality and added several scaling modes applicable to individual desktop programs.
Zoom Modes
How to use Windows 10 scaling modes for selected desktop and portable programs? You need to go into the properties of their shortcuts.
And switch to the "Compatibility" . Here you need to check the box to override the scale at high resolution. And experiment with the values of the drop-down list. There are three of these values:
• “Application” - disables system scaling and applies the settings of the program itself; • “System” is the Windows 10 scaling algorithm mentioned above; • “System (Advanced)” is the use of a system scaling algorithm when multiple monitors with different resolutions are connected to the computer.
However, Windows 10 scaling modes, alas, are not a panacea. Using the “System” , if it helps solve any problems, these will most likely be problems with the correct display of programs with a modern type of interface, associated not with blurriness, but, for example, with correct adaptation to the screen size. The issue with blurry fonts and interface elements of old programs can only be solved by using the “Application” , but it is resolved by setting the scale to 100%. How to make it so that you can work comfortably with old Windows programs at an increased scale - this question is still open, now into the 4th year of the Ten’s existence. Microsoft will try to close it in the next cumulative update.
Fix blur when zooming in Spring 2022 Cumulative Update
In the spring of 2022, Microsoft plans to introduce the next major update to Windows 10, which will presumably contain an option in the scaling settings to correct the blurriness of the interface of desktop programs. This option can already be tested in the Windows Insider build. Once you go to the screen settings, you need to click on the custom scaling option.
Set the “Fix scaling for apps” to the “On” position. .
And re-login.
In the case tested by the author of the article, this, alas, did not solve the problem with the blurry interface of the old program. But perhaps such a feature will pay off in correcting the scale of other Windows programs. Well, or it will be finalized by the time the cumulative update is released. The probability of the latter, of course, is small, but nevertheless it exists.
How to fix blurry interface of individual programs in Windows 10
How can you fix the blurriness of the interface of individual programs right now, without waiting for solutions from Microsoft?
Another scale
You can try setting a different scale. It may turn out that the interface blur will be less noticeable at a larger scale.
Current versions of programs
If you are using an older version of the program, the problem may be resolved by updating it to the latest version. If we are talking about a “live” program, its creators have probably already worked on adapting the interface to the Windows 10 scaling algorithm.
Settings within the programs themselves
Some programs may provide alternative interface themes adapted to the Windows 10 scaling algorithm. For example, Steam in its settings allows you to select the modern “Metro for Steam” interface theme. The so-called Metro (or its analogue in the design concept of Windows 8.1 and 10) can also often be found in skin catalogs for various players.
Return of the Windows 7 and 8.1 scaling algorithm
As a last resort, the blurred interface of old programs can be corrected by returning the scaling algorithm to Ten that was used in Windows 7 and 8.1. This can be done by introducing system registry tweaks posted on the website of the creators of the famous tweaker program Winaero Tweaker:
https://winaero.com/download.php?view.1829
Having unzipped the downloaded folder, we will find two REG files in it. One of them, the Windows 8 DPI method , activates the old scaling algorithm in Windows 10. Double-click to launch this REG file and confirm the changes.
The second REG file in the folder returns the “Ten” to its native algorithm.
ClearType
In some cases (for example, due to incorrect operation of video card drivers), the problem with blurry text may be caused by incorrect operation of the ClearType font smoothing function, which is enabled by default in Windows 10 for LCD screens.
Try disabling or configuring this feature and check if the problem is resolved. To do this, type ClearType into the taskbar search and run “Adjust ClearType Text.”
- How to fix blurry font in Windows 10.
After that, try both the option to configure the function and the option to disable it. Read more: Setting up ClearType in Windows 10.
What to pay attention to if the image becomes blurry and cloudy
Settings for resolution (scaling), brightness, refresh rate
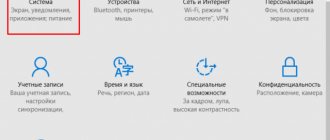
In order to view (or change) these parameters, you need to open the screen/display settings (video driver). To go to them, just right-click anywhere on the desktop: in the menu that appears, select “Display settings” (as in the screenshot below).
Right click anywhere on the desktop
Next, pay attention to two lines:
Resolution and scaling in Windows 10
In general, it is impossible to give specific values for these parameters (to whom and what to set) (depending on the model and screen diagonal of your monitor).
How to find out and change the screen resolution (if the image is too large/small, not clear, etc.) - https://ocomp.info/razreshenie-ekrana.html
A few words about interfaces
Now the most popular connection interfaces are: VGA, HDMI, DVI, Display Port. A lot can depend on the interface, for example, the quality of the transmitted image, max. resolution, the ability to simultaneously transmit audio and video signals.
For example, the “old” VGA interface, although still quite popular today, is noticeably inferior to DVI and HDMI. And, by the way, blurriness is more common with VGA.
Interfaces for connecting the monitor to a PC
Monitor connectors (VGA, DVI, HDMI, Display Port). What cable and adapter is needed to connect the monitor to a laptop or PC - https://ocomp.info/razemyi-monitorov-dvi-display-port.html
The note!
Check if everything is in order with the cable, if it is pinched by furniture, try re-connecting the plug to the video connector. In some cases, such “shamanism” helps eliminate the problem.
Video drivers and their settings
There are three ways to open the video driver settings:
2 ways to open AMD Radeon video card settings / clickable
I note that if none of the methods suggested above allowed you to enter the settings (there is no link to the video driver control panel), most likely your drivers are simply not updated. How to do this is described in one of my previous articles, link below.
Among the video driver parameters, pay attention to the “Scaling settings” section (as an example, below are screenshots from the control panels of AMD and NVIDIA video cards). Try moving the slider responsible for scaling - you may very well immediately notice how the image on the monitor has become clearer!
AMD Radeon - Scaling Settings
AMD Vega - scaling settings (display) / Clickable
Setting up font smoothing (and a few more words about fixing scaling)
In general, I would recommend everyone to try using ClearType (especially those who notice that the text on their screen is blurry, for example).
To run ClearType:
In Windows 10, you can use the search (the “magnifying glass” button next to START) - just enter the word “clear” and the system will find a link to the tool you are looking for (example in the screenshot below).
Additional Information
There is also a Windows 10 DPI Blurry Fix program available online to solve the problem of blurry fonts. The program, as far as I understand, uses the second method from this article, when instead of Windows 10 scaling, the “old” scaling is used.
To use it, just install “Use Windows 8.1 DPI scaling” in the program and configure the desired scaling level.
You can download the program from the developer’s website windows10_dpi_blurry_fix.xpexplorer.com - just don’t forget to check it on VirusTotal.com (at the moment it’s clean, but there are negative reviews, so be careful). Also keep in mind that the program must be launched every time you reboot (it will add itself to startup.
And finally, if all else fails, double-check whether you have the original latest drivers for your video card installed, not by clicking “update” in the device manager, but by manually downloading from the corresponding official sites (or using NVIDIA and AMD utilities) .
July 16, 2019
Windows 10 operating system displays screen blur when logging in or on the lock screen. The user clearly sees the login (account name), fields for entering a password or PIN code, and the rest of the background on the computer screen is blurred.
- How to disable the background blur effect on the lock screen in Windows 10
Starting with Windows 10 version 1903, Microsoft introduced a feature with acrylic background blur effects to focus users' attention on Microsoft account input fields. It is expected that this will make it more convenient for users to enter a password without being distracted by the background image displayed on the computer screen.
Setting up an account (Microsoft account or local account) that does not require a password to sign in also causes the background image to blur on the PC screen.
Not everyone likes this; the blurred background on the screen can be annoying. Therefore, some users have questions about how to remove screen blur so that the background image appears clearly when logging into Windows 10.
There are several ways to remove background blur from your lock screen. In the article you will find several instructions in which I will show you how to remove screen blur in Windows 10 in system settings, using the Local Group Policy Editor and the Registry Editor.
How to disable MIUI 12 lock screen?
First, go to Settings. Scrolling down the page, you will find the item “ Screen lock”
"
If you want to disable the MIUI 12 lock screen
, then click on the first line - “Sleep mode”. Here you need to select the “Do not turn off” option.
Interesting materials:
What does before eating mean? What does it mean to switch to silent mode? What does it mean to reboot the system? What does it mean to reboot into Recovery mode? What does it mean to reboot in Recovery mode? What does the first category of fabric mean? What does it mean to sing to minus? What does it mean to sing through your nose? What does Pink Floyd mean? What do you mean the plugin is outdated?
Disable screen blur effect in Windows 10 settings
This method allows you to remove blur on the monitor screen, but its use affects other parameters of the graphical shell of the Windows operating system. Specifically, transparency will be disabled in the Start menu and taskbar.
Follow these steps:
- From the Start menu, open the Settings app.
- In the "Options" window, enter the "Personalization" option.
- Open the “Colors” option, in the “Transparency Effects” setting, move the switch to the “Off” position.
After you restart your computer, the background image displayed on the screen when you log in will no longer be blurry.
In order to return the operating system settings to their defaults, go back to the personalization settings and move the switch to the “On” position. The background image will become blurry again.
Calibrate the touch screen on Windows 10 tablets
The touch screen must be calibrated to ensure that the tablet responds adequately to finger touch. If the device is not calibrated, then instead of the letters you press, others will appear on the screen or the image will rotate one hundred and eighty degrees .
To calibrate the touch screen, you need to do the following:
- Open Control Panel.
- Tap the Tablet PC Settings shortcut.
- Press the "Calibrate" button.
Touch the Calibrate key - Answer “Yes” to the User Account Control prompt.
- The calibration program will start.
- In the program window, touch the areas marked with a cross on the touch screen.
- Apply the changes.
- Reboot your tablet.
- If the calibration was completed with errors, then click “Reset” and repeat the calibration.
Disabling screen blur in Windows 10 in the Local Group Policy Editor
Now we will remove screen blur in Windows 10 using the built-in system tool: Local Group Policy Editor.
The Local Group Policy Editor only works in older versions of Windows 10: Professional, Educational and Enterprise. Users who have Home versions of Windows installed on their computers will have to use other methods to solve this problem.
To change Windows 10 settings, you need to go through the following steps:
- Press the "Win" + "R" keyboard keys.
- In the Run dialog box, enter the command "gpedit.msc" (without the quotes).
- In the “Local Group Policy Editor” window, in the left column “Local Computer Policy”, follow the path: “Computer Configuration” → “Administrative Templates” → “System”.
- Open the Login option, look for the Show blank login screen option.
This option disables the acrylic blur effect on the login screen. When you enable this option, the background image on the operating system login screen will no longer be blurry. When the policy is disabled or not set, an acrylic blur effect is applied to the background image displayed on the login screen.
- In the “Show blank login screen” window, enable the “Enabled” option and then click on the “OK” button.
Once you restart your PC, the acrylic blur effects on the login screen will be disabled.
To enable the blurry effect on the PC screen, again enter the policy setting “Show blank login screen”, switch the value to the “Not configured” option.
Disable turning off or dimming the screen
With prolonged inactivity, the display screen goes dark after a certain period, and after a few minutes the computer goes into sleep mode, turning off completely. In the system parameters, you can set the option to turn off sleep mode and screen dimming . To disable the energy saving mode, you need to perform a number of operations:
- Left-click on the “Start” button.
- Open Settings.
- Select the "System" section.
- Click on the “Power and Sleep” icon.
- Click the "Advanced power options" button.
- In the “Power Options” window, click on the “Configure power plan” button.
Select "Power Plan Settings" - In the “Turn off display” line, disable screen dimming when running on AC power or battery power. To do this, select “Never” from the drop-down lists.
Select "Never" from the drop-down list - Similarly, in the fields next to the “Put the computer into sleep mode” icon, disable putting the computer in the off state.
In the drop-down list, click on “Never” - Click "Save Changes".
When working with a standalone device, it is not recommended to disable screen dimming and sleep mode. Disabling will lead to faster battery drain and, as a result, to a decrease in the user's time working with a laptop or tablet.
Video: a non-standard way to disable screen dimming
One of the main criteria for a graphical interface is brightness, contrast and color gamut. The clearer the display of graphic objects looks, the more comfortable the work will be for the user. Therefore, do not neglect spending a few minutes in order to achieve maximum effect when displaying graphics and text documents. It should be remembered that incorrectly setting the screen parameters also affects the user’s visual system and can lead to a gradual deterioration of vision. To adjust the screen and fix minor problems with the image, you can use the methods given in this article. If they do not lead to the desired result, then you should contact the service center specialists.
The standard Windows 10 tools include a utility for calibrating the image on the monitor (display) screen of your computer or laptop. It allows you to adjust the color, brightness and contrast of the screen for the most comfortable work in your conditions.
Note : in this article we will not delve into the professional intricacies of calibrating screens using special software or equipment. This instruction describes the procedure for setting up a monitor using standard Windows tools, without the need to download additional programs. It is perfect for beginners who have noticed any deviations in the picture quality of a laptop or desktop computer screen, or simply want to slightly adjust the image to suit themselves. The perception of color/contrast/brightness is purely individual, so you should be guided by your own instincts, but not go too far.
Another note : All procedures must be performed from an administrator account. Otherwise you will need an administrator password.
How to disable Windows 10 screen background blur in Registry Editor
To disable screen blur effects, you can use the system tool: Registry Editor. This method is suitable for all versions of Windows 10, including home ones.
Before making changes to the system registry, create a system restore point. If something goes wrong, you can roll back Windows 10 to the state in which the OS was at the time the restore point was created.
We will need to do the following:
- Launch Registry Editor using one of these methods.
- In the Registry Editor window, follow the path:
HKEY_LOCAL_MACHINESOFTWAREPoliciesMicrosoftWindowsSystem
If there is no “System” section, create one. To do this, right-click on “Windows”, select “New” in the context menu, then “Partition”, name the section “System”.
- Right-click on the free space inside the "System" section.
- In the context menu that opens, select “New”, then “DWORD Value (32 bits)”.
- Give this setting a name: "DisableAcrylicBackgroundOnLogon" (without quotes).
- Right-click on the “DisableAcrylicBackgroundOnLogon” parameter and select “Change...” from the context menu.
- In the “Change DWORD Value (32-bit)” window, enter “1” in the “Value” field and click the “OK” button.
Now, in Windows 10, when you log in, the background image will be clearly displayed on the computer screen.
To undo changes and enable acrylic blur effects, follow these steps:
- In the Registry Editor window, follow the path:
HKEY_LOCAL_MACHINESOFTWAREPoliciesMicrosoftWindowsSystem
- Right-click on the "DisableAcrylicBackgroundOnLogon" option, select "Change...".
- In the window for changing the DWORD parameter (32 bits), change the value of the parameter from “1” to “0”, then click on the “OK” button.
The background blur effects on the Windows 10 login screen will be enabled again.
Increase or decrease screen brightness and contrast
Brightness and contrast are some of the main screen settings. Each user adjusts them individually to their own requirements.
Contrast on laptops and tablets is adjusted automatically. On monitors and displays of personal computers there is a Menu button, with which you can adjust the contrast using the device menu.
There are several options you can apply to change the screen brightness settings.
Changing screen brightness in system settings
There are two ways to access screen options:
- First way:
- right-click on an empty space on the “Desktop”;
- Click on the “Screen Settings” icon.
Click on the "Display Settings" icon - Second way:
- left-click on the “Start” button;
- click on the “Settings” icon;
- Click on the “System” icon.
- Open the "Screen" tab.
- Move the “Change Brightness” slider to adjust the screen brightness level.
Change the screen brightness using the Change Brightness slider - Once you've selected the optimal brightness level, close the Settings window.
Video: How to change screen brightness through Windows 10 settings
Changing screen brightness using the keyboard
Almost all modern types of keyboards have the ability to change the screen brightness without resorting to system settings. Previously, only laptops had this feature, but now this function is also inherent in many types of personal computer keyboards. As a rule, you can change the brightness using two keys, which have a sun icon and an arrow indicating increase or decrease brightness . They are most often found in the upper or lower case of the keyboard.
Use the keys to adjust the brightness level of your screen
In some cases, you may need to press the Fn key along with these keys to change the screen brightness.
If the keys do not respond to commands to change brightness, download and install the keyboard driver from the manufacturer's website.
Changing screen brightness through Notification Center
In the Notification Center, you can set the screen brightness level only in fixed positions. To change the brightness level, follow these steps:
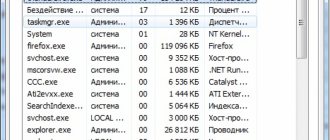
- Click on the Notification Center icon in the lower right corner of the screen on the Taskbar.
Click on the Notification Center icon - If the tiles in the expanded Notification Center menu are in a collapsed state, then first expand them by clicking on the “Expand” line.
- Click the screen brightness tile. The brightness level will go to 0%.
Set the required screen brightness - Sequentially click on the tile and change the brightness in 25% increments from 0 to 100%.
Change screen brightness using the battery indicator on the "Taskbar"
On laptops and tablets, there is a battery charge indicator on the “Taskbar”, which can also be used to change the screen brightness:
- Left-click on the battery charge indicator.
Click on the battery indicator - Click on the screen brightness change tile.
Adjust the screen brightness level - You can change the brightness level using fixed values from 0 to 100% in 25% increments.
- Click on the "Power and Sleep Options" tab.
Click on the "Power and Sleep Options" tab - Click on the “Advanced power settings” line on the right side of the “Settings” window that opens.
Click on the "Advanced Power Options" tab - In the “Power Options” window, set the required brightness using the “Screen Brightness” slider.
Adjust the screen brightness level using the slider - Click on the “Power Plan Settings” tab.
Click on the “Power Plan Settings” tab - In the “Change circuit parameters” panel that opens, use the “Adjust brightness” slider to achieve its optimal level when powered from the mains and from the battery.
Adjust brightness on mains and battery power
Changing screen brightness through the Start menu
You can also use the Start key to access the screen brightness settings panel. To do this you need to do the following:
- Right-click on the Start button.
- Select the "Power Management" line.
Click on the "Power Management" line - Open the "Screen" tab. Click on the “Advanced power settings” button.
Click on the "Display" icon and on the "Advanced power settings" tab - Adjust the screen brightness level in the same way as discussed in the previous paragraphs of this article.
Introduction
Many users experience fuzzy fonts in Windows 10. For a variety of reasons, when using this operating system, problems may arise with the display of fonts. For example, it may happen that the fonts are blurry (cloudy) and unreadable. However, depending on the cause of the problem, the level of difficulty of fixing varies.
Some of the fix steps are pretty obvious. However, not everyone understands how this operating system works. Therefore, inexperienced users may encounter this problem and not be able to understand how to solve it, although it is quite possible to simply go into the settings/options and correct the settings values.
That’s why we’ll take a closer look and tell you about several ways to fix an unclear font in Windows 10.
Causes of blur
The reasons for errors with fonts on your computer on Windows 10 can be very different. But in most cases, the problem can be fixed with just a few easy steps.
Fuzzy fonts in Windows 10 may occur due to the following reasons:
- Screen resolution . A very important point, and in most cases the error occurs due to the wrong permission being set. We will find out how to change the screen resolution (Display) of Windows 10.
- Unstable video card drivers . This is also a possible reason why problems arise. It will be enough to update the drivers. This can help with both AMD and Nvidia video cards. The video adapter settings affect a lot.
- Use of third-party applications related to the operation of fonts . For example, the program could replace the main fonts with its own, which would cause this error. In this case, there are tools/utilities that will help you manually fix the display problem. It is also worth removing font-related applications from startup. Make sure that other programs do not affect the work with fonts, check the Compatibility tab.