Back in 2022, the iPhone X ruffled feathers by ditching the Home button in favor of the biggest phone screen Apple has ever made, and the company has since doubled down with the (even larger) 11 Pro Max and XS Max, as well as the 11 11 Pro, XR and XS.
These are great devices, but how do you unlock your device, go to the Home screen, activate Siri, enable the app switcher, and do everything else using the Home button?
Using gestures or alternative buttons, or with your face! In this tutorial, we will explain how to use iPhone 11 and X series.
Note that the 2022 and 2022 iPad Pro models also lack home buttons and follow a similar set of gestures. You can learn about them in the section How to use the iPad Pro 2022.
How to unlock your iPhone 11
The iPhone 11 and X series do not have Touch ID because the fingerprint scanner was in the Home button (RIP) and Apple decided not to move it to the back of the device or embed it on the screen.
Instead of Touch ID, we get Face ID.
To unlock your iPhone, you simply need to pick up the device and look at it—by default, you need to make eye contact, a deliberate feature designed to prevent people from unlocking your phone while you're asleep or unconscious. It should unlock next to you instantly.
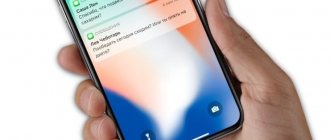
Please note that this will not automatically take you to the Start screen, it will simply unlock the device - this can be seen by the change in the lock icon at the top of the screen.
Then you need to swipe up from the bottom or activate one of the other features available on the lock screen (such as the camera).
We'll cover this feature in more detail elsewhere: How to Use Face ID.
How to use Apple Pay with iPhone 11
The loss of the Touch ID fingerprint scanner also affects Apple Pay. This is also now confirmed by facial recognition.
You must double-press the side button (formerly known as the power button!), look at your iPhone to confirm your identity, and then hold the device up to the contactless terminal to complete the transaction.
If you use Apple Pay online or in the app, things are a little different—you double-tap and authenticate, and the transaction should be completed within 30 seconds.
If it's not, you'll have to double-tap and authenticate again.
How to return to the home screen
The original and most obvious purpose of the Home button is to return you to the Home screen from anywhere in the world. This is now done with a gesture: swipe up from the bottom of the screen as you did to open Control Center.
There is a small bar at the bottom of the screen, except when it disappears during video playback and the like, to remind you of this.
Also note that iPhone 11 and X can display an on-screen Home button - this is explained in How to Get a Home Button on iPhone X.
How to switch from one application to another
As usual, you can go back to the Start screen, find the app icon and tap to open it, but you'll need to know the equivalent of the old double-click on the Home button, which was used to bring up the app switcher. ,
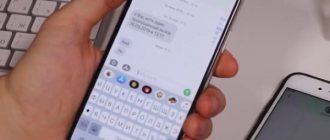
Swipe up from the bottom of the screen (on the small bar) just like you would back to the Home screen, but this time hold your thumb or fingertip on the screen for a few seconds until the app switcher appears.
You can now swipe left or right to scroll through your recently opened apps, then tap one to open it.
If you don't want to bother with the app switcher and just want to go back to the previous app, you can swipe the bar at the bottom of the screen.
Some early users found it easier to make a small half circle up, across and then down, but experiment to find what works best for you.
That's the gist of it, but we'll cover the process in more detail elsewhere: How to Switch Apps on iPhone X.
Using Display Adaptation
Open Settings
> Accessibility > Display and Text Size.
Configure one of the following options:
Bold font. Formalize the text by highlighting the characters in bold.
Enlarged text. Turn on Larger Sizes, and then select the font size you want using the Font Size slider.
This feature allows you to display the font size you select in applications that support the Dynamic Font feature (including Settings, Calendar, Contacts, Mail, Messages and Notes).
Button shapes. Selecting this option will highlight the text you touch.
Labels On/Off When this setting is selected, switches that are on will be marked with a "1" and switches that are off will be marked with a "0".
Reduce transparency. This setting reduces transparency and blur on some backgrounds.
Increase contrast. With this setting, you can improve contrast and readability by changing the color and style of the text.
Apps that support Dynamic Font (such as Settings, Calendar, Contacts, Mail, Messages, and Notes) will display text in the font size you select.
Differentiation without color. This feature replaces user interface objects that convey information using color with alternatives.
Functions "Smart inversion" or "Classic inversion". Smart Inversion changes colors on the screen, but does not apply to images, media, and some applications that already use dark colors in the interface.
Light filters. Tap a filter to apply it. To adjust the intensity or hue, move the appropriate sliders.
Lowering the white point. This setting reduces the intensity of bright colors.
Auto brightness. This feature automatically adjusts the screen brightness according to the current lighting using the built-in ambient light sensor.
How to take screenshots
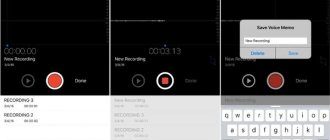
You can't take a screenshot on your iPhone 11 series by pressing the Home and Power buttons at the same time because you don't have a Home button. Instead, you now press the Volume Up and Power buttons at the same time.
The screen will flash white and you will see a small thumbnail of the screenshot in the lower left corner. You can tap it to add annotations or share it, swipe left to make it disappear, or just wait until it disappears.
Some users find themselves triggering screenshots without meaning to - often when picking up the iPhone. In a separate article, we explain how to stop random screenshots on iPhone X.
How to Set up the Control Panel on iPhone ~ KOMP-REVIEW.RU
With the iPhone control center, quickly turning on Wi-Fi and Bluetooth is possible
Control Center on iPhone 5 and iPhone 4S with iOS 7 firmware
All iPhone models, iPad tablets and iPod players that managed to update to iOS 7 received a new control widget. This extra menu has been missing since the first iPhone model. The widget is called a control point; with it you can quickly control some functions of the operating system and launch the most frequently used applications in two clicks.
Before the release of iOS 7, some users installed the SBSettings program, which is somewhat similar in functionality to the new control center. SBSettings required a jailbreak to install, so not everyone could use this add-on.
How to turn off iPhone 11
You turn off most iPhones by holding the side button until the power off slider appears. But as explained earlier, this will activate Siri on these phones.
Instead, to turn off your iPhone 11 or X series, you must press and hold the Side button and one of the volume buttons (up or down - it doesn't matter).
Again, hold them down until the power off slider appears, then swipe it to turn off the phone.
Setting Up Your Control Center
It's incredibly easy to add shortcuts (or quickly customize tiles to steal them from Android) to your iPhone's Control Center. Simply go to the Settings page, select Control Center, then Customize Controls. From there, you can freely choose which tiles you want to add and then simply exit once you're done.
However, there are some settings that cannot be removed or reorganized, including Airplane Mode, Cellular Data, Personal Hotspot, Bluetooth, Wi-Fi, AirDrop, AirPlay, Volume, Do Not Disturb, " Rotation Lock" and "Music Player".
Among them you can add/reorganize: Flashlight, Timer, Calculator, Camera, Home, Accessibility Shortcuts, Alarm, Apple TV Remote, Do Not Disturb While Driving, Guided Access, Hearing, Low Power Mode, Screen Magnifier, Notes, Scan QR- code, screen recording, stopwatch, text size, voice notes and wallet. I hope this list grows to include third party apps someday.
Read: How to Remove Unneeded Profiles and Certificates on Your iPhone to Protect Your Privacy and Security
Images by Jake Peterson/Gadget HuxTo add controls, simply click the green plus sign (+) next to the control's name in the More Controls section. To remove a control, under Enable, click the red minus (-) button. To change the order of items in the Include section, touch and hold the icon on the three lines next to a control, then move it up or down in the list, then repeat for any other controls you want to move.
How to put iPhone 11 into DFU mode
Entering DFU mode on the 11 and X series phones is difficult due to the lack of a Home button.
Connect your iPhone to your Mac or PC and open iTunes (or Finder if you're using macOS Catalina). Press and quickly release the Volume Up button, then press and quickly release the Volume Down button.
Press and hold the Side (Power) button until the screen turns black. Hold the Side and Volume Down buttons for another five seconds, then release the Side button but continue to hold Volume Down until iTunes/Finder says it has "detected an iPhone in Recovery Mode."
You can now release the Volume Down button.
If you did it correctly, the iPhone screen will be black. In iTunes/Finder, you should see the iPhone appear in the "Devices" list.
How to activate Reachability
When Apple first introduced its larger-screen iPhones, it was worried that people wouldn't be able to reach the entire touchscreen with their thumbs while holding the device, so it introduced a new feature called Reachability, which caused the entire screen image to shrink when
You pressed (not pressed) the Home button twice. There's no Home button now, but the screen is bigger than ever, so how does Reachability work?
It is now activated by swiping down at the very bottom of the screen. It's a little awkward, so read our tutorial How to Use Reachability on iPhone XS Max for a more detailed explanation (and GIF!).
If you're worried about this being accidentally activated when using apps, you can turn it off (or on) in Settings under Accessibility.
iOS 11's Auto Setup feature lets you quickly set up your new iPhone and iPad
Probably everyone, when buying a new iPhone, dreamed of simply holding it up to their old smartphone and magically transferring all the data, including Wi-Fi passwords, Apple ID, personal settings and passwords from the iCloud Keychain. As you might have guessed, iOS 11 provides this opportunity thanks to the new Automatic Setup feature.
Everything works approximately the same as on Apple TV - when you bring your iOS device to the TV, tvOS offers to transfer settings.
Step 1: First, you will need two devices running iOS 11. That means you will either have to install the beta version or wait for the final version to be released.
Step 2. On your new device, you need to go through the standard setup procedure - select your language, region, etc., after which you will be greeted by a new iOS Assistant screen.
Step 3: “Bring your iOS device closer to this iPhone” will appear on the screen. Next, follow the onscreen instructions. Data transfer occurs using a camera, that is, on one device you point the camera at a special pattern displayed on another device.
Step 4. That's it. As noted earlier, all Wi-Fi passwords, Apple ID settings, and other information from iCloud Keychain will be transferred to your new device.
This is not to say that the previous method of setting up iPhone and iPad was too difficult or time-consuming, but Apple in iOS 11 decided to simplify this process even more.
Follow Apple news in our Telegram channel, as well as in the MacDigger application on iOS.
Join us on Twitter, VKontakte, Facebook, Google+ or via RSS to stay up to date with the latest news from the world of Apple, Microsoft and Google.
Share this article with your friends
www.macdigger.ru
How to Get a Home Button on Your iPhone 11
If the tips above are not enough to quench your thirst for home button functionality, you may want to consider extreme methods. For example, so that your iPhone always displays the Home button on the screen.
This is activated through the Accessibility section of the Settings app. Go to Settings > General > Accessibility, then scroll down and find the AssistiveTouch option.
(Searching for AssistiveTouch may be faster on the initial Settings screen.) Turn this option on and a button will appear on the right side of the screen
This is a quick version, but read How to Get a Home Button on iPhone X for a more detailed explanation of how to use AssistiveTouch and what it can do.
Turn on AssistiveTouch
Once AssistiveTouch is enabled, an on-screen button will appear. It can be dragged to any edge of the screen, where it will remain until you move it. By default, pressing the button once opens the AssistiveTouch menu. To close a menu, simply tap the screen outside the menu once.
There are several ways to enable AssistiveTouch.
- Go to Settings > Accessibility > Touch and select the AssistiveTouch checkbox.
- Use the “Hey Siri” feature and say “Turn on AssistiveTouch.”
- Go to Settings > Accessibility > Shortcuts and turn on AssistiveTouch.
You can also add AssistiveTouch to an Accessibility shortcut for quick access from Control Center or from the Side button or Home button.
How to avoid screen burn-in
One last tip that doesn't apply to the Home button but does apply to another feature on the iPhone X, XS, XS Max, 11 Pro, and 11 Pro Max (but not the XR or 11): screen recording.
This is an extreme form of image retention and the main drawback of OLED screens, which are otherwise excellent. (The XR and 11 have an older LCD screen type.)
If you allow a static, bright, high-contrast image to display on the iPhone 11 Pro for a long time, there is a danger that it will end up on the screen and remain there in a faint, ghostly form for a long time.
So be careful when using Auto-Lock, and remember to turn down the brightness if you need a static image on the screen for a long time.
More tips (and a few possible fixes for the problem, in case the worst does happen) in a separate article: How to Avoid and Fix iPhone X Screen Burn-in.