Almost all modern smartphone users know that Google Pay is a payment system that functions perfectly on the Android OS. Google Pay is one of many contactless payment systems that can be made via mobile phone. This application was developed by Google; it is worth noting that this program is an analogue of software such as Apple Pay. If the user does not know where to pay using Google Pay, he can read the material below. The article discusses the possibility of paying for purchases in a store through this program. The only thing you have to take into account is the need for preliminary step-by-step configuration of the application. Let's look at all the features of the Google Play Store, learn about setting up an account, adding credit cards, purchasing methods, principles for returning goods, and the ability to manage personal settings.
Rules for working with Google Pay.
Login to the Google Play program
Setting up the system will be easier and faster if the user has a Google account. In other words, a Gmail address must be created. In principle, this is the base that will make it possible to “closely communicate” with the Google Play Store program in the future. If the account is valid, the application will allow you to easily log in to the system by first entering personal data, in particular, the username and password (the standard procedure for all typical programs). Only if you don’t have a Gmail address, you will have to spend a little time creating one. The primary setup for Google Pay is to have a phone and run this software, as well as step-by-step implementation of the recommendations below.
Creating a Google Account
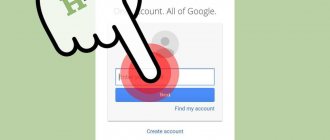
After activating the application, the Play Store will automatically indicate to the user the need to log in personally. If you do not have a personal address, you should use the “Create a new account” command (the image is located at the very bottom of the screen). Once the link works, the user will be able to enter their name. The next step is to define a name by which Google will identify the user. The information you provide in your Gmail account will be used by Google. If you have difficulty entering certain words (frequently used names/logins are busy), you should come up with something more original or enter your personal data.
After the name is approved by the system, you will have to provide a password. You should not stop at your date of birth or name; it is better to choose a phrase that attackers will not be able to pick up, but which the user himself will not be able to forget over time. The best password is one that contains uppercase and lowercase letters, and numbers (symbols can be used). The complexity level of the password you create directly affects how quickly it can be cracked.
To connect google pay, in addition to specifying the username and password, you must provide a personal phone number; this information will be useful if the user forgets the information regarding his account. Subsequently, a special code will be sent to your smartphone, with which you can restore access to the system. The phone number will be useful if you need to carry out two-level authorization. Of course, you should not add a personal phone number in a situation where the user has not read or does not agree with the application's privacy policy.
After completing these steps, the final account page will appear. The user will have access to the most popular Google services, interaction with which is established precisely by registering a Gmail address. All features of YouTube and Google Maps will become available only after logging into your account, the user will have access to their settings and will be able to use the saved data.
The program abilities connected through the account should be approved using the “Next” command, agree to the terms of the application, and, if necessary, create a backup copy of all software that is currently installed on the smartphone. Along with the applications you use, Google will “remember” passwords for wireless networks (Wi-Fi) and other personal settings. If you do not want to save and copy everything, you should use the “Next” command, or uncheck the list of listed actions.
At this step, the initial installation and configuration of Google Pay is considered complete. The user is required to enter data that will certainly relate to payment for services and goods. Payment information will be useful so that you can subsequently quickly pay for software, books or music that are sold on a paid basis. By the way, there is no need to add credit cards; this is the desire and need of each individual user.
Pros and cons of using the system
In your Google Pay review, you need to include the positive and negative qualities of the service. Advantages:
- The service successfully replaces many cards that you don’t need to carry with you. A smartphone can be used instead of a PC and a camera, but also a wallet.
- High speed of payments. Paying for goods takes a minimum of time, because the buyer does not need to look for cards or a wallet in his pockets or bag. All you have to do is bring your mobile phone to the device and pay for the goods.
- Google guarantees customer safety and Android Pay protection from hacking. If you wish, you can save gift cards and bonus offers in the app.
Disadvantages of Google Android Pay:
- The phone battery tends to discharge. Today, no smartphones have yet been invented that do not require charging. In order not to lose face, you will have to carry cash or cards with you (just in case). The second way is to monitor the charge level.
- Due to poor implementation of the technology, it is not available in all retail outlets. So far, few sellers have entered into an agreement with Google, but over time this problem will be solved.
- Payment without entering a PIN code is possible for an amount of up to 1000 rubles.
A brief analysis of the Android payment system shows that it has more advantages than disadvantages. That is why the service is popular and gaining popularity in Russia, as well as a number of other countries.
Instructions for adding credit cards
Instant use of Google Pay is optional; you can add payment information, but not use its functions immediately. Of course, there are a huge number of resources on the Internet that distribute certain data for free; if the user fundamentally denies the purchase of some content, music or software, there is no need to indicate credit card information; it is enough to simply skip this step. However, if you wish, you can enter your credit card information, which will help you make certain purchases.
To understand how to use Google Pay as a payment machine, you should start by adding your first card. If the user has previously linked his card to a specific Google account (probably, purchases were made through the Play Market), the program will automatically “pull up” the data and allow you to select this card. Otherwise, if there are no payment cards, the user will have to provide information regarding the card number, CVV code, and expiration date of the payment card. At the same time, you will need information regarding the owner’s first and last name and mobile number.
As soon as personal payment information is entered, an SMS will be sent to your smartphone containing a confirmation code. Characters from SMS should be specified in a special field in the program. In addition to the fact that the program will send the message, the owner of the payment card will receive a notification from his bank, which will confirm the successful addition of data.
Virtual card
To pay for purchases in the Play Market, you can successfully use a virtual Internet card. This payment method is no different from the one described above. Only instead of a real plastic card in your hands you will have a virtual card with the same parameters. You can create such a virtual card to pay for purchases in the Play Market in services such as Qiwi, Yandex.Money, WebMoney. Where the card parameters are located (number, expiration date, CVC2/CVV2) is shown schematically in the following figure.
READ How to pay with Thank You bonuses on Ozone: instructions and conditions
Linking a card in Google Pay
If you use the application, you know that during the initial settings the software makes a request regarding the smartphone parameters. After allowing access, it will be possible to add payment cards belonging to absolutely any banks. As a rule, when linking several cards, one remains the main one, and all the others are auxiliary. If payment is made, money will be debited from the main card by default. If the user does not independently assign the main card, the program will do it for him, defining as the main card the card that was added first.
At the same time, the application allows you to add gift and discount cards. It is worth noting that this is quite simple to do; you only need the number of such a card, as well as the barcode scanned from it. Sometimes users encounter problems adding such cards; most likely, problems arise due to their incorrect support.
Possible problems
People may encounter problematic situations when it becomes necessary to indicate a postal code, resulting in an error during registration. Even if the index is specified correctly, it may cause a problem.
You can try to solve the problem in the following way: enter the index of the regional center.
Expert opinionAlexander IvanovichFinancial expert Ask a question to an expert If after this registration does not proceed, it is recommended to contact the call center. Our support staff will find a solution to your problem.
How to pay for a purchase with Google Pay
If the user installed the application for the first time, he probably hasn’t yet figured out how to pay with Google Pay. In fact, everything is quite simple and accessible. Once all of the above steps have been completed, the system setup can be considered completely completed and ready for use. Now the smartphone is ready for contactless payments. To pay using Google Pay, you need to unlock your smartphone, but there is no need to activate the program. The user can bring his device to the payment terminal. The only thing that should be taken into account is the terminal’s support for contactless payment technology. As a rule, all typical terminals are equipped with a special sign.
You should hold the phone over the terminal until a notification appears confirming the success of the payment. It is worth noting once again that money will certainly be debited from the main card, and not from other linked ones. If you connect Google Pay, you will be able to pay for services through online services. It will be possible to make purchases in Play Market, Uber, Yandex Taxi. In this case, you should remember the need to indicate a payment method such as “G Pay”.
How to pay for purchases with a smartphone at the checkout?
Instructions:
- Go to the cashier and tell them that you are paying by card
. - Wait until the amount to pay is displayed on the terminal.
- Unlock your smartphone and touch it to the terminal (not close to it, but at a distance of 3-5 cm). Wait while the terminal reads the data from the NFC chip (usually takes 1-2 seconds). If you remove the smartphone too quickly, the payment may not go through.
Attention!
In some cases, there is no need to unlock your smartphone.
Officially, the maximum amount for payment using locked
device is 1000 rubles, and in large networks this is true. But in small shops I paid for purchases worth both 3,000 and 6,500 rubles without unlocking my smartphone.
Payment for contactless payments using a non-based card
If the user is interested in how to use a payment method that is not the primary one, he should understand that using a non-primary payment card can only be used to make a one-time payment. If you need to use a certain payment method often, you should set it as your main one. If your preferred card is not set as the main one, you must first unlock your smartphone, activate the Google Pay software, and select your preferred one from the list of added cards. Swiping from right to left on the default main map will help you carry out this action.
After this, you should bring the smartphone with the back panel to a payment terminal capable of making contactless payments. After selecting the “Credit” card type, you may need to enter the password for this card (PIN code issued by the bank). The Cards section will help you decide on the payment method. In the list of added ones, it is worth noting the card from which funds will be debited, and then touching the smartphone to the terminal.
How to use the payment system
The process of installing and using the service raises many questions. Let's give a brief overview of Google Pay and look at the main points.
How and where to download?
The smartphone application is available in the Google Play software store. The algorithm of actions is as follows:
- Find the Google Play app on your phone. If Google Android Pay has already been installed previously, it needs to be updated (as a rule, the procedure is carried out automatically).
- Wait for it to load and click on the “Start” button.
- Select the required payment method and add cards.
- Please authenticate by message or e-mail.
After installation and configuration, the Android Pay payment system is ready for use and can be used on any terminal. You can use the service in other applications or on resources on the Internet.
How to link a card?
When you first start the program, you will be prompted to attach a plastic bank card. For this:
- Point the camera at it to read the main parameters (number, expiration date) or enter this data yourself;
- indicate the CVV code (last three digits on the back) and the owner's address.
- To confirm your identity, send the verification code.
If the owner of a smartphone with the application installed has previously connected a card to a Google account, Android Pay will offer to use the already existing option. To activate Android Pay, you will only need to specify the CVV password.
How to pay?
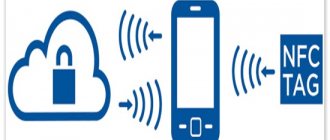
Today, many people know about the existence of Google Android Pay, what it is, and how to install the application. But people don't always know how to use it. First, you need to log into your smartphone and activate the NFC option in the settings section. At the same time, the Android Beam option will be enabled, allowing you to exchange data with other devices. For convenience, the NFC enable function can be placed in notifications and activated at a convenient time.
To pay for goods in the store, follow these steps:
- Take out your Google Android Pay phone and unlock it. You don't need to log into the app to pay.
- Orient the device so that the back is parallel to the terminal screen.
- Wait for the payment request and select the “Credit” section. The type of “plastic” (debit or credit) does not matter.
- Provide a PIN or signature if required.
These steps are enough to make payments from your default card.
To use Android Pay in the app, follow these steps:
- Open an application that supports Google Pay.
- Click the purchase button using Google Pay.
- Select a payment option and indicate the address where you want to send the goods.
- Confirm your order.
Today, all Android applications have a button that allows you to make purchases using Google Pay. There is no need to waste time entering the “plastic” data and delivery address.
To use Google Pay on websites, do the following:
- Select a resource to make a purchase or receive a service.
- Find the Google Pay button or the old version (Android Pay).
- Confirm payment.
Making payments via Android Pay in Russia is available from any browser. For reliability, it is recommended to update it.
How to remove a card
If desired, you can remove the old “plastic”. To do this, enter the application on the device, find the picture of the required card and enter the menu section. At the last stage, follow the “Delete card” link.
Another way is to unlink the card through the official Google service, but problems may arise here due to the linking of the “plastic” to a mobile account, phone, electronic wallets, etc. To unlink, do the following:
- Go to Payment Center on your PC or smartphone.
- Select “Payment Method” from the menu on the left.
- Decide on the card and click the “Delete” button.
- Confirm your decision.
Following these instructions allows you to quickly remove or unlink your plastic card.
