April 3rd, 2022 Nikolay Bagromyan
Over time, the computer operating system undergoes wear and tear, which affects both the performance of the device and our nerves. This is especially noticeable when working on weak computers. However, this is far from a reason to reinstall Windows prematurely, and you shouldn’t rush to create an installation flash drive and remember which key starts the transition to the BIOS. Using several simple methods, we will not only return crystal virginity to our system, but also speed it up, in some places making it run faster than the new one.
- 2 Hardware acceleration: unloading the processor
- 3 Hard drive: memory cleaning and defragmentation
3.1 How to increase performance: cleaning the hard drive
- 3.2 Disk defragmentation: how to speed up your PC
How to speed up using laptop power settings?
Laptops have the following shutdown modes:
- complete shutdown;
- hibernation;
- sleep (activates and turns on the laptop in a few seconds).
If the user accesses the PC many times during the day, it is not recommended to frequently resort to the first shutdown method.
Firstly, this is a significant load on the computer’s hard drive, and secondly, it takes extra time to fully load Windows 7. The optimal solution to make the user’s work on the laptop faster is to simply use the “Sleep” function. The function is activated through the “Control Panel”, for example, there you can set the device to “fall asleep” after the screen saver starts working or the lid is closed.
To do this you need to do the following:
- Log in to the “Control Panel”;
- Open “Power Settings”;
- Then, in the “Defining power buttons and enabling password protection” tab, determine the required settings.
Note: as a result, the user has the opportunity to quickly start using all the functionality of his compact device, which allows him to speed up his work in general.
Using a third-party program CCleaner to speed up your laptop
The application is freely distributed on the global network. Most programmers agree that this program best solves the problem when the PC is running slowly and it is very convenient even for beginners who want to speed up their laptop. After launching it, an intuitive interface will be displayed for effectively cleaning the registry from accumulated “garbage”.
There is no need for a detailed description of the application of the program's functionality, since most of the tools are located on the first page of the utility. You just need to apply the programs step by step.
System disk
The system disk is a drive on which all operating system files are stored. Typically, one HHD is divided into two parts, for example, into drive C and drive D. According to the unspoken rule, 20-30 GB are allocated to drive C, specifically for storing the system and installed software. According to the standard, all new files on the computer will be saved on the system disk, right down to shortcuts on the desktop. Until the user makes his own changes to such settings.
Excessive clutter on this disk also slows down Windows. Therefore, it is recommended to constantly monitor the order and cleanliness of it. If this happens and it already stores a lot of excess garbage, then you can clean it in certain places:
- Desktop. Everything that is on the desktop is on the system disk. It has been confirmed more than once that a large amount of information on the desktop not only does not speed up, but, on the contrary, slows down the system. This occurs due to mandatory Windows content indexing. Therefore, it is worth removing everything unnecessary from your desktop, and everything you need too, since all this can be found in the Start menu.
- "Downloads" folder. The second place where every user accumulates a lot of unnecessary garbage. Oddly enough, the “Downloads” folder, which was created automatically, is also located on the same drive as the operating system. This also affects its performance. Torrent files, unnecessary archives, images, music, installers and other files - it’s better to either move all this to another drive or simply delete it. By the way, there are detailed instructions on the Internet on how to configure your browser so that all files are downloaded to another drive.
- Libraries. “Documents”, “Images”, “Music”, “Video” - these folders belong to the native library of the system. It is generally recommended not to save anything in them, or at least to maintain order in them.
Services
You can overclock a Windows 7 system by eliminating unnecessary services during operation. Let us remind you that Windows services are a list of standard, native utilities and applications that also feature auto-start, which does not depend on the user. Simply put, this is something that the user practically does not see while working on a laptop, but in a certain way it negatively affects the acceleration and performance of the device.
This is done very simply - you just need to follow these instructions step by step:
- We call the command line, as we know from the previous method (“Win” + “R”).
- We write or copy the following command (without quotes) services.msc.
- Next, an active window called “Services” will open.
- There are many processes running in absentia, stopping which optimizes the system.
In 100% of cases, the local services window that opens will contain a large list of services. A common person can easily get confused about what can be turned off and what cannot. To avoid such questions, there is a comprehensive answer to this question freely available on the Internet.
You should not expect global changes in the speed of the laptop from this procedure, however, this will to some extent give a positive result that is felt in reality.
Defragmentation
This process allows the system to operate much faster. In order to defragment disk space, you again need to open “Disk Properties”, from where go to the “Tools” tab and then click on “Optimize”.
If you don’t want to constantly do this procedure manually, it is possible to set the process to start automatically. You just need to check the “Enable” box and set a time convenient for the user.
Removing unnecessary programs
Typically, while operating a computer or laptop running Windows 7, the user installs a considerable number of games and applications; Some of them, even before being manually launched, continue to run in the background, slowing down the OS.
To optimize Windows 7, it is recommended to remove programs that are clearly unnecessary and have not been used for a long time. This can be done either using products from third-party developers or using a standard uninstaller:
- Once again in the “Programs and Features” subsection, the user must select the applications to be removed from the main list.
- And go through all the stages of the standard removal procedure.
- After completing the first uninstallation process, you can immediately proceed to the next one - and so on; in most cases, an “intermediate” reboot is no longer required.
Optimizing Windows 7 performance
Completely disabling UAC (User Account Control)
First of all, it is worth drawing your attention to the fact that this tool is one of the most important in terms of system security and disabling it will inevitably reduce the overall level of its protection from external threats.
However, many users have greater confidence in high-quality antivirus software. In this article, we offer you the opportunity to either completely disable UAC or change the protection level.
Before performing the suggested actions, you should log in under the Administrator .
1. Click the Start button
2. Open the Control Panel 3. Go to User Accounts 4. Change the User Account Control (UAC) settings 5. Select the required degree of protection by changing the position of the slider. 6. Click “OK” 7. Restart the computer.
Setting Standby Mode (“Sleep Mode”)
In the default settings, using sleep mode is inconvenient: the computer wakes up at the slightest movement of the mouse.
To fix this, you need to do the following: 1. Click the Start button 2. Open the Control Panel 3. Go to Device Manager 4. Open the “Mice and other pointing devices” tab 5. Find the “Power Management” tab
6. Uncheck the option “Allow the device to wake the computer from standby mode” 7. Click “OK” In the future, to exit standby mode , use the keyboard (by pressing any key).
Speeding up the Start menu
One of the most frequently used controls in Windows is certainly the Start , the functionality of which increases with each new version of the OS. If you use a “non-classic” design mode, it is possible to significantly speed up the operation of this indispensable control. So, let's get started: 1. Right-click on the Start menu icon or on the panel
tasks 2. In the context menu, select “Properties” 3. Open the “Start” tab 4. Click “Customize” 5. In the “Customize the Start Menu” window that opens, find the “Highlight recently installed programs” option and uncheck it 7. Click “OK”
We recommend reading → Mirror Librusek - 2022
Aero Visual Effects
Problems with the Aero interface most often arise if the computer has a video card integrated into the motherboard or a weak video card is installed - problems are very likely to occur when using the Aero interface. also often experience difficulties with processing graphic elements in Windows 7 . However, it is possible to reduce the Aero interface's consumption of PC resources without disabling it completely . By disabling some elements, you will relieve the computing power of your computer and video card, without losing much of the beauty of the Aero interface. To do this, you need to do the following: 1. Click the Start button
2. Open the Control Panel 3. Go to the System 4. Open Advanced system settings 5. Go to the “Advanced” tab 6. Click the “Options” button in the “Performance” section
7. Disable the following options: 7.1 Animated controls and elements inside the window 7.2 Fading the menu after calling the command 7.3 Casting shadows on desktop icons 7.4 Displaying window contents when dragging 7.5 Displaying shadows cast by windows 7.6 Displaying swatches and filters in this folder 7.7 Displaying transparent selection rectangle 7.8 Displaying a shadow under the mouse pointer 8. Click “Apply”.
You can disable some other options, but the effect will be more noticeable. Attention! If after saving the changes the “transparent” Aero interface disappears, right-click on the desktop and select “Personalization” » “Window Color and Appearance” » Check the box next to “Enable transparency” and click “OK”.
5. Changing the display of Service Pack
There are times when we are unable to completely install all elements of the game, or after installing it we see a notification about Service Pack 2 installed in Windows 7. In order to correct the situation, we need to:
1. Press the Win+R keys simultaneously (or Start » Run) 2. In the “Run” window that opens, enter the command: “regedit” and click “OK” 3. A registry editor window will open 4. Find the folder
“HKEY_LOCAL_MACHINE\SYSTEM\CurrentControlSet\Control\Windows” 5. Change the “CSDVersion” value from “0” to “100” ( SP1 ). Click “OK” and exit the Registry Editor. If you set the parameter value “CSDVersion” = “300”, then the system will display that
Service Pack 3, and if the value “CSDVersion” is = “0”, then the system will display that Service Pack 6 is installed and not installed. Reboot the computer.
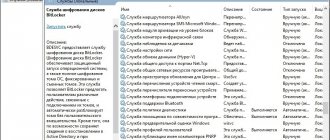
Disabling services
Disabling rarely used services will free up some of your computer's RAM and will also allow the system to access virtual memory less frequently, which will result in faster system performance. Although unforeseen complications as a result of disabling services are unlikely, we nevertheless suggest that you create a restore point , which, if necessary, will allow us to roll back the system to the required time (control panel » system » system protection » create). To ensure maximum stability of the system and applications, we recommend that you use the “Manual” option when disabling services. To disable services, perform the following steps: 1. Click the Start button 2. Open Control Panel 3. Select Administrative Tools
4. Select Services To disable a service, double-click on its name with the left mouse button. The service control panel will open. In the “Startup Type” drop-down menu, select “Manual” and click on the “Stop” button. Save your changes by clicking OK. completely safe to disable the following services: Tablet PC Service entry Support IP Service Remote registry
Disabling other services can lead to unstable operation of the operating system and should only be done if you are absolutely sure that you know what result this will lead to. Be extremely careful and careful when handling this tool.
ReadyBoost function
Windows operating system implements the ability to use USB flash memory devices as an additional resource to RAM for data caching, which speeds up the time of data read-write operations and increases system performance. Expensive RAM modules or the lack of free slots on the motherboard often do not allow you to physically increase the amount of memory. Using USB drives or Flash cards as additional RAM using ReadyBoost technology makes it possible to virtually expand memory and increase computer performance. The system writes to the media memory
data from the most frequently used programs, which can significantly reduce their launch time. To activate the ReadyBoost function, you need to perform the following steps: 1. Insert the USB drive into the port. 2. In the Autorun window that appears, select “Speed up the system using Windows ReadyBoost” 3. Activate the “Use this device” option 4. By moving the slider, set the limit of used storage space 5. Save the changes by clicking on the OK button. After performing these operations, the ReadyBoost.sfcache file will be automatically created on the flash card. Do not remove the flash drive from the computer!
8. Performance Tuning
When installing the operating system, the default power plan is “Balanced,” which reduces system performance and responsiveness. In total, the Windows 7 operating system provides three main power plans: Balanced (system performance when necessary and energy saving when inactive). Energy saving (reduced system performance). This scheme helps mobile PC users make the most of a single battery charge. but for a desktop system it is not relevant. With high performance (increases system performance and responsiveness).
Your computer may also have other energy saving settings configured by the PC or laptop manufacturer. In this case, we do not recommend changing their settings, because The manufacturer has already selected the most optimal values for all parameters. In order to change the plan, do the following: 1. Click the Start button 2. Open the Control Panel 3. Go to Power Options 4. Select a plan that meets the needs of our system and device.
Recommended reading → Updating iOS 9 to iOS 9.0.1
9.Customizing the Taskbar and Superbar
Superbar Windows 7 has ample opportunities for personalization and customization for a specific user. To optimize the panel, follow these steps: 1. Place the mouse cursor over the taskbar and press the right mouse button. The taskbar context menu will open. Uncheck the “Lock the taskbar” checkbox. 2. Now move the cursor over the edge of the taskbar until it turns into
double arrow. Click and hold the cursor with the left mouse button. Move the cursor up, the dotted line will show the location of the taskbar. Release the mouse button. 3. Now fix the Panel again in the context menu. This is necessary for the normal display of tabs and panels. If this is not enough for you, the size of the taskbar can be increased to suit your needs up to half the screen. ease of navigation by opening the taskbar's Properties context menu and changing the way the taskbar buttons are grouped from "Do not group" to "Always group by hiding labels."
Memory diagnostics
If your operating system is prone to failures and is unstable, we recommend diagnosing your RAM. This also applies to users who overclock system components. Settings for Windows 7 OS : 1. Open the “Start” menu 2. In the Search column, enter “Memory” 3. In the search window, select “Windows Memory Checker” 4. In the window that appears, select one of the options:
– Reboot and test (recommended) – Run the test the next time you turn on the computer 5. After the computer restarts, wait for the RAM test to complete. This process can be quite lengthy. After the diagnostics are completed, the computer will automatically restart. You will see the results of the scan when you log into the operating system.
11. Defragment hard drives
The built-in disk defragmentation program organizes fragmented information for more efficient and faster system operation. The disk defragmentation program runs according to a specified schedule, but you can also start fragmentation manually. To launch the built-in disk defragmentation program, you must perform the following steps: 1. Click the Start button 2. Select Computer 3. Select drive C 4. By right-clicking the mouse, call up the context menu and select
“Properties” 5. Open the “Services” tab
6. Select the “Run defragmentation” . You can also run a disk analysis, after which the system will make a recommendation whether there is a need to defragment the selected disk and indicate the percentage of fragmentation. Depending on the size of your hard drive and how fragmented your files are, defragmentation may take anywhere from a few minutes to several hours. During defragmentation, work with the PC can not be interrupted, however, the system may slow down significantly.
Startup control
Many programs installed on a PC are automatically registered in the startup of your computer, even when there is no urgent need for it.
Being constantly in RAM, they significantly reduce system performance. Ideally, the startup list should contain no more than two or three programs that you urgently need. As a rule, this is an antivirus and an email client. The easiest way to clear the startup list is to use the free program CCleaner , open the Tools section, then click on Startup and manually set the launch parameters for the programs you need.
Do not remove Windows system programs from the list. They can be distinguished by their location in the \system32 folder.
Cleaning and defragmenting the registry
The system registry is a database for storing information about the computer configuration, operating system settings and program settings to which the system
accesses hundreds of times per second during system boot and operation. A cluttered and fragmented registry can seriously slow down your computer. When installing and uninstalling various programs, various “garbage” may remain in the registry: program settings, links to shortcuts, incorrect file extensions, and much more. Over time, a large number of such erroneous registry settings can significantly slow down the operating system, leading to crashes and various problems, interfering with the normal functioning of the OS.
To optimize the registry, we will perform the following steps: 1. Open the CCleaner program and go to the “Registry” menu 2. Click on the “Search for problems” button 3. After completing the search, click on “Fix” 4. The program will offer to save backup copies of the changes made, if not If you are sure, save 5. In the window that appears, click “Correct marked” and confirm your choice. Perform this operation once every two to three weeks.
The Windows 7 registry is prone to fragmentation, which causes the system to gradually slow down. System defragmenters do not work with registry files, so for these purposes you will need to install a specialized program. One of the best solutions for defragmenting the registry is the Auslogics Registry Defrag .
We recommend reading → Aurora operating system: difference from Android and iOS, functions
Disable autorun functionality from removable media and CD drives.
Disabling autorun will not only speed up work with external storage media, but will also protect you from a number of viruses entering your computer. Launch Notepad (in the Start menu, in the Search line, enter the word “Notepad”). After the launch of the Notepad program, we copy the following text there: Windows Registry Editor 5.00 [Hokey_Local_machine \ Software \ Microsoft \ Windows \ CurrentVERSIONS \ Explorer] "= Dword: 00000001" Nodrivetypeautorun "= dword: 000000FF 3. Next, select the item menu “File” - “Save As”. 4. Select the file type “All files” 5. Specify the file name and extension for it “*.reg” 6. Close the Notepad program. 7. Run the newly created file and agree to make changes. 8. Restart the Computer and check for autorun on the media. If the autorun function is still present, do the following: 1. Open the Notepad program 2. After starting the Notepad program, copy the following text there: Code : Windows Registry Editor Version 5.00 [HKEY_LOCAL_MACHINE\SYSTEM\CurrentControlSet\Services\Cdrom] “AutoRun ”=dword:0000001 [HKEY_LOCAL_MACHINE\SOFTWARE\Microsoft\Windows NT\CurrentVersion\Winlogon] “allocatecdroms”=”0” [HKEY_CURRENT_USER\Software\Microsoft\Windows\CurrentVersion\Policies\Explorer] “NoDriveTypeAutoRun”=dword:0 0000091 [HKEY_CURRENT_USER \Software\Microsoft\Windows\CurrentVersion\Policies\Explorer] “NoSaveSettings”=dword:00000000 3. Next, select the menu item “File” – “Save As”. 4. Select the file type “All files” 5. Specify the file name and extension for it “*.reg” 6. Then exit the Notepad program. 7. Run the newly created file and agree to make changes 8. Restart the Computer and check for autorun on the media. Attention, this method will disable autorun for you from all storage media: Flash and portable drives; CD, DVD, BD discs; Network drives; Local disks.
Move the Recycle Bin from the desktop to the taskbar
If you want to completely rid your desktop of icons, then you can do so. After all, in Windows 7 you can not only remove the Recycle Bin from the desktop , but even pin it to the taskbar. 1. Right-click on an empty space on the Desktop. 2. In the context menu, select Create – Shortcut.
3. In the Object location field, insert: %SystemRoot%\explorer.exe shell:RecycleBinFolder
4. Click Next. 5. In the window that opens, in the Shortcut name field, enter Trash and click Finish. 6. A shortcut has appeared on the Desktop (to make sure it is the Recycle Bin, double-click it), but it looks like an Explorer shortcut, not
Baskets. To fix this, right-click on it and select Properties, then click the Change icon . 7. In the Search for icons in the following file field, enter: %SystemRoot%\system32\imageres.dll and press Enter.
8. From the proposed collection of Windows 7 icons, select the Recycle Bin icon and click OK twice. 9. Now our Recycle Bin icon looks authentic. Drag it with the right or left mouse button somewhere on the taskbar. 10. Right-click on the desktop, select Personalization, then Change desktop icons and uncheck the Recycle Bin.
What to do if your hard drive partition disappears after installing Windows 7
Let's assume that your computer's hard drive contains two partitions (C and D) and after installing another OS on the second partition, the first partition disappeared. In fact, the partition remained where it was, but Windows 7 did not assign a letter to it. Therefore, we do not have access to the data stored on this disk.
To assign a drive letter, go to Control Panel -> Administrative Tools -> Computer Management.
In the left menu, select Storage Devices -> Disk Management. This displays information about all drives connected to the computer, including logical drives (partitions), drives, and removable drives. Our lost partition is located here - it is displayed in the list and has neither a letter nor a volume label, but is recognized by the system as a hard drive.
1. Right-click on it and in the menu that appears, select Change drive letter or drive path. 2. In the window that opens, click the Add button. 3. In the window that opens, in the Assign a drive letter line, all free letters are presented in the form of a drop-down list; we can assign any of them to our “unidentified” partition. 4. Select a letter and press the OK button.
As you can see, setting up and optimizing the operation of Windows 7 with the proper approach is an easy and quick way to both improve the process of using your computer and increase its performance and speed.
Important!
If, after optimizing Windows operation, you have not achieved the desired result, or your actions have led to disruption of the system, computer assistance specialists at St. Petersburg USService will help you.
PRICE LIST
Read more: Windows 7 support will end on January 14, 2022.
Disabling system visual effects
To optimize the performance of your laptop and speed up the loading of Windows 7, you should first disable visual effects, the absence of which will not affect the operation of the system in any way. To do this, go to “My Computer” and select “System Properties” or simply press the hotkey combination “Windows + Pause / Break”.
Next, in the menu on the left, click on “Advanced system settings”.
Click on the “Options” button in the “Performance” section.
Check the box "Provide the best performance"
Or you can select “Special Effects” and check the boxes that you see in the picture. Since these functions make the system more convenient.
Click “Apply” and “OK”.
Please note : All these functions take up some of the RAM, which becomes noticeable on weak PCs or laptops. This is especially true for animated controls.
Adding Memory
You can physically increase the capabilities of the computer hardware, which will increase productivity, although it will require some material costs. Unfortunately, laptop manufacturers do not give the buyer the freedom that desktop computer owners have. As a rule, you can only increase RAM and disk space.
If your computer has 32-bit Windows 7 installed, then the optimal amount of RAM will be 3 GB. It is useless to increase more: the system will not be able to use the additional gigabytes. It is better to reinstall the system to the 64-bit version, for which 4 GB is the minimum amount for full operation. It is better to change RAM in a workshop. In addition to volume, it is important to know the physical characteristics of the slats, including their speed.
This bar can be replaced with a more capacious or faster one
The best results in hard drive performance will be obtained by replacing the traditional hard drive with a solid-state SSD drive. This solution is expensive, so as a compromise, you can install a small solid-state drive to run Windows 7, and store basic user information on a traditional, cheaper and larger magnetic device.