Recently, mobile device cameras have become so functional that some of them can already be compared with mid-price cameras. It is difficult to meet a person on the street with a point-and-shoot camera in his hands, trying to squeeze out of it a more or less acceptable photograph. All the work is now done automatically by the smartphone camera. However, this particular function does not yet allow you to take decent quality pictures, and the question of how to improve the camera on an Android phone is still relevant for many home-grown photographers.
Rules for taking a good photo
Before you start using your phone, it is recommended that you familiarize yourself with several rules that will allow you to take a beautiful photo. First, you need to wipe the lens. This must be done with a special rag. A napkin for glasses or other optics is also great. Carefully monitor the condition of the lens to avoid scratches. Chips and fingerprints will turn a potentially good photo into a blurry one.
To ensure that the lens is always in excellent condition, use protective film or glass.
Secondly, you need to familiarize yourself with the functionality of the camera. Advanced smartphones are equipped with multiple lenses. One is suitable for wide-angle photography, and the other for photographing objects at close range.
Perhaps the main advice is the correct use of light. Try to keep your subject facing the light source. Otherwise, individual elements of the photo will be overexposed, and this will directly affect the overall quality.
Another point regarding light involves avoiding the use of flash. Not every smartphone can boast of a high-quality LED. A bad flash will not only fail to cope with its main task, but will also cause an overexposed frame.
Finally, using the zoom is not recommended. Most models have a digital zoom feature, which reduces the image resolution. As a result, the photograph turns out to be far from ideal. However, some smartphones are equipped with optical zoom. This is a completely different matter, since the increase in this case occurs by rearranging the objective lens.
Photosensitivity
A parameter that determines the brightness of a photo, regardless of the amount of light that hits the matrix. Light sensitivity is indicated in ISO, the higher the value, the brighter the finished result. In the world of digital photography, the same values on different matrices give different results, so it is worth considering the specifics of each individual device.
By increasing the value you can compensate for a short shutter speed. You need to be careful, high values lead to digital noise, even completely damaging the photo.
How to improve the camera on your phone through settings
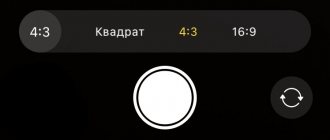
Any smartphone camera has a wide range of settings. This was done so that the owner could adjust the quality of pictures and videos at his own discretion. To get into the settings mode, you need to open the Camera application and press the gear-shaped button.
In the menu that opens, you will be able to change the resolution of photos and videos. Usually the default is set to average values. But the user can turn all the settings to the maximum to achieve the best image quality. Thus, the conventional 5 megapixels can be changed to 12, and the video resolution from HD can be increased to FullHD.
Also in the settings there may be a mysterious HDR item. This is a special function that adds clarity to a photo taken in too bright light or in the dark. Try enabling this option and perhaps the image quality will improve.
When shooting in HDR mode, the smartphone takes longer to process the image.
Focal length
Smartphone autofocus systems are constantly evolving. From basic contrast to advanced phase! There are also hybrid systems that use a rangefinder laser - it works in any conditions. As a result of evolution, focusing time has decreased from one second to an average of 0.3 seconds in favorable conditions.
The last sentence is key, because even modern systems are not always able to cope with poorly lit scenes. Autofocus takes an unacceptably long time to work or is completely wrong. In such situations, it is beneficial to use manual settings. Manual focusing is also beneficial when shooting the same subject using a tripod to avoid constant refocusing, and therefore eliminate errors and speed up the process.
Manual camera settings for good photos
Average smartphone users are used to being limited to standard photo settings like changing resolution or switching between lenses. But the camera of most models allows the owner to feel like a professional photographer by setting the exposure independently.
This is done through a special manual mode. To activate it, you need to go to the appropriate section of the Camera application. There are a large number of settings available here, including:
- White balance.
- HDR.
- Excerpt.
- ISO.
- Exposition.
- Focus.
It’s easy for a beginner to get confused in this variety, but we will try to explain what each of these settings is. Such knowledge will help you take a truly high-quality photo.
We have already talked about the advantages of the HDR function. This mode should be activated in a situation where the frame is very light or dark. But the remaining characteristics require a detailed description. So, white balance involves changing the hue of a photo. Typically, the following options are available in the settings:
- Incandescent lamp.
- Fluorescent Lamp.
- Sunny.
- Cloudy.
This characteristic will be especially important if you are filming in a professional studio.
Shutter speed is the amount of time it takes to process a photo. The average smartphone allows you to set the value from 1/8000 of a second to 30 seconds. If your subject is in motion, you should choose the slowest shutter speed. The opposite situation is with a static frame. The experimenter can change this indicator at his own discretion to obtain a unique photograph. Shutter speed also affects the brightness of the frame. For the brightest possible shots, it is recommended to use the highest setting.
But the main characteristic that affects brightness is ISO. Its values can range from 50 to 1600. The lower the value, the darker the frame will be. Exposure is somewhat similar to ISO, but this setting uses light received from outside. A high value takes the most light from the source, which can be a lamp or the Sun.
For those who take portrait or landscape photographs, focus adjustment will be important. Of course, we are all accustomed to autofocus, but professionals try to build this characteristic on their own. The minimum settings are for shooting very close subjects. On the contrary, a high value is suitable when you are photographing a subject at a far distance.
Some smartphone models are equipped with artificial intelligence, which independently adjusts the settings to obtain a high-quality photo. If manual settings seem complicated to you, use the Auto mode.
Exposition
The story about manual mode should begin with this concept. What is exposure? — This is the amount of illumination of the matrix, which is determined by three parameters: aperture, shutter speed and photosensitivity. The last of them does not in any way affect the amount of light falling on the matrix, but is an excellent lever for regulating the illumination of the frame. In addition, due to the design features of the smartphone, the aperture value does not change - two levers remain in the hands of the mobile photographer.
It is worth considering that to achieve the same correct exposure, you can choose no combination of the specified parameters. The choice of a specific set largely depends on external conditions. More on how exactly, later in the article.
How to Improve Your Phone's Camera Quality Using Apps
Countless programs available on Google Play and the App Store offer users advanced camera settings. There are often many more of them than in the standard application. Also, such utilities have a more developed auto mode, which independently builds exposure and other indicators.
Let's look at the principle of operation of enhancement programs using Google Camera as an example. There is an HDR+ mode in the application settings. The presence of this function will be useful for those people whose standard camera does not have the ability to correct a photo that is too light or dark.
For shooting in the evening, there is a cool Night Sight mode. Without the use of flash, it gets the most out of the attached lens, allowing you to improve the quality of your photography. In addition, there is a Sphere mode for panoramic shots, as well as Smartburst for dynamic scenes.
All Google camera settings can be applied at the shooting stage. That is, it is absolutely not necessary to process the photo later. If you put GCam's features into practice correctly, you can get some really cool shots.
Don't forget about photo editing apps
Sometimes the most important photo editing happens not during the shoot, but after it. Many improvements to the resulting photograph can be attributed to the use of photo editing applications after such photographs have been taken.
- The Photoshop Express app (Android, iOS) and Pixlr Express app (Android, iOS) perform various editing functions, crop levels, alignment, flip, rotation, and removing the regularly occurring red-eye effect.
- If you like filters, you should try the Snapseed app (Android, iOS) and VSCO Cam (Android, iOS).
- Don’t forget about the popular Google Lens in our country.
This is good to know: an application that improves the quality of photos.
Additional accessories for better photos
The smartphone attracts novice photographers because a person can start shooting by simply taking the device out of his pocket. But getting a good shot will be quite difficult if you don’t turn to the help of additional devices.
For example, selfie lovers use monopods everywhere. And although this element is gradually losing popularity, it can be useful for those people who do not have enough arm length to get into the frame of all people.
A stabilizer will be much more useful. This device is quite expensive and is most often used for shooting video. But shaking hands can ruin not only a short video, but also a photograph. Therefore, a stabilizer will definitely not be superfluous.
For people whose smartphones are not equipped with a wide-angle lens, the so-called “fish eye” will be useful. This additional lens is attached to the main camera, allowing the owner of a mobile device to capture the maximum number of objects in the frame.
For a person planning to take portraits or landscapes outdoors, a tripod will come in handy. The device eliminates the “shaking hand effect” and allows you to create a very beautiful shot. A tripod is a must-have in any aspiring photographer's arsenal.
And if you are going to shoot underwater, you cannot do without a special case. Protective boxes will prevent liquids from affecting the performance of the smartphone. So you can safely head to the seashore to photograph beautiful fish underwater.
In the case of some smartphones, using a special case for underwater photography is completely optional. When choosing a device, you need to pay attention to the presence of IP68 or at least IP67 protection.
Rules of composition
Choosing the right composition is a great way to take attractive photos. Learn some basic rules of composition, such as leading lines, the rule of thirds, framing, scale, and more.
Once you understand the rules of composition, try breaking them by playing with the level of angle and lighting.
And since we mentioned angles, shooting from a different angle can make the subject you are shooting more attractive and interesting, highlighting overlooked details.
Photographer tips
In addition to our recommendations, which were outlined at the beginning of the material, it would not be amiss to turn to the advice of photographers. Of course, these people rarely use a smartphone at work, but when professional equipment is not at hand, a mobile device can become an assistant in capturing a beautiful shot.
Of course, photographers advise carefully monitoring the condition of the lens. This is the first thing a beginner should pay attention to. Professionals also note the poor quality of the standard flash, which only spoils the photo. As an alternative, it is better to use a special night mode.
Separately, photographers speak out about smartphone cameras that shoot at 48, 64 or 108 megapixels. This is a marketing ploy by manufacturers that does not improve the quality of the pictures at all. On the contrary, turning on a special mode slows down the photo processing process.
Owners of Android devices are recommended to use special applications. For example, GCam, which was discussed earlier. Typically, such programs have more productive camera settings than the standard “Camera”.
In conclusion, photographers advise not to despair if you end up with a blurry or ugly photo. Firstly, defects add uniqueness to a photograph. Secondly, you can apply a filter to any photo, which will correct most imperfections.
Let's draw conclusions
Don't forget about such a parameter as ISO (light sensitivity). It can also be adjusted in the camera settings of smartphones. As a rule, the “Automatic” mode and several numerical values (100, 200 and more) are offered to choose from. A higher value allows you to take clearer pictures in low light. At Normal, it is recommended to use lower values to limit the appearance of noise and increase sharpness.
We told you whether it is possible to improve the camera on your phone. But I would also like to recommend not being shy about black and white photography, using filters and plugins. This is the only way to achieve originality, and eminent professionals take great advantage of this.
Bonus: TOP 5 best programs for the camera on your phone
Advanced users have long been convinced that the standard camera application of any smartphone is significantly inferior to programs from third-party developers. Therefore, we decided to compile for you a rating of the best utilities that improve the quality of images in real time.
| Name | Description | Download link | Rating |
| Google Camera | A program that can do the impossible even on a cheap smartphone. | ★★★★★ | |
| Open camera | A very lightweight application with a lot of built-in features. | ★★★★★ | |
| Ucam Ultra Camera | A good solution for those who want to turn a photograph into a real work of art. | ★★★★★ | |
| A Better Camera | One of the best programs of this type, with night shooting and HDR modes. | ★★★★★ | |
| Line camera | A simple utility for beautiful selfies and collages. | ★★★★★ |
We've already said a lot about Google Camera, which is the best app for beginner photographers. Therefore, now we will dwell in more detail on other programs. But first there is an important note to make. GCam cannot be downloaded via Google Play. You will have to look for download links on specialized forums, where craftsmen adapt the application for each specific smartphone model.
Line camera is a very popular photo editor application. But the program also offers a photo shooting mode, which allows you to expand the capabilities of a standard camera.
A Better Camera is an extremely advanced program that will be quite difficult for a beginner to understand. But, if you are serious about taking up professional photography, the application will not disappoint you.
There is a paid version of A Better Camera for 49 rubles, which adds several new modes.
Ucam Ultra Camera doesn't have a very nice interface, but somehow the app manages to take pictures that are as good as GCam. But the main competitor to the Google camera still seems to be Open Camera. There is nothing superfluous here, only the basic functions that turn a beginner's photo into a professional photo.
4.3/5 — (27 votes)
Clean the lens
This recommendation can already be called universal, because a dirty lens is the main reason for unsuccessful photographs. If you don't clean the lens, your photo will turn out bad even in ideal lighting conditions. At the same time, you must understand that over time the lens collects scratches, which also spoil the pictures. Therefore, it makes sense to think about replacing your smartphone, if this is, of course, possible.
Shoot a lot...
Once I was engaged in professional photography and came to the conclusion that the difference between a good and a bad photographer comes down to the number of pictures taken. Do you agree that if you take 100 photographs, there will definitely be a few photos that everyone will like?
So next time you take a photo, don't be lazy and click the shutter again, it should become a habit. Thanks to the excellent backup function of Google Photos, the pictures you take will not fill up your device's memory. A slight change in position, focal point or angle when shooting and there will be plenty to choose from in the future.
Color rendition
This tip is one of the options for post-processing photos. That is, it is applied after the picture is already ready. In any photo editor, including the one built into the stock “Gallery,” you can change the color balance. Often this helps make the frame more saturated or dull, which overall affects the quality of the picture. Be sure to try this setting if, after changing the white balance and exposure, you are not satisfied with the final result.
On a note. In the “Auto” shooting mode, the smartphone automatically selects color rendition, white balance and other settings. Therefore, to take photos on the go, it is recommended to use it, leaving “Pro” for shooting from a tripod.
Checking permission
Continuing the conversation about the shooting application settings, we cannot fail to note the resolution setting, which can usually be changed. To save space, the user is asked to select a lower resolution (for example, 5 megapixels instead of the standard 12MP) so that the photo does not weigh as much as it originally did. However, at the same time, the quality of the photo will deteriorate. It will become less detailed and “noisy”.
Important. On smartphones with a camera with a declared resolution of 48MP, 64MP or 108MP, it is not recommended to use full resolution mode. In Auto mode, the phone merges adjacent pixels rather than compressing them, which is why 12-megapixel photos often turn out better than 48-megapixel photos.
Turn on the grid and use the rule of thirds
One of the main techniques in photography is to use the rule of thirds. The rule of thirds involves dividing the camera's viewfinder into nine sections. All phones have a camera grid, find it in the settings and turn it on.
This rule is based on the fact that key objects should be ideally located at the points of intersection of lines. Choose which objects are the most important and try to place them along the intersection lines.
Obviously, following this rule will take you a step higher as a photographer. But you shouldn’t get too hung up on this, in some cases you won’t be able to use them, for example, if you plan to use your photos on Instagram.
Flash
Flash is a controversial thing. Sometimes it really helps to correct the situation when its light is dispersed evenly. But often the subject is overexposed. Photographs in which the subject is a person look especially ugly. Therefore, in most cases, you are better off refusing to use it. Moreover, such advice is given by professional photographers who know a lot about creating high-quality photographs.
Use a tripod
The main reason for blurry pictures is shaking hands. You can get rid of it only by using additional equipment in the form of a tripod. Of course, a special stand for a smartphone is inconvenient when used on the go, but if you plan to capture some important event with your family, a tripod will definitely not be superfluous.
Try burst mode or 4K recording
Burst mode is very convenient to use when shooting children, group shots (there will always be someone who asks to retake), athletes or home devices. Play with the shutter speed, a short shutter speed (about 1/1000) will literally freeze time, and a long shutter speed of 1/15 will allow you to get artistic blur.
I also recommend trying to shoot 4K video and then choosing a frame to take as a photo. The easiest way to do this is to press the camera's shutter button while filming. There are several pre-installed video players (for example, Samsung) that allow you to frame while playing a clip.
If your phone doesn't have this feature, try a third-party app like AndroVid.


