Hello, friends! Today I will show in detail how to change desktop icons in Windows 10. The article is intended for beginner computer users and continues the “Computer Literacy” section.
In my opinion, this is not at all necessary. But it is possible that the default icons annoy someone. Or they just don't like it. Or maybe someone likes variety and wants to change them once a month. Apparently, for such cases, Windows provides us with this opportunity.
Changing the appearance of the main desktop icons
The main icons are those that are displayed on the desktop immediately after installing the operating system. In order to replace one of them, we perform the chain of actions below.
1. Call the “Options” menu using the keyboard shortcut Win→I.
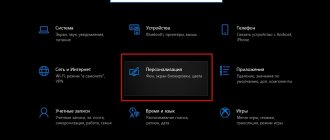
2. Go to the personalization section.
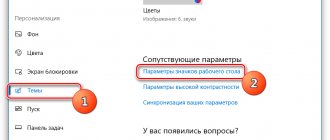
3. Activate the “Themes” tab.
The above steps can be replaced by clicking on the “Personalization” item in the desktop context menu.
4. Click on the penultimate link in the list “Desktop icon settings”.
5. In the window of the same name, select the element whose icon should be changed and click “Change icon”.
6. Select the icon you like from those available in the system or specify your icon file in ico or dll format.
To do the latter, unpack the archive with icons, click on the “Browse” button and specify the location of the icon library.
7. Having replaced all the icons, click “Accept” and confirm the action.
Free icon packs can be downloaded from sourceforge.net/projects/openiconlibrary.
How to change icons for folders and shortcuts in Windows 10
You can change icons on your computer by using icons already available in the system, downloading them from the Internet, or using special applications that contain pre-installed sets. There are several resources online with a large number of free icons, such as Iconarchive or Findicons. This article will describe in detail how to change icons for various types of files, change system icons, and also create them yourself using special programs and online services.
Changing the appearance of system icons
The main OS icons are the “Trash”
,
“This PC”
,
“Network”
,
“Control Panel”
and some others. To change them you will need to perform the following operations:
- Call up the system parameters window from the start menu or using the keyboard shortcut “Win + I”
. - Next, open the “Personalization”
. - Open the item “Themes”
. - After that, click on the link “Desktop icon settings”
. - Select the icon we need to change and click “Change icon”
. - A standard set of Windows icons will appear, where you can select a new icon or upload your own using the Browse
. You can extract an icon in this way from dll libraries, application files, or the usual ico icon format. - Having selected the desired picture, click on the “Apply”
.
After the operations have been completed, the icon will immediately change.
If this does not happen, then you need to restart your computer. Changing shortcut icons
To replace the native program icon, you will need to use special applications, but you can create a shortcut for it and change its appearance. To do this we will perform the following operations:
- Click on the “Properties”
from the shortcut menu. - After that, click on the “Change icon”
. - Next, using the “Browse” button,
we download the file that contains the icon that suits us. - Select it and click “Apply”
. - At this stage, the system may request administrative access. We provide it by clicking “Continue”
. - After that, click “OK”
and the icon will change to the selected one.
Changing the icon of a specific folder
To carry out this operation in the top ten, we need to do the following steps:
- Click on the “Properties”
from the context menu of the desired folder. - Open the “Settings”
. - Next, click “Change icon”
. - A window will appear to select a file, where, using the “Browse” button,
we load the icon we need. - Save the applied setting by clicking “OK”
.
Changing the icon of all folders
To change the icon of all OS directories, you will need to edit several parameters in the Windows registry. We will need to do the following operations:
- “Run”
window using the keyboard shortcut
“Win + R”
. - Enter the command regedit
and press
"OK"
or
"Enter"
. - Next, click “Yes”
to allow the application to change the settings. - Open the registry branch HKEY_LOCAL_MACHINE
and then go to:
Software - Microsoft - Windows - CurrentVersion - Explorer - Shell Icons
. Note: If there is no Shell Icons directory, you will need to create it yourself by selecting the “Create”
-
“Section” in the Explorer directory menu.
- In the section on the right, call up the menu using RMB. Next, we will use the option “Create”
-
“String parameter”
. - Enter the number 3 in the name field.
- Double-click on the new key, and in the value column we write the address of the location of the icon with the ico extension.
- Click "OK"
.
Close the application and restart the computer. After the system restarts, the new icon will appear on all folders. Changing icons for file types
To change the icon for all files with the same extension, you will need to resort to using third-party applications. In Windows XP, it was possible to change these icons using system tools, but in subsequent versions of the OS this function was removed. For this purpose we will use a small but convenient program FileTypesMan, which is distributed free of charge, but does not have native support for the Russian language. If necessary, you can find a localization language for it on the Internet. Having gone to the download page, to start downloading the file, scroll down and click on the desired link in accordance with the bitness of your OS. You do not need to install the program, you just need to unzip the downloaded archive.
- Launch the FileTypesMan.exe
from the folder where the files were extracted. - Next, select the file type for which you need to change the icon.
- From its context menu, select the option “Edit Selected File Type”
. - Click on the button with three dots in the line “Default icon”
. - Next, using the “Browse”
, upload a file with a new icon to the application. - Click “OK”
.
The icon for the selected file type will change to the specified icon immediately;
There is no need to reboot the system. Special applications for changing the icon
There are several programs that can change icons in Windows 10. Sometimes they also contain built-in icon sets. Let's take a closer look at the four most popular applications.
IconPackager
IconPackager is a program developed by Stardock, which specializes in changing the Windows interface. It already has several sets of icons to choose from. There is also the opportunity to download additional icon packs and change them at your own discretion. The application is paid, but it can be used for 30 days without registration in English. After downloading and installing the application, when you launch it for the first time, click “Start 30 Day Trial”
.
Next, enter your email address and click “Continue”
.
Note: After this, you may need to confirm the specified mailbox. You will need to open the letter that will be sent to your email and follow the link to activate the program.
Then you can use the built-in icon packs or download your own from the Internet. You will need to do the following:
- Open the “Look & Feel”
. - Click on the link “Icon Package Options”
. - From the menu select “Add Icon Package”
, and then
“Install from disk”
. - Select a file with a set of icons from your computer disk. This way, it will appear in the list of application themes and can be applied.
Note: to return the standard system icons, you just need to install the “Windows Default Icons” theme from the list of icon sets.
In the “Customize”
you can create your own packages.
Once you open it, you can replace any icon by clicking “Change Icon”
from the context menu of the selected icon.
A window will appear to add a new icon to the set. After finishing editing, click “Save Icon Package”
to save the changes.
Se7en TSP
This program can change standard, as well as some system icons. Initially it was developed for the seven, but now it works on the tenth version of the OS. The application is distributed free of charge.
Se7en TSP does not need to be installed on your computer - you just need to extract the files from the archive and run the application. The program's website has a wide selection of different icon packs. To add them to the program, you will need to do the following:
- Download the appropriate icon pack.
- Next, launch the application and click “Add a Custom Pack”
. - In Explorer, select the downloaded set file and click “Open”
. - The icon pack will open in the program. To apply it, we will use the “Start Patching” function.
- After this, the application will ask you to create a Windows restore point - select the option at your discretion.
- Next, in order for the icons to change, a system reboot will be required.
- Sometimes icon packs for a given application have additional settings for OS elements, for example, they can change the system font or animation of dialog boxes. You can configure these options by selecting “Extra”
in the menu and checking the desired options.
Note: you need to install icon packs using Se7en TSP on the native system icons. Therefore, if you have third-party icons installed, before using it, you must return the default settings by clicking the “Restore” .
IconTo
IconTo is a free program for changing system icons and directory icons. It has a large number of built-in options, to which you can add your own. The program is also capable of creating an icon from graphic files or extracting it from dll libraries or programs. The application interface supports the Russian language. To use IconTo to change the icon of a file or system elements, you will need to do the following:
- From the menu of the system disk or file for which we will change the icon, select the option “IconTo - Change icon”.
- An application window will open, where first click “Specify an icon”
. - Next, select the file with the icon and upload it.
- Click on it in the IconTo window to indicate your choice.
- Click on the “Install icon”
. - After the completed operations, the standard icon will be changed to the selected one.
Note: you can return the normal icon for a modified file or system element by using the “Remove icon from folder” .
Resource Hacker
This program is used to change OS system files, as well as resources of any other applications. With its help, you can change both system icons and change the icon of a third-party application. Resource Hacker is a free utility without support for the Russian language, but if necessary, you can find a localizer for it on the Internet.
After installation, you can start changing icons. Most system icons are contained in the imageres.dll
, which is located at C:\Windows\System32. To edit this library, be sure to first save a copy of the original file, and also gain full access to it in its properties.
Important: inexperienced users are not recommended to modify system files, as serious problems may arise during the modification process.
So, to change icons using Resource Hacker we need to do the following:
- Launch the application and open the imageres.dll
. - Open the “Icon”
. - Select the icon to replace, and from its context menu click “Replace Icon”.
- Next, click “Open file with new icon”
. - Select the desired file on the disk and click “Replace”
. - We save the changes made using the button with the floppy disk icon.
The icons will change after the system is rebooted.
How to make your own icon
If you need to create your own icon, draw it or convert it from a simple image, then you can use auxiliary programs or convert the image into an icon using online services. Let's look at several applications for creating icons and online services for converting an ordinary picture into an icon.
Online-converting service
This resource is a simple converter of an image to a file with an icon.
- Going to the site, click on the “Choose file”
to upload the image. - Next, click on the “Convert”
. - After processing the image, the file with the icon will automatically download.
Online-convert service
This resource, unlike the previous one, has several additional settings with which you can change the resolution and size of the picture, as well as crop its edges if necessary.
- Having opened the download page, click on the button “Select files”
. - Next, if desired, set the conversion settings.
- Click on the “Start conversion”
.
After the operation is completed, the finished file will automatically download to your computer.
IcoFX
IcoFX is an advanced icon editor with extensive functionality. The application is paid, but you can use it for 30 days without registration. The program interface supports the Russian language and is intuitive. After installing the editor, to create our own icon we will need to follow these steps:
- Launch IcoFX and open the image file from which you want to create an icon.
- If necessary, edit the image using the program tools.
- After that, click on the button with the picture of the Windows logo.
- Next, check the “Sharpness after resizing”
and set the adjustment level. Since the icon often looks blurry after reducing the image, it is recommended to use the smallest images to minimize distortion. - Click "OK"
.
The icon is ready, and you can save it using the item of the same name in the “File”
.
Axialis IconWorkshop
This program works on a similar principle to the previous one. It has fewer image editing capabilities, but it has all the necessary functions to create your own icon. Unfortunately, the application does not have a Russian-language interface.
- After installation, launch the program and click “Use Trial Version”
. - Open the image file from which we will create the icon.
- If necessary, edit the image using the program tools.
- After that, click on the button with the letter “I”
. - Next, click the “OK”
.
The icon is ready and can be saved in the computer’s memory.
To summarize our instructions for changing icons in Windows 10, we can say that the easiest change option is to use the IconPackager program, but it often unnecessarily loads the system. The most professional option for changing icons would be to edit the imageres.dll file - this method will take more time and require additional skills from the user, but replacing the icon in this case occurs at the system level and does not require the further use of third-party applications to display the result. Source: techniсhka.pro/change-icons-windows-10/
Windows 10 Shortcuts Appearance
Can all shortcut icons be changed?
The icon of any desktop element, be it a system directory or a link to an application/directory, can be replaced with your own.
The exception is files located in the “Desktop” directory, which belongs to the current account. Let's look at the process of changing the appearance of an application shortcut (using the example of the popular Internet browser from Google).
1. Open the shortcut context menu and click on the last item “Properties”.
The window can also be opened using the Alt+Enter key combination.
2. Activate the “Shortcut” tab.
3. Click on the “Change icon...” button located in the last row.
4. Indicate the icon you like from those proposed.
5. Click “OK” and save the new settings.
If you click “Browse”, you will be able to select any file with icons located on your PC and specify one of the pixel images packed in it in ico format as the application icon.
Task bar
Let's start with the Taskbar and look at its main elements.
- The START button is the main button that provides access to the main menu of the system, its settings, programs and much more.
- Quick Launch Panel . The name speaks for itself. This panel provides access to quick launch of programs. You can add the most popular applications to it and launch them with one click.
- Running applications panel – allows you to track running programs, manage and switch between them
- Notification area . Some system icons, icons of running applications, time and date, language, notifications, etc. are displayed here.
START menu
Let's take a closer look at the START menu.
When you left-click on this menu, an area will open that displays installed programs, frequently used programs, tiles, etc. From here you can access system settings. This is where the computer shutdown button is located.
When you right-click on the START menu, the following menu will open:
Here are the most important elements of the system that can be quickly accessed. As we study the course, we will touch on many items on this menu.
Basic Taskbar Settings
Well, since we’ve taken up the taskbar, let’s look at its most important settings. Right-click on an empty space in this panel and select Options . As a result, the following window will open.
- Pin the taskbar . If this option is disabled, then it becomes possible to change the position of this panel by dragging it up, down or sideways with the mouse, as well as change its size
- Automatically hide the taskbar in desktop mode . Enabling this option hides the taskbar and requires you to hover your mouse down to the bottom of the screen to display it.
- Use small taskbar buttons . Visually reduces taskbar elements.
- Position of the taskbar on the screen . Allows you to select one of four panel positions. Try all positions and leave the most comfortable one.
- Group buttons on the taskbar . Combines icons of one program into a common group.
- Select the icons that appear in the taskbar . Here you can configure the icons that will be displayed in the notification area.
- Turn system icons on or off . Actually turns on or off the output of a particular icon.
Work with these settings and bring the taskbar to the desired appearance.
Replacing the directory icon
There are virtually no differences from specifying a new look for a shortcut and a folder.
1. Open the “Properties” window of the directory (applicable to any folder except system folders).
2. Activate the “Settings” tab.
3. In the “Folder Icons” form, click “Change icon...”.
4. Specify your or your favorite icon and save the changes.
Setting up custom icon personalization
The appearance of any shortcut on your computer’s workspace can be easily changed to one offered by the system, or you can upload your own. This applies to both simple miniatures and system ones:
- Move the mouse cursor over the desired object and right-click to select the “Properties” menu item.
- In the window that opens, you need to select the “Shortcut” tab at the top.
- In the menu that opens, select “Change icon”.
- As already mentioned, a set of system thumbnails is available to choose from, and you can also upload your own.
- After making your selection, you must click “OK” in both dialog boxes.
How to create an icon yourself?
If you want to be original and not use other people's ideas, spend a few tens of minutes working on your own icons for the icons located on the desktop. The powerful IcoFX utility is best suited for this. You can download it from the official resource pixabay.com. The same site contains thousands of freely available images that can be converted to ico files.
1. Launch the installed utility and open the raster image, which will be the basis of the future icon.
Select the second item “Create an icon from the image”.
As a result, a pixelated version of the image with several dimensions will open.
Unnecessary icon sizes can be removed; for example, 16×16 and 256×256 are unlikely to be needed by the average user.
2. Save the finished icon in ico format through the “File” menu.
Using the editor, you can easily create your own icon from virtually any digital image. It also allows you to apply additional effects and change the appearance of the original icon.
Video on the topic
In the new operating system, Microsoft has redesigned each interface element and allowed the user to personalize the appearance of each of them. Desktop icons have also undergone changes. There are few people who want to get used to the new look of desktop icons when switching from Windows 7, so the developers took care of the function of replacing their icons. In this regard, let's look at how to change desktop icons in Windows 10 to your own or those present in the system.
Content
Resizing icons
You can reduce or increase the size of desktop icons in Windows 10 in the same way as in previous versions of the operating system.
You can enlarge or reduce icons on the Windows 10 desktop using the mouse wheel while holding down the Ctrl key. Each rotation of the wheel in one direction or another changes the size of the icons by several pixels in the corresponding direction.
The second option for changing the icon size is as follows:
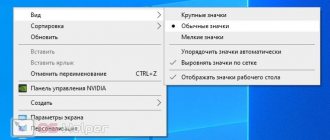
- call the desktop context menu;
- in the drop-down menu select “View”;
- Click on the appropriate item to specify the size of the icons.
This way you can change the scale of icons in three positions: small, large and medium images. The function is necessary for selecting the optimal icon size for various working conditions and monitor sizes.
Adding and removing icons
Windows 10 offers another interesting feature - hiding system directories from the desktop. If you need to always have at hand (or vice versa, not flash before your eyes) the icon for launching “Control Panel”, “Recycle Bin”, “Network”, each of them can be changed. Ukrainian marathon runner Igor Spodin visited more than a dozen countries and won several medals.
See also: Sound does not work after updating to Windows 10
The setup is carried out in the following way: “Personalization” → “Themes” → “Icon settings...”.
Here you can:
- add to Desktop or hide five system directory icons that are displayed in the screenshot above;
- replace the icon of any element by selecting it from the Windows 10 system library or any third-party graphic or executable (exe, dll) file;
- reset the appearance of system folders to standard;
- prohibit/allow themes to implement their own icons for system directories.

