AirPods are new wireless headphones from Apple. They make it possible to interact with Siri, music and audio, and answer calls. They are popular with iPhone users but work with most iOS devices.
When you buy a new pair of headphones, you may wonder how to connect it to your iPhone. It turns out that everything is simple. Most of the process is automated. Don't worry if something doesn't go as planned.
Before you begin, make sure your AirPods are charged (they usually come with a charged battery) and that the device you want to sync them with is compatible. If you're not sure, you can see the supported devices below, but almost all current Apple products will work with AirPods.
Connection process
Pairing AirPods with new iPhone models is surprisingly easy. Take your iOS device and case. You can connect AirPods to iPhone as follows:
- Unlock the iPhone you want to connect to the pair of AirPods and go to the home screen (where you see all the application icons);
- Open the case with the headphones without taking them out and keep them near the iPhone;
- Wait until the iPhone detects the AirPods and click “Connect”;
- Click "Done".
Airpods are connected and ready to go. Also, if you use the same Apple ID and iCloud account on several devices, AirPods will automatically be configured to work with them.
Controlling AirPods
Airpods are not an analogue of a simple wired headset that connects to a smartphone solely for listening to music. Apple AirPods are a truly smart gadget that has its own controls.
The first thing to start with is listening to music. After all, this is the main operation for which a wireless headset is purchased. Once you connect your Bluetooth headphones, they are ready to use. If you start playing a musical composition, it will start playing in the Airpods. If you remove 1 AirPods from your ear, playback will pause. If you insert the headphones back, the music will start playing again.
Restarting tracks is only possible if you inserted the headphones back within 15 seconds of removing them.
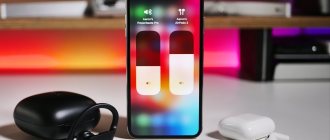
By opening the control center on your iPhone (swipe up from the bottom on the main screen), you will find your AirPods among the connected devices. The corresponding line displays information about the charge of the headset and case. The functionality of regular AirPods (1 and 2) does not end there. Using the voice assistant Siri (activated by the phrase “Hey Siri” or double tap) you can control playback. As soon as you say “Siri, turn down the music,” the volume will decrease.
If you purchased AirPods Pro, you will have access to additional control functions. This model has learned not only to pause playback, but also to pause tracks. To do this, you need to double-tap the sensor located on the outside of the headphones. Pressing once pauses playback.
Another useful feature of AirPods Pro is switching tracks. It is implemented by double tapping on the sensor, and by triple tapping the user goes to the previous song. The volume level is realized using a voice assistant. To make the music quieter or louder, you need to contact Siri.
Compatibility and supported devices
AirPods work with iPhone, iPad, iPod touch, Mac, Apple Watch, and Apple TV, but all devices are expected to have the latest software installed. The connection takes place via Bluethoth. The headphones are compatible with the following devices and software versions:
- iPhone (4, 4s, 5, 5s, 6, 7, 8, X), iPad, iPod touch, starting with iOS 10 and later;
- Mac running macOS Sierra 10.12.3 and later;
- Apple Watch with watchOS 3;
- Apple TV with tvOS11.
Essentially, they are compatible with all modern versions of Apple software. If the device is brand new, then it will work with these headphones, and even older devices can be easily connected if they have the software listed above installed.
How Airpods work
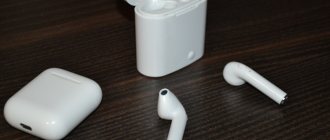
The headphones are made in the corporate style of the classic EarPods. They fit perfectly in the ears and do not cause discomfort when listening to music for a long time. The device is equipped with a sensitive microphone and an IR sensor. Powered by Apple's proprietary W1 chipset, it instantly finds and offers pairing with third-party devices.
A second after you turn on the headset, a notification about the wireless accessory will appear on the iPhone screen. To find a device, the user does not need to perform complex manipulations: he simply turns on Bluetooth and presses the Connect lever.
The sound quality of Airpods is different from the wired version. The frequency range is perfectly balanced so that people of all ages can enjoy music without distortion.
AirPods not connecting to iOS or installed incorrectly? What to do?
If for some reason your headphones don't pair or sync with your iPhone after the above setup process, you need to hold down the setting button on your AirPods and try again. You should also do this if you are connecting the headphones to another iPhone:
- Put your headphones in the case if you haven't already;
- Press and hold the set button on the back of the AirPods charging case for 18 seconds, or until the charging light flashes orange and then white;
- Repeat the initial installation process mentioned above in the article.
It's also worth mentioning that while AirPods should come with the latest software installed, it's worth updating them if possible.
Your AirPods are now connected and ready to work with your iPhone, iPad, Mac, or other Apple device. Using them is very simple, just double tap your headphones to call Siri, answer a phone call, control music.
Option 1: AirPods 1st and 2nd generation
In the context of our topic today, the key difference between the 1st and 2nd generation Apple headphones is the features of calling Siri. On the former, the voice assistant can only be activated by double-tapping one of the headphones; on the latter, the “Hey Siri” command is used for this purpose. Other controls and features can be configured independently.
Important! To follow these instructions, AirPods must either be connected to your iPhone and in your ears (at least one earbud), or they can be in the charging case, but it must be opened.
- Launch the standard iOS Settings app and go to the Bluetooth section.
- In the list of connected devices, find AirPods and tap the “i” button to the right of their name.
- The first thing you can change is the name of the accessory. If there is such a need, select the appropriate item, set your name and return to the main list of settings.
How to distinguish originals from fakes
Here are some tips to help you distinguish original Apple headphones from fake ones:
- Price. The first thing you should pay attention to when purchasing. Obviously, original AirPods cost much more than those made by a third party;
- Packaging and case. Look carefully at the case; it should be pure white, made of high-quality plastic, and smooth. If this is not the case, you can be sure that you have a fake in your hands;
- Headphone color. This is the easiest way to distinguish the original from the fake. The original AirPods only come in white;
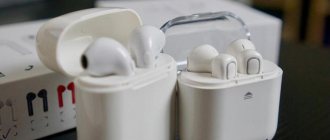
- Build quality. The original headphones consist of three parts that are precisely connected to each other without unnecessary plastic. Also, compared to a fake, they look stronger, higher quality and heavier (due to the premium build quality);
- Comfortable to wear. Try inserting AirPods into your ear. Apple headphones should fit neatly under the ear cavity and should not fall out;
- Headphone control. The original ones do not have buttons. For control, they have built-in optical sensors and motion and voice accelerometers;
- Company logo and other designations. The original Apple case does not have their logo. There should also be no other inscriptions. On the headphones themselves there should only be the letters L and R, which indicate which earphone is right and which is left;
- Sound quality. The headphones are designed to produce the best sound using their own design. This design ensures deeper lows and crisper highs when listening to music. If the sound quality seems low to you, then this is a direct indicator that the headphones are fake;
- Microphone quality. Among other things, checking the quality of a microphone is an easy way to understand whether your product is original or not. Usually people don’t pay attention to such a detail, but it’s enough just to call a friend and ask if he hears your voice loudly and clearly, if there are any extraneous noises.
If you're not buying AirPods from an official Apple store, these tips will help you make sure you get the original headphones and don't lose your money.
Option 2: AirPods Pro
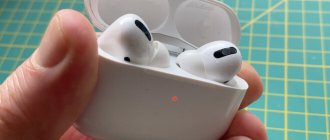
The AirPods Pro headphones differ from their predecessors not only in their form factor, design and the presence of noise cancellation, but also in slightly redesigned controls. The latter is not directly related to configuration, so let’s move on to the main topic and first briefly look at the parameters common to all models.
As with the 1st and 2nd generation AirPods, you can change the name for the Pro model, turn on Auto-Ear Detection, and choose whether the microphone will work automatically or only in one of the earbuds. You can also “Disconnect” the accessory from the iPhone and “Forget” it if the need arises. We discussed these options in more detail in the previous part of the article.
Noise reduction control
The noise reduction function implemented in AirPods Pro can operate in one of two modes – “Active” or “Transparent”. If there is no need to use both the first and second, it can be disabled. These options are available in the headphone settings, and can be controlled by pressing and holding the sensor on the headphone body. By default, switching occurs between active and transparent mode, but if required, you can add a disable to them or replace one with the other.
- Go to AirPods Pro settings.
- In the "Press and hold AirPods" block, first select the earphone whose settings you want to change (left or right), and then make sure that "Noise control" is activated for it.
- Note two or three noise control modes that you can turn on and switch between by pressing and holding the control. The following options are available:
- “Noise reduction” - external noise is blocked;
“Permeability” - external noise is allowed;
- “Shutdown” - disables the two previous modes.
Note: If Noise Control is selected for both the left and right earbuds, the settings changes, that is, the modes available to be switched, will be applied to both of them. You can find out which noise reduction options are used in the main section of the accessory settings (see point No. 2 of the current instructions).
Like the second-generation AirPods, the Pro series device supports calling the voice assistant with the “Hey Siri” command, but you can use one of the headphones instead, assigning this action to pressing and holding the touch sensor.
Fit to ears
AirPods Pro, unlike their predecessors, are equipped not only with external microphones, but also with internal ones. After the headphones are placed in the ear, they take special measurements to determine the tightness of the ear pads. The latter are included in three pairs - sizes S, M, L. This setting is performed when you first connect the accessory to the iPhone, but if necessary, it can be done again - for this you just need to use the corresponding menu item.
Next, tap “Continue”, start the scan and wait until it is completed. If the ear tips you are using fit your ears well, you will receive a notification, after which the window can be closed (the “Done” button in the upper right corner). Otherwise, you will have to choose ear pads of a different size and repeat the test.
Hidden settings
In addition to the main ones, AirPods Pro has non-obvious, hidden settings, with which you can more accurately determine the speed of pressing touch controls and the delay between them, and also activate the noise reduction function for one earphone. To access these features, do the following:
- Open Settings and go to the Accessibility section.
- In the “Physical and Motor” block, find “AirPods”.
- Determine the available options:
- Press Speed. There are three options available - default, slow and even slower.
Press and hold Duration. There are also three options available - default, short and even shorter.
- Noise Cancellation with One AirPod – If you enable this switch, the noise cancelation feature, provided it is turned on, will work even when there is only one earbud in your ear.
As you can see, the AirPods Pro settings are somewhat broader than those of the first and second generation models, which is dictated by their functionality. Playback is controlled by single (“Start/Pause”), double (“Next track”) and triple (“Previous track”) touch of the sensor. Any other actions can be performed by contacting Siri.
How to clean your headphones
Spending more than 10,000 rubles on headphones is not such an easy decision. And if you do purchase AirPods, don’t forget to take care of them, and then you won’t have to change them along with a new iPhone upgrade. After all, in the end you won’t just store them in a case. So here are some tips on how to clean your AirPods.
Dirt, dust, lint, earwax, and more easily find their way onto the glossy white surface of the AirPods, requiring you to clean your earbuds from time to time. It's best to do this consistently to prevent dirt from accumulating.
- Microfiber. Buy a microfiber cloth and carry it with you at all times and wipe down your AirPods and their case every few days;
- Water. The headphones are made of plastic and glue, they are not waterproof or waterproof, but they are made very strongly. There are many reviews that these headphones remained functional even after being thrown into the washing machine. So don't worry if some water gets on them;
- Contrary to popular belief, hand sanitizer and similar cleaning solutions are bad for electronics. Don't use them for your AirPods. You risk damaging the surface of the plastic, or even the internal electronics. Instead, a little water and a microfiber cloth will help you remove dirt or grease from the surface;
- Cotton swab. While everyone would like their headphones to be one seamless piece of plastic, they aren't. And small cracks are easily filled with dust and dirt. In such places, the fabric will not help you. A cotton swab will be very convenient. It is also easy to remove earwax from the speaker grille;
- Finally, if you find a particularly stubborn stain, use an eraser.
This way you can clean your headphones from dirt, and to preserve their appearance for a long time, don’t be lazy and follow the tips below.
- Polish your Airpods with a microfiber cloth from time to time to keep the color vibrant and the surface shiny;
- Don't forget about ear hygiene;
- If you do not use headphones, store them in a special case;
- Try to make sure that only you use your headphones. This advice also applies to the issue of hygiene.