Creating a good photo includes composition, play of light and shadows, and storyline. It’s not easy to catch a good shot, and it’s even more offensive when there are some inscriptions on the photo. Most often this is the date and time of shooting. Previously, almost all cameras had the date function set by default, and not everyone knew how to disable it. We will tell you how to remove the date from a photo on your computer, and what applications are suitable for this. Modern graphic editors allow you to remove and add inscriptions quickly and without compromising the quality of the image. The complexity of the procedure lies in the background, which is hidden under the inscription. Let's look at the main options for applications and tools.
Setting the date on a photo.
How to change the date on a photo?
Open the app and go to the camera roll. Click the plus button and import the photo for which you want to view date information. Select this photo and press the (i) button. The date and time the photo was taken will be shown, as well as many other useful details.
How to remove the date from a photo on a Xiaomi smartphone
Using the Paint program is the easiest way to add a date to a photo on your computer, iPhone or Android.
There are many applications. There are those who can put them right away when taking photographs, and there are those who will add them later.
In fact, the date and time in pictures taken with digital cameras on the phone are placed in so-called EXIF tags, available when displaying the image properties.
How to shift EXIF date in IrfanView
The free program IrfanView is designed for viewing and processing files in graphic formats. The IrfanView application has a tool for changing the shooting date attributes in EXIF, which is added to the program using a plugin.
In the IrfanView program, follow the steps:
- You need to add a photo to the program window.
- Enter the "Service" menu.
- In the context menu that opens, click on “Change shooting date/time in EXIF... (plugin)”.
- In the “Change shooting date and time in EXIF” window, select a new date and time.
- Click on the "Run" button.
How to set the date and time in Samsung Android A50 | s8 | s7 | a5 | a7 | j6 | a7 | a9 | a30
By default, the token is set in a format such that, for example, December 9, 2014 is saved as September 9, 2014.
You can type somewhere in the note to display the city name, latitude and longitude. (You need to turn on internet or GPS to get location information).
Do you remember when you took photos from the camera of a Samsung a50, s8, s7, a5 2022, a7, j6, a7, a9, a30 and others with Android OS.
Sometimes there is a need to recreate with maximum accuracy the events taking place at various rallies, events or some kind of investigative actions. Each of the pictures in this case requires the placement of clear information about the time when all this happened. How to set the date on a photo of a Redmi Android smartphone and make the photos more informative?
Instructions
Next, in the settings window that opens, click on the “Watermark” section and activate the switch next to the “Date and time on photo” item.
In the event that photos were taken without a date and time, they are still stored in EXIF data and displayed in the “Gallery” or file properties.
In the standard “Camera” application, call up the menu and select “Settings” (it is worth noting that the camera must be turned on in one of the possible options for taking photos, not videos).
Once launched, the screen will be divided into three tabs. Before choosing a photo to apply markers to, let's first go to the middle tab with settings.
After moving the photo to the computer, the user can view the saved metadata of the image. This information is in the file properties of this image.
Editing EXIF in ShowEXIF
ShowEXIF is a free program specifically designed for editing photo metadata. Using ShowEXIF you can change the time the photo was taken to another. The ShowEXIF program does not require installation on your computer and supports the Russian interface language.
If the program opens in English when you first launch it, go to the “File” menu, click on “Language”, select Russian.
You need to do the following:
- Using the folder tree, open the folder in the program that contains the desired photo, and then select this photo.
- Enter the “Tools” menu, in the context menu, alternately click on “Operations with Date/Time” and “Change date and time in the Exif section”.
- In the “Enter a new date and time” window, fill in the fields with the new data.
- Click on the "Record" button.
Where to view photo metadata
One thing you can do is check your photo's metadata and then use image editing software to add the date and time. But this approach is time-consuming and a bit messy, not to mention that the resulting image can easily be modified by someone else, creating a security risk.
If you prefer a different date format, fortunately you can quickly change it using a template.
To avoid this risk, you need to add date and time stamps as soon as you take a photo on your Android device.
We talked earlier about how to mark images with watermarks. The free Tagg.ly app for iOS and Android helps you caption photos taken on your smartphone or tablet.
The application does not require registration; after installation, you indicate in the settings whether the date and location should be displayed on the pictures and set a signature.
If you go back 10-15 years ago, digital cameras had this feature enabled by default, which was probably true. But if you are photographing a beautiful sunset or a cat catching a bird, such a mark interferes with perception, distracts and turns the picture from an artistic documentary, which is why Xiaomi smartphones have abandoned the time display.
In some situations, it is very useful to display the date and time of the shooting on a photograph. When you photograph something for beauty, or on vacation, it is not necessary to leave a date on the picture, but if you take serious photos for work, such marks will be extremely useful.
These parameters are always stored in the file properties; even if you forgot to enable the option, you can view them.
Cleaning up with Movavi Photo Editor
Of course, Photoshop has many more features, but it can be very difficult for a beginner to understand. And the program is not cheap. We recommend using the product of domestic developers - Movavi Photo Editor, which is available for download on the official website. Working with this application is much easier than with the previous one. For photos with a simple background, do the following:
- Drag the desired image into the program.
- Find the “Delete objects” function on the top panel.
- Select the inscription using a brush and paint over it. You can also use the Lasso option and draw an outline around the date. Use the Eraser to make adjustments to the selected area.
- Select the “Erase” item. All!
ADVICE. if some blots are still noticeable, you can adjust the “Search Depth”. This parameter determines from which region neighboring pixels are taken for replacement.
To work with more complex backgrounds, Movavi, like Photoshop, has a Stamp tool. The main disadvantage of the program is that the free version allows you to save only ten photos. This is how easy it is to get rid of unnecessary elements in photographs. Making such inscriptions is much easier - any photo editor has such a function. If something didn’t work out for you, ask any questions you have in the comments!
How to find out the last modified date of a photo from the file properties on Xiaomi?
Having opened the settings menu, all that remains is to activate the “Add date to photo” item and make sure that the date and time in the smartphone are correct.
To do this, launch the camera application and click on “Options” (in some firmware there may be a different name for the menu item). In the window that opens, click on the gear image located in the upper right corner.
At one time, it was very popular for digital cameras to display the date and time of shooting. This helped to immediately determine when the picture was taken and thereby link it to certain events of that time. Digital point-and-shoot cameras are a thing of the past, and smartphones have appeared in their place. How to display the time in photos taken with a Xiaomi smartphone?
After that, every photo taken with your smartphone’s camera will display the date and time of the photo, just like in the good old days.
By clicking the Remove Metadata button, you can remove all data. By clicking on the icons on the bottom panel, you can edit the date, geolocation and other data.
Photo Exif Editor app helps you view and change metadata on Android smartphones.
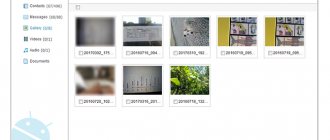
Many of you know that every photo contains a lot of metadata. Any photo taken on any device has this data. And among them may often contain confidential information such as geolocation. In this post I will tell you how to view and delete metadata from a photo on a smartphone.
Group change of shooting date in Explorer
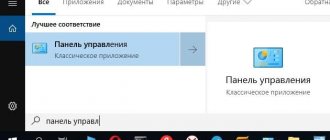
Built-in system tool - file manager Windows Explorer can change the shooting date settings of several photos in batch mode.
Follow these steps:
- Open your photos folder on your computer.
- Select a group of images in a photo folder.
- In the Explorer window, go to the “View” tab.
- In the "Areas" group, click the "Details Area" button.
- Information regarding the selected photos will appear on the right side of the window. In the “Date of shooting” item, change the original data to others.
- Click on the "Save" button.
Android
There is a wonderful app called Metapho on iOS. When you launch the application, a regular gallery will open with all the photos on your smartphone. When you tap on a photo, detailed information with metadata about it will open.
The application can remove some data from the photo or correct some of it. For example, you can change the geolocation of the photo or add any of the EXIF tags. All actions can be performed both for a single photo and for several at once.
Why do you need date and time on photos?
The habit of setting the date and time of shooting appeared simultaneously with the invention of photography. Photos were considered very rare, so they were kept for several generations, in order to tell more about the captured moment, they put a date on the back. With the advent of film cameras such as point-and-shoot cameras, the date and time migrated to the photo itself (this function was present in advanced cameras; the presence of a mark emphasized the status of the owner). In the era of digital photography, all markings are added using software methods and are carried out automatically. Among the main advantages of the function:
- quickly obtaining information about the place and time when the event occurred in the image;
- sorting photos by category;
- photo decoration;
- the ability to view marks on a printed photograph.
How to Add Date/Time Stamps to Photos on iPhone
Whether you want to create an alibi or run through your memory, it would be handy to see the tagged data directly on the photo. Unfortunately, Apple doesn't have a built-in timestamp for photos on the iPhone or iPad.
Step 1 - Install the app on your iPhone or iPad
First, go to the App Store and download Auto Stamper. As mentioned earlier, you will have to pay a small fee to use this app.
To get started, follow the installation instructions and grant the app the necessary permissions to access your iPhone files.
Step 2 - Set your stamp options
Next, set up your photo print. It automatically inserts the current date and time displayed on your phone, but you can also add additional stamps to the same photo. You can add three other types of watermarks: GPS location, signature text, and logo.
Additionally, you can also customize your stamp(s) by choosing the position, size, font, color, and opacity for each stamp. You can add event stamps in different font styles on one side while subtly marking the date on the other side of the photo - this app really allows you to customize the experience! When you're done, the Live feature will give you a preview of the photo with your stamps.
Timestamp Camera Basic - Free and Easy Option
If you're looking for a free, simple, basic timestamp, this is the app for you. You can download this from the Apple App Store for free and instantly get timestamps on your photos.
Step 1 - Download from App Store
Click Get and follow the iCloud verification instructions (fingerprint, Face ID, or password), then grant your permissions. This app will ask for permission to access your photos, cameras and GPS location.
You can deny it the ability to track your location, but it won't work without access to your photos and camera.
Step 2 - Take a Photo
All you have to do to get started is take a photo. If you have denied access to your GPS location, you may need to update your time zone, but you will only need to do this once. Do it:
- Tap the clock icon in the bottom left corner and scroll to your current time and date settings.
Step 3: Access photos with timestamps in the Photos app
The great thing about this app is that it automatically tags your images and places them in your Photos apps. There's nothing to do there. The Timestamp Camera Basic app works just like your phone's built-in camera.
Downloading a third-party app isn't always fun, especially for something as simple as a timestamp. Each of the options listed in this article are quite easy to use and work well.