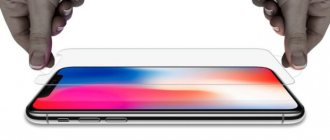
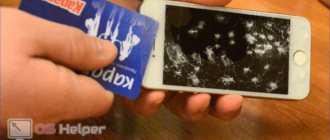
You no longer need to tell anyone why you need protective glass or film for your smartphone. Everyone already understands that scratches can be avoided by installing a protective accessory in a timely manner. And if the glass is also shock-resistant, then you can even avoid expensive repairs to replace the display after an unsuccessful fall.
Of course, everyone wants to save money and many install protection themselves. True, not everyone succeeds the first time. And very often dust particles and small debris stick to the glass or film during the installation process. What to do in this case? In our article we will talk about an alternative to buying a new accessory. That is, about what to do if the first attempt fails.
How to determine the type of fault
The main faults are divided into three types:
- No image, but full screen. 50% to 50% the screen module, or the microcircuit that is responsible for powering the screen, is faulty. Also, do not rule out a software failure if the smartphone turns on at all.
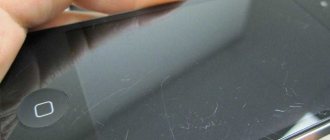
- Cracks on the screen. Usually in this case the screen itself works; there are only cracks that are purely visual. Or the screen does not respond to touches, in which case the sensor (touchscreen) is damaged and needs to be replaced.
- The screen works, but there is no image and there are cracks. The display shows small parts of the image, pixels that light up during operation. Only a complete replacement of the module will help.
Advantages of safety glass
Protective coating for sensor technology has advantages over conventional film. These include:
- strength;
- crack protection;
- glass does not allow moisture to pass onto the screen;
- does not affect the operation of the sensor;
- durability.
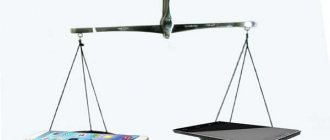
Technologies are developing more and more. Almost every user of a modern touch device encounters the problem of a broken screen. Protective glass absorbs the force of the impact, thanks to which the tablet remains unharmed.
Important! Changing the protective coating is cheaper than buying a new screen. It is especially suitable for protecting devices used by children.
Search for parts
There are different types of screens. Conceptually there is a display and a touchscreen (sensor). The display displays the image, and the touchscreen is essentially a sensor through which you can control the smartphone.
Screens on smartphones are implemented in several ways:
- Separate display and touchscreen. There is an air gap between them. Most often these are simple TFT displays. If there is a crack on the touchscreen, but the screen itself works, then it is enough to replace the touchscreen.
- Modular assembly. Both the sensor and the display are a single unit. There is no air gap between them; instead there is glue that covers the entire area. Glass is added to this sandwich on top, which performs a protective function. Or, for example, there may only be a display and a sensor, but no protective glass (not to be confused with a protective film).
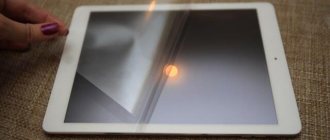
How to identify a modular screen
Just pay attention to the reflection on your smartphone screen. If it doubles, then the display and touchscreen are not made in the form of a module. You can also apply a little pressure on the screen and the sensor will begin to stick to the display. If the image does not double, then it is a modular smartphone.
Or you can search on the Internet. Just enter the name and model of the smartphone (and year of manufacture, if it’s Samsung).
If the screen is of a modular type, then the cost and complexity of repairs increase significantly. For example, the screen on the A320F smartphone is broken.
It lights up, but there is no picture. If there was an image, you could change the touchscreen. However, this is a modular type of screen; you will need to either cut off the broken touchscreen or very carefully peel it off. The whole difficulty lies in the AMOLED display. It is thin and fragile, any careless and sudden movement can lead to a crack. One crack is enough to destroy the entire display. In addition, for a good repair you need an ultraviolet lamp and special glue.
In this case, only replacing the module will help, since the display does not work. There are several options available for sale. There is a copy of the module. This is a TFT display. It displays colors worse, has no brightness adjustment and has glare. The main advantage of such a module is its low price compared to the original.
As you can see, the price of the original differs from the copy by more than 3,000 rubles.
This does not include consumables and tools. Then the smartphone user decides whether to buy the original module or take a copy, but much cheaper.
You can buy a module or a separate touchscreen either in a specialized store or on the Internet.
Even before purchasing, you need to take into account an important detail - the presence of different revisions or models of the device.
For example, the tablet model is almost the same.
Both characteristics and external data. However, the internal filling is completely different. And you can mistakenly order and buy a completely unnecessary spare part. It may differ in cables and attachment points. Therefore, it is worth carefully studying your device model to see if there are different revisions or types of models. It is also advisable to first disassemble the tablet or smartphone and visually compare the screen you are purchasing with the one that is broken. All cables and attachment points must be 100% identical.
When purchasing, make sure that there are no cracks on the part you are purchasing, that the cables are intact, and that all seals are in place.
Seals, ribbons, and protective films must not be torn off before checking the functionality of the part. This is very important, if the protective film or seal is torn off and the part turns out to be defective, then it will no longer be possible to return it. No one is insured against a defective or damaged part, so it must be checked before installation and glue.
When ordering a part from an online store, you need to take a video of its unpacking and visual inspection. Also, protective seals and films cannot be peeled off. This will be the only evidence that the part was received in this particular form. It is not uncommon for glass and screens to break during delivery due to mail. And unscrupulous sellers may seal the damaged cable with tape.
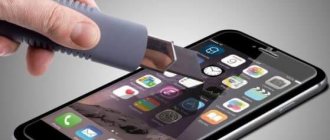
What do you need to prepare?
Gluing is unlikely to be successful if you use only your hands and paper napkins. To carry out the work efficiently, you need to prepare a small arsenal of auxiliary tools:
- alcohol wipe;
- polyester flap (microfiber);
- scissors;
- screen cleaning product or special wipes;
- stationery transparent tape;
- spatula (can be replaced with a plastic card).
Auxiliary products for gluing protective glass to a smartphone
Transparent tape is best suited for this purpose. If you take masking, mounting or colored adhesive tape, there is a high probability that marks will remain on the glass or coating. Instead of tape, stickers are also used - for example, those on which price tags are printed.
As a rule, the protective glass kit includes everything you need: a piece of microfiber cloth, an alcohol wipe, a substitute for adhesive tape, and sometimes even a spatula.
The protective glass kit includes all the necessary means for gluing
It is better to buy screen cleaning liquid. But if this is not possible, then you can prepare it yourself from available ingredients. Required:
- water, preferably distilled - 5 parts;
- alcohol - 1 part;
- a little dishwashing liquid.
All ingredients are mixed and the display cleaner is ready. A piece of lint-free cloth is impregnated with it and the working surface of the device is wiped.
How not to glue smartphones
You cannot glue with superglue, PVA glue, sealants or simple double-sided tape.
Superglue ruins the frame and can damage the part. A quick chemical reaction occurs with such glue; it destroys the surface and eats into it. Moreover, with such glue there will be only one attempt at repair; the second time you will have to buy a new part and tear the old one off the frame with tweezers, sand the surface from superglue. It is 100% not suitable for gluing parts in phones.
Sealants are bad because over time they begin to let dust through and the gluing technology itself is not suitable for them. At first the part will stick, but over time it will begin to peel off. No automotive or construction sealants are suitable for repairing electronics.
Most often, special glue is used when assembling phones and tablets. It holds up to changes in temperature, moisture, and does not damage touch surfaces. An example of such an adhesive is B7000.
Reusability
You can reuse old safety glass. Over time, the glue loses its structure and begins to peel off, the appearance deteriorates, and the coating must be re-glued.
Step-by-step instruction:
- Remove the case from the tablet and pry the edge of the protective layer with a plastic card.
- Push the card in with smooth movements.
- Remove the covering and place it with the adhesive layer facing up.
- Clean the surface of the display from dust and dirt using a damp cloth soaked in alcohol.
- Dry the surface with a dry cloth.
- Glue the glass in place.
- Smooth the surface with a special scraper or plastic card.
- The edges are coated with glycerin and smoothed again to prevent air from getting inside.
Old glass can last for a long time if there are no chips or broken areas left on it. It is better to replace a damaged coating with a new one.
Necessary tools and consumables
The bare minimum is a plastic pick. Why plastic? It leaves fewer marks on the body, reduces the risk of damage to cables, and is more resilient than a metal pick. A plastic pick can be made from an ordinary plastic bottle; just cut out a small piece and level it.
For a better replacement, you need to heat the smartphone screen. There are two heating options:
- Separator. This is a stove that heats up to the desired temperature; the smartphone is placed face down and heated evenly over the entire area. Such devices are used in workshops and service centers.
- Warm air. You can use a soldering hair dryer, or you can use a regular hair dryer to dry your hair. Its temperature is enough for the glue to begin to peel off the surface.
Isopropanol (isopropyl alcohol) or Galosh gasoline will also come in handy. Using these products you can remove old glue and speed up the process of peeling off parts.
For gluing you will need B7000 glue. This is a universal glue, it is great for gluing touchscreens or screen modules to the frame of a smartphone and tablet. There are different types of such glue. T7000, B7000, E8000, etc. They differ in color, adhesion, price and other characteristics. For most repairs the B7000 will be suitable.
Double-sided tape is also widely used when repairing smartphones and tablets. They allow you to create a gap between the sensor and the display. And when gluing a modular screen, they create additional space for the frame. Double-sided tapes also come in different sizes, colors and adhesion.
What to use again depends on the situation. For example, some parts contain factory glue; it is not always of good quality, or over time it loses its adhesive properties. Therefore, a new layer is applied on top of the old glue. And tape is used to hide gaps or in cases where there is no tape at all.
Disassembling the device
This article is of review type. To properly replace the screen, you need to look for your smartphone model with complete disassembly. The phones are all different. In some cases, you may not need to completely disassemble the entire device, but in other models you will have to peel off the back cover and unscrew all the bolts.
For example, to change the module on a 2017 Samsung A3 smartphone, you just need to open the cover.
Remove the battery and open the small cover. Behind the cover is the module connector and cable.
Regardless of the type of device, you must turn it off before disassembling it. Be sure to remove the battery as soon as possible. This is to ensure that static electricity does not damage the motherboard or part. All manipulations on the motherboard, with cables and wires must be done without a battery.
And on the Dooge X6 smartphone you will have to unscrew all the bolts that are attached to the case.
This is the only way to get to the board and cables.
The situation is not simple with those devices whose back covers are glued. It will need to be peeled off from the body.
Please note that in this case the complete tightness of the device is lost.
Safety precautions
Screens, modules, touchscreens and most back covers are made of glass, so you need to wear safety glasses when peeling off a faulty part. Splinters can get on your skin or face, especially with sudden movements.
Or you can tape the glass surface before sticking it up. The tape will help contain small fragments, preventing them from flying out.
How to peel off the back cover of your phone
There are three main methods for peeling off the screen or back cover of smartphones and tablets:
- Heating of the part. The entire screen area heats up to 100 °C. The glue begins to gradually peel off, and you can use a mediator to detach the part from the body. With this method, it is important not to heat the screen in only one place, not to set the temperature above 100 °C and not to heat it for too long (more than 10 minutes).
- Use of alcohol. Isopropyl alcohol is applied with a cotton swab into the screen cracks. After half an hour or more, the glue begins to lose its adhesion due to exposure to alcohol. Then alcohol is applied again to the same places, and the glue completely comes away from the body. All that remains is to pry the screen off with a spatula. You need to carefully examine the device and screen so as not to flood the speakers, camera or microphone. There should not be a lot of alcohol and it should be applied carefully. Otherwise, you can flood the board, the speakers, and the camera, which will have to be dried or replaced altogether. The good thing about this method is that there is virtually no chance of scratches or chips, and you won’t be able to damage the case.
- Mechanical impact. This method is best suited for broken screens and glass. The mediator is inserted into the gap between the body and the part, and is carried around the entire perimeter to remove the glue. The disadvantage of this method is that most devices have a small gap. In addition, without the help of heat and alcohol, it is quite difficult to remove the glue with just a mediator. Another drawback is that you can accidentally bend the body. Because of this, the new or old part may not stick. Therefore, working with a mediator should be smooth and accurate, without sideways movements.
All three of these methods can be combined together. For example, first apply alcohol in small portions into the cracks around the perimeter (but not into the speakers, camera or microphone). After 10 minutes, the device must be heated with air at a temperature not exceeding 100 °C for several minutes. Next, using a mediator, the screen or cover is peeled off from the body. If it is difficult with one mediator, you can use several at once. Use one to pry, and the other to further walk around the perimeter, preheating the lid or screen.
Before peeling off the back cover, you need to carefully study its structure and layout. Be careful if there is an NFC, antenna or fingerprint scanner on it.
The process of replacing a module on a smartphone
Let's start with the simplest option - replacing the entire module. To unstick the module, you need to heat it. We evenly warm up the faulty module with warm air.
The temperature is not higher than 100 °C, there is no need to linger at one point. After a few minutes, we pry up the module with a plastic card or a mediator and move it around the perimeter. removing the glue. No need to push too hard, no sudden movements. There may be cables under the module that break with one movement.
Usually these are control buttons. If the pick is slow, you need to stop and warm it up again. And you need to heat the entire area, not just the difficult area. The pick does not need to be pointed to the side, they only need to remove the glue. You can try adding a little alcohol to the end of the pick, it will help wet the surface and remove the factory adhesive.
From the old module you need to remove all components that are missing on the new one. These could be buttons, LED reflectors, speaker grids, etc.
The glue is removed from the body using tweezers or a cotton swab moistened with alcohol to increase the adhesion of the new glue and install the new part without any problems.
Replacing the touchscreen
In general, everything is the same as when replacing the module, but now the pick must pass through the touchscreen. That is, the mediator should be visible visually, in a very small part. This is the only way to remove 100% glue from the body.
Further, all procedures are the same as with replacing the module (moving parts, cleaning off old glue).
If, while peeling off the sensor, the matrix becomes dirty with fingerprints or there are fragments left on it, then you can clean it in several ways.
The first method is tape and a large paint brush. Use a brush to remove splinters with light and smooth movements. And with tape you can remove the glued fragments of the old part. The tape is glued to the matrix, and it takes the fragments with it.
The second uses a napkin and alcohol. The napkin is rolled into a horizontal tube.
A small layer of isopropyl alcohol is applied to it. With one movement, you need to lean the napkin against the matrix on one side and, under slight pressure, move it to the second. The stains are diluted with alcohol and spread evenly over the entire surface. There should not be too much alcohol, otherwise there is a risk of flooding the matrix with it. If small marks remain, repeat the procedure again.
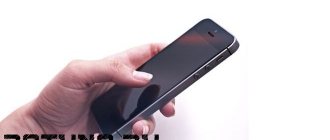
How to remove
If it doesn’t stick well, you can immediately remove the protective glass. This can also be done later if scratches or cracks appear during use. You will need something thin and hard - usually a plastic card is used. Use it to pry the edge of the glass and gently peel it off. If the protection is cracked after an impact, remove it slowly and as carefully as possible, carefully separating it with a card - otherwise you can damage the screen with a fragment.
Checking a new part
When the faulty part is peeled off, you need to fully check the new spare part that is ready for installation. Under no circumstances should protective seals or films be removed unless you are sure that the part is in good working order. First you need to connect a new part. We carefully install the new part without damaging the seals, fasten the cable and install the battery. No bolts should be screwed in during testing.
You can go to the engineering menu and run a set of tests for the device matrix or sensor.
The touchscreen should not twitch when touched. Select an icon from the desktop and move it across all corners evenly, in a circular motion. If the icon twitches or falls out, then the sensor is defective.
The display should not have many dead pixels, stripes or other artifacts.
If one or another part does not behave as expected, try connecting it again. Disconnect the battery and disconnect it again, and connect the cable.
If the part is faulty, it can be returned if all seals and protective films are present. If the seal is damaged, parts may not be returned.
If the new module does not light up or show, but the smartphone makes sounds, then the problem may be in the motherboard. It is likely that the power or backlight chip has failed or the connector has been damaged due to moisture.
Gluing a new part
After checking the part, you can glue it to the body. All seals are removed, all components from the old one (speaker grids, reflective films, buttons, etc.) are transferred to the new part. B7000 glue is applied in a small layer both to the part and to the body of the smartphone or tablet. Be careful with speakers and microphones; they should not be filled with adhesive materials.
Now all that remains is to aim at the body, and in one motion lean the part against the body. It is important that the module or touchscreen does not protrude from the case, otherwise they will fall out over time.
After repair, all functions of the smartphone are checked. The microphone and speakers may be accidentally covered with glue.
The glue dries in a couple of hours. To improve the gluing process, you need to place a weight on the device. It is important that the module does not protrude from the housing. The smartphone needs to be wrapped in a towel in one layer and put a small weight on it, which will put even pressure on it. The glue will spread evenly. All of the above actions must be done carefully, and the load should not be large and cover the entire surface.
After several hours of drying, all functions of the device must be checked again. Remaining glue from the cracks is simply removed, without the help of alcohol.
Alternative methods
How can you stick glass on your phone screen? A couple of alternative options for performing the procedure are presented below.
1. Method No. 1
The glass is covered on the adhesive side with a special film, with a tongue located above it. You need to pull it to remove the film sheet and apply this side to the display. During application, be sure to check that the holes and contours under the speaker and keys match.
Gluing occurs gradually, without hard pressing, which allows you to make adjustments to the location.
When performing the task, you should inspect the surface and make sure that there are no foreign bubbles or dust particles - the check is carried out under a table lamp. If there is nothing, then lightly move the fingers to expel the air, then use a napkin to wipe the entire display.
2. Method No. 2
The product must be placed close to the screen without removing the factory protective film. All grooves are aligned until they touch perfectly, only then it is worth gluing. One side of the gadget should be glued with tape.
Next you need to remove the film protection and put on the “book cover”. This approach helps to seal all the glass at once. Accumulated air bubbles are removed using a card; movements proceed from the central area to the outer sides.
The owner decides how to glue the protective glass onto the phone. You can choose one of the above methods, stick it yourself and get results no worse than when gluing it in a store.
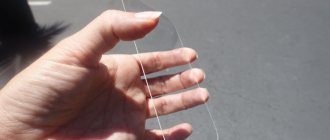
Removing old glass with thread
Self-replacement of the module on iPhone
The replacement rules are similar to the previous cases discussed. Only in this case you need to be extremely careful with the bolts. One incorrectly installed screw can lead to a complex restoration of multi-layer traces on the motherboard. Therefore, when disassembling, it is important to arrange all the bolts in the order of disassembly. If they are mixed, you will have to look for a detailed disassembly video.
Do not forget about your fingerprint, it can be damaged due to the included battery and static electricity.
Therefore, all manipulations with the board must be carried out only with the battery turned off.
How to properly stick 3D glass on your phone
How to glue 3D glass to a smartphone:
- The entire surface is wiped with a napkin, without exception, and an antistatic film is applied to it several times;
- the protective layer is separated, the edges of the product are installed exactly along the edges;
- then it is pressed from the top and bottom using the thumbs;
- later, by smoothing along the sides, in the area of the upper and lower borders, accumulated air is removed;
- The central part is pressed last.
The inside of the product is covered with a special layer that cannot be touched. If the rule is violated, the layer due to which the surfaces adhere may be damaged.
Removing accumulated bubbles
Module repair: replacement of glass or touchscreen assembly
The most difficult thing to restore is a modular screen. In such screens, the adhesive covers the entire area of the module, and it is very difficult to peel off the protective glass (this design is usually used by Apple and Samsung manufacturers) or the touchscreen (Xiaomi, Lenovo). The sensors and glass themselves are not expensive; their cost can be around 500 rubles, with the price of the original module being 5,000 rubles. For modules of top Samsung models, the price for original Amoled can reach 23,500 rubles.
During module repair, any error can lead to complete loss of display functionality.
The smartphone is disassembled in the same way as when replacing the module, but now this will have to be done extremely carefully so as not to damage the working display. It also peels off from the frame of the device.
There are three methods for posting a module:
- Manually using isopropanol and hot air. The longest method, but the most gentle. The broken glass is periodically heated and, using a thin plastic mediator coated with isopropyl alcohol, the glass fragments are removed from the glue. With this method, it is important not to put pressure on the display and avoid sudden movements. Any minor scratch can lead to complete loss of functionality of the restored module.
- Using a string and a separator. The module is fixed on the separator and heated to 100 °C. A string is used to pry the space between the glass (or touchscreen) and the display. And then, with smooth movements and slight tension, the string cuts off the heated glue. This is a fast but very dangerous method. You can cut off part of the display, cut off the polarizer, display protective films, etc.
- Freeze screen. With the help of freezers, the screen freezes and the glue begins to lose its properties. Using a mediator, the fragments are removed from the display. Expensive and specific method. The cable and microcircuits can be damaged.
Some displays are so thin that repair requires a specially designed machine. Even laser machines have been adapted to replace back covers with glue.
After removing the broken glass, you need to remove the old glue from the module. Special cleaning products are available on the market. Isopropyl alcohol will also work.
Now all that remains is to glue the glass or sensor onto the module. Of course, before this, the screen needs to be checked for functionality by connecting it to a smartphone.
If you do not fill the space between the glass and the module, colors may change, glare will appear, strength will decrease and there will be a high risk of glass peeling off.
The main methods of filling the space between glass and display are OCA film and LOCA glue.
LOCA glue dries when exposed to ultraviolet light. It is applied to the screen, then placed against the glass and pressed using small clamps. Next, this entire structure is placed in an ultraviolet lamp for ten minutes. The glue hardens and the module is ready for use. There are some problems with this method. For example, bubbles may appear during gluing, which will need to be removed with tweezers or the whole thing will need to be re-glued.
OCA film is applied to the module. And for this you need a vacuum separator. Without it, it will not be possible to remove air bubbles.
Next, after all the procedures, the repaired module is sealed in exactly the same way as a new part.
Repairing a display module yourself at home is a very difficult task. It requires a lot of experience, effort, patience and equipment. But that doesn't mean it can't be done.
Preparing for work
To carry out the manipulation, the workplace is first prepared. In order for the glass to be securely attached to the screen, a humid environment is necessary; it is recommended to carry out work in the bathroom. In a dry room, dust or dirt particles will fall on the display, which will ruin the appearance of the tablet.
Preparation rules:
- In the bathroom, hot water is drawn to create steam. You can take a shower.
- The doors are not opened during operation.
- A table or stool is first brought into the room, and sometimes the lid of a washing machine is used.
- The display is wiped with a rag and cleaned of dirt.
- Before starting work, wash your hands thoroughly with soap or wipe them with alcohol.
- Tie your hair into a bun or put on a shower cap to prevent it from getting caught under the covering.
Water vapor deposits small dust particles on the floor and improves the adhesion of the screen and glass.
Why does the screen not work after replacement?
If a part was tested before installation, but after final installation it behaves as if it were faulty, then there are several main reasons. Error during installation or screwed in bolt. An installation error may be due to either a poorly secured cable or damage to it. And with a bolt screwed in everything is worse. This happens very often on iPhone. If the wrong size bolt was screwed into a different seat, then most likely the board or microcircuit was damaged. Another sign of such an error is stripes on the screen.
Further repairs and diagnostics will have to begin with the device’s motherboard.
Selecting a Protective Accessory
When searching for a suitable accessory, you need to rely on several facts:
- Important criteria when choosing include the model of the device; many manufacturers produce products for a specific smartphone;
- it is selected strictly according to the parameters and dimensions of the mobile device;
- Don’t forget about the thickness of the glass - the most reliable ones are made for use in extreme conditions, but they are quite expensive.
If the protection parameters and the smartphone do not match, a number of problems will arise with sound distortion, poor audibility of the interlocutor, and the display not being blocked during calls.
The main characteristics of protective devices are presented:
- thickness - reliability depends on this value; varieties with a volume of 0.15-1 mm are commercially available;
- hardness indicators - strength is usually measured on the Mohs mineralogical scale, values in the range of 1-10 units correspond to various minerals, the latter is used for diamonds, the optimal option is considered to be a strength of 9H.
Main characteristics
Varieties of coatings are presented:
- glossy type - standard solution, invisible on the screen;
- matte - solves the problem of sun glare, but negatively affects the contrast of pictures;
- oleophobic - designed to prevent the appearance of traces of grease, dirt or fingerprints on the surface.
The division is also divided into three additional categories:
- standard glass with straight ends that do not reach the edges of the screen by 1 mm - this is the 2 D option;
- in the presence of smooth chamfers around the perimeter, combined with rounded body parts - 2.5 D;
- specialized types have rounded ends for gadgets with a display that extends onto the side faces - 3D.
The benefits of using aids include:
- reliability and ease of installation - even a beginner can attach;
- invisible presence on a smartphone;
- prevention of scratches;
- prevention of splitting during falls and impacts due to the multi-layer surface;
- possibility of long-term use.
A serious disadvantage of glass protectors is their high cost.
The highest quality safety glasses are quite expensive
Bottom line
This article discussed in detail all the main options for replacing the screen on a smartphone or tablet yourself. Depending on the type of device and the malfunction, the difficulty of repair varies in direct proportion. This does not mean that you cannot repair your phone at home. The main thing is to take your time, do everything without sudden movements and, if possible, take breaks while working. Of course, don't forget to check the parts before installation. Therefore, changing the screen on your Xiaomi, Samsung, LG or iPhone is not as difficult a task as it seems at first glance.
All repair methods described above for smartphones are similar for tablets. The fundamental difference is only in size.
Cost of work
As a rule, the average price in service centers starts from 1,000 rubles. The price depends on the complexity of the repair. For example, restoring the original module and gluing the original glass can cost from 2,000 rubles. Service centers and workshops have professional equipment and consumables (separators, tweezers, UV lamps, adhesives, etc.) that speed up the replacement process. And at the same time, a guarantee of at least one month must be provided for the work performed.
How to choose
Cheap safety glass may disappoint you during use. The main indicators that you need to focus on when choosing are strength and thickness. Good protection of the screen surface is provided by glass with a thickness of 0.2-0.35 mm with a strength of 9H. Bigger does not mean better: increasing thickness makes the phone vulnerable to side impacts, and increased strength increases the likelihood of display deformation if the protective coating breaks.
Before purchasing, please read the instructions and selection tips:
- Glossy copies are cheaper, but more fragile. Matte ones can easily withstand a sharp drop, but sometimes change color rendition.
- The presence of an oleophobic layer will help keep your smartphone clean - your fingers will move easily over the surface without leaving greasy fingerprints.
- The anti-reflective layer keeps images clear in any light.
- If the kit contains additional accessories for stickers - rags and napkins - it will be easier to fix the coating.