A reliable, durable and high-quality protective film reduces the likelihood of damage or even scratches to the touchscreen of your gadget. Unfortunately, such protection does not last forever; it is subject to abrasion, scratches appear, and the transmission of information from the display, as well as its sensitivity to touch, is reduced. In this case, you will need to remove the protective film from the phone and install a new one.
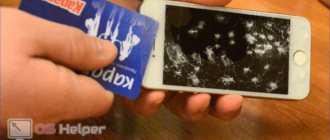
The variety of phone security products requires the use of different replacement methods depending on the device model and security manufacturer. To begin with, just try to pry off the film in the corner of the display using a plastic card or similar objects that do not have a high density - a toothpick, a mediator. Usually, you can even remove the film from your smartphone using your fingernail, grabbing its edge.
In simple cases, using a plastic card, film removal is carried out in 5–10 seconds. Next, it will be enough to clean the display and stick on new protection. What should you do if the device is so attached to the surface that available means will not allow you to remove the protection? Let's try to study all the options relevant for carrying out such procedures.
Why do you need instructions for removing glass?
Incorrect, careless removal of the protective glass can lead to a sad outcome: at a minimum, you will damage the surface of the smartphone screen, which you took such care of, and in the worst case scenario, you may injure yourself.
Many active smartphone users use improvised means when removing protective glass - knives, scissors, or simply tear the glass off the screen with a rather sharp movement.
These actions are fundamentally wrong, and we will tell you how to properly remove protection from the screen and not cause unpleasant consequences!
Progress
We present the entire order of the sticker step by step. The gluing itself is preceded by important preparatory operations.
- To begin with, we prepare the entire scope of work, put the work table in order - dust is out of the question, wash our hands thoroughly, lay out everything that may be useful.
- We clean the display - needless to say, it must be in perfect condition, otherwise all the stains will disappear under the film. Do not use alcohol solutions for cleaning; they leave streaks and affect the quality of the screen itself.
- We cut the film to the size of the screen - here it’s better to measure seven, but cut only one and, for sure, very carefully. For the convenience of the sticker, let it be 2 millimeters in width and height less than the size of the screen under protection (1 millimeter on each side).
- Checking the cleanliness of the film.
- Remove the bottom protective layer (it is always indicated by the number “1”).
- Very carefully, preferably starting from one of the corners, apply the film to the screen.
- First we align it to the smaller side.
- Then we stretch it smoothly over the larger one.
- Using a spatula, level the surface, removing all bubbles. At this moment, under no circumstances press hard so as not to move it. Here it must be said right away that it is quite difficult to remove the air bubbles formed under the film. There is, as a rule, only one alternative in this situation - to prevent the formation of these bubbles in principle, which means carefully preparing the surfaces and applying the film very slowly and carefully, or tolerating them until the next gluing (although this may happen literally after 10 minutes). In any case, take your time and don't panic. As practice shows, only large bubbles can be removed with a spatula, while small ones “scatter” by themselves.
- Remove the top protective layer of film (number “2”).
- The work is completed.
Why remove the protective glass?
Glass protects your smartphone from shock if you drop it. The same goes for tablets. The likelihood of scratches, cracks and chips can be significantly reduced thanks to the protective glass, which in most cases takes the blow. So, why bother removing the protective glass from the screen?
- You've found a more durable screen protector.
- The protective glass is cracked.
- You are cleaning a device (possibly for sale).
As you can see, there are several reasons why you might want to remove the protective glass from your phone or tablet. But how easy is it to do?
Warning: Be careful when removing the tempered glass protective film.
Old plastic protective films can be removed quite easily. The same goes for a tempered glass screen protector, but it requires additional care, especially if it has already developed cracks.
So how do you safely remove your screen protector?
The easiest method is to stick tape over the crack. This will prevent the risk of cuts when removing the protective film. You can also use rubber gloves to provide an extra layer of protection. Ultimately, however, you just need to exercise extreme caution.
Clean your phone's display
After removing the protective film, it is recommended to clean the display.
When you use a screen protector, dirt and grime tend to collect around the edge. This debris often consists of general dirt and sweat and should be cleaned off. Whether you're selling your phone or replacing your screen protector with a more durable replacement, cleaning your display makes sense.
Although special cleaning products are available, you can usually get by with a lint-free cloth and some warm Luke water.
Related: How to Safely Clean Your Tablet or Mobile Phone Touchscreen
Features and types of protective glass for phones
To understand how to properly handle safety glasses, you need to understand their features. Such accessories are designed to protect the smartphone screen from damage. When dropped, the glass absorbs the entire impact, so the display remains intact and unharmed in almost any situation.
Unlike protective glass, films cannot fully protect the display from falls. They can only minimize the risk of scratches on the surface.
Safety glass is a multi-level component, which does not only consist of a transparent and hard layer. Each such accessory has several layers underneath:
- Silicone. The bottom layer is soft enough for the protection to firmly adhere to the surface of the smartphone. Thanks to it, the glass continues to stay in place even if the owner actively uses the device.
- Safety. Perhaps the main layer, which is glass. This is a solid pad that absorbs shock when the phone falls and other damage occurs.
- Anti-glare. One of the additional layers, which is not found in every model of protective glass. Designed for comfortable use of a smartphone in bright sunlight.
- Containing. Another hard layer whose task is to stop the occurrence of cracks. It prevents the process from spreading, so the protective glass does not crumble into small pieces.
- Oleophobic. A special water-repellent coating that is applied to the top of the glass. Designed for comfortable sliding of your finger across the screen.
Not every protective glass can boast of having all the layers considered. Cheap models can only offer the buyer silicone, safety and containment layers, which perfectly protect the smartphone screen, but at the same time do not have a sufficient level of comfort during use. And to feel more comfortable, you can think about buying a new iPhone. The best offer is on iPavlik.
Also, accessories to create a sufficient level of display security differ in different areas. For example, according to form factor, protection is divided into:
- 2D – ordinary flat glass;
- 2.5D – flat with curved edges for more pleasant gliding of fingers;
- 3D – fully curved. Designed for models with waterfall screens.
Protective glasses in 4D, 5D, 6D and so on are nothing more than a marketing ploy by the seller and misleading the buyer.
Also, the protection may differ in the type of top layer. This is the oleophobic coating mentioned earlier, matte, private or glossy (the simplest). Finally, glass differs in strength and thickness. All these indicators affect the safety of the display during falls and other physical impacts.
How to choose
Since the pricing policy is not unitary, it can be assumed that the glasses differ in some internal properties and type, and not just in size in accordance with the smartphone.
There is no single and suitable advice for all cases on which protective glass to choose, since to a large extent this is a matter of taste and preference. But there are several positions that you can focus on when choosing.
- There are two types of protective glass: glossy and matte. The first ones are inexpensive, withstand impacts well, but cope less with scratches. The latter are distinguished by their reliable durability, do not give glare in the sun, but are purchased at a significantly higher price.
- You should always study the characteristics of the glass you choose. Greater thickness determines better protection, especially during falls. It is also worth checking it to ensure that it does not bend too much. Good glass should have the same oleophobic layer, otherwise the screen will be constantly covered in smudges and fingerprints. Expensive glass should also include special napkins for gluing and spare glass.
- If your display has rounded edges, you should choose protective glass with a 3D effect. They are less common, but provide high quality protection on the sides of the smartphone.
Kinds
Before you get down to business and decide how to properly apply the protective film, you need to find out what its types are. The convenience of using your phone depends on the right choice.
So, films come in different types of surface:
- glossy;
- and matte.
The first ones are completely transparent, they do not affect the flow of light, but when the sun's rays hit them they produce glare. In addition, dust particles settle on them (it’s like on the black surface of a piano, which can be wiped even every hour, and the dust will still be visible), and what is especially unpleasant is greasy fingerprints. Doesn't like this kind of film or perfume.
Matte is the direct opposite of glossy. There are no greasy stains left on them, they do not give glare, they are stronger. But the image passes through them with a slight blur, it is thicker than glossy. Although in fairness it must be said that increasing the thickness does not affect ease of use.
One type of glossy film is mirror film. These are more for those who are constantly concerned about the “secrecy” of their information on the screen. The fact is that light passes through the “mirror” only perpendicularly (well, plus or minus) - someone standing on the side will not see anything on the screen.
According to its protective characteristics, the film can be:
- ultraviolet - protects from exposure to direct sunlight, the screen does not lose its appearance so quickly from fading;
- antibacterial - contains antiseptics that prevent the collection of microbes on the surface;
- antistatic - dust “doesn’t like” to collect on these.
Based on the use of film, it can be divided into:
- for universal ones - these will have to be adjusted to the size of the phone screen;
- specialized - produced by the phone manufacturer itself and exactly match the size of its screen.
Films are also differentiated by frequency of use:
- disposable - these are glued only once, you remove it, it is no longer suitable for reuse;
- reusable - these have a magnetic fastening method, but can be removed and installed again more than once (within reasonable limits, of course).
Removing the glass - what you need for the job
For work, you should prepare the following set of devices in advance:
- A pick or a narrow plastic card - it is better to take 2 pieces for greater convenience;
- Suction cup with silicone base is an optional choice;
- A napkin with a lint-free surface;
- Glass cleaner - it is advisable to choose a composition containing alcohol;
- Medical gloves are an optional choice.
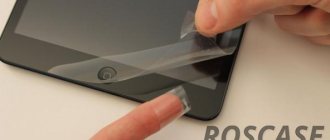
How to remove a screen protector without tools
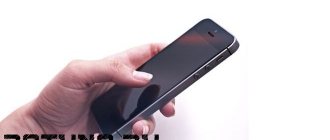
If for some reason you don't have a credit card or toothpick on hand, you can try removing the glass with your fingers. Typically, a fingernail can “climb” between the protective film and the device’s display. However, even more caution must be exercised when using this method, especially with glass.
- Start by running your fingernail along the corners of the protective film.
- Select the corner that is closest to the display and move your fingernail.
- Once the screen protector begins to peel away from the display, run your fingernail along the edge.
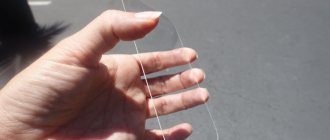
- As air gets trapped under the glass, lift it slowly, carefully and with equal force along its entire length.
So you should have already removed the glass. If there are any pieces left on the screen, follow the steps above again.
What you need to remove screen protector from phone
To remove the protective film without damaging the display, you will need several pieces of equipment. Careful removal is essential as you don't want to damage the touchscreen. This may result in you being unable to use your phone.
To start, make sure you have most (but not necessarily all) of the following:
- Adhesive tape
- Bank or credit card (a pick/pick or even a toothpick is a good alternative)
- Hairdryer
- Scotch
Once you've collected these items, you'll be able to safely remove any plastic or glass protective film.
Smartphone display elements
Before studying the direct instructions, you should understand what modern displays used in most smartphones consist of. Their components include:
- Matrix - a panel of liquid crystal or LED type that contains an array of pixels that form the final image. On the back side there is a stainless steel case, and the front part is covered with thin glass. The design includes a cable connecting the screen to the board of the mobile device.
- A touchscreen is a panel that is placed on top of the matrix and registers the user’s touch. The software combines the received information with the arrangement of elements on the screen and performs the appropriate action. When dropped, it often takes the blow and, as a result, cracks. Replacing this element is cheaper than replacing the matrix.
These components can be attached to each other in two ways:
- Through the air gap. This simpler design, previously used, allows for easy replacement of glass without the use of special tools.
- Without an air gap - the so-called OGS display, which is a single whole, combining a matrix and a touchscreen. Replacement can be done independently, but it takes more time and requires the use of special tools.
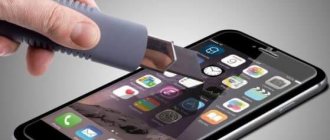
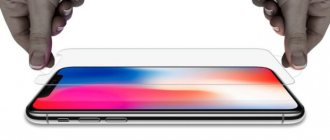
Installing a new protective glass on your smartphone screen
There are two ways to install protective glass on your smartphone screen. They provide for dry and wet glass installation, respectively. The first method is for protection using tempered glass, which does not come with a special solution.
First, you need to clean your phone screen with a lint-free microfiber cloth. Then you need to detach the glass from the sticky side from the factory protective film. After that, you need to carefully attach the protective glass to the screen, making sure that the Home button, speaker and camera holes are located exactly in their places. You can use a credit card or other tools to ensure even coverage and prevent bubbles.
Wet installation is designed to be protected by tempered glass, which comes with a spray bottle (usually containing alcohol) to assist with installation. Some people prefer to use protective films and glass this way because it completely prevents the penetration of dust and small hairs. Then you should repeat all the steps from the previous method.
Sources
- https://mikomo.ru/articles/how-to-take-off-glass
- https://SetPhone.ru/stati/kak-bezopasno-snyat-steklyannuyu-ili-plastikovuyu-zaschitnuyu-plenku-s-ekrana/
- https://KakOperator.ru/lifehacks/kak-ubrat-zashhitnoe-steklo-s-telefona
- https://geekon.media/zashhitnoe-steklo-na-telefon-obzor-instrukcija/
- https://vseplus.com/article/kak-snat-zasitnoe-steklo-s-ekrana-telefona-675
- https://mobila.guru/faqsingle/kak-pomenyat-osnovnoe-steklo-smartfona/
- https://www.1rre.ru/166372-zashhitnoe-steklo-so-smartfona-mozhno-snyat-samostoyatelno-prostymi-sposobami.html
[collapse]