Hi all! Today we will look at how to enable noise reduction for the Windows 10 microphone using the operating system itself, in Realtek Manager, in OBS Studio, what are the advantages and disadvantages of each method, and is it worth doing it at all. And I’ll also tell you about my solution (from the author of the blog).
Let's clarify right away: in Win 10, as well as Windows 7 and Windows 8, the ways to activate or disable noise reduction are not much different.
Before installing this option and recording your voice, I advise you to conduct a small test: whether the sound distortion will be so strong as to distort your voice beyond recognition. This can be observed in some budget microphone models.
Types of background noise
Microphone noise can be defined as “unwanted sound.” Basically, the duration and level of background sounds determine the characteristics of the noise.
There are 3 main types:
- Broadband (or continuous wave) - when acoustic energy is distributed over a wide range of frequencies as it is picked up by a microphone. This category includes hissing, buzzing, and static noise.
- Narrowband is limited to a narrow range of frequencies. Has a constant level, usually caused by improper grounding and poorly shielded cables connecting microphones. This is any unwanted signal that remains persistent over time.
- Pulse includes sharp sounds such as clicks and pops. Has high frequency and short duration.
- Electric usually comes from the technology used to record the sound.
- Irregular - conversations, traffic, thunder and rain.
If there is electrical noise, make sure that the recording equipment is connected to the same power strip. Microphone cables should be kept away from electrical cables.
Irregular noise is very difficult to remove because it is made from many random sounds that vary in frequency and volume.
In other cases, the problem may be caused by an inappropriate audio card driver. System sound settings also need to be adjusted. However, first of all, it is recommended to reconnect the microphone to a different connector (for example, on the rear panel of the system unit) and test it on another computer.
Basic Tips for Recording Sound Clearly
Before diving into the software's features, you should follow some basic guidelines for clearer audio recording. Here are some quick tips:
- Wear headphones: If your microphone picks up noise from your speakers, wear headphones to eliminate echo.
- Use a dedicated microphone or headset: Many laptops have fairly poor quality built-in microphones. Of course they work, but that's all that can be said about them. Try connecting a dedicated microphone or headset to your computer.
- Eliminate or step away from background noise: Close windows, move away from vents, go into less noisy rooms, close applications that make your laptop fans whir, move the microphone further away from your mouth so other people can't hear you breathe, and generally think about yourself. how you can avoid noise. Try trading in that noisy mechanical keyboard for one that's quieter during calls. You can also mute your call while you're not talking.
Troubleshooting
The first stage is to entrust the search for the problem to a system tool. In the latest version of the OS, it copes with the tasks much better. There are two ways to carry out diagnostics.
Via Control Panel
- Open the Control Panel using the “Run” window (Win + I – command control – Enter).
- In the list, find the “Troubleshooting” section and open it by clicking the left mouse button.
- Go to the “Hardware and Sound” subsection.
- Select “Sound Recording”.
- A new window will open - click the “Next” button.
- The system will start searching for the problem.
- Select a device from the list and click “Next”.
- The tool may or may not identify the problem. If an issue is detected, you must follow the on-screen prompts to correct the error.
- After the process completes successfully, close the window.
Through the context menu of “Speakers”
- Right-click on the “Speakers” icon, which is located on the taskbar on the right. Select “Troubleshooting...”.
- The tool will start looking for the problem and, if it can, fix it itself.
The impact of processor power on sound quality
When recording and playing sounds on a computer, regardless of whether it is Windows 7 or a newer version, a sound card is always used. It is usually integrated into the motherboard, and the central processor is responsible for audio processing.
Extraneous sounds and unnecessary noise may also occur if the CPU cannot cope with the load. If, for example, clicks appear in your headphones when playing a game or the sound “chokes,” this only indicates that the processor is heavily loaded.
Chances are, if you also communicate via Discord or RaidCall, your voice will also be distorted. It is very difficult to suppress such interference - there will be some expenses. A more expensive option is to buy a more powerful processor that can handle such a load.
It's cheaper to buy an external sound card. The processor will no longer be so heavily loaded, since noise suppression and sound processing will fall on the microcontroller of the external sound card. However, this is, one might say, a radical method - sometimes, in order to correct the situation, it is enough to “fiddle” with the Windows settings.
Standard microphone settings
The next step is to remove the software amplification of the digital audio signal:
- Right-click on the “Speakers” icon and select the “Sound Options” menu item.
- Open the companion option "Sound Control Panel."
- In the new window, go to the “Recording” tab. Select the device with the cursor and call up its properties.
- On the Levels tab, set the volume to 100% and the microphone gain to 0 dB. It is better to select the value experimentally (it can be at the level of 10 dB).
- Go to the “Listen” tab, check the box of the same name - you need to speak into the microphone to check the settings.
- In the “Advanced” tab, set the bit depth and sampling frequency to 16 bits, 48000 Hz. The higher the frequency, the more hissing is heard.
- When you are satisfied with everything, you need to uncheck the “Listen to...” item, apply and save the changes.
Volume control with a physical knob and on a PC
Let's look at what to do if the microphone is noisy and there are no physical problems. Advanced audio detection devices are equipped with an input level control.
For devices without a physical controller, the signal level is reduced by software, this is the only way to get results when using a cheap microphone.
Driver setup
You should also try updating the software:
- Open Device Manager by right-clicking on the Start icon and selecting the tool of the same name from the menu.
- Expand the “Audio inputs and outputs” section, double-click on the desired device.
- In the window that opens, go to the “Driver” tab and click the “Update” button.
- You can perform either an automatic driver search by the system or a manual one. But in the latter case, you must first download the driver yourself from the official resource.
Update Realtek High Defenition Audio in the same way.
If this does not help, it is recommended to reinstall the driver:
- Right-click on the device name and select “Delete”. Confirm action.
- Restart your computer for the changes to take effect. After restarting, the system will try to reinstall the driver.
- If this could not, find and download the appropriate microphone driver on the official website of the PC manufacturer and install it through the “Update” option.
Reinstall Realtek High Defenition Audio in the same way.
How to Remove Background and Microphone Noise in Discord: Additional Steps
If changing the settings in Discord doesn't work and the microphone is still noisy, try other methods. They relate to monitoring the operation of the PC or laptop on which the program in question is installed.
Diagnose the problems
In the toolbar of your PC or laptop, click the speaker icon and select Detect audio problems. This method is also useful in other cases where crackling, interference, or other noise occurs. After analysis, the system provides possible causes and solutions.
Check Gain Levels on PC
Sometimes, due to a weak microphone, users artificially increase its volume, causing device noise, echo, or buzzing when using Discord. To clean up the clutter, follow these steps:
- go to the Recording section and select a microphone;
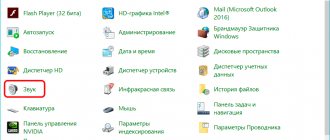
- go to the "Sound" section in "Start" and "Control Panel";
- double click on it and go to the desired section;
- turn off the boost function.
If the option is still needed, set it to no more than 10 dB. This often removes background or noise.
Check drivers
If the microphone buzzes or pops, there may be a driver problem. Make sure the software is working properly and update it if necessary. The best option is to completely remove the drivers and reinstall them. Also try the following steps:
- Enter the Realtek menu.
- Go to the Microphone section.
- Check echo and noise cancellation points.
After activating these options, make sure that the gain does not exceed 10 dB.
Special programs
Many audio card manufacturers produce utilities for adjusting sound. For Realtek, this is Realtek Audio Control, it can be downloaded from the Microsoft web resource.
The utility itself is very simple and understandable. In the “Microphone” tab, select the appropriate effect, adjust the volume and gain. You can also activate the option to eliminate acoustic echo, set the bit depth and sampling frequency.
Here you should try different parameters and see how the sound changes, whether the noise becomes less audible.
It is also worth highlighting third-party applications for noise reduction:
- Voicemeeter.
- NoiseGator.
- SoliCall.
- Andrea PC Audio Software;
- Samson Sound Deck;
- Krisp.
Echo suppression in Discord
You can eliminate interference that occurs when using a microphone in this program using the built-in tools.
To do this, perform the following actions:
- Open the application, click on the settings icon. Go to the “Voice and Video” section. Here you can configure the parameters of sound and image transmission during communication.
- Go to the “Echo Cancellation” tab and move the slider to the right. They say something into the microphone and evaluate the sound quality.
If it is not possible to eliminate echo in a program in this way, use the tools built into the operating system.
Noise Canceling Accessories
Some accessories help eliminate background noise:
- The preamp makes it easier to transition between the microphone and other equipment.
- A laptop power adapter does a great job of reducing static noise, especially if you are using multiple sections of recording equipment.
- Shock Mounts – Mounting them on the microphone stand will reduce background noise caused by shake and vibration.
- The wind shield fits over the head of the microphone and cuts out unwanted wind noise and heavy breathing.
Krisp Reviews and Testimonies
I work 100% remotely and do software development. He barks often, no one notices. Also, sometimes when someone is in a busy cafe (I'm not), I can tune out their surroundings. Crisp cuts both sides, it's amazing!
@AaronRosenzweig
I have dogs, kids, a loud window air conditioner, and an outside air conditioner outside my window, and Crisp blocks it all.
@Karine Souto
Crispus KILLS him. There is no sound of extraneous noise coming into the microphone. No movement, no birds, no typing on the keyboard. It's like a highway outside my window and @krispHQ is KILLING it.
@98codes
Quick links:
- RetargetApp Review 2022: Sell More Up to 200% ROI (Is It Worth It?)
- Apploye Review 2022 Pros and Cons (Lifetime 90% Off Offer)
- Freedom App Review + Discount Coupon 2022: Save Up to 20%
- Cobalt Apps Review 2022 with Discount Coupon ($149 Full Access)
Why doesn't voice chat work in PUBG?
Sometimes you can hear from your friends but they can't hear you, and sometimes you can't hear your friend's chat but they can hear you. It's annoying. Possible causes include incorrect settings on your microphone or hardware failure.
Sometimes it's difficult to figure out the reason, but there are some things you can do to fix the no voice chat issue in your PUBG.
Fix 1: Install the latest patch
Since many technical problems can be resolved by restarting, restarting your computer and games never hurts. Often this will be enough to solve the problem.
Game developers always release patches to improve their games and fix any problems, so you should check for updates to your game on Steam or the official website. then install the latest patch to keep it up to date. This may fix some problems such as voice chat not working.
Fix 2: Make sure your microphone is enabled for PUBG (Windows 10 users)
If you find that your voice chat is not working in PUBG on Windows 10 PC, the first thing you need to check is to enable microphone resolution for PUBG. Here's what you need to do:
1) On your keyboard, press Windows Logo Key
and also me at the same time.
2) Click Privacy in Settings.
3) Click Microphone in the left panel and make sure microphone access for this device is turned on and the status is On for PUBG.
4) Login to PUBG and see if your microphone works this time.
Fix 3: Adjusting Sound Settings on Your Computer
If PUBG voice chat is not working on your computer, you should also check and set the microphone as the default device for your computer.
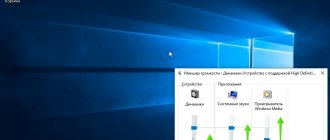
1) Right-click the volume icon in the lower right corner on your desktop and select Sounds.
2) Click play and make sure your microphone is set to Default Device.
3) Click Record and make sure your microphone is Default Device.
4) Then right click on the microphone device and select properties.
5) In the new pop-up panel, click the Advanced tab.
6) Make sure to uncheck the box next to Allow an application to take exclusive control of this device. Then click Apply and OK.
7) Save your settings.
Restart your computer and try PUBG voice again to see if it works.
If this method doesn't work for you, don't worry. We have other solutions to try.