In the age of modern technology, people may not take plastic cards or cash with them when going to the store. You can make a purchase using your smartphone, but what should those who were unable to set up contactless payment do? This is a fairly common problem that discourages people from using an NFC chip in their gadget. Today we’ll figure out why this error occurs and how to fix it.
Description of the Google Pay system
The main purpose of the service is to pay for goods and services using smartphones. For this, NFC wireless data transmission technology is used. This technology is a replacement for the chip, as well as the magnetic stripes that are found on regular plastic.
The user of the presented payment system can independently link a bank account to his smartphone, tablet or smart watch and pay for purchases by simply touching the device to the payment terminal. In general, the procedure for making a purchase is no different from using plastic with contactless payment. However, the presented service, unlike cards, has two-factor authentication, which significantly increases the level of security.
Blocking Google Play Market access to network resources
Sometimes Freedom does not block the launch of the Market, but prevents it from connecting to the Internet. When trying to download something, the user sees messages: “The program was unable to contact Google servers” or “There is no network connection, try again later.”
If you have root rights, solving the problem is not difficult - just make adjustments to the system Hosts file (on Android it performs the same function as on Windows - it maps domains to IP addresses). The file is located in the \system\etc\ folder. You can get into it either through the Android root explorer (for example, “Root Explorer”), or through the already familiar MyPhoneExplorer running on a Windows machine.
Open the hosts file using a text editor, such as Notepad, and remove all entries from it except “127.0.0.1 localhost”. Save without extension by selecting the file type - “All files”.
If network connection errors are not related to Freedom, check your security software settings. It's possible that Market's access to the network is blocked by a firewall.
Which phones doesn't Google Pay work on?
Using the service, you need to pay for goods and services using your smartphone. This process is carried out using NFC technology. It is used instead of a chip or magnetic stripe on a plastic card.
The user just needs to link bank cards to their phone, tablet or smartwatch. After this, you can use gadgets to pay by placing them on the terminal.
Using this method is no different from using a plastic card. But the service has two-factor authentication to increase security.
The service does not work on phones that do not meet the requirements necessary to successfully make contactless payments. For Google Pay to work, your phone must have:
- operating version Android 4.4 or more;
- factory firmware of the system;
- built-in NFC module;
- locked bootloader;
- inactive developer mode.
To check this parameter, go to your phone settings. In them you can find out the OS version and other basic parameters.
Attention! Google Pay does not work on non-certified phone models.
For smartphones without an NFS chip, there is a solution for installing it. Read how to do this here.
Why do problems appear?
There are several reasons why contactless payment cannot be set up:
- There is no certified phone firmware, and as a result, it does not allow the application to work normally.
- ROOT rights are not open. In order to fix this problem, you need to perform some manipulations with the system.
- The smartphone has a locked bootloader
What cards does the application support?
Initially, users could only link credit cards issued by American banks, since it was created in the USA. After some time, a similar opportunity appeared in the UK, Ireland, Japan and other countries.
Recently, the application has appeared in Russia. The company that developed the service has entered into partnership agreements with most large banks in Russia. Now, MasterCard and Visa holders can link their accounts to their phone and make purchases with one touch.
However, there are some restrictions on connecting to this service. See the table for more details:
| Bank | Supported | Unsupported |
| Sberbank | Any debit and credit MasterCard and Visa. | Maestro, Visa Electron, previously issued MIR cards. |
| Russian Standard Bank | MasterCard only. | All others issued by the represented bank. |
| Raiffeisenbank | MasterCard and Visa, as well as corporate and jointly issued with other companies. | Electron and MIR. |
| Rosselkhozbank | All types of MasterCard. | Visa, corporate and virtual. |
| Alfa Bank | All products produced by the organization are supported. | None. |
As you can see, for the most part, only virtual, corporate and those with the MIR payment system are not supported. All other types are available for connecting to a smartphone running Android OS.
The main disadvantages and limitations of the World map
DF-DFERH-01 - error on Android on Google Play
Unfortunately, its own payment system imposes some restrictions on its use, which can safely be considered among its disadvantages:
- For settlements, only the national currency – the ruble – can be used. Although this may be completely irrelevant in Russia, some difficulties are also possible when making payments in foreign online stores. For example, if you can only pay for a purchase in euros or dollars.
- The payment system was launched quite recently, so it still remains “raw”. From time to time, negative reviews regarding its use surface, the essence of which boils down to the fact that not all retail outlets can accept it.
- The card cannot be linked to the electronic payment system through the Apple Pay and Google Pay services (Samsung has allowed transactions with Mir cards through its devices). Even the application designed to make contactless purchases is still available only for devices running Android (special Mir Pay application).
- There is also no possibility of adding a card to PayPal and WebMoney payment systems.
- You cannot pay for the purchase of applications in the Google Play Market.
- The list of countries and banks in which you can make purchases and withdraw cash is significantly limited. Therefore, this card is not suitable for those who travel frequently.
Frequent problems and solutions
If Android Pay doesn't work, start with general diagnostics. It is important to understand what exactly the problem is - installation, adding/removing a card, the application itself, or payment. For convenience, we will consider each option separately.
Problem with the application
There may be many reasons why Android Pay stopped working. You need to start by checking whether your phone has an NFC chip. This is another standard for wireless data transmission. As a rule, in new phone models it is installed by default.
How to check:
- Go to the settings section wireless networks .
- If you see an NFC item there, then everything is in order, if not, look in the tab more or dots at the top.
- Enable if disabled.
Without this technology, you won’t be able to pay by phone.
Google Pay doesn't work
If Google (Android) Pay used to function normally, but now it doesn’t, the reason may be in the phone or the program.
Let's highlight the main ones:
- Software is outdated. The smartphone developer releases updates from time to time and fixes existing bugs. The user’s task is to check their availability, download and install them on the phone. Alternatively, you can set automatic updates in the settings.
- Low battery. When considering why Android Pay isn't working, it's important to keep your battery level in mind. If the battery is low, the application may not start, and a corresponding message appears on the display. To solve the problem, reboot the device.
- Software glitch. There are situations when Google (Android) Pay does not work or periodically crashes. If the solutions discussed above did not help, you can uninstall the software and install it again.
If the smartphone supports Android Pay and meets Google requirements, problems with the software are extremely rare.
Application won't install
Many people face difficulties when trying to install the Google Pay app. Let's highlight the main reasons:
- Software does not comply with Google requirements. Installation of Google Pay is available for smartphones with Android OS 5.0 and higher. Otherwise, you need to update the system (if possible) or buy a new phone that supports the system.
- Lack of NFC module. Situations often arise when Google (Android) Pay does not install and does not work if there is no NFC device or it is turned off. You need to make sure the module is available. This can be done in the specifications or through the device settings. If you have NFC, you need to turn it on.
- Being in the wrong country. Citizens of Belarus or a number of other countries complain that they can’t install Android Pay. The reason is that the program is not supported in all states. Today Android Pay is available in the USA, Poland, Russia, Ukraine, Great Britain and several other countries. A complete list can be found on the Google service page. This nuance must be taken into account when planning a trip to another country.
- The phone has root rights or has custom software installed. The Google Pay app does not work on jailbroken devices due to reduced security. When I try to install the application I get an error. To correct the situation, you may need to reset to factory settings, and in the case of root, use a special program called Magisk to mask superuser rights.
- The smartphone is not approved by Google and does not have software protection. Android Pay doesn't work on devices that aren't verified by Google. This nuance must be taken into account at the stage of purchasing the device.
There are situations when an error appears when downloading Google Pay from the store. The reason may be a banal bootloader lock.
The card is not added
Owners of Android smartphones complain about situations when the map is not added to the application. Sometimes I come across comments that say I can’t enter an index into Android Pay or other data. Let's highlight the main reasons:
- The issuing bank of the plastic card does not work with the Google service and does not support Android Pay. To avoid this problem, you need to immediately clarify which banks work with the contactless payment service, except for large associations such as Sberbank or VTB. By the way, do not forget that there is also the possibility of paying by QR code through VTB.
- The payment card is clearly damaged. The user points the camera at the “plastic”, but the data is not scanned. To solve the problem, you can use manual input of information or change the “plastic”.
- Owner's error. The card is not added if the user made a mistake when entering information - validity period, 16-digit number or other information. To avoid such problems, it is important to enter data carefully.
- Incorrect code. When adding “plastic”, a confirmation is sent to the phone in the form of a set of characters. The key from the SMS must be transferred to a special field. In this way, a person confirms the specified data and identity. Entering the wrong code when adding “plastic” to Android Pay results in blocking the addition of the card.
When tying the “plastic”, be careful to avoid mistakes. All data must be entered correctly. Even if the “plastic” is connected, but the information is incorrect, the payment service will not work.
The card is not deleted
There are situations when previously added “plastic” is not removed. This need arises when changing the card and payment instrument details. In normal mode, deletion is carried out through the application. You need to go to Google Pay, select payment methods, click on the card you are interested in and delete it.
If this method does not work, you can unlink the “plastic” through the official Google website. To do this, log into the “Payment Center” on your PC or via phone, select the “Payment Method” section on the left, find your card and delete it. At the final stage, you need to confirm your action. As a last resort, if the application does not work and the card is not deleted, you can uninstall Android Pay and then install it from scratch.
Can't pay
Smartphone owners often wonder why Google Pay doesn’t work when they try to pay for goods in a store. There could be many reasons for this:
- The smartphone is in lock mode. According to the rules, a phone with Google (Android) Pay must be brought to the terminal in an unlocked state. Otherwise, the payment service does not work.
- The NFC module is disabled or the receiving device (terminal) does not pick up its signal. To solve the problem, you need to change the position of the smartphone, for example, bring it closer.
- The contact time between the smartphone and the terminal was not enough to complete the transaction. The device must be held until a green flag appears.
- The phone vibrates and a green mark is visible on the display, but the service does not work. This indicates that Android Pay has transferred data, but the terminal does not respond (it beeps and makes other strange sounds). In this case, you need to ask the person at the cash register for help.
- Deviation of "plastic". If the card does not work and the terminal refuses to carry out the operation, you need to contact the bank to find out the reason. The payment instrument may be blocked or other difficulties have arisen.
- Low balance. Sometimes Android Pay does not work due to insufficient funds on the client's card. Check your balance and make sure there is enough money to make the payment.
- Check again whether your bank’s card is in the list of project partners; this can be done through the Google Pay help menu or on the official website.
- The NFC module has turned off. Go to settings and turn it on again.
If the above steps do not work and Google (Android) Pay still does not work, try removing the card and adding it again. If difficulties arise with all types of contactless payments, contact Google Pay technical support.
Google Pay doesn't work after update
Some xiaomi phone users have complained that after they updated their phones to MIUI 10, there were problems with the program. When you open Google services, you may see a notification on your phone screen stating that the application is not compatible with your device.
To solve this problem, the developers have released a new patch that is designed to fix the bug in the new updates.
ASUS Zenfone ZB602KL users also encountered difficulties after updating the system. This is due to developer errors. In this situation, it is unlikely that you will be able to cope with the problem on your own. You must wait until a new update appears or revert back to the previous version. But this is a rather lengthy and labor-intensive procedure.
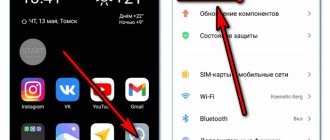
Sometimes an update resets your device's settings. You need to check NFC activity and check permissions in the Google Pay app. For this:
- go to settings and find the tab with wireless networks;
- Having gone to the section, you need to drag the slider opposite NFC and click on enable. You should also check that HCE Wallet is enabled;
- Next you need to return to the settings and reboot the device.
In addition, you can clear the device cache.
Problems solved by magisk hide
For Xiaomi brand users, there is a known problem when the contactless payment service does not work. This is attributed to the fact that the user gave root permission to his smartphone using the Magisk application. To solve the problem, you need to launch magisk hide manager and go to the magisk hide tab. After that, click on the menu and check the box next to “Show system application”.
After that, click the icon and enter “Google”. This will ensure that only Google apps that can be marked as root will be visible.
Next, you need to delete data from the Google Play Services application. To do this, go from the settings to the section with all applications and select Google Pay services, then delete the data. The same steps should be followed with the Google Services Framework and the Google Pay app. For the settings to take effect, you need to reboot the device.
Then you just need to launch Google Pay and add the necessary bank cards to the service in order to make payments in the future.
Cards fly off
Sometimes difficulties arise with adding cards to the system. This happens if:
- The bank has not formalized a partnership with the service. It is important to study the list of financial organizations that cooperate with Google Pay.
- The user made a mistake when registering the card. The parameters must be carefully checked after entering, because the slightest error will lead to malfunctions of the system.
- The user entered the verification code incorrectly. At the end of the registration process, you must enter the key that comes via SMS. It must be entered into the field. If there is a typo, card authorization will not be possible.
Therefore, if cards fail, in order for them to function normally, you should carefully carry out the registration procedure.
I don't receive a confirmation code
If you were unable to set up gpay contactless payment due to the lack of a confirmation code, you must:
- make sure that the phone is within range of the network or connected to the Internet;
- try the procedure again;
If you still do not receive a confirmation code, you should contact bank employees for help.
HCE Wallet is not configured
HCE Wallet is the technology that allows the NFC system to function successfully. It provides emulation of NFC cards on smartphones using certain software. If you have problems with Google Pay, then the problem may be a problem with your wireless network settings. To deal with the problem, you need to:
- Go to advanced options in your phone settings.
- Go to the wireless networks section.
- Activate NFC if it is turned off.
- Install HCE Wallet in the “Security Element Location” tab.
- Go back to settings, go to permissions, and from there to autorun.
- Select Android Pay and enable auto-download permission.
Setting rules may differ for different phone models. This option is suitable for xiaomi mi 8.
How to solve a problem?
So, if root access has been activated on your smartphone, the bootloader is unlocked, or the device is based on unlicensed firmware, you will not be able to pay for purchases in a store contactless. But, if you are not sure that Root access is open or there are problems with the operating system, it is recommended to first double-check the settings:
- Activate the NFC icon in the notification shade.
- Open your phone settings and go to the “More” section.
- Change wallet type from HCE to SIM.
- In the application section, enter all permissions for the program that is used as payment for purchases.
- In the “One touch payment” item, set the value to GP or AP.
If after “playing” with the settings nothing has changed, and contactless payment is still not available, it means that Root, the bootloader is activated on the phone, or there are problems with the firmware.
First you need to lock the bootloader. This situation usually happens on Android smartphones. The user needs to turn off the device and open the developer menu (hold down the top volume rocker and power button). Next you should pay attention to the “Look State” item. There you need to set the value “locked”, which will indicate that the bootloader is blocked.
When it becomes clear that the bootloader is not active, but at the same time NFC does not work, you need to move on to other ways to solve the problem. For example, to disable root rights. If the user is sure that he really has Root activated, deactivation can be performed as follows:
- Download the SuperSU application.
- Open the program and go to its settings.
- Confirm complete removal of root rights.
- Agree to the terms of use.
- Reboot your smartphone.
After completing this simple operation, Root will be disabled and, most likely, contactless payments will work on your smartphone again. But if you fail, don't despair. You need to make sure that the smartphone runs on the latest licensed firmware. For this:
- Open phone settings.
- Go to the “About device” section.
- Click on the item with the software version.
- Click on "System Update" if available.
If it becomes clear that, for example, Xiaomi is running the Chinese version of MIUI, you will have to download the firmware from the official website and install it. In other cases, after completing the updates, NFC should work.
Google Pay stopped working on Xiaomi? Here's the solution
A criticism in favor of smartphones under the Xiaomi brand is the lack of a module. NFC is only included in some samples, but is increasingly being sought in devices given the growing mobile payment services that are being developed. Among the most famous we will probably find Google Pay , but how to do this if at some point on the display of our terminal we find the inscription “This device cannot pay in stores via Google Pay”?
Some users have encountered this error while for others the service seems to be working properly and the cause of the problem does not seem to depend on the firmware version as according to reports this has happened on both the official and custom versions of MIUI. The cause of the problem seems to be caused by Google itself, or rather by the developers who are trying to improve the security system of the Google Pay service . In fact, the mobile payment app seems to be giving problems only for those users who have given root permission to their smartphone through the app Magisk. So let's see how to solve this problem and how to test it properly.
First of all, let's remember that for Google Pay payments to work properly , the firm needs to pass a SafetyNet check . You can then proceed to a test using the SafetyNet Test , which should return the following results:
PASSED - means that the test was passed. Google Pay should work. FAILED - failed. Google Pay will not work.
If the test is successful, but when you pay or add a card, a warning is returned: "You cannot pay with this device in stores with Google Pay" or something like that, this means that you should do the following.
Solution
- If you're not using Magisk, you can skip straight to the third point. If instead you installed the tool before running it, you need to go to settings and click on the “HIDE MAGISK MANAGER” option. You will now have a new MANAGER connection at home with a random package name.
- Open "MANAGER" again, go to the Magisk Hide tab, in the upper right corner click on the menu (three items) and check the "Show system application" checkbox (show system applications). Then click the search icon and enter "Google". Now you will only see Google apps that you can mark as root.
- Delete all data from the Google Play Services app. To do this, go to Settings > All apps > Google Play Services > Clear data > Delete all data. Do the same with Google Services Framework and Google Pay app. Then reboot your device.
- Now you just need to launch Google Pay and add a payment card.
Many solved the problem, and some had to update Magisk to the trial version. 18.2_canary.zip via TWRP recovery and then they adopted the procedure just described.
Features of the payment system
Using the Google Pay application, funds are transferred in a contactless manner, for which a mobile device is used in contact with a bank terminal equipped with the Pay Pass function.
A bank card is linked to the system, from the account of which money is planned to be debited for further payments. To pay for goods or services, the smartphone approaches the terminal scanner, and a special signal confirms the successful completion of the transaction.
Such payments are accepted in shops, restaurants and cafes, shopping centers, public transport and supermarkets. In addition to payment cards, the application supports travel tickets, bonus and discount products. In a word, it successfully replaces the wallet in which we store bank cards and cash.
Is it possible to use Android Pay with root rights on a smartphone?
Root rights give the right to use an administrator or superuser account, which allows the user to access many inaccessible things on their smartphone.
Google updated the security certificate without notifying Android device users. This caused the service to fail. As a result, the payment system began to refuse users with Root rights .
Google experts claim that smartphones with superuser rights are more susceptible to attacks by cyber fraudsters than others. Therefore, the company cannot guarantee the security of money transfers via Android Pay. On the other hand, without root rights it is impossible to solve some problems with gadgets that require contacting a service center.
Not every smartphone owner can boast of using a convenient payment service that frees them from the need to carry all their bank cards with them.
For most users, the application undergoes initial installation on the gadget, but during the download process the service displays a message that Google Pay is not supported on the device. This problem has a solution, you need to check your smartphone for all the parameters described above and you will definitely find a solution .
How to change your payment method when purchasing
- Open the Google Play Store app Sources
- https://DiskontClub.ru/sovety-i-idei/kak-udalit-bankovskuu-kartu-iz-google-play.html
- https://uprostim.com/kak-udalit-bankovskuyu-kartu-iz-google-play/
- https://poandroidam.ru/google-play/kak-otvyazat-kartu.html
- https://GuruDroid.net/kak-otvyazat-bankovskuyu-kartu-ot-google-play.html
- https://CartoVed.ru/bezopasnost/kak-otvyazat-bankovskuyu-kartu-ot-google-play.html
- https://support.google.com/googleplay/answer/4646404?co=GENIE.Platform%3DAndroid&hl=en
- https://WiFiGid.ru/android/kak-iz-google-play-udalit-kartu
- Select the “Applications” section;
- We look for it in the Play Market list and tap on it;
- In the new window, alternately click on the “Clear data” and “Erase cache” buttons.
Usually this helps solve the problem, but the method does not provide a 100% guarantee.
What to do if the reason is not described here
It happens that Google Pay gives an error that may not be described here.
Then the developers ask that you inform them.
This can be done through the feedback system in the program.
- From the menu, click Help.
- There you can choose: either write a message or call.
- You can also write a letter and send it by email.
So that you don’t have any questions with the work of Google Pay, you don’t think why I can’t do it, why it doesn’t work, I recommend that you constantly update. The development team is steadily improving and improving the program, so in the near future all problematic issues will go away completely.
Currently, Google Pay is actively promoting its product in many countries. If your service doesn’t work yet, don’t despair, I think everything will change in the near future. Of course, you can try installing it by downloading it from a third-party site, and try linking a bank card from the Google list - go ahead and share your experience. True, you can only pay on the Internet, because most likely you will not have terminals.
Play Market is not installed
Today, Android smartphones without pre-installed Google services have appeared on the Russian market. In particular, products from the Chinese manufacturer Meizu, for example, Meizu M3 Note, Meizu M3 Mini and other models. Devices purchased in our country make it possible to easily correct this shortcoming by installing the necessary equipment using another application.
So, to install the Play Store on your Meizu device, tap the “Best” application icon. It contains a selection of programs available for quick download, including Google tools. Tap the Install button under the Google Services icon. After installation, reboot the device.