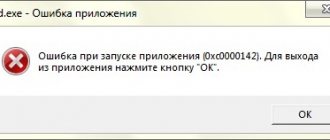
Any digital storage medium, be it a regular flash drive or a hard drive, is not protected from failures in its operation. It may happen that when you try to open folders or files, the error “Disk access is denied” appears. In such cases, an inexperienced user immediately despairs of restoring the device’s functionality and runs to a technician for help or simply buys a new drive. But this is not at all necessary. This article will tell you how to fix the “Disk access denied” error in Windows 7. But it’s worth clarifying right away that the instructions that will be provided below are suitable not only for the “seven”, it is also feasible in other versions of the operating system systems from Microsoft.
Method 3: Format and restore data
It happens that access problems arise due to some system failures. In this case, the best option would be to format the drive. However, to prevent data from being lost, it is better to restore it before doing so. In this article, the R-Studio program will be used for such purposes.
- Launch the application.
- Select the drive from which you would like to recover information.
- Files suitable for recovery will appear on the right. Select the one you need and right-click on it.
- From the list of options that appears, select “Restore”.
- In the new window, navigate to the folder where the files will be transferred.
- Click Yes.
After recovering all important data, you need to format the flash drive. This is done through Explorer.
- Open My Computer.
- Right-click on the section.
- From the menu, select the "Format" option.
- In the window that appears, click “Start”.
All that remains is to wait until the formatting process is completed, after which the partition or drive should work properly.
Reason 5: File system corruption
A variety of reasons can cause damage to the USB flash file system. If this happens, all information on the flash drive will become inaccessible. In this case, you will need to check the disk for system errors, and if this does not help, take other measures. Windows has a built-in console utility that will help you do this easily.
- Call the console with administrator rights in any convenient way. This can be done, for example, through a search in “Start” or by right-clicking on it. In the second case, you are interested in the “Windows PowerShell (Administrator)” item (depending on the settings and version of Windows, it may also be called “Windows Terminal (Administrator)” or “Command Prompt (Administrator)”).
- Next, you need to enter the command chkdsk x: /r /f (replacing “x” with the letter assigned to your device) and press Enter. An automatic scanning process will begin, allowing Windows to identify any damage to the device's file system and repair it.
Option 1: Data Recovery
If chkdsk doesn't solve the problem, it's likely that Windows couldn't recognize the device's file system or the information stored on it is corrupt. The solution to this problem is to use data recovery software. This will allow you to access the contents of the drive regardless of whether the error was caused by incompatibility of the device's file system or data corruption.
For example, you can use the Recoverit tool. This program is extremely easy to use. From the moment of installation, the application can automatically recognize the compatibility settings of your operating system, so when you recover information from your device, it will automatically carry out the processes necessary to access the data in just a few clicks.
- Select your device as the target location and click the "Start" button.
- A comprehensive scan of the external media will be launched, during which you can immediately find the files you need. Wait a few minutes for the process to complete (you can also pause or stop it as needed). Select the found files and click “Recover”. You cannot restore them to the same flash drive! Only to another device without performance problems.
- Once the scan is complete, you will also be able to preview the detected files. Click "Recover" and save them somewhere safe.
Option 2: Formatting the flash drive
If the data on the flash drive is not valuable, you can format it. This process will delete all information from the drive and restore a functional file system. In Windows, formatting is performed using built-in tools - we have already talked about this in another article.
Important! If the USB drive is 32 GB or less, select FAT32; if it is larger than 64 GB, select exFAT.
Read more: Formatting a flash drive via the “Command Line”
Remember that after formatting, you can still try to recover the data - with the program mentioned above or another, for example Recuva.
Option 3: Antivirus scan
Infecting a computer with a virus can result in denial of access to the flash drive. To solve this problem, you will need to complete the following steps:
- Install antivirus software on your computer.
- When connecting a USB drive, perform a thorough scan with the installed antivirus with updated databases. It is advisable to check the device with several programs.
- If possible, format the flash drive using the built-in operating system tools or additional utilities.
- Be sure to check your computer's hard drives for viruses to prevent them from spreading to other removable media in the future.
“Access denied” error - solution to the problem - Sys.Admin Notes
Hello again, dear readers! Today we’ll talk about eliminating the “Access Denied” error.
Many of you, probably after reinstalling Windows, encountered the fact that you forgot to copy the “My Documents” folder from the previous system, and when you tried to access it (unless, of course, you deleted it when installing the new OS) you received the message: “Access is denied” .
Today, we will talk about how to gain access to such a folder, which (ultimately) will help you save information that is quite valuable to you.
Let's start.
To begin with, it should be said that to solve this problem, you need to disable simple file sharing and become the owner of the folder, thereby gaining rights to access and change it.
It's simple:
- Open “My Computer” (aka Explorer), right-click on the folder to which you want to restore access and select “Properties”;
- Go to the “Security” tab, where click the “Change” button (if necessary, enter a password for access):
- Select the user (if the one you need is already in the list) or click the “Add” button, where enter the name of the system user (under which you log into Windows) who needs access and click the “Check names” button:
- Select the found user and click the “OK” button;
- Next, check the “Replace owner of subcontainers and objects” checkbox so that not only this folder, but also the files inside it are accessible;
- All.
Done, use the daddy, as they say, to your health!
If you have an old system, then...
Access Denied Solution for Windows XP
- Click the "Start" button and select "My Computer";
- In the “Tools” menu, select the “Folder Options” command and go to the “View” tab;
- In the “Advanced Options” section, uncheck “Use simple file sharing (recommended)” and click “OK”;
- Right-click the icon of the folder whose owner you want to change and select “Properties”;
- Open the Security tab and click OK if a security message appears;
- Click the "Advanced" button and go to the "Owner" tab;
- In the Name column, highlight your user name, the Administrator entry (if you are signed in with an Administrator account), or the Administrators group. To take ownership of the contents of the folder, select the "Change owner of subcontainers and objects" checkbox;
- Click "OK" button; You may receive the following error message (folder is the name of the folder whose owner you want to change): “You do not have permission to read the contents of the folder. Do you want to change the permissions for this folder so that you have Full Control rights? All permissions will be replaced if you click the “Yes” button;
- Click the "Yes" button;
- Then, click “OK” and configure security settings for the folder and its contents.
Let's move on to the option for more modern operating systems.
Correct access errors by relinquishing ownership rights
The most basic fix to try when you see “Folder access is denied” is to take ownership of the folder through File Explorer. Here's how to do it.
First, right-click on the desired folder or file and select Properties. In the window that appears, go to the Security tab. We are interested in the “Advanced” button; click this.
At the top of the next window, you will see a box labeled Owner. It will most likely say "Unable to display current owner" if you're having trouble. Click on the blue Edit link next to this to fix it - note that you need to be an administrator to do this.
You will now see a dialog box titled Select User or Group. Inside this, enter the account name of the new owner of the folder. This can be either the username of an account or a group of users on your PC. Groups include building blocks such as Administrators (if you want all administrators of the computer to own it), or Users (for everyone who owns it). In home use, it usually makes sense to transfer ownership to one person.
We assume that you want to own this folder under your account, so enter your username here. If you use a Microsoft account to sign in to Windows 10, your username is the first five letters of your email address. Click "Check Names" to make sure it's correct. If so, it will automatically change to PCNAMEUSERNAME. Click OK.
Back in the main Advanced window, you'll see a box at the bottom that starts with Replace all child object permission entries. If you want your changes to apply to all folders inside the current one (which you probably do in most cases), check this box. Then click OK twice and you're done.
Be careful when changing file ownership settings
When dealing with "access denied" errors, you should use the above steps with caution. Avoid owning folders in system directories such as Windows, Program Files, Program Data or similar.
This will weaken the security of your system since regular accounts should not be the owners of these directories. They contain important Windows folders that you should not touch.
You can still access these folders using the method above without becoming the owner.
How to set a custom text position?
Graphics in Word can be rotated around an axis. To do this, there is a green circle next to the frame. But with captions, this operation became available only in Word 2010 and later versions. If you need to position the text not vertically, but at an angle, do this:
- Open the menu “Insert” - “Inscription” and select a type.
- Click on it. Dots or white squares will appear along the perimeter, and next to it there will be a green circle (in Word 2007 this type of figure does not have it). When you hover over it, the cursor takes the form of a circular arrow.
- If you “pull” this marker, the object will move along the axis. This way you can change the printing direction not by 90, but, say, by 30 degrees.
- To set the exact position, “drag” the circle while holding down the Shift key. The figure will not move smoothly, but in jerks of 15 degrees.
- Narrow the shape down to the size of a line or even a word to turn it separately.
Green marker for rotating the figure
In Word you can write not only horizontally. The lines are easy to read, but sometimes you need to change the position of the text and put it at an angle. To draw up documents, make neat tables or create beautiful flyers.
Method 3: Format and restore data
It happens that access problems arise due to some system failures. In this case, the best option would be to format the drive. However, to prevent data from being lost, it is better to restore it before doing so. In this article, the R-Studio program will be used for such purposes.
- Launch the application.
- Select the drive from which you would like to recover information.
- Files suitable for recovery will appear on the right. Select the one you need and right-click on it.
- From the list of options that appears, select “Restore”.
- In the new window, navigate to the folder where the files will be transferred.
- Click Yes.
After recovering all important data, you need to format the flash drive. This is done through Explorer.
- Open My Computer.
- Right-click on the section.
- From the menu, select the "Format" option.
- In the window that appears, click “Start”.
All that remains is to wait until the formatting process is completed, after which the partition or drive should work properly.
Question details
1. Right-click on the desired drive, select Properties ; 2. The disk properties window will open. Go to the Security ; 3. Click the Advanced ; 4. Go to the Owner ; 5. Click the Change at the bottom; 6. Select in the list Change owner to: Your user account, check the box Change owner of subcontainers and objects and click OK . If an additional request appears, agree. When the additional window closes, click on OK to close the permissions window.
Next, change the disk access permissions: 7. Similar to steps 1-3, open the disk access permissions window; 8. Click the Change permissions at the bottom; 9. Uncheck Add permissions inherited from parent objects , in the additional window that appears, click Remove . If the checkbox is not checked, proceed to the next step; 10. If, after completing the previous step, there are still elements in the list, delete them manually using the Delete ; 11. Now that the list is empty, click the Add ; 12. Enter the text All in the Enter the names of the selected objects . Click OK ; 13. In the new window , permission element for. check the Full control in the Allow . This will automatically select all the checkboxes in the column. Click OK ; 14. Check the Replace all child object permissions checkbox. OK again . If an additional request appears, agree; OK again OK again to close the disk properties window.
Incorrectly changing file system security settings and access control sheets can cause serious problems. These problems may require you to reinstall the operating system. Microsoft does not guarantee that these issues will be resolved. The user is responsible for changing access rights.
How to fix problem accessing network folder in Windows 10
Before moving on to solving problems with access to a network folder in Windows 10, it is recommended to make sure that the local network has been configured correctly and is fully functioning. Only after this can you move on to our recommendations.
Option 1: Checking that the server settings are correct
This can partly be attributed to the preparatory stage. Make sure that all basic settings from the “Server” system section are activated on the selected computer.
- Open Control Panel. This can be done through the system search bar, which opens by clicking on the magnifying glass icon or using the Win+S keyboard shortcut. Enter the name of the object you are looking for in the search bar and press Enter to go to the results.
By default, the Control Panel interface will be divided into categories. For convenience, it is advisable to turn on the value “Large icons” or “Small icons” opposite the “View” line. Among the presented elements of the “Control Panel”, go to the “Administration” section.
A separate folder will open in Explorer with all the Administration elements. Here, open the Services component.
From the list of parameters, expand the full description of the “Server” parameter. To do this, right-click on it and select “Properties” from the context menu. For the “Startup type” line, set the value to “Automatic”. Below, use the “Run” button and click “Apply”.
If this method does not help to open access to network directories, then move on to more advanced methods of correcting the problem.
Option 2: Grant access
Not all folders are open to other devices on the local network. Some, especially those located on the system volume, may require administrator access. Luckily, you can quickly grant access to another account. True, all manipulations will have to be done only through the administrator account. Otherwise, you will not be allowed to change anything in the folder properties.
- Right-click on the folder that you are having trouble accessing. From the context menu, select "Give access to".
The Network Access dialog box will open. In the line below, you can either select a specific user to whom you are going to grant access or allow it all by selecting the appropriate item from the context menu. In the “Permission Level” column, you can specify the available permissions: read or read and write. Here you can delete a user if you change your mind about giving him access to the folder. After completing the settings, click on the “Share” button. Confirmation of administrator rights will be required.
At the end, you will receive a notification that the selected folder is fully open to public access. Click "Done" to complete the settings.
Similar actions need to be done with all folders, access to which is limited to other participants for some reason. The problem is that if a similar problem occurs on another computer, then you will have to solve it in a similar way there, which will lead to additional time costs.
Option 3: Component Service
This utility may be required to edit some access settings for applications and folders within the local network. However, its name is much more extensive.
To configure access using the Component Service utility, follow the following instructions:
- Launch a system search by clicking on the magnifying glass icon or using the Win+S keyboard shortcut. In the line that opens, enter the name of the object you are looking for.
- The Component Services window opens. On the left side of the interface, expand the Component Services section. There, open the “Computers” directory.
In the central part of the interface, right-click on the “My Computer” icon. In the context menu, select “Properties”. In the “Properties” window, expand the “Default Properties” tab. Set the Default Authentication Level to Default and set the Default Impersonation Level to Impersonation. After completing the settings, click the “Apply” button.
After completing this operation, restart the operating system so that the settings are fully applied.
Fixing the problem with accessing network folders in the Windows 10 operating system is quite simple. Most often, it is enough just to configure the local network correctly, and then, if problems arise with access, open it for folders where administrator rights are required.
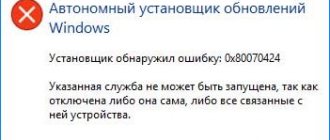
Fixing error 0x80070005 using subinacl.exe
The first method is more related to error 0x80070005 when updating and activating Windows, so if you have a problem when trying to restore the system, I recommend starting with the next method, and only then, if it doesn’t help, return to this one.
To get started, download the subinacl.exe utility from the official Microsoft website: and install it on your computer. At the same time, I recommend installing it in some folder close to the root of the disk, for example C:\subinacl\ (it is with this location that I will give the code example below).
After that, launch Notepad and enter the following code into it:
@echo off Set OSBIT=32 IF exist "%ProgramFiles(x86)%" set OSBIT=64 set RUNNINGDIR=%ProgramFiles% IF %OSBIT% == 64 set RUNNINGDIR=%ProgramFiles(x86)% C:\subinacl\subinacl. exe /subkeyreg "HKEY_LOCAL_MACHINE\SOFTWARE\Microsoft\Windows\CurrentVersion\Component Based Servicing" /grant="nt service\trustedinstaller"=f @Echo Gotovo. @pause
In Notepad, select “File” - “Save As”, then in the save dialog box, select “File as type” - “All files” and specify the file name with the .bat extension, save it (I save it to the desktop).
Right-click on the created file and select “Run as Administrator”. Upon completion, you will see the inscription: “Gotovo” and a prompt to press any key. After that, close the command prompt, restart your computer and try the same operation that gave you error 0x80070005 again.
If the above script does not work, try another code option in the same way (Warning: the code below may cause Windows to not work, run it only if you are prepared for such an outcome and know what you are doing):
@echo off C:\subinacl\subinacl.exe /subkeyreg HKEY_LOCAL_MACHINE /grant=administrators=f C:\subinacl\subinacl.exe /subkeyreg HKEY_CURRENT_USER /grant=administrators=f C:\subinacl\subinacl.exe /subkeyreg HKEY_CLASSES_ROOT /grant =administrators=f C:\subinacl\subinacl.exe /subdirectories %SystemDrive% /grant=administrators=f C:\subinacl\subinacl.exe /subkeyreg HKEY_LOCAL_MACHINE /grant=system=f C:\subinacl\subinacl.exe /subkeyreg HKEY_CURRENT_USER /grant=system=f C:\subinacl\subinacl.exe /subkeyreg HKEY_CLASSES_ROOT /grant=system=f C:\subinacl\subinacl.exe /subdirectories %SystemDrive% /grant=system=f @Echo Gotovo. @pause
After running the script as an administrator, a window will open in which, over the course of several minutes, access rights to registry keys, files and Windows folders will alternately change; upon completion, press any key.
Again, it is better to restart your computer after completing it and only then check whether the error was fixed.
System message “No access to flash drive. Access denied": reasons for appearance
A failure of this nature itself can be caused by the same software problems, physical damage to the drive, or (even worse) errors in the operation of the microcontroller, viruses, etc.
In principle, today it is customary to include removable memory cards as flash drives. Things are easier with them. Any adapter has a special switch that switches the device to protected mode. In other words, it is possible to see the device and everything that is on it, but it is not possible to perform any targeted actions. The simplest solution is to turn off the lock.
The situation is worse with viruses or damage to the file system due to software failures due to a sudden power outage of the computer, improper removal of the drive from the port, etc. In this case, the file system may be converted to RAW format. It will have to be returned to its original form through low-level formatting. But, as a rule, this is not even the problem.
Autorun virus
Sometimes the appearance of warnings that there is no access to the flash drive (access denied) may be due to the impact of viruses. One of these is the Autorun.inf threat, which is very often present in illegal software distributions.
Actually, the virus itself replaces the standard Windows service, which is responsible for automatically recognizing the connected storage medium and selecting an action. As is already clear, to eliminate the consequences of its impact, you will have to perform a full scan of the system. Moreover, even if you use a standard antivirus, it is better not to use SMART technology, which in most cases is enabled by default. After all, it is aimed at scanning objects vital for the operation of the system in an accelerated mode. Therefore, it is better to use in-depth analysis.
In addition, the most preferable way out of this situation would be to use independent disk utilities with the general name Rescue Disk. They have their own downloadable interface. It starts even before Windows commands are executed. And it is precisely these scanners that are capable of finding even those viruses that have penetrated too deeply into the system or have settled in the RAM.
Fixing Disk access denied
The first thing that comes to mind in this case for any non-newbie is to check the partition for errors using the chkdsk repair utility, which, by the way, is available right there. It appears from the disk context menu in the Tools tab. However, the disk itself appears empty, and the disk status checker says that it is unavailable:
The only thing available to the user is the formatting operation. However, there is no point in proceeding with data deletion until other methods have been tried. And the most direct of them is to find out: perhaps your account simply does not have enough rights to carry out basic operations. So…
open the Security tab (if it is not there, the system is not able to recognize the file system of the volume/disk) and check the name of the account that has been assigned rights to work with the partition:
In this case, Windows did not even recognize the account name. This may indicate that the disk “appeared” after reinstalling Windows (which the user simply cannot help but know about) or moving from another system. Or we are talking about the result of a hacker attack on the system, one of the options is to create an account with a certain set of rights to access certain sections of the system. Let's fix this...
- …by clicking Edit…, selecting (optional) Remove Unknown Entry and clicking Add…
- in the User Selection window, start typing your account name as it appears on the welcome screen
- Click Check names..., after which the official name of your account will appear. We agree (OK) and Apply at the exit. Don't forget to check if all the checkboxes in the Permissions window are checked:
Often the fundamental window (if the above procedure is not enough) is the delegation of rights in this window:
In the Select “User” or “Group” window, simply start entering your account name, click Check Names and click OK.
Don't forget to indicate that you need rights to all subfolders and files inside containers (button 5). The transfer of rights will begin online in the form of a window where you will see alternating names of files and folders of the contents of the volume (if they were there). At the end of the operation, everything (or almost everything)…
files and, importantly, the entire disk will be available for operations. Sometimes such an operation should be carried out first for the Administrator account, and then for a specific account
Sometimes such an operation should be carried out first for the Administrator account, and then for a specific account.
Method number 2. Command line
The command line, being a universal tool, allows you to customize your computer completely, activate hidden processes or disable unnecessary ones. In particular, to get rid of the error described above, the computer owner will need:
Upon completion, the user will see a message indicating the operation was successful. Now he, knowing how to fix the error, will again be able to delete, move or copy important documents and directories.
If you couldn’t restore access the first time, it’s not a problem. First of all, you need to make sure that the command line is running as an administrator, and then try again. Sometimes restarting the PC helps solve the problem.
Fixing error 0x80070035
There are quite a few reasons that cause such failures. This may include denying access to the disk in security settings, lack of necessary protocols and/or clients, disabling some components when updating the OS, and so on. Since it is almost impossible to determine exactly what caused the error, you will have to follow each of the instructions below in turn.
Method 1: Opening access
The first thing you need to do is check your network resource access settings. These steps must be performed on the computer where the disk or folder is physically located. This is done simply:
- Right-click on the disk or folder during interaction with which an error occurred, and go to properties.
- Go to the “Access” tab and click the “Advanced settings” button.
- Check the box shown in the screenshot and put a letter in the “Shared resource name” field: the drive will be displayed on the network under this name. Click “Apply” and close all windows.
Method 2: Change usernames
Cyrillic names of network participants can lead to various errors when accessing shared resources. The solution cannot be called simple: all users with such names need to change them to Latin ones.
Method 3: Reset network settings
Incorrect network settings inevitably lead to difficulties in disk sharing. In order to reset the settings, you must perform the following steps on all computers on the network:
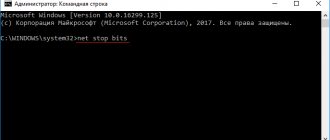
Launch "Command Line"
This must be done as an administrator, otherwise nothing will work. Read more: Calling the “Command Prompt” in Windows 7
Enter the command to clear the DNS cache and press ENTER.
We “unbind” from DHCP by running the following command.
Please note that in your case the console may give a different result, but this command will usually run without errors. The reset will be carried out for an active local network connection.
We update the network and get a new address with the command
Reboot all computers.
Method 4: Adding a Protocol
- Click on the network icon in the system tray and go to network management.
- Let's move on to setting the adapter parameters.
- Right-click on your connection and go to its properties.
- On the “Network” tab, click the “Install” button.
- In the window that opens, select the “Protocol” item and click “Add”.
- Next, select “Reliable Multicast Protocol” (this is the RMP multicast protocol) and click OK.
- Close all settings windows and restart the computer. We perform the same actions on all machines on the network.
Method 5: Disable the protocol
The enabled IPv6 protocol in the network connection settings may be to blame for our problems. In the properties (see above), on the “Network” tab, uncheck the corresponding box and reboot.
Method 6: Configure Local Security Policy
“Local Security Policy” is present only in the editions of Windows 7 Ultimate and Enterprise, as well as in some builds of Professional. You can find it in the “Administration” section of the “Control Panel”.
- We launch the equipment by double-clicking on its name.
- Expand the “Local Policies” folder and select “Security Settings”. On the left we look for the network manager authentication policy and open its properties by double-clicking.
- In the drop-down list, select the item whose name includes session security and click “Apply”.
- Reboot the PC and check the availability of network resources.
Conclusion
As it becomes clear from everything read above, eliminating error 0x80070035 is quite simple. In most cases, one of the methods helps, but sometimes a set of measures is required. That is why we advise you to perform all operations in the order in which they are located in this material.
Describe what didn't work for you. Our specialists will try to answer as quickly as possible.
What to do if the shared folder is not available in Windows 10?
- Check for folder sharing settings on your computer.
- Enable network discovery
- Check your computer's credentials
- Enable all network services
- Run the Shared Folder Troubleshooter
Check for folder sharing settings on your PC
If you can't access a shared folder on Windows 10, the first thing to do is check your system to make sure your file sharing settings are accessible. Typically this setting is built into Windows; thus it is usually present.
To perform this check, follow the instructions below:
- Open the Start menu and click Settings.
- Select Network and Internet.
- Under Network and Internet, select Network and Sharing Center.
- Now click Change adapter settings.
- Find your network connection, right-click on it and select Properties.
- Go to the This connection uses the following area, and then find File and Printer Sharing for Microsoft Networks.
- If an option is available, simply check the box next to it; otherwise, continue.
- Click Install.
- After that click OK.
- Exit the window and restart your computer.
If the problem persists, you can try the following fix.
Enable network discovery
In case you are unable to access the shared folder on Windows 10, it is recommended to check whether your computer's network is discoverable by other computers. To set up network discovery in Windows 10, follow these simple steps:
- Open Application Settings.
- Select Network and Internet.
- In the left pane, select Wi-Fi or Ethernet (depending on your connection type).
- From the Related Settings menu, click Change advanced sharing settings.
- Under Advanced settings, check whether the Make this PC discoverable option is turned on (On). If it is not enabled (Off), simply enable it by switching the button to On.
- Then click Save Changes.
If the problem persists after detecting your PC, there is obviously another factor at play. So you can try the following solution.
Check your PC credentials
If you can't access a shared folder on your computer, you may have credential issues. However, this can be fixed by following these steps:
- Open the Start menu and search for Control Panel.
- Select Control Panel.
- Go to the User Accounts page and click on it.
- Under User Accounts, find and select Credential Manager.
- Find and click Windows Credentials.
- Select Add Windows Credentials.
- Add other important details such as administrator username, password, and host computer IP address.
- Save your changes by clicking OK.
If the problem persists after startup, try the next solution.
4.Enable all network services
If you are unable to access the shared folder on your PC, make sure that you have enabled all relevant network services on your PC. Below is a list of relevant services that must be enabled and running automatically for file sharing to work:
- IPv6
- SSDP detection
- Publication
- Feature Discovery Provider
- DNS client
- Peer group
- Host
- Function detection result
- UPnP device host
- Homegroup Provider
- Home band listener.
If the problem persists, you can try the next solution.
Run the Shared Folder Troubleshooter
Windows 10 has a dedicated troubleshooter specifically designed to fix errors like this one. If you still can't access shared folders, running the troubleshooter may help. You can do this by following these steps:
- Go to Settings. Find and click Update & Security.
- Select Troubleshoot > Shared Folders.
- Follow the onscreen instructions to complete the process.
- Exit the program and restart your computer.
So, here are some solutions that can help you fix Windows 10 not having access to shared folder. Feel free to let us know in the comments section if these solutions helped you resolve the issue.
Method number 3. Special programs
One of the best applications for restoring access rights to files and directories, regardless of where they are located on the hard drive, is TakeOwnershipEx. The program is distributed free of charge. You can download it using the button below.
[Download not found]
Now, in order to complete the solution to the problem and be able to view or delete data, the user will need to:
In a similar way, you can return rights lost for some reason:
To resolve the “Access Denied” error, you can use Windows Explorer or the command line. In the first case, you need to select or add your account, in the second, enter a simple request. The best third-party app for reclaiming rights is TakeOwnershipEx. With its help, you can regain access to a directory or file in just a few seconds.
Source
Moving applications on a smartphone using the App 2 SD program
If the first method does not help, then the best solution is to download and try to move applications to the SD card via App 2 SD.
Operation Guide:
- The first step is to download and install the application from Google Play.
- In the store, enter the name “AppMgr 3 App 2 SD” without quotes.
- Launch the utility from the store or via a shortcut on your desktop.
- Make sure the Movable tab is selected on the left.
Select the desired application from the list and click on it, a new context menu will appear.
- In the settings menu that opens, select “Move application”, as indicated by the arrow in the figure above.
- Next, select a location to move, check the “Allow accessibility features” box, and click on the “Play” button.
In the new window that appears, agree and click “Yes”
After these steps, the application will begin moving to the SD card.
All! Your selected application is now on the device's memory card. You can do this with all applications that are allowed to be moved in the “Roamable” menu
Important: for the latest versions of Android, moving any elements in the application is prohibited.
Pros of App 2SD:
- intuitive interface;
- Russian localization;
Minuses:
- has recently become a paid utility;
- not supported on the latest versions of Android and most Xiaomi models.
Method 1: Change owner
The first solution to the problem in question is to change the owner of the directory.
- Open the location of the problematic directory. Select it, right-click and select “Properties” from the context menu.
In advanced security properties, find the line “Owner” and click “Edit”.
In the next window, type the name of your account in the block marked in the image and click “Check names”.
The account will be found and added. Click "OK" and proceed to the next step.
When you return to the Advanced Properties window, you should o and "Replace all permission entries of the child object with those inherited from this object" so that you do not have problems opening and editing files in the target folder. Use the "Apply" button.
A warning will appear, click “Yes” on it.
Make sure that your account is now listed as the owner, then click on the “OK” button.
This option helps in most cases.
The symptoms are similar, but Windows no longer boots...
If you are faced with the system not booting at all, in some situations only removing the disk can help you. In this case, I would advise you:
- turn off the computer and disconnect the disk physically using a cable: power or data; The disk itself does not need to be removed.
- turn on Windows before the Desktop appears, so that the system loses the already broken indexing settings, forgetting about the “faulty” disk
- turn off the computer and reconnect the drive to power
- After waiting for Windows to load, repeat the procedure described in the middle of the article.
If the instructions above did not help, connecting the disk to a working system as an external one will help. In this case, you won’t have to disassemble someone else’s computer or laptop. All you need is an inexpensive SATA-USB adapter cable. In this case, the described procedure for reassigning rights will have to be carried out on several computers. However, all information on the disk will remain safe and sound. Just take your time.
Good luck.
Location inaccessible, access denied when opening flash drive - how to fix
05/09/2019 windows
If, when you connect any flash drive or external hard drive via USB and try to open its contents (this article discusses exactly this situation, if this happens with one specific drive, the problem may be different) you see the error message “The location is not available, there is no access to disk, access is denied", the reason in most cases is the security policies of Windows 10, 8.1 or Windows 7, which restrict access to flash drives and other removable USB drives: sometimes this is the result of actions of the system administrator (if we are talking about an organization), sometimes - own experiments with the system or even the operation of malware.
This guide tells you what to do if, when you try to open a flash drive or other storage device in Windows, you see a message saying that your access is denied and the location is unavailable.
A mandatory requirement for you to be able to complete the steps below is to have administrator rights on the system; without them, this will not be possible.
If, on the contrary, you need to restrict access to USB drives, more on that here: How to prohibit the use of flash drives and other USB drives in Windows.
Enabling access to flash drives and other USB drives in the Local Group Policy Editor
If you have Windows 10, 8.1, or Windows 7 Professional, Enterprise, or Ultimate installed on your computer, you can use the Local Group Policy Editor to fix the problem. For home edition, proceed to the next method.
The steps to fix “Location Unavailable” for USB drives will be as follows:
- Press the Win+R keys on your keyboard, type gpedit.msc and press Enter. The Local Group Policy Editor will open.
- Go to Computer Configuration - Administrative Templates - System - Removable Storage Access.
- On the right side of the editor window, look to see if there are any policies that show “Enabled” in the “Status” column.
- If any are present, double-click on them and set them to “Not configured” or “Disabled”. Apply the settings.
- Repeat steps 2-4 in the similar subsection in “User Configuration”.
As a rule, a reboot after these steps is not required: the changes take effect immediately, but the drive will need to be removed and reconnected to the computer or laptop after completing the settings.
Unblocking access to removable drives using Registry Editor
If you have a home edition of Windows installed on your computer, you can access the flash drive by unlocking it in the Registry Editor:
- Press the Win+R keys on your keyboard, type regedit and press Enter.
- In the Registry Editor that opens, go to HKEY_LOCAL_MACHINE\SOFTWARE\Policies\Microsoft\Windows\
- Check if there is a subsection (folders on the left) named RemovableStorageDevices. If it is there, right-click on it and select “Delete”.
- Repeat steps 2-3 under HKEY_CURRENT_USER\SOFTWARE\Policies\Microsoft\Windows\
A reboot after these steps is usually not required, but the flash drive (or external hard drive) will need to be disconnected and then reconnected to access it.
Method number 1. Windows Explorer
A user who does not want to download and install third-party software products can remove the error message using the capabilities of Explorer. To regain access or be able to delete a file, just:
By clicking on the “Apply” and “OK” , the user must check whether he was able to remove the “Access Denied” error. As a rule, the listed measures are enough to regain your rights. If nothing works, you need to move on to the next method.
How to fix local drive “D: is inaccessible. Access denied"
So let's see what we can do to restore access to the drive. If this error occurs on your PC, Windows 10 cannot display the current owner of the drive and displays a blank Security tab (no user groups are shown).
Well, let's move on to fixing the problem.
First, you must log in to a user account with administrator rights. Then do the following:
- Right-click the drive or folder and select Properties.
- Go to the Security tab.
- Click Advanced.
- Now you will see “Unable to display current owner.” Click Edit.
- By default, Windows adds 4 user groups to the Security tab: Authenticated Users, Administrators, Users, and System. If you add only Administrators and System, you will not be able to access the disk normally or even read its properties such as used and free space, even from accounts that are members of the Administrators group, except for the built-in Administrator user.
Why you shouldn't add everyone
There are several forum posts online that suggest resolving the "Access Denied" error by adding "Everyone" to your drive's permissions.
We don't recommend that you do this because it will actually allow everyone, including guests (unauthorized users), to access your drive. In some cases, this can get you into trouble.
So, we advise adding only those objects (groups and/or users) that we talked about above.
We hope this guide helped you stop your Windows 10 from telling you: “Drive D: Unavailable, Access Denied.”
Once the error is fixed, you can access your data on the same volume located on the HDD or SSD and view information about its free and used space.
Let us know if the solution worked for you, and don't hesitate to ask questions if anything is unclear.
Source
How to choose the right archiver?
There is a decent amount of software of this type on the Internet. For the most part, such programs are of the shareware type. For example, WinRar. This is a very convenient and functional archiver, but it offers you to buy a paid version, but at the same time continues to function. Some of its options are blocked, but few people use these functions. Its main task is to pack/unpack zip, rar, 7-zip archives. In addition to these archives, there are other types that are quite rare. To reveal them, other programs are needed.