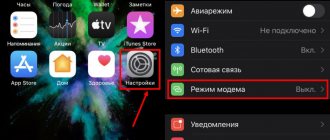
A Virtual Private Network (VPN) provides privacy and anonymity by creating a private network from connecting to the Internet in public places. VPNs mask your IP address so your online activities are virtually untraceable. Most importantly, VPN services establish secure and encrypted connections to provide greater privacy than even a secure Wi-Fi hotspot.
Options for setting up a VPN on an iPhone or iPad.
Briefly about VPN
In order to understand what a VPN is on an iPhone, you need to download and understand the meaning of the term VPN itself. This term is an abbreviation for Virtual Private Network, which can be translated into Russian as a virtual private network. Such networks are used in cases where it is impossible or not rational to organize a real, physically existing network. Virtual networks transfer data over existing networks, most often the Internet. At the same time, thanks to encryption, all transmitted information remains reliably protected, regardless of the reliability of the network on top of which the virtual network operates.
A typical example of using a virtual network is a corporate network that unites several regional branches of a company into one common computer network. When building such a network, it does not matter how far the company's branches are located from each other, since the data will still be transmitted via the Internet.
Also, virtual networks can be used to solve other problems. For example, some Internet service providers use VPN to connect users to the Internet. But ordinary users most often use VPN when they need to ensure the security of their Internet connection or bypass blocked access to websites. This is the VPN usage scenario that is most often used on the iPhone and other mobile phones.
How to enable VPN on iPhone
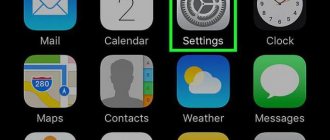
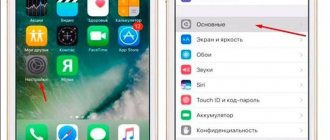
In order to enable VPN on iPhone, you must first configure it. To do this, open your iPhone settings and go to the “General - VPN” section.
In this section, you need to use the “Add VPN configuration” option.
After this, a large window will appear with the VPN connection settings. Here you need to correctly specify the connection type, server address, and also enter the correct access data. You can find out detailed information about the settings that need to be used here from the support of your VPN service. After making all the settings, you need to save the connection to the VPN using the “Finish” button.
After setting up your VPN connection, return to the main iPhone Settings screen. A VPN toggle should appear here next to Wi-Fi and Bluetooth.
Turn this VPN switch to the On position and your iPhone will automatically connect to the VPN network.
It should also be noted that many VPN services have their own applications that make connecting to a VPN much easier. In this case, you just need to launch the application on your iPhone and click on the “Connect” button.
Settings
A simple solution is to connect certain programs. Download them from the Internet. But these applications are not always of high quality. Some utilities only allow you to be on a virtual network for a few minutes, the connection is constantly lost, and the amount of data received is limited.
There is another way to enable VPN: connecting to the VPN Gate relay service on your iPhone or iPad using an L2TP/IPsec VPN client. It is complex, but guarantees ease of use. The function is initially installed in the iOS operating system. Supported by iPhones of all versions.
Another interesting article for you: How to download books to iPhone: via the Internet, via iTunes
The first stage is preliminary setup. The execution algorithm is as follows:
- Click on the “Settings” icon.
- Select "General" and go to the VPN option.
- Define "Add new VPN configuration".
- A settings page will open where you need to fill in the empty fields.
Information for filling out this form can be found on the Internet. However, it’s easier to go to the App Store and search for applications using the “VPN” key. These applications help you create a working VPN configuration in the iPhone settings in one click.
Let's look at how this works using the example of one of the applications:
We go into the application and allow us to create a configuration on our device:
As a result, the VPN turns on automatically:
Another interesting article for you: How to distribute Internet from iPhone to other devices
As a rule, such programs provide free access to servers under limited conditions (slow loading, limited operating time, etc.) and offer a paid subscription for access to high-quality servers. The price range is as follows:
Fees for access to VPN servers
Standard method
Apple mobile devices have a built-in ability to enable VPN with manual settings.
Note! The method is suitable for a local network if there is a system administrator or when the VPN configuration data is known.
- Open in “Settings” → “General”.
- Select "VPN".
- Click "Add VPN configuration...".
- Specify the type of network to be created → fill in the required fields → “Done”.
- Return to the previous menu → turn on the “Status” toggle switch to activate the connection.
In the future, you can manage the created network through the basic settings using the appropriate toggle switch.
Using the app
Using the provider's program from the Apple Store is an alternative option for enabling VPN.
Note! This example uses the Hide.Me application.
- Create an account on Hide.Me.
- Launch the program → “Log in to your account.”
- Fill in the “Username” and “Password” fields with the information used during registration.
- Click "Enable Protection".
This will automatically enable and configure the virtual private network.
Note! There are many free VPN services available in the app store.
How to disable VPN on iPhone
If you enabled VPN on your iPhone using the settings, then to disable it, just go to the settings again and click on the VPN switch. However, it is not necessary to delete the created connection.
If you connected to the VPN using an application, then you need to disconnect through it. In this case, disabling through the settings will not work.
Instructions for setting up PPTPVPN for iOS
To set up PPTP VPN on iPad and iPhone, follow these steps:
- Go to Settings on your iPad.
- Click "General" on the left and then click "VPN" on the right side of the screen.
- Click "Add VPN Configuration...".
- Click Type.
- Click "PPTP".
- Set up the fields as follows.
Description: Enter a name for the connection so you remember which connection you are using. We recommend using CactusVPN.
In the Server field, enter the IP address of the CactusVPN server. Now your PPTP VPN on iPad connection is created and you can start using it.
VPN services for iPhone
As you may have noticed, VPN is very easy to enable. On an iPhone, all you have to do is add a new configuration and turn on the switch in the main settings menu. But the question may arise, where can I get the parameters that need to be specified when creating the configuration?
To do this, you need to select a VPN service, register on its website and pay for the service according to the tariffs. After payment, the service will give you detailed instructions for setting up your devices; server addresses will be indicated there, as well as a login and password, which must be specified when creating the configuration in the iPhone settings.
Typically, such services are paid monthly, but if you pay for a year in advance, you can save significantly. A trial period is also sometimes available, during which you can test the service without paying for the service.
Below we will look at several proven services that provide a stable connection and high Internet speed.
HideMy.name is a simple and affordable VPN service with a fast and stable connection. The main advantage of this service is its affordable price.
The monthly tariff here costs only 470 rubles . But, if you pay for the service for six months, the price will be 250 rubles , and if you pay for a year in advance - only 190 rubles . Refunds are possible (within 30 days).
At the same time, the service offers an extensive network of servers that are distributed throughout the world. There are servers in North America, Europe and Asia. Internet speed is 70 Mbit/s or higher, the connection is stable. There is an application for iPhone that allows you to connect in one click, without setting up any configuration. Go >>>
NordVPN is a popular Western VPN service with a large number of servers and high speed. NordVPN's specialty is its emphasis on security; it uses only the most secure connection methods and does not keep any logs. The service also reliably protects against leaks of IP addresses and DNS requests. Connection setup can be done through the application. The cost of a monthly subscription here is almost $12, but if you pay for the service for a year or more, the price will be noticeably lower. Refunds are possible (within 30 days). Go >>>
Source
TunnelBear - no device registration
Another popular VPN service, which is somewhat more modest. Its servers are located in more than 20 countries around the world, supporting simultaneous operation of up to five devices. However, none of the devices, according to the developers, are registered in the system. After downloading the application, you will be asked to install a TunnelBear profile, and after that you can use the utility to your heart's content. Simply select the country whose server you want to use and connect to it.
500 MB are given free every month
The service provides 500 MB free of charge for traveling on the Internet every month, which is not enough for me personally. For an additional fee, you can expand the number of gigabytes available for surfing the Internet, but the service will cost a little more than its competitors.
Pros:
Minuses:
How VPN works
Virtual private network (VPN) technology is becoming more widespread every year. This is due to increased control of user actions by government organizations and copyright holders. The technology became widespread among the general public after Internet providers began massively blocking websites by court decision and at the request of copyright holders. According to the principle of operation, the technology is similar to the use of proxy servers, hiding the user’s real IP address and allowing you to connect to web pages through servers located in other countries, bypassing any blocking. Unlike a proxy server, the connection is securely encrypted and all logs are deleted, which makes it impossible to track user actions on the network.
How to change VPN connection on iPhone or iPad
By setting up a VPN connection, it becomes possible to watch broadcasts and videos from services such as Youtube, Twitch, Netflix from countries where they are prohibited. Anyone can master the technology - no special knowledge in the field of IT is required.
There are two ways to connect to a VPN network on iPhone:
1. Using the iOS operating system. 2. Using third-party free applications from the AppStore
Setting up a VPN for an iOS phone
To connect to a virtual server, you must first obtain the server settings and authorization data. To do this, you can use any search engine and find a free server or sign up for a paid subscription.
By purchasing a paid subscription, the user receives a dedicated server, 24/7 support and low response time. On a free server, there may be problems with connection speed and stability, and choosing an IP address for a specific country is not always possible.
Getting virtual network settings
To connect to a virtual network, you will need the following information:
After receiving the settings, you can proceed directly to creating a VPN connection on your iPhone.
Creating a VPN connection on an iPhone or iPad
To set up a VPN connection, you must: 1. Go to settings 2. Touch the “General” section 3. Touch the “VPN” menu
4. Add a VPN configuration 5. Select a type in accordance with the settings received
6. Enter the received settings, login, password (or use a certificate) 7. If using a proxy server, you should add it by tapping the corresponding item “Manual” or “Auto” 8. Tap “Done”
9. The created connection will be displayed on the VPN screen. 10. You can enable it using the switch in the “VPN Configurations” section. Disconnecting from the server occurs in the same way.
How to set up a VPN on iPhone using free apps from the AppStore
If the user does not have server settings, and cannot find them on his own, applications from the AppStore will solve this problem. Virtually no action is required from the user other than pressing the connect button. Some applications have the ability to select a virtual server from a specific country, with a specific IP address, or with the shortest response time (ping).
Most programs are completely free, but have some limitations. One of the disadvantages of free versions is the large number of advertisements in the application.
How to set up your own free virtual network
Programs like Open VPN make it easy to create your own dedicated network using your home PC and connect to it from your smartphone. This solution will be useful for those who care about the security of their data - traffic encryption can be easily configured on a home PC, and such a network will have only one user. You can also easily unite friends or colleagues through such a network and be sure that the information is reliably protected.
The most popular free programs for connecting VPN on iPhone and iPad:
TunnelBear
Benefits:
Up to 2GB of traffic per month is provided for free. This is quite enough to occasionally check your email or make online payments without worrying about your credit card details.
Windscribe
Advantages:
HideMe
Advantages:
Built-in browser capabilities
Some browsers have built-in VPN support. Among these applications:
The undoubted advantages of this method are the absence of traffic restrictions, advertising and complex settings.
How to choose the best way to change VPN on iPhone
In order to choose which service is best for the user, you need to determine the tasks that need to be solved with its help. If you need one-time access to blocked sites or to make online purchases, you should look towards simple free applications like TunnelBear. An encrypted connection is established with the click of just one button. If you need daily access to the network via VPN technology, the best solution would be to sign up for a paid subscription to applications from the AppStore or rent a dedicated server. The user's costs in this case can range from three to fifty dollars per month, depending on the volume and type of traffic, the number of servers and devices.
VPN on iPhone when using public Wi-Fi networks
When using public Wi-Fi networks, you should always remember to secure the connection and not enter passwords for your email and accounts.
Without using a secure connection, you should never make online purchases. There are virtual networks for such tasks. Source
Browser with VPN for iOS
A free VPN for iOS can be downloaded from the AppStore. Popular ones include Aloha Browser, a free package that focuses on user privacy and security.
The list of services includes:
- Ad Block – helps you block ads and quickly browse websites.
- Free and unlimited GNP.
- VR player – you can enjoy virtual reality right in your browser.
- Background playback – music tracks can be listened to with the display turned off or while using other utilities.
- Media player – built-in player allows you to listen to music and watch videos, provides support for various formats.
- Saving – all information passing through the functionality is compressed, which ensures low mobile traffic costs.
The list of positive qualities includes privacy, security, anonymity and a QR code scanner. The developers also offer a premium version of the utility, which allows you to get additional features:
- selecting a country – it is indicated as the user’s address;
- automatic connection when logging into the browser;
- support for ZIP format archives;
- the ability to use the utility in other utilities;
- additional design themes.
Monthly subscription costs $2.99* and annual subscription costs $24.99 (local currency varies depending on location). Payment is made through iTunes, the subscription will automatically renew until you cancel the service.
Aloha browser
What is a VPN and why is it needed?
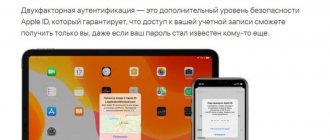
A VPN, or virtual private network, is a reliable way to protect the data you transmit over the Internet. Technically, a VPN is a separate encrypted channel within a common global network. When you connect to the Internet through a virtual network, you use the same sites and applications, but as if on top of the connection provided by your provider. This means that a VPN requires a working Internet to function.
After connecting a virtual network on your device, all data that you transfer will first pass through a secure channel to the VPN server, and from there it will go out to the open Internet. This way, neither your ISP nor attackers will be able to see which pages you visit, and your data, such as passwords, will be reliably protected from theft.
There is another undeniable advantage of using a virtual private network, which has become especially important in recent months, when Google services and many other sites have been accidentally blocked by government agencies in pursuit of lawbreakers. Using a VPN, you can use your usual resources without interruptions.
Surfshark - encrypts data at a bank level
An advanced VPN service that allows you to connect to both physical and virtual servers. Surfshark features bank-grade encryption and private DNS. The application uses an encryption algorithm with 256-bit AES keys. There is also a P2P mode that provides optimal speed and performance for related activities.
Good VPN and increased security
Looking ahead, I will say that we ultimately settled on this application. The CleanWeb mode, which blocks advertising, website tracking and malware, played a role. But the main thing is that you can enable connection blocking if there is no VPN connection, that is, you can guarantee that the connection will always be protected.
Pros:
Minuses:
Setting up a VPN using apps
The same thing can be done even easier by using the free Betternet app. This is the easiest way to set up a VPN on Apple devices. After installing it and launching it, you will find only two buttons: Connect and Disconnect.
With a single tap on the screen you can start a connection via VPN or disconnect it and start using the Internet directly. Many people wonder why it's free. If in the case of manual setup we are talking about an academic project, then Betternet can be helped by installing free applications from partners from the App Store.
The idea that encryption is only necessary for hackers and attackers is completely wrong. Confidentiality of data transmitted via the Internet has long become the norm and necessity, because information is expensive and privacy is inviolable.
Source
Connecting to OpenVPN
Although Apple hasn't directly added OpenVPN support to iOS. Like Android, iOS supports third-party applications to implement and operate VPN. This means that you can connect absolutely any type of VPN from your iPhone or iPad, as long as the app has a third-party app that can connect to it.
In the case of OpenVPN, there is an official OpenVPN Connect app that you can install. Install the application, launch it and use it to connect to the OpenVPN VPN.
To set up a VPN server in the OpenVPN Connect app, you will have to import a profile - this is an .ovpn file. If you want to do it manually, you can connect your iPhone or iPad to your computer, open iTunes and select the connected device. In the Applications section, you will be able to copy the .ovpn file and its associated certificate and key files into the OpenVPN application. you can connect to VPN from the app.
The OpenVPN Connect app and similar apps are not "just an app" that you use. They provide a system-level VPN connection, so all apps on your device will connect through the VPN - just like VPN connections you connect to normally from the built-in Settings app.
This is for the home user. Large organizations centrally managing iPhone or iPad deployments will want to avoid configuring each device and specify a VPN server through configuration profiles or a mobile device management server. Provide a configuration profile file with all the VPN settings specified in it, and users can download and install this configuration profile to instantly get the appropriate VPN settings configured on their devices.
VPN on iPhone - protect your data online
VPN (virtual private network or “virtual private network”) is a kind of private encrypted tunnel that the user can configure over the “regular” Internet. Recently, this type of connection has become increasingly popular. Let's look at how to create a VPN on iPhone using internal settings or third-party applications.
Pros and cons of connecting to a VPN
It’s not for nothing that connecting using a VPN has become widespread in Russia and abroad. The user receives an encrypted channel at his disposal, and this provides additional data security and anonymity on the Internet. VPN can provide additional protection for your passwords and payment card data. An important factor is access to blocked sites. If any resource has been blocked by Roskomnadzor, then by setting up a VPN, you can access it absolutely legally. Here is a partial list of features that a VPN offers:
True, this technology also has a number of disadvantages, among which the largest is the reduced connection speed. The more complex the encryption, the slower the data is transferred. However, this parameter varies among different VPN services. However, do not forget that a fast connection is synonymous with weak encryption. If a service offers you the maximum data transfer speed, then most likely it is not capable of reliably protecting your personal data. But it is great for gaining access to blocked resources.
Most services with truly strong encryption are generally paid. On the other hand, VPN is a relatively cheap way to protect data, which does not even require the purchase of special equipment.
How to set up a VPN on iOS
You can set up a VPN connection not only on a computer, but also on mobile devices running iOS: iPhone and iPad. Moreover, setting up on a tablet is no different from a similar procedure on a smartphone.
Setup without third-party applications
iOS offers the user the option to manually set the VPN configuration. To do this you need:
The location of these VPN settings varies between versions of iOS
You will see a window with several lines of settings
L2TP is great for connecting iOS devices
There are hundreds of free VPN servers on the site
Password and login are set by server owners
The closer the physical location of the server, the faster the connection will occur.
Due to the fact that VPNGate offers free servers from enthusiasts, you can’t count on high connection quality. Moreover, sometimes the setup with the first IP that comes across does not work - perhaps the server administrator has already restricted access to it or changed the login and password for logging in. If you don't succeed the first time, just try another server from the resource.
Using third party applications
Applications from third-party developers provide a simpler, faster and more stable connection. If you don’t want to go through the hassle of manual configuration, then try downloading a similar utility to the AppStore.
TunnelBear
TunnelBear is one of the best VPN connection setup apps available in the AppStore.
The application has high ratings and excellent reviews
When you first open the application, you will have to register. "Bear" does not support login through Google, Facebook and other services - you will have to enter your e-mail and come up with a separate password for the application. After this, the developers will send you an email confirmation. However, there is one small catch with this... To successfully verify your email, you need to already have a device with a VPN connected - for example, a computer or another smartphone. The fact is that the “bear” server is blocked, and access to it can only be obtained through such a tunnel connection.
If you manage to confirm your email, then TunnelBear will let you through. If not, he will growl and tell you to check your incoming emails again.
Immediately after the first successful download, the “bear” will offer you a short training
The interface is a world map on which you can see the location of the bear. Enabling VPN is done by simply touching the switch at the top of the screen. At the bottom you can configure the physical location of the server. If you change the country, the virtual bear will growl and dig a tunnel across half the planet. Looks funny.
In all countries where you can connect, you will see pipes sticking out of the ground - a bit like Mario
A convenient feature is constant monitoring of the remaining traffic. At the bottom of the screen, the app indicates how much data is left for the month. In the free version, 500MB is available monthly. You can use unlimited VPN from Mishka for 699 rubles per month. In this case, you can connect up to 5 devices - for example, use it with the whole family.
You can subscribe for either a month or a year
Betternet
One of the best free apps for setting up a VPN is Betternet. Immediately after the first launch, the application will offer a trial version of a premium subscription for seven days. But we will refuse - we will immediately check the quality of the free connection. To select this option, tap Use free with ads on the last page of the tutorial.
To opt out of the trial version, you need to scroll down the window a little
Setting up a VPN through Betternet is amazingly simple - tap Install Profile, then Allow when a window pops up notifying the user that the app wants to access the VPN's configurations. Ready!
If you accidentally miss, it's okay - the application will prompt you to try again
The profile is installed automatically. When the VPN is connected, the character on the screen lights up blue. If you touch the Disconnect button, the connection will be interrupted and the picture will turn gray.
The application interface is not overloaded with details and looks very nice
The user can change the country by tapping Select Location. However, this feature is only available to premium subscribers. But for the average user it is not needed. A monthly subscription for a premium account costs a little more than that of a “bear” - 750 rubles. Betternet Premium also supports connecting up to five devices.
Unlike all other VPN services, free Betternet does not limit traffic, but connection speed. Therefore, you can sit in it as long as you like, but the speed of loading pages and data will be a C grade.
Windscribe VPN
Windscribe offers quite a lot of traffic when connected - 2 GB without specifying an e-mail during registration (for real indoor anonymous users) and 10 GB if you indicate your email.
The developers are very sensitive to user safety - even e-mail is optional
The application, like others, will request access to VPN configurations. Then it will set up the connection itself and even select the optimal location. Below you can see all available countries for connection. Many will open only after a premium subscription, but the basic minimum is also in the free version. It is very convenient that the connection quality is also displayed here - you can independently determine where it is better to connect.
You can change the location if you wish - this option is available both in the free version and in a paid subscription
As in TunnelBear, here we see a counter of the remaining traffic at the bottom. The cost of unlimited connection is the same as for the “bear” - 699 rubles per month. With a premium subscription, a static IP option is also available.
I was very pleased with the connection speed, especially compared to the free Betternet. True, I had to choose a different location than the application initially suggested. After changing the country to Germany, the Internet became almost as fast as without a VPN.
Speedify
The Speedify app can provide you with a really fast VPN connection. It connects you to several servers at the same time to kind of combine the connection speed. True, the application itself is somewhat complicated compared to all the previous ones considered.
Either the application has a lot of settings, or the design is not the simplest, but compared to other VPN applications, Speedify is not simple
Right after opening it for the first time, Speedify will connect you to the nearest server. This is a little pointless for those who want to use a VPN for anonymity and security on the Internet - for example, it calculated my location right away. It's kind of unpleasant. Let's try to change the country.
By touching the first line “Connected” we get to the server settings. Here you can select your country. The list is quite large, and the locations are sorted in descending order of connection quality. This is probably quite convenient.
The number of countries is not limited for the free version, unlike Windscribe
The free account offers 5 GB of traffic monthly. A premium Speedify subscription with unlimited data usage costs RUB 599 per month. The function of connecting five devices to one premium account is also available here.
You can buy a year of subscription at once - it will be half the price
One of the nice additions is the ability to add commands for Siri.
You can now ask Siri to connect to a VPN
It is worth noting that this application is the heaviest of all those reviewed. Sometimes when I open it, it freezes for 10-20 seconds, showing a white screen and a loading ring.
I don't have an old iPhone model, but the app still freezes