Do you want to transfer some photos, movies, books, music to iPad and iPhone from your computer and vice versa? We'll tell you how to do it easily!
Thanks to its portability and high-resolution display, the iPad is great for viewing photos, movies and reading books. If you need to transfer photos, videos, files, cartoons, games from your computer in order to watch a movie, cartoon, read a book, listen to music, play a game on the iPad.
In this article I will tell you about three ways to transfer a movie, photo, book (File) from iPad to computer.
How to Transfer Files to iPad from Computer Using iTunes
Step-by-step instructions to learn how to transfer a file from PC to iPad using iTunes:
1. To start the transfer process, you need to connect your iPad to your PC (laptop) using a USB cable. Select the iPad icon from the menu.
2. Add the desired file to the iTunes Library from your PC. Edit > Preferences.
In the main tab, all sources are listed, check the box for the desired type of file.
3. Check File Sync, which will force iTunes to sync with iPad. Here you can select the desired category into which you will transfer data from iPad to computer (laptop) or from computer (laptop) to iPad.
4. Once this is done, you need to click on “Apply or Sync” to complete the process and select all the files that you want to transfer from iPad to computer (computer to iPad).
Play file
- In the QuickTime Player app on your Mac, open a video or audio file.
- Move the pointer anywhere on the video to reveal playback controls. Controls for audio files are always visible.
Tip: Depending on the length of the file or how much time is left during playback, you can change the playback nature or reverse playback speed to 2x, 5x, 10x, 30x or 60x. Just keep pressing the forward or backward button until you play at your desired speed.
Note: Some media files display a time code—an 8-digit code (00-00-00-00)—in the playback control panel, instead of a 4-digit code showing the remaining time. Time shows the time source of information about a particular frame or recorded point, such as the time of the original recording, or the frame number. When editing a project, you can use timecode to jump to the exact location of the frame in the media file.
- Use the playback controls to play a video or audio file; You can drag controls to move them out of the path.
If your Mac has a touch screen, you can use the playback controls on the Touch Bar.
If you want the file you are playing to appear in front of all other windows on the screen, choose View > On Top so a check mark will appear next to it. Select it again to turn it off.
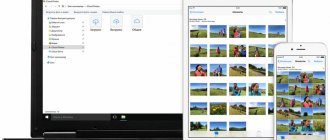
How to Transfer Data from iPad to Computer Using iCloud Drive
You can transfer from iPad to computer using iCloud Cloud Drive. The iCould drive is available for Windows 7/8/8.1/10 computers. If you want to use iCould on a Mac, it requires OS X or OS X Yosemite. Please note that iCloud only has 5GB of free storage.
1. First, you need to have a registered iCloud account. To get started, you must make sure that your operating system is Windows 7 or later. You can then download iCloud from Apple's website.
2. Open iCloud on your computer.
3. To share files with your iPad, you need to drag and drop the files into the iCloud Drive folder. Keep in mind that accounts are limited to 5GB.
[dzs_videogallery id=”kak-perenesti-s-ipad-na-kompyuter” db=”main”]
Transfer files from computer to iPad via email
This is the easiest way to transfer files to iPad or iPhone. Send an email, you don't even need to write a subject, just the address will be enough. Now send the desired files as attachments, open the mail on your iPhone or iPad and download the file from the letter. You can transfer photos, music, and other files, but you cannot send large files.
In the following steps we will show you how to transfer files via Mail. If you do not have two mails (for example, one mail in Yandex, the other in Mail.ru), you need to create a second one.
1. In the letter, click on the “Attach” button. Find and select the files you want to send. A small disadvantage of this method is that the limit is 30 megabytes, you can send small files (photos, music, documents).
2. Send a message to yourself.
3. Open it and simply download the attached files.
But the problems with this method are also obvious, there are many limitations: file size, network latency and other problems.
Part 3. How to Transfer Files from iPad to PC Using Your Email
The good thing about iPad to PC transfer using email is that you can save the transferred file in your email for backup. However, most email servers have limits on the file size of attachments, so using this method may be a good way if you need to transfer files from your iPad to PC.
Step 1 Find the file you want to transfer to iPad. For example, let's say you want to stream a video. The first thing you want to do is open the camera app.
Step 2 Click the select button in the top right corner and select a video. After that, click the share icon in the top left corner and select Mail from the pop-up menu.
Step 3 After listening to the Mail icon, you will enter next to Mail, enter your email address and click the Send button.
The iPad allows you not only to surf the Internet, download movies and music, but also to shoot videos or vivid photos from everyday life. This is convenient, because the gadget is always at hand.
But how advisable it is to store tons of accumulated data in the iPad’s memory is a controversial issue. Isn't it easier to periodically dump files onto your computer, freeing up megabytes for new information? For those interested, the article offers 7 instructions on how to transfer multimedia from iPad to computer and vice versa.
How to download a movie to iPad from computer using EaseUS MobiMover
MobiMover Free, software for transferring files from computer to iPhone and iPad. The program supports Windows 10/8.1/8/7, your iOS version must be higher than 8 (iOS 8, 9, 10...). You can use this software to transfer files easily. MobiMover not only supports iTunes function, but also supports file management on iPhone and iPad.
1. Download and install EaseUS MobiMover for free on your Windows PC. Then connect your iPhone/iPad to this computer. If your iPhone asks for permission, tap Trust on the screen.
2. Click the first button "Transfer to this device" in the user interface. This feature will help you transfer any data to iPhone and iPad easily.
3. Find the data and files you want to transfer from iPad to computer or vice versa. If the files are in different folders, please click "Add" to select other files on the computer, you can send music, movies, books, apps to iPad at the same time.
4. Click the Transfer button at the bottom of this window. The transfer process will be completed within a few seconds. Then check the files and data on your iPhone. When the process is completed, you can find all the files you selected successfully transferred to iPad.
Follow the above instructions, you can easily transfer files to iPad without iTunes. Also, EaseUS MobiMover can also help you backup text messages on iPhone. So if you just bought a new iPad and want to add files from your computer or back up your iPhone to protect them, just download and try MobiMover.
Interesting: Apple admitted that it artificially “slows down” older iPhone models and how to change fonts in iOS on an iPhone or iPad?
As a result
There are a lot of instructions offered in the article, but is there any point in trying them all to find your one and only one? It’s easier and better to immediately choose software suitable for transmitting specific content. The table below summarizes the functionality of each software and will help users decide.
| What can you transfer? | Which computer OS is it suitable for? | |
| iTunes | Music, movies, TV shows, podcasts, books, audiobooks, sounds, any content purchased from the Apple virtual store. | Latest version of macOS or version of Windows 7 or later |
| AirDrop | Photos, documents, bookmarks, contacts. | Only for Mac OS at least OS X 10.10 Yosemite |
| iCloud Drive | Files of any type up to 50 GB in size | Latest version of macOS or version of Windows 7 or later |
| Dropbox | Any files, including large ones. | For any version of Mac OS, Windows and Linux |
| EaseUS MobiMover | Audio: Music, Voice Memos, Ringtones, Audiobooks, Playlists; | Mac OS X 10.7 – Mac OS X 10/11, Mac OS 10.12-10.14, Windows 7-10 |
| Photos app data: Photos, Live Photos, videos, iCloud Photos, and Photo Stream. | ||
| Data from Video app: Movies, TV Shows, Music Videos, etc. | ||
| Miscellaneous: Contacts, Messages, Notes, Books, etc. | ||
| iMobie AnyTrans | Music, photos, videos, applications, books, contacts, sms and other data can be added to an iOS device in just two minutes and just as easily removed from there. | Works stably on all Windows and Mac operating systems |
How to transfer from iPad to computer - online drives
Many other cloud drives can be useful, such as Google Drive, Mail cloud and Yandex drive. Most of these cloud drives initially give you a couple of gigabys (8-15). So, this can be another good way to transfer files from computer to iPad. But this will be greatly influenced by the Internet network you use.
1. Upload files to a cloud drive on your computer.
2. Find this cloud drive app or open the website directly on iPad/iPhone.
3. Upload files from mobile devices.
After you read all the methods we have presented to transfer files to iPad from your PC or laptop, it is up to you to decide which method is best. If you need to transfer large files (from computer to iPad) or a large number of them, Google Drive may be a good solution, as it offers 15 GB of space.
[dzs_videogallery id=”kak-perenesti-s-ipad-na-kompyuter-windows” db=”main”]
How to Download Movies to iPad from Computer Using iMobie AnyTrans
1. Install AnyTrans on your computer, launch it and connect your iPad to your PC. Wait while AnyTrans downloads your iPad content. To quickly transfer iPad files to PC, click the Content To PC shortcut.
2. Select the files you want to transfer from iPad to personal computer, install the device on your computer and click the "Start Transfer" button. After this, the exported files will be saved in the “AnyTrans-Export-201X-XX-XX” folder.
Note. You can also transfer selected files from iPad to PC. Here we will take books on your iPad as an example. On the AnyTrans home page, click the "Books" button, select the books you want to transfer, and click the "to PC" button.
The note:
– With AnyTrans, you can transfer any file format you like from iPad to PC, even music, notes, calendar and videos that cannot be transferred to iTunes.
– This guide can also be used to send files to your computer from iPhone, iPod, and iPod touch.
[dzs_videogallery id=”kak-perenesti-s-ipad-na-kompyuter-skashivat” db=”main”]
Methods for mutual data exchange
iFunbox
It is a universal tool for managing iPad applications and files. It has a huge number of functions and does not have the limitations that iTunes has. You can download from the developer’s website: https://www.i-funbox.com/en_download.html. Here are some of its features:
- Installing iOS applications from custom and unsigned .ipa packages;
- Transfer media files: songs, videos, pictures and ringtones. It's incredibly easy to upload photos to your iPad. They can be copied by simply dragging and dropping;
- Data exploration in sandbox mode;
- Use iPad as a USB flash drive with fastest file transfer speeds;
- Full control of the iPad file system.
To share photos between your computer and tablet, follow these steps:
- Connect the tablet to the computer and launch the iFunbox program;
- Go to your device tab, select the “Export files” or “Import files” section;
- Click on the icon you need, for example, Photo Library or Camera;
- Select the required files;
- All files will be copied successfully.
Private Camera app
Photo gallery with improved security. Can be downloaded from the link https://itunes.apple.com/ru/app/castnoe-kamera-zapirat-vasi/id477970594?mt=8. Has access to camera functions. Allows you to edit albums, rename, change the cover. There is a group photo processing function.
Thanks to iCloud, your photos will be available on all devices simultaneously. The protection function allows you to set a password on a photo or on the entire gallery.
Cloud services
In principle, when fast Internet became very accessible, the use of cloud storage became very relevant. The iOS system already has a built-in iCloud cloud. The only downside is that sharing is only possible between Windows, iOS and Mac devices. If, for example, you want to copy data to an Android device, you will have to use another service.
A large number of them are available for free: Yandex.Disk, Google Drive, Microsoft OneDrive, Mail.ru Cloud and others. All you have to do is set up automatic uploading of new photos to the cloud. If, for example, if you do not want to waste mobile traffic, this can be done manually. Synchronized photos will be available on all devices simultaneously. You will not need to transfer files between all devices separately.
Transfer files to and from Mac using AirDrop
If you have a Mac, then you have access to an easy way to transfer files between your iPad and PC without the need for cables or cloud storage. AirDrop is designed specifically for file sharing, and it does it very well. Unfortunately, sometimes it can be a little difficult for a newbie.
1. On a Mac, open a new Finder window and navigate to the AirDrop folder. This will enable AirDrop and allow your Mac to transfer files to your iPad or iPhone or discover other devices.
2. To transfer a file to your iPad, simply drag it onto the iPad icon and into the AirDrop folder. To transfer a file from iPad to Mac, navigate to the file, click the Share button, and select the Mac icon under AirDrop.
3. Typically you need to be within a few meters to transfer files this way. You'll also need both Mac and iPad AirDrop to make it available to Contacts Only or Everyone contacts only.
[dzs_videogallery id=”kak-perenesti-s-ipad-na-kompyuter-peredat” db=”main”]
Directly through Windows Explorer
Connect your tablet to a USB port. The operating system must detect the external media.
- Open My Computer
- Find the "Portable Devices" section. Double click on "iPad".
- Go to Internal Storage - DCIM - 100APPLE. Your photos will be there.
There is another way to transport them.
- Right-click on the iPad icon in the My Computer folder and select Import. A window of the same name will open in the lower right part of the screen.
- Click on "Options". You can set the path to save the pictures. If o, then the files will be copied to the PC and erased from the tablet. Set your settings and click “OK”.
- In the "Tag these images" field, enter a keyword for the images. For example, “Birthday photo.”
All pictures and videos located on the iPad will be copied. After importing, you will have to delete unnecessary ones.
Copy files directly to computer from iPhone and iPad
If you have a Windows computer or are having trouble using a Mac's AirDrop feature, and I did say it might be from time to time - you can transfer files the old-fashioned way: with a cable. Or in this case, the lightning (or 30-pin) connector that came with the iPad.
To transfer files this way, you'll need a recent copy of iTunes on your PC. (If you don't have the latest version installed, you will be prompted to update to the latest version when you launch iTunes.)