The Windows 7 page file is a virtual memory component used to increase the size of RAM if there is not enough free space on RAM while the PC is running. This system tool is built into the Windows operating system for use on computers running it.
Some users are wondering whether a Windows 7 paging file is needed and whether it is worth using this tool on their computer. Let's figure it out.
Often the reason for a computer's slow operation is a lack of physical RAM, which has a certain limited amount. Any computer has a physical device installed - random access memory, called RAM (Random Access Memory) or RAM (Random Access Memory). Typically, the more RAM a PC has, the faster the computer runs.
During the operation of the PC, the necessary data of applications and system tools used during system operation are stored in RAM. After turning off the computer, the RAM is cleared of occupied data, because it is a temporary storage of information.
In case of insufficient RAM, there is a need to add sufficient space on the hard drive, which can be used by the RAM at certain times when working on the PC. This function is performed by the paging file - pagefile.sys, a special area located on the HDD disk.
If there is not enough physical memory, RAM uses the paging file, where some data that does not fit in RAM is mixed. Thanks to this, the operating system has enough resources to continue normal work on the PC. Otherwise, the computer would become very slow due to lack of memory.
As needed, Windows moves some data to the paging file when there is not enough free space on physical memory, or vice versa, for use by software. As a result, virtual memory: physical memory and page file ensures optimal PC performance in various situations, for example, when using resource-intensive programs.
Which Windows 7 paging file is created on a PC
By default, the Windows 7 operating system automatically creates a paging file of a certain size. The size of the Windows 7 paging file depends on various factors.
Typically, the size of pagefile.sys is set equal to the physical RAM available on the computer. For example, if your computer has 4 GB of RAM, then by default the page file has the same size.
In some situations, it is necessary to increase the Windows 7 page file by one and a half or two times. In other cases, the size of virtual memory needs to be reduced, and sometimes it is advisable to disable it.
To determine the optimal size of the Windows 7 paging file on a specific device, you need to experimentally make several changes to its size to achieve better system performance.
Using a paging file does not solve the problem of computer performance; for this, it is much more rational, if possible, to increase the physical amount of RAM, because it works much faster.
What is virtual memory
Before increasing the paging file in Windows 7, you need to understand what it is. To fully understand how this parameter works, you need to understand the basic terminology:
- Random Access Memory (also known as RAM) acts as a random access memory device. If you opened some program or application, then part of the data for this procedure is saved in the RAM. When reopening, the process is faster thanks to it. After turning off the computer it is completely cleared. The more RAM, the faster programs respond.
- Paging-file (aka swap-file) is a document on the hard drive called pagefile.sys, it is hidden by default. The Windows system uses it to store data and parts of programs that do not fit in RAM. If space is freed up, then information from the swap part will be placed in RAM and back.
- Virtual memory is the combined meaning of the previous two terms.
Where is the Windows 7 swap file located?
The file "pagefile.sys" is located on the computer's hard drive. The operating system places this file on the system partition, usually the Local drive “C:”.
Follow these steps:
- Go to the Start button menu and launch Control Panel.
- In the All Control Panel Items window (view type: small icons), click the System option.
- In the “View basic information about your computer” window, click on “Advanced system settings”.
- In the System Properties window, open the Advanced tab.
- In the "Performance" section, click on the "Options..." button.
- In the Performance Options window, open the Advanced tab.
- The "Virtual Memory" section shows the total size of the paging file on all drives on the computer.
Why might you need to change the size of the paging file?
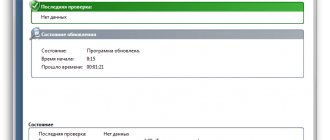
Although the size of this file is determined by the system itself, and by definition it is usually equal to the size of the RAM on the PC, the system may slow down from time to time when executing various scenarios, since there is not enough memory to carry them out. Usually in this case (when saving files and processes), there is a requirement to clear processes of unnecessary tasks and only then start saving the file. The mere appearance of such a notification is a clear signal that you should play with the paging file settings.
System warning
Attention! You don’t have to wait for notifications from the system to appear and change the file right away. Usually the need to clean up and play with the size of the paging file is clearly visible in the performance of the system
How to change the page file in Windows 7
Despite the fact that the operating system independently creates the paging file, the user has the ability to carry out some manipulations with the virtual memory of his PC.
The following changes to virtual memory are available in the OS settings:
- The paging file size can be changed at your discretion.
- The paging file can be moved to another partition of the hard drive.
- The page file can be disabled and removed from the Windows operating system.
The Virtual Memory window shows the current page file size, recommended size, and minimum page file size. With the default settings, the “Automatically select paging file size” option is activated. In the window, the computer disk on which the swap file is currently located is highlighted.
Changing the size, for example increasing the Windows 7 page file, occurs as follows:
- Uncheck "Automatically select paging file size" to unlock the ability to make changes.
- Activate the “Specify size:” item.
- Set the paging file size in the "Initial Size (MB)" and "Maximum Size (MB)" options.
- Click on the "Set" button.
- Click on the "OK" button.
- A window will open warning you that you must restart your computer for the changes to take effect.
- Restart your PC.
In a similar way, you can change the size of the Windows 7 paging file in order to reduce the size of virtual memory to the required values.
You may also be interested in:
- Comparison of Windows 7 versions: table
- Windows 7 support has ended: what to do
Creation
Let's move on to the main question: how to create a paging file in Windows 7, 10 and others. Let me make a reservation right away that to do this, in any version of Windows you need to go to the “System Properties” window, and this can be done in at least 5 ways:
- The simplest one is to simultaneously press the Win (floating window) and Pause Break buttons.
- Using the “Run” window, launched via Win+R or “Start”, into which we enter the command sysdm cpl.
- Right-click on the “My Computer” icon to open the menu and select (usually the bottom) “Properties”.
- The standard way is to go to the “Control Panel” the old fashioned way and find the “System” section there.
- Personal for Windows 10 – enter “performance” in the “Start” search bar and open the “Customize view and...” item that appears.
The next step is to go to the “Advanced” tab, display the parameters of the “Performance” section by pressing the corresponding button, move again to the same “Advanced” tab and, finally, start changing the settings of the “Virtual Memory” section, for which there is a special button under it "Change".
Windows
It is possible to create a swap file using the path outlined above in all editions of Windows (10, 8, 7 and even XP), so I will not discuss this point further. Let's move on directly to the creation process:
- We opened the virtual memory settings and see if there is a fad responsible for automatically setting this parameter (in some editions of the OS it is available, usually in the upper part of the window).
- If there is and we do not need any special settings, then check it, click the “Apply” / “Set” button, confirm by clicking on OK, restart the computer and forget about this problem.
- An alternative to the described method is to select the “Size by OS choice” item, mark it (usually with a dot) and perform further actions described in the previous paragraph of this list. In this case, the system itself will decide which swap file it needs, but this is not always convenient, since Windows is often either greedy, which greatly reduces the RAM, or, on the contrary, deprives itself of MB and continues to slow down.
- It is more correct to set the indicator manually, for which we mark the “Special size” item with a dot, enter the initial and maximum value, click “Apply” / “Set” and continue according to the script.
Size selection
Most often, the required size of the paging file can only be determined experimentally, by setting the parameter and trying to work on the PC in its maximum load mode. But there are averages in MB that I and other experienced users have discovered over many years of using machines of varying power and performance:
- 16 GB – no additional virtual space required.
- 8 GB – 2016/2016.
- 4096 – 3024/3024.
- 2048 – 3548/3548.
- 1024 – 4012/4012.
- 512 – 5012/5012.
Attentive readers may have noticed two features:
- I specified the same value for both sizes - maximum and original. It's not a mistake. This arrangement reduces defragmentation of the paging file and significantly speeds up the reading process.
- The smaller the amount of RAM available on the PC, the larger the size of sys.
There is another advantage of manual configuration - the local disk for allocating spare virtual space is selected by the user.
Android
It is quite possible to increase performance by allocating virtual memory on smartphones and tablets. Let's briefly but informatively talk about how to create a paging file on mobile devices running on the Android platform. Separately, I would like to note that it is reasonable to perform the manipulations described below with your gadget only if you have root rights. If you still don’t have them, the UnlockRoot Pro application will help fill this gap. Before you begin, we strongly recommend that you save all important information on a reliable third-party device, such as a PC or removable storage device.
The essence of the process is as follows (I don’t go into details, it’s worth writing a separate article about this):
- We install a special program on the computer - MiniTool Partition Wizard Home Edition.
- We insert a blank SD card into the device, which we connect to the PC via a data cable.
- We launch the program, find the specified SD card and create a swap file.
- We disconnect the gadget, reboot and use the result - the user-specified volume of the card (in whole or in part) will be used as a spare virtual space.
The RAM Manager and SWAPit RAM EXPANDER programs are intended for the same purposes.
That's actually all I wanted to tell you today. Write questions and feedback in the comments, I will try to answer everyone. Bye.
Moving the paging file to another hard drive partition
If necessary, the user can move the paging file to another computer drive: another hard drive partition or another physical hard drive. This operation is only possible if there are other partitions (volumes) or hard drives on this computer.
There are some advantages to moving the page file to another drive:
- Faster processing of I/O requests.
- The file is not split into several parts, as can happen on a system partition if its size increases.
The page file will not be fragmented, and this increases the speed of accessing virtual memory.
This method has its disadvantages:
- The system will not be able to create a backup memory file, which may be needed to record debugging data in the event of errors such as a blue screen (BSOD).
The paging file must be present only on one of the computer drives in a single copy.
Go through the following steps:
- Select the system disk with the paging file.
- Activate the “No paging file” setting, click on the “Set” button.
- Agree with disabling the page file.
- Select another partition (disk).
- Select "Specify Size".
- Enter the desired paging file size in the Initial Size (MB) and Maximum Size (MB) fields.
It is advisable to set the same initial and maximum sizes so that the PC has a static page file that is not subject to fragmentation.
- Click on the "Set" button and then on "OK".
- Restart your computer.
Page file and computer performance
Virtual memory does not in any way increase the performance of the system; its expansion is necessary so that programs or games can simply WORK on a computer with insufficient RAM.
Here's how it works:
- You're running app #1 and you're running out of memory.
- All temporarily unnecessary processes No. 2 are flushed to disk into the paging file, thereby freeing up RAM, your program No. 1 works
- Suddenly, the system calls process No. 2 from virtual memory, while the RAM is “clogged”
- Now we need to find another “unnecessary” process No. 3, the execution environment of which is written to disk, and process No. 2 is read from the disk into RAM
As you understand, read-write operations from a hard drive are hundreds of times slower than RAM (that’s why it’s “RAM”