It seems like it should help.
O_o, I'm fine in this regard. one network adapter with a cable that comes with Internet and one USB adapter for distribution. everything works out. That is, there once at a time. Someone like)
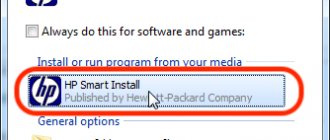
I have DLink DWA-525. Steadily showed a speed of 54 Mb/s. I found advice on one site, and it helped. I will describe in detail what to do, maybe it will help someone.
That's all. Next we rejoice in the 802.11n mode
Many thanks to the author b0rk where did it come from?
PS: only the phone connects, the laptop doesn’t want to, the connection is constantly interrupted (configure via the standard driver interface (follow step 3 for another connection) then everything is fine, but the phone will not work) who can tell me to keep everything in the heap? I solved the problem and installed the drivers HERE. I configured the rest according to the instructions in the header. The WIFI radio broadcasts in 802.11 n and connects normally to both Android and laptop.
Thank you! You were very helpful with the first point, but another problem arose. I am attaching a screenshot. Can you help me decide?
Source
TP-Link TL-WN725N: connection, driver installation and access point setup
TP-Link TL-WN725N is one of the most popular USB Wi-Fi adapters. This is a small Nano adapter that is ideal for laptops. For example, if the built-in Wi-Fi module in the laptop is broken, or something else. But it can be connected and used on a PC without any problems. For those who are not at all in the know: after connecting the TL-WN725N adapter to a computer, it will be possible to connect to Wi-Fi networks, and even distribute the Internet by launching an access point on the computer. This little piece of hardware can turn your computer into a router.
In this article:
Let's get to work!
Possible problems
No one is immune from mistakes, and therefore you should be prepared for the most common of them:
- The driver did not install. This is an extremely rare problem because the procedure is set to auto-adjust. You need to check if the adapter is plugged in, try downloading the programs again, or try a different USB port;
- The device does not see Wi-Fi. If the adapter appears in the device manager, but the Wi-Fi network is not visible, you should check the WLAN auto-configuration service. To do this, press “Win + R”, enter “services.msc” in the search and find “Auto Configuration Service” in the expanded list. Right-click on it, open properties and select “startup type: automatic”. Then restart your PC;
- The PC does not connect to Wi-Fi via the adapter. Most likely, the problem is in the computer itself, and not in the “TP link”, especially if the computer does not connect to any network at all;
- Internet speed is low. Unfortunately, the reasons can be anything: from problems with the provider to a malfunction of the adapter. You must first make sure that the problem is in the device.
How to install the driver on TP-Link TL-WN725N?
Don't rush to install. It is quite possible that the system itself installed the driver and the adapter is already ready for use. In my case, Windows 10 automatically installed the driver for the TL-WN725N and everything worked right away. The connection status will be like this:
This means that the computer already sees Wi-Fi networks and can connect to them.
If you choose the second option, you must first find out the hardware version of the adapter. There are V1 and V2. It is indicated on the packaging:
Below, on the “Driver” tab, download the driver for Windows.
There is also a separate driver for Windows 10. Download the newest one.
Open the archive downloaded from the site and run the setup.exe file. Installation is very simple.
During the installation process, there will be a window in which you can choose one of two options: install only the driver, or install the utility. The choice is yours. Through the utility you can manage Wi-Fi networks, some settings and launch an access point. But all this can also be done using Windows.
After installation is complete, it is advisable to restart your computer.
I think you have succeeded and everything is working. If not, write in the comments.
How to distribute Wi-Fi through the TL-WN725N adapter?
Exactly the same as through all other adapters and built-in Wi-Fi modules. Nothing is different. If your computer is connected to the Internet via a cable or via a USB modem, then you can distribute it to other devices via a Wi-Fi network using the TP-Link TL-WN725N adapter.
If you installed a proprietary utility, you can try it through it. Everything is configured there on the SoftAP tab.
If not, then try to configure everything using standard means. According to the instructions:
There's a lot of information there. Everything is described and shown in detail.
Possible problems
Let's look at the most common cases when the adapter does not work or some errors appear.
What to do, if:
Questions/Answers:
I tried to collect as much useful information as possible on the TP-Link TL-WN725N. If there are any new popular questions and issues related to this adapter, I will update the article.
In the comments you can always share your experience, useful information, or ask a question.
Source
Login to the web interface (via PC or phone)
There are two ways to enter the tp link router settings using:
- cable (via PC, laptop);
- Wi-Fi (via phone, tablet, computer).
When opening your personal account, follow the following algorithm:
Login to the router web interface.
- Enter in the address bar of your computer, laptop or smartphone browser: 192.168.0.1 or 192.168.1.1 or https://tplinkwifi.net
- Going to the identification page, enter your password and login. See them on the back of the router.
- Correct data entry will open the start page. From there, go to the main menu subsections that will help you manage the router.
Important! You can always go to the web interface to configure the router, even when the Internet is not working!
For those who don’t like to read :), watch the setup video:
Setting up the TP-LINK TL-WN721N Wi-Fi network adapter
Hello. Not very long ago I wrote an article How to connect a regular (desktop) computer to Wi-Fi in which I explained what Wi-Fi receivers are and how you can use them to connect a regular desktop computer that does not have a Wi-Fi module to Wi-Fi. After installing the TP-Link TL-MR3220 router, which I wrote about in the article Installing and configuring TP-Link TL-MR3220. Setting up a Wi-Fi router to work with a 3G/4G modem, or cable Internet. I needed to connect one desktop computer to the Internet via Wi-Fi.
Of course, it was possible to simply lay a network cable from the router to the computer, but I considered this the wrong decision. Pulling a cable across several rooms is not very convenient and is unnecessary. a TP-LINK TL-WN721N Wi-Fi receiver . If I'm not mistaken, this is the cheapest network adapter from the TP-LINK family. It cost me about 11 dollars. I bought TP-LINK because I have a router from this company, and I really like the devices of this company and the prices are reasonable.
If you decide to create a network, no matter wired or wireless, then I advise you to buy devices from one company. The fact that devices from the same company work more stably in conjunction with each other has already been tested in practice.
Manual configuration
Setting up a Wi-Fi router model TP-Link N300 begins with changing the network parameters:
- In the navigation menu, open the “Network” section.
- Select the “WAN” subcategory.
- If your provider uses DHCP to connect, then you need to select the “Dynamic IP” option. Such routers connect to the provider's nodes automatically to obtain the desired configuration. In this case, you do not need to enter any information, just click on the “Save” button.
- If you are using a static IP, then you need to select this option in the “WAN connection type” section. You must specify the IP received from the provider, mask (255.255.255.0), default gateway, primary and secondary DNS. Let’s look separately at the “MTU Size” parameter. This function is responsible for the size of transmitted data packets. It is recommended not to change the setting unless necessary.
- Click "Save".
Setting up PPPoE
Many people ask how to connect a TP-Link wireless router to the Internet. This can be done after changing the parameters of the tunneling protocol:
- In the navigation menu, open the “Network” tab.
- Select the “WAN” option.
- In the “WAN connection type” section, specify “PPPoE/Russia/PPPoE”.
- Enter the username and access key received from your provider.
- In the item “Secondary connection” o.
- In the “WAN Connection Mode” section, select “Connect on demand”.
- Specify a maximum idle time of 10 or 15 seconds.
- Click on the “Save” button.
The local network
Setting up a local Wi-Fi network is also a must. See below for step-by-step instructions:
- Go to the “Networks” section.
- In the dialog box, select “Local Network”.
- The “MAC Address” item will display the physical address of the LAN port.
- In the “IP address” section, specify the IP of the wireless router “192.168.0.1”.
- In the “Subnet Mask” tab, write “255.255.255.0”.
- Click "Save".
Wireless mode
To ensure connection to the network, you must correctly set the parameters for the access point:
- Open the “Wireless Mode” item and “Wireless Mode Settings”.
- Specify the name for the access point “SSID”. The name can be anything. Letters, numbers and punctuation marks are allowed.
- Select your region of residence from the drop-down list. Only the country is indicated.
- In the “Mode” item, specify the value “802.11 b/g/n mixed”.
- In the “Channel Width” section, specify “Auto” or “40”.
- In the “Channel” tab, select one of the available ones. Please note that 1,2,3,4,5,6,7 and 8 are the busiest. They power most of the devices in your apartment building. It is recommended to use 9, 10, 11 and 12.
- Select the maximum data transfer rate.
- A. Thanks to this, your gadgets will be able to detect the access point.
- Click "Save".
Encryption protocol
Now we have moved on to the last point of manually setting up the router. All that remains is to specify the encryption protocol parameters. The safety of your confidential data will depend on this:
- Select “Wireless Mode” in the navigation menu.
- Open the “Wireless protection” sub-item.
- It is recommended to use the encryption type “WPA2-PSK/WPA-PSK”.
- In the “Version” item, select “Automatic”.
- In the “Encryption” section, specify “TKIP”.
- Create an access key.
- Leave the “Group key reset period” parameter unchanged.
- Click "Save".
Review of the TP-LINK TL-WN721N Wi-Fi network adapter
If you are just going to buy this device, then I will do a short review and show a few photos. I think you will find it interesting.
As is customary for TP-LINK, the device is packaged in a beautiful green box. In this box, there is another box :), opening which we see a securely fixed TP-LINK TL-WN721N Wi-Fi network adapter. The upper part of which is sealed with a transparent film, as is customary for glossy surfaces.
We pull out the cardboard in which the adapter itself is installed and see several brochures, a disk with drivers and a small USB extension cable, for which many thanks to the manufacturer.
Of the controls on the body, there is only a QSS activation button:
And while working, the green indicator on the front of the adapter blinks.
Specifications of TL-WN721N
The device operates at speeds up to 150 Mbps , has a built-in antenna, supports 64/128-bit WEP, WPA-PSK/WPA2-PSK encryption types and has the ability to quickly establish a wireless network connection thanks to the QSS function.
For connecting to Wi-Fi with a low data transfer rate and for organizing a small home network, this adapter is quite enough. But to organize a high-speed wireless connection and for better reception over a long distance, I advise you to look at more expensive adapters.
Setting up the TP-LINK TL-WN721N Wi-Fi adapter
Connect the Wi-Fi adapter to your computer. I connected it using the USB extension cable that comes with the TL-WN721N. It’s much more convenient, and the signal is a little better.
If, when connecting, windows appear stating that the driver is not installed, etc., then do not pay attention to them, just close them. Take the disk that comes with the adapter, run it on your computer, then run the installation wizard from the disk.
A program will appear in which select our TL-WN721N adapter and click “Install driver and utility” .
In the installer, click “Next” .
If you have 32-bit Windows, then most likely a window will appear stating that only the driver will be installed. There is nothing wrong with this, click “Yes” .
You may also receive a warning that “The publisher of these drivers could not be verified . Select “Install this driver anyway” .
We wait a little and everything is ready. In the notification panel, where the Internet connection status is, I immediately saw Wi-Fi networks available for connection.
Click on the connection status and select the Wi-Fi network to connect to. Click the “Connect” .
A window will appear in which we enter the password for the Wi-Fi network and click “Ok” .
That's it, the connection is established!
We just literally in a few minutes connected and configured the TP-LINK TL-WN721N Wi-Fi network adapter and even connected to the Wi-Fi network with its help.
The installation is very simple and fast, for which many thanks to TP-LINK. I worked on the Internet through this adapter for several hours, and there were no connection interruptions. This adapter is actually very good, especially considering its price.
Source
How to connect a router to the Internet
Connecting and setting up the Internet occurs in the Quick Setup section of the side menu on the left. In other models, this section may be called WAN Settings / WAN Configurations.
How to connect a TP-Link router to the Internet: WAN and ADSL settings
In this section, it all comes down to entering 2-5 connection parameters that are provided by the provider. In our example it is:
· connection method (WAN Link Type): PPPoE mode;
· VPI/VCI values set to 0 and 33;
· login (PPP Username) and password (PPP Password) for authorization with the provider (not to be confused with the login-password of your personal wireless network!).
Each provider has its own settings: for Beeline they are one, for MTS they are different. Although they differ slightly, you should check with your Internet operator. In any case, to connect the router to the Internet you will need to enter no more than a few values. When the router is working as a repeater, it should not be configured to connect to the Internet. These parameters are needed only for the access point.
How to change your password
In order to change the password on a TP-Link router, you need to follow these steps:
- Open any browser from your computer, laptop or mobile device;
- Go to the addresses “192.168.0.1” or “192.168.1.1” and log into your account;
- On the left side of the menu there is a “Wireless Network” section. Let's go there.
- Click on the “Wireless Network Security” subsection;
- In the “PSK password” column, enter a new password instead of the existing one.
If you have forgotten your password, you can use the reset method via a button or using the wifi router web interface.
How to update firmware
Updating the firmware is necessary in order to keep up with the developments of the router manufacturer, which are aimed at optimizing and improving the operation of the router. In addition, newer versions of the router firmware take into account and correct the shortcomings of older versions, and also add innovations aimed at improving the Internet connection and the operation of the router as a whole.
Before updating, you should make sure that you have more current versions of firmware for your router than it currently has. If there are any, feel free to install a newer version. Here are instructions for readers on how to flash the router:
- Go to the official website of the manufacturer (https: //www. tp-link. com/ru/);
- In the search box on the right side of the screen, enter the detailed model name of your router;
- And select “Support” from the proposed product categories, then “Firmware”;
- Read the recommendations and notes provided by the manufacturer to avoid connection problems;
- In the router’s web interface, go to the “System Tools” section;
- Then go to Firmware Update. There will be a “Select file” button - use it to upload the firmware file downloaded from the manufacturer’s official website;
- Unzip the file, upload it to the interface and click the “Update” button.
Wait for the firmware to install and pay attention: under no circumstances turn off the router or yank any cables. After this, the router will automatically reboot and you will need to configure the router again.
How to reset your router
Resetting your router settings can be useful if you have forgotten your password, want to reset settings left over from your old provider, or solve problems with an incorrect connection.
There are two ways to reconfigure the router:
- Restore settings to factory settings via the button;
- Do this through the web interface.
The first method involves using a special button called “WPS/RESET” or simply “RESET”. The outer part of this button is recessed into the plastic case of the router, and this does not allow it to be touched and accidentally pressed to reset the settings.
To reset settings using a button, you need something narrow and thin: a needle, a paper clip, a thin writing part of a pen, a special device that comes with the phone to open the slot for micro-SD and SIM cards. The idea is simple: just press the narrow and thin end of something onto the button, which is recessed into the body. Wait 10 seconds. When all the lights turn off and then blink at the same time, the router has been reset to factory settings.
There is a possibility that resetting the settings will not work the first time. To finally do it, turn off the router, hold down the reset button and at the same time turn on the router, holding the button down for 30 seconds after turning it on.
The second method is much more practical and universal, since it can be applied to any router from TP-Link. To reset settings through the router control panel, you need to do the following:
- Go to the control panel via an Internet browser at the addresses “192.168.0.1” or “192.168.1.1”;
- Enter the login and password “admin” and “admin”. If there is unique data located on the bottom of the router, use it, but there is no need, because there are standardized input username and password;
- Once in the management interface, go to the “System Tools” tab, then to “Restore Defaults”;
- After reading the contents of the page, click “Restore”;
- Review the warning in the pop-up window and click OK.
The settings have been reset, and now you need to reconfigure the way your TP-Link router works. Depending on the firmware version and router model, the interface may be in Russian or English. There are enough Russian equivalents to follow the same steps and achieve the same effect.
Appearance
The adapter is packaged in a traditionally green branded box. The kit is not rich, but contains everything you need - this is the USB adapter itself, a fairly long USB - miniUSB cable, a disk with drivers and setup software, visual instructions in pictures and a warranty card.
Very original appearance of the TP-LINK wifi adapter. We are used to the fact that the network adapter looks like an enlarged USB flash drive. The concept of the device is slightly different here - it is not designed to be inserted and protruded from the case of a computer or laptop. TP-WN822N was originally designed for the highest quality wifi signal reception.
By the way, when folded, these antennas are originally disguised as a white glossy case and visually complete it.
Among the external controls on the TP-Link wifi adapter body there are:
Installing the TP-Link TL-WN822n driver on Windows
In order to connect a TP-Link wifi adapter to a computer running the Windows operating system:
If autorun is disabled in Windows, the driver installation program for TP-Link TL-WN822 must be launched from the disk - “autorun.exe”. In the event that your adapter was not new and the disk is lost, then you can download the driver for the wifi adapter from the official website, as well as the installation program itself.
The software on the disk is universal for several models of TP-Link adapters, so to configure the WN822N, select it from those offered in the list.
Next, we are asked to either install the drivers only, or together with the utility. By and large, you can only use firewood, since Windows already has all the necessary programs for working with wireless networks. But we'll see what happens if we put everything together.
Driver
Publication date: 2019-11-22 Language: Multilingual File size: 9.61 MB 1. For Mac OS 10.15. 2. For models Archer T3U v1, Archer T4U v3, Archer T9UH v2, Archer T2U v3, Archer T2U Nano v1, Archer T2U Plus v1, TL-WN821 v6, TL-WN822 v5, TL-WN823 v3, TL-WN8200ND(UN ) v2, TL-WN727N(EU) v5.20, TL-WN725N v3, TL-WN722N v3.Note: This driver version is a beta version.
Publication date: 2019-09-18 Language: Multi-language File size: 8.83 MB Note: 1. For TL-WN821N(EU)/(US) V6. 2. For Mac 10.14. Publication date: 2018-11-09 Language: English File size: 24.96 MB 1. For TL-WN821N(EU) V6. 2. For Mac 10.8 Publication date: 2018-11-09 Language: English File size: 43.11 MB 1. For TL-WN821N(EU) V6. 2. For WinXP/Win7/Win8/Win8.1/Win10 32bit/64bit. Publication date: 2018-11-09 Language: English File size: 13.93 MB This is a beta version; unknown bugs may still exist. The formal version is coming soon. Publication date: 2018-05-08 Language: English File size: 3.83 MB 1. For TL-WN821N V6/TL-WN822N V5/TL-WN823N V3. 2. For Linux kernel 2.6.244.9.60. 3. Monitor mode support on ubuntu and mint. 4. Beta version. The final version will be available later.
Publication date: 2018-04-28 Language: English File size: 11.03 MB 1. For TL-WN821N(EU) V6. 2. For MAC 10.8 Publication date: 2018-04-28 Language: English File size: 43.11 MB 1. For TL-WN821N(EU) V6. 2. For WinXP/Win7/Win8/Win8.1/Win10 32bit/64bit. Date of publication: 2018-01-30 Language: English File size: 3.02 MB Date of publication: 2017-09-13 Language: English File size: 11.02 MB Date of publication: 2017-07 -26Language: EnglishFile size: 43.28MBSetting up a wifi network adapter on a computer system
After installing the driver for TP-Link TL-WN822n, the application will open on the “Network” tab, where we see a list of all wireless networks available for connection. We select the SSID of our router, enter the password and voila - the Internet appears on the computer
After connecting, you can go to the “Status” tab and see all the data about the current connection - SSID, IP address that the computer received from the router, wifi channel, MAC address of the access point, etc. Please note the speed - this is the theoretical stated speed from the manufacturer, which has nothing to do with the actual speed.
What data is needed to connect the router?
To change the parameters of the router itself, you will need two things: a browser and a password with an access login. The latest data can be found on the label attached to the device body. As a rule, the standard login and password are the English word admin.
To use the Internet you will also need authorization data, which you must obtain from your provider. However, they must be specified in the service agreement. They must be entered in the router or a specialized program, if provided by the provider. Be sure to know the connection type (PPPoE, L2TP, PPTP and others) for proper configuration. When using a dynamic IP, you need to know your IP address, subnet mask and the like. If all these parameters are already in hand, you can connect to TP-Link.
WiFi speed tests via TP-Link USB adapter
And we checked the real one separately. Firstly, using the SpeedTest online service, we found out how the Internet speed through a TP-Link adapter differs from a direct cable connection from the provider. As a WiFi router, we used the TL-WR840N model, which also supports operation at speeds of up to 300 Mbit/s in wireless mode and which is guaranteed not to slow down the Internet speed, as we have already tested, which means our test will be quite objective.
We got the following result.
As you can see, the speed remained the same as with a direct connection from the provider cable, which means that the adapter also does not reduce the Internet speed.
Secondly, we measured the speed of data exchange between two computers within a local network connected via a router.
As you can see, with each subsequent addition of a wireless link, the data transfer speed between computers, as well as its stability, dropped. Here it was measured in slightly different units - not in megabits, but in megabytes per second. To compare with the first tests, we need to convert the readings using a converter and get the following data on average speed:
In the last test, we can make allowances for the fact that the adapter on the second laptop supported speeds up to 150, but I think this was not critical for the final result.
Packaging, appearance and price
TP-Link TL-WN823N is a miniature Wi-Fi device that allows you to turn your computer into a powerful wireless network signal receiver and access point for relaying Internet traffic or the local environment.
The external dimensions of the adapter are close to the nano-USB standard, although they do not reach it. The device is very convenient to use with both a laptop and a home PC. The assembled device (with the lid closed) has dimensions of 8x18x39 mm. It is smaller than the lion's share of modern flash drives.
The connected adapter does not interfere with the operation of the PC or laptop in any way
The package contains an adapter, a disk with a driver and software, as well as instructions
The price of TP-Link TL-WN823N in online stores varies in the range of 500–700 rubles, which makes the device one of the cheapest in its segment.
Video: unpacking TP-LINK TL-WN823N
Connecting to a laptop or PC
You need to turn on your PC or laptop and insert the adapter into it. The setup is usually carried out automatically: the driver is downloaded to the computer and installed without user intervention. A green light on the wifi adapter will indicate that the installation is complete. An icon will also appear on the desktop: by clicking on it, you can search for networks and connect to them.
What are the differences between 3G and 4G networks: features, advantages and disadvantages
Important! After installing the drivers, it is recommended to restart your computer.
If installation does not occur in the first 10-15 minutes, you will have to do everything manually: insert a disk or download a file and install.
Adapter Specifications
In terms of its technical characteristics, TP-Link TL-WN823N meets all the latest fashion trends. During operation, it uses all the necessary connection security parameters when receiving or distributing the network. The supported data transfer rate is limited to 300 Mbps. The adapter supports WPS technology. The presence of a Restart button allows you to restart the device without removing it from the PC.
Table: technical specifications of TP-Link TL-WN823N
| Data transfer rate | Dynamic: 11n: up to 30011g: up to 5411b: up to 11 Mbps |
| Standard | WiFi |
| Security Features | Encryption support 64/128-bit WEP, WPA-PSK/WPA2-PSK/WPA/WPA2 Support WPS technology QSS button |
| Antennas | Built-in |
| Contents of delivery | Wireless adapter TL-WN823N Information disc Quick installation instructions |
| Additional functions | Software Access Point (SoftAP) Client Mode (Ad-hoc/Infrastructure Network Support) Sony PSP X-Link Support for Crash-Free Online Gaming (For Windows XP) |
| Wireless capabilities | IEEE 802.11g IEEE 802.11n IEEE 802.11b |
| Type | External |
| Frequency range | 2.4 GHz |
| Manufacturer country | China |
Speed characteristics and covered area
The TP-LINK TL-WN823N adapter has a powerful built-in antenna. It is capable of transmitting a stable high-speed signal over considerable distances. Maximum values of 300 Mbit/s can be observed even ten meters from the device, despite physical barriers in the form of walls. With slight signal attenuation, the adapter coverage reaches thirty meters or more.
Connecting and using the TP-LINK TL-WN823N Wi-Fi adapter
To connect and use the adapter, you need to insert the device into the appropriate USB connector, install the driver and software, after which all functions of the device will be available for consumption.
To connect the TP-Link TL-WN823N adapter, it must be inserted into the appropriate connector
Where to get and how to install the driver
Windows often installs the basic driver for each new device on its own, but to fully unlock the device’s potential, you need to use software from the manufacturer, TP-LINK. You need to download the driver from the official website:
On the official TP-Link page we find a column with the TL-WN823N driver for Windows
In the downloaded archive, run the Setup.exe file
Proprietary utility for working with the adapter
In addition to the driver in the archive, you can find a special application that is designed to help manage the device, although it is not required to be installed:
In the Utility folder run the file Setup.exe
Using the installation wizard, install the program
All available connections are visible in the Network tab
Driver
Publication date: 2019-11-22 Language: Multilingual File size: 9.61 MB 1. For Mac OS 10.15. 2. For models Archer T3U v1, Archer T4U v3, Archer T9UH v2, Archer T2U v3, Archer T2U Nano v1, Archer T2U Plus v1, TL-WN821 v6, TL-WN822 v5, TL-WN823 v3, TL-WN8200ND(UN ) v2, TL-WN727N(EU) v5.20, TL-WN725N v3, TL-WN722N v3.Note: This driver version is a beta version.
Publication date: 2019-09-18 Language: Multi-language File size: 8.83 MB Note: 1. For TL-WN821N(EU)/(US) V6. 2. For Mac 10.14. Publication date: 2018-11-09 Language: English File size: 24.96 MB 1. For TL-WN821N(EU) V6. 2. For Mac 10.8 Publication date: 2018-11-09 Language: English File size: 43.11 MB 1. For TL-WN821N(EU) V6. 2. For WinXP/Win7/Win8/Win8.1/Win10 32bit/64bit. Publication date: 2018-11-09 Language: English File size: 13.93 MB This is a beta version; unknown bugs may still exist. The formal version is coming soon. Publication date: 2018-05-08 Language: English File size: 3.83 MB 1. For TL-WN821N V6/TL-WN822N V5/TL-WN823N V3. 2. For Linux kernel 2.6.244.9.60. 3. Monitor mode support on ubuntu and mint. 4. Beta version. The final version will be available later.
Publication date: 2018-04-28 Language: English File size: 11.03 MB 1. For TL-WN821N(EU) V6. 2. For MAC 10.8 Publication date: 2018-04-28 Language: English File size: 43.11 MB 1. For TL-WN821N(EU) V6. 2. For WinXP/Win7/Win8/Win8.1/Win10 32bit/64bit. Date of publication: 2018-01-30 Language: English File size: 3.02 MB Date of publication: 2017-09-13 Language: English File size: 11.02 MB Date of publication: 2017-07 -26Language: EnglishFile size: 43.28MB We treat your personal data with responsibility. The full text of the privacy policy is available here.Can it be used as an access point?
In addition to the standard function of receiving a Wi-Fi signal, TP-LINK TL-WN823N can act as an access point. You can even make a router out of a computer to distribute the Internet throughout the apartment. To do this, use a special built-in function in the Soft AP program tab.
To enable distribution, go to the specified tab, set the toggle switch to the ON position, set the network name and password (SSID and Security Key fields), launch the program with the Apply button.
In the Soft AP tab we create an access point in the device
Setup without additional software
Another method does not require the use of any programs - the built-in tools of Windows 10 are enough to configure. You will have to perform the following steps:
- Open Network and Internet Settings. The easiest way is through the menu that opens when you click on the network connection symbol on the taskbar.
- Go to the “Mobile Spot” section.
- Change or leave the default network name and password suggested by the computer.
- Select the method of connecting to the network – Ethernet or another option.
- Turn the switch at the top to the “On” position.
- Make sure a new network appears and connect devices to it.
A similar result, also without using third-party programs, can be achieved using the command line. To configure the access point, you will need the following steps:
- Call up the command execution menu (Win + R combination) and enter “cmd”. Or call the command line from the context menu that appears when you click the Start button.
- Enter two commands in turn: netsh wlan set hostednetwork mode=allow ssid=“Name” key=“Parol” keyUsage=persistent (where Name is the name, Parol is the password) and “netsh wlan start hostednetwork”.
- Close the window and go to the Network and Sharing Center - through the “Control Panel” or “Network and Internet Settings”.
- Open "Properties".
- Allow other users to access the local network connection by selecting its name in the window and checking the boxes.
The created network is ready to connect new devices. But for its normal use you will need stable Internet access on the device to which the adapter is connected.