Many people today cannot imagine life without music in their favorite player - they take it with them on trips, download it for commuting to work or just on vacation. To download a large volume of songs, you may need a large storage medium; a USB 2.0 16Gb flash drive is perfect for such tasks. This is one of the best-selling options in retail stores.
Before downloading music from a laptop, you need to format it correctly and select the desired format. If you ignore these rules, it may turn out that the player or player simply will not be able to read the media or recognize the files. In this article we will talk in detail about the features of downloading music to flash media.
Video: How to transfer from computer to flash drive
A flash drive is an example of a modern information storage device that can be used to record, copy and read various content.
Such a digital drive has come into modern reality, displacing floppy disks, which were very quickly subject to demagnetization. In addition, such a removable drive successfully competes with floppy disks in terms of the volume of stored material, as well as the speed of writing and reading. Also, such a drive takes up less space than a floppy disk. Copying information to a USB drive is easy.
It is thanks to these advantages that the flash drive has easily replaced floppy disks. Of course, at the moment, most users can easily operate various removable media without the need to obtain additional information. However, there may also be users who find it difficult to figure out how to transfer information from a computer to a flash drive.
If you are one of these users who find it quite problematic to copy a file, upload a video or other content without additional information, we will help you solve this problem by providing useful tips on how to copy a file to a flash drive from a computer.
Ways to transfer music from iPhone to computer
As it turns out, there are more options for importing music from your computer to your iPhone than you might have thought. All of them will be discussed later in the article.
Method 1: iTunes
iTunes is the main program of any Apple user, since it is a multifunctional processor that serves, first of all, as a means for transferring files to a smartphone. Previously on our website we have already discussed in detail how music is transferred from iTunes to an i-device, so we will not dwell on this issue.
Read more: How to add music to iPhone via iTunes
Method 2: AcePlayer
In place of AcePlayer there can be almost any music player or file manager, since these applications support many more music formats than the standard iPhone player. So, using AcePlayer, you can play the FLAC format, which has high sound quality. But all subsequent actions will be performed through iTunes.
Read more: File managers for iPhone
- Download AcePlayer on your smartphone.
- Connect your Apple device to your computer and launch iTunes. Go to the device management menu.
- On the left side of the window, open the “Shared Files” section.
- Find AcePlayer in the list of applications, select it with one click. A window will appear to the right into which you will need to drag music files.
- iTunes will automatically start syncing files. Once it is completed, launch AcePlayer on your phone and select the “Documents” section - the music will appear in the application.
Method 3: VLC
Many PC users are familiar with such a popular player as VLC, which is available not only for computers, but also for iOS devices. If both your computer and iPhone are connected to the same network, music transfer can be done using this application.
- Install the VLC for Mobile application. You can download it completely free from the App Store using the link above.
- Launch the installed application. First, you need to activate the function of transferring files over Wi-Fi - to do this, tap on the player menu button in the upper left corner, and then move the toggle switch next to the “Access via WiFi” item to the active position.
- Pay attention to the network address that appears under this item - you will need to open any browser on your computer and follow this link.
- Add music in the VLC control window that opens: you can either immediately drag it into the browser window, or simply click the plus sign icon, after which Windows Explorer will appear on the screen.
- Once the music files are imported, synchronization will automatically start. After waiting for it to finish, you can launch VLC on your smartphone.
- As you can see, all the music is displayed in the application, and now it is available for listening without access to the network. This way you can add as many favorite songs as you want until the memory runs out.
Method 4: Dropbox
In fact, absolutely any cloud storage can be used here, but we will show the further process of transferring music to an iPhone using the example of the Dropbox service.
- To use this you will need to have the Dropbox app installed on your device. If you don't already have it downloaded, download it from the App Store.
- Transfer the music to the Dropbox folder on your computer and wait for the synchronization to complete.
- You can now run Dropbox on your iPhone. As soon as the synchronization is completed, the files will appear on the device and will be available for listening directly from the application, but with a small clarification - you will need a network connection to play them.
- In the same case, if you want to listen to music without the Internet, you will need to export the songs to another application - this can be any third-party music player.
- To do this, tap the menu button in the upper right corner, and then select “Export”.
- Select the “Open in...” button, and then the application into which the music file will be exported, for example, the same VLC discussed above.
Read more: Best players for iPhone
Method 5: iTools
As an alternative to iTunes, a lot of successful analogue programs have been developed, among which I would especially like to mention iTools due to its simple interface with support for the Russian language, high functionality and conveniently implemented ability to transfer files to Apple devices. Using this instrument as an example, we will consider the further process of copying music.
Read more: iTunes analogues
- Connect your iPhone to your computer using a USB cable, and then launch iTools. On the left side of the window, open the “Music” tab, and select “Import” at the top.
- An Explorer window will appear on the screen, in which you will need to select the tracks that will be transferred to the device. Once selected, confirm copying the music.
- The process of transferring songs will begin. As soon as it is completed, you can check the result - all downloaded songs have appeared on the iPhone in the Music application.
Each of the presented methods is easy to implement and allows you to transfer all your favorite tracks to your smartphone. We hope this article was useful to you.
We are glad that we were able to help you solve the problem. Thank the author and share the article on social networks. Describe what didn't work for you. Our specialists will try to answer as quickly as possible.
What to do next
So, you have downloaded music from the Internet, and the flash card is in the USB port. Now you can proceed directly to copying. You can do what is most convenient for you, for example, copy the folder and paste it on a removable disk, or cut and paste. If you use the first method, you will have music not only on a flash drive, but also on your computer. If you cut a folder, it will be deleted from the PC memory. See for yourself what suits you best, because everything is individual.
Please note that the folder size should not exceed the size of your removable storage device. If this condition is not met, then you are unlikely to succeed.
As you can see, everything is simple here, so let's go further and deal with another elementary, but very important point.
Flash drives - there are many of them and they are different
A flash drive is a means by which you can store information without fear that it will demagnetize over time, as was the case before with disks and floppy disks.
Today, only those who have gone to another world do not have information storage devices. Although no, their relatives give them phones that are equipped with micro flash drives. So, what types of flash cards are there?
- External memory with USB port;
- Micro-CD flash drives (found in phones, tablets, cameras, etc.);
- External HDs.
There are also a huge number of them in design: from cute ones to classic business style. Here everyone chooses according to their own taste. And “there are no comrades according to taste.”
It’s the same with the amount of memory for the storage medium: for some, 24 MB is enough, but for others, 32 GB is not enough. What external media do you prefer? And how do you go about choosing them? Please answer these questions in the comments.
How to download music from the Internet to a flash drive
To do this, we need to go to the site from which files will be downloaded. It is desirable that its rating be high, since currently they offer paid options, but there is no need to rely on this, because the Internet is full of free music, and for every taste. To find what you need, just enter the name into the address bar of your browser or into the special search field
Please note that depending on which browser you use, downloaded files may be saved in different locations. Most often you need to go to “My Documents” and then to “Downloads” or “Downloads”
But here you can see that the material is scattered, which is not very convenient, so we recommend creating a separate folder for this.
Possible problems
Sometimes our flash drive doesn’t want to open at all, and sometimes Windows can’t even format it. If this happens to you, use the detailed step-by-step instructions to solve this problem. We wrote it down just yesterday and included in the article the most effective ways to resolve this issue.
Attention: let’s say right away - if there is such an opportunity, be sure to save all the data from the flash drive, and only then proceed to recovery.
The best social networks to download music for free
By communicating online, people not only always stay in touch, but also follow new events, including changes in the world of music. It is more convenient to download tracks on such services than on other sites. This convenience lies in the ability to pre-save songs to your folder in your personal account.
VKontakte - convenient and free
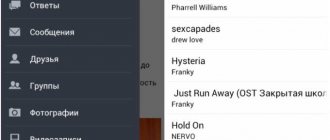
The social network for communication “VKontakte” has one of the largest music libraries. Here you can find a lot of interesting tracks for every taste. A convenient addition is to show updates of added music from friends.
Odnoklassniki is a network with music mega-collections
The resource offers various tracks, including youth music, as well as music that middle-aged people like to listen to. In the search, you can filter by genre and artist. Downloading tracks is free.
After downloading music to your phone’s flash drive, you can listen to it in the car via AUX
Zvuk.com - exclusively music social network
The resource offers free music for downloading and listening. Allows you to select foreign songs or stop at Russian. In the search bar you can find a song by title, artist, genre or album.
In some cars, the on-board computer has a function for determining the artist by motive.
GOOD TO KNOW!
In order to unlimitedly use the ability to download audio tracks through the VKontakte and Odnoklassniki networks, you need to install a special extension in the browser you are using.
List of the best free sites with quality music content
For those who are less familiar with good resources that provide unlimited music for downloading, we recommend that you familiarize yourself with the list of popular sites that regularly update songs.
Patefon.net - a portal with daily “delicious” new products
By visiting this resource, on the main page you can see a list of the most recently added songs that were popular on the day of downloading. Then there are no difficulties to download, just click on the appropriate button, and after a few seconds the song will end up in the desired folder.
The correct loading of tracks may depend on the speed of the resources.
Jamendo Music - Russian and foreign music service
This site offers free listening and unlimited downloading of tracks. Within the portal you can find the best compositions, according to music lovers, and also choose a song from your favorite genre. The site operates with a license, so all services are provided outside of paid tariffs.
It is better to create a separate folder for downloading from each site, so that later you can evaluate the quality of the playlist
Zaitsev.net - many years of honest service
The resource works with popular social networks, regularly updates music, focusing on the rating of the Muz-TV channel. Here you will find the most interesting new musical releases, but there is one drawback. Some users who upload tracks have the right to limit the downloading of songs.
It is not recommended to download full collections, as they often do not contain the songs that you would like to hear.
Zvukov.FM - site with a convenient menu
You can download music on this portal without restrictions. There is a choice of narrow collections. After clicking on the “Download” button, the download occurs automatically, so the user does not have to search for a lot of available download links. When listening to tracks from collections, the system automatically suggests music of similar genres.
For listening on headphones, you should not select high-frequency tracks for downloading
How to write a program to a flash drive. Option one
The simplest of these options is when you just need to transfer a file of a program, for example, its installer, to a flash drive and nothing more. This can be done simply, using standard functions of the operating system, or some third-party tools. The easiest way to do this is to use Windows Explorer or some other file manager. At the same time, you can copy the program to a flash drive in a lot of different ways. Naturally, the first thing you should do is connect the flash drive itself to the computer.
By the way, everything written here can equally apply to both regular USB flash drives and flash cards. In this matter there is no fundamental difference between them.
Next, we can select the file we need in Explorer and, depending on the version of the operating system, select “Copy to …” from the menu (standard menu, right-click context menu, panel button, etc.). And in the window that opens, where you need to specify the destination for the copied file, find your flash drive.
Another way is to use drag and drop, the so-called “drag-n-drop” method. You just need to select the file with the left button and, without releasing it, drag it with the mouse to the desired location - folder, flash drive, etc. - and then let go. If you use Windows Explorer, then on the left it will show a tree of folders and computer devices, in which you can easily find the flash drive we need.
Another method available in Explorer on some versions of Windows is to use the Send to menu. Select the desired file with the right mouse button and in the context menu that appears, find the line “Send...”. If you hold the mouse cursor over this construction site, it will expand into a more detailed list, in which one of the options will include the flash drive to which we need to copy the file.
There is another, universal, copying method that works always and everywhere, regardless of the versions of the operating system or the file managers used - the “copy-paste” method.
The word “copy-paste” comes from the English combination “copy-paste”, which literally means “copy-paste”.
To use it, you need to select the file you are looking for and select “Copy” from the menu (note: not “Copy to ...", but simply “Copy”). Then go to the desired folder (in our case, a flash drive) and select the “Insert” option from the menu
That's it, the file will be copied to the location we need.
It is much more convenient to copy-paste using hotkey combinations rather than menu functions. In this case, the key combination “Ctrl+C” will correspond to the “Copy” command, and the “Ctrl+V” combination will correspond to the “Paste” command.
This is all that is needed if the user just needs to copy the program file to a flash drive.
Loading music onto a flash drive from a laptop or computer: what is special about recording
At first glance, the process of copying music tracks to removable media via a computer is not difficult. But this rule applies provided that the user has extensive experience in working with PCs. If for some reason the user is far from reaching this level, we offer a step-by-step algorithm.
Opening a flash drive and copying process
As a rule, the entire process of recording audio information takes from 5 to 10 minutes. The duration of media transfer may also depend on the speed of the removable storage clusters. Regardless of the type of device, the principle is more or less identical.
- First, let's activate the drive. To do this, insert it into the appropriate connector on the computer.
- Go to the “Properties” tab, which can be called through the context menu by right-clicking on the name of the flash drive.
- We make sure that the device is working properly.
- We begin the process of copying music. To do this, find the required folder and open it.
- Using the mouse, select the audio tracks that we plan to transfer, then press the key combination “Ctrl+C”.
For recording, it is better to use only files in MP3 format, since most players play them painlessly
Listening to music from a flash drive through speakers is better than music that is recorded without noise.
At this stage, the process of checking the operation of removable media and copying can be considered complete. Let's move on to the next point.
The recording process
To copy music, you need to simply transfer it from a folder on your computer or laptop to a flash drive. This must be done immediately before copying the music list. If after this the clipboard is used for other purposes, the whole process will have to start over.
When recording music onto a flash drive, it is better to keep it in an open window to observe the entire recording process
You can burn selected music to disk as follows:
- activate the flash drive and, if necessary, create the corresponding folder on it (you don’t have to create it);
- By right-clicking on the open drive window, open the context menu and select “Paste”.
- You can replace this action with a simple combination of buttons on the keyboard “Ctrl + V”.
When you click on the “Cut” button in the context menu, to restore data, you must immediately click on “Paste” or use the appropriate keyboard shortcut
After the completed actions, all previously selected tracks will be successfully duplicated onto the Flash drive. Experienced users say that you can do without mandatory copying. It is enough to select the entire list of songs and simply drag it from one window to another with the mouse.
You can use the internal Paste and Copy tools that are available in the work panel of each folder. Depending on the type of operating system, their location may vary slightly.
How to open a flash drive, folder for copying
1) First, open the folder to which we will copy.
Double-click on the Computer icon (in Windows 7), or My Computer (Windows XP). This icon is usually located in the upper left corner of the monitor screen (desktop).
Rice. 1
A window will open with the contents of your computer (Fig. 1). This is what the window looks like in Windows 7.
Rice. 1a
And this is how the window looks in Windows XP (Fig. 1a).
The windows on your computer may also differ due to appearance settings. I don't think it's necessary to waste time changing the appearance of windows. It's not important
I draw attention to the most important points
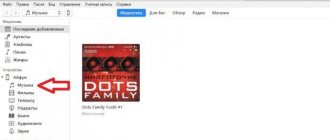
List of Hard Drives. In Fig. 1 you see in the list, 4 local disks on a computer, in Figure 1a we see 2 local disks on another computer. The minimum can be 1 local disk, this is when the computer has one hard drive (hard drive) installed and it is not divided into local disks.
List of Devices with removable media. Your CD drives and DVD drives will be visible in this list. Your flash drive will appear in the same list when you insert it into the USB input of the computer. For example, in Fig. 1, the flash drive is visible under the name Removable disk (K). Your drive will most likely be assigned a different letter, depending on the number of drives on your computer.
In this example, I want to copy a folder from a flash drive to local disk H. Therefore, double-click on Local disk (H) in Fig. 1.
Rice. 2
A list of folders and files on my N drive opened. If you need to create a new folder into which you will transfer files from the flash drive, I wrote in red where you need to right-click to create a new folder. And I think you’ve already learned the lesson on creating a folder.
If you want to drag a folder from a flash drive directly to the disk (and not to an additional folder), then you do not need to create a folder. In this case, we assume that we have already prepared the disk to which we will copy the folder from the flash drive.
Now take the window by the top edge and drag it to the right, or down. I wrote in red where you need to press the left mouse button and, without releasing it, drag the window to the side or down. Practice dragging windows!
2) Now you need to open the flash drive (disk) from which we will copy.
Double-click on the “My Computer” icon again. A new window opens, exactly the same as in the pictures. But, if in the first case, we chose the disk where to copy, then now we need to open the disk from which we will copy.
I was going to copy from a flash drive. In my case, this is Removable disk H (Fig. 1). I double-click on this disk and a window with the contents of the flash drive will open.
The window from which we are copying and the window into which we are copying should not completely cover each other. I placed them one above the other (Fig. 3), and if you have a widescreen monitor, you can place the windows side by side.
First steps, or Where to start?
So, after our memory card is in the right slot, you can throw whatever you want onto it. Of course, you can transfer not only those files that are stored on your hard drive, but also those directly downloaded from the Internet. What's the difference, you ask? The second method saves time, since you do not need to repeatedly copy the file from the hard drive to the flash drive. The only thing we recommend you pay attention to is installing such a useful program as USB-security. It is needed to detect threats on removable media and remove them. If you refuse to use such software, then you must have a reliable antivirus that will intercept the malicious file. Now let's move on to the next step.
How to write a program to a flash drive. Option two
But much more often, the answer to the question in the title requires something a little different. You need to not only copy the program there, but also make sure that this program can work from this flash drive. Purely theoretically, there is nothing complicated about this, but in practical application this will not always be possible, since several important points must be taken into account.
Let's say you already have the desired program or game installed on Windows. Then you can try to simply copy its files and folders to a flash drive (by any of the methods described above). But it is far from a fact that it will work. Or another option - it will work, but only when the flash drive is connected to your computer. She will not want to work with any other PC.
There may be three reasons for this behavior. The first is that the files needed by the program were copied during its installation not only to its own folder, but also to other system directories. Therefore, when simply copying to a flash drive, you cannot copy everything that the program needs to work, and understanding the details is usually quite difficult and time-consuming. The second reason is that the program needs some system files to work, which your Windows has, but others, for example, your friend, may not have. And third, when installing the program, it is written too deeply into the operating system, and when you try to run it from a flash drive, its connections with the operating system are broken, and all sorts of errors occur, or the program refuses to work at all.
However, no one forbids you to try. Find the folder with the files of the desired program on the system partition of the disk and copy it entirely to the USB flash drive. By any of the methods we described above. And you try to run it from a flash drive. It works, without glitches or failures - you are glad that everything turned out well. If not, think about other options.
Another compromise method that you can try. Connect your USB flash drive to your computer and run the installation program. Specify the USB flash drive as the destination folder, and the program will install on it. Now it will work from this flash drive, but, most likely, only when the flash drive is connected specifically to your computer; it may not work with other PCs. Again, no one forbids you to try.
Using Cardreader
If, when you try to download music, you receive a message that there is not enough free space on the removable disk, then this is a clear signal that you need to free up memory. You need to be guided by exactly how much volume you are missing. If it is 100 megabytes, then you need to delete exactly the same amount, although again you can delete everything completely if there are no important files there. Well, now the process has begun. Please note: damaged ports can cause a variety of errors to appear. In this case, it is best to use a “Card Reader”. Insert it into the port through a special adapter. And then - your flash drive. The process itself is not much different from the usual copying of music from the Internet. Wait until the download is complete; interrupting the procedure is not recommended, as important sectors can be damaged, as a result of which the device will generally not work correctly. By the way, another interesting point that will help save you time. It is not at all necessary to transfer audio files from the drive to the computer and only then listen; this can be done directly from the removable disk. As for games, it is advisable to dump them onto the hard drive, since many flash cards have low speed.
Connect to a computer: how to do it
In order to understand how to download music from a computer to your phone, use the included instructions and select the most appropriate synchronization option.
So, let's say you have a USB cable. However, for some unknown reason, the phone is not detected by your personal computer. What could this be connected with and how to emerge victorious from a difficult situation? It's simple - you need to install the necessary drivers.
- Enter your phone model and the phrase “synchronization with computer” in the search bar of your browser.
- Download and install the appropriate software. However, remember that, as a rule, the data cable should be disconnected from the PC when installing a synchronizing application.
- Once the installation is complete, connect your phone and wait a moment while the system initializes your device.
This is the most traditional way to download music from a computer to a phone. Let's move on to a more interesting connection method.
If you need to download it to your phone
A memory card designed for a phone is different from a stationary flash drive. And you won’t be able to insert a standard flash drive into your phone. There are special double-sided USB drives : one connector for the PC, the second for the phone.
However, you can do without them by purchasing an OTG cable (you can find out how to determine whether a smartphone supports the technology in our article).
This is an “adapter” between a flash drive for a computer and a phone. The operating algorithm is no different from an ordinary MicroSD card. All you have to do is find the desired song on the Internet and download it to your phone, specifying a flash drive connected via OTG as the download location.
Why is this happening
This occurs due to the file system (FS) and is associated with some of its features. Typically, flash drives have one of the versions of FAT - File Allocation Table. It is this that prevents you from writing a large file to an external drive. Even on a 128 GB flash drive.
There is another FS - NTFS or New Technology File System. It is widely used in Microsoft Windows. And it does not block downloading if the file exceeds 4 GB. In NTFS, the size of each cluster is much smaller - this is a certain area into which information is added.
Before attempting to write a file larger than 4 GB, check the file system type of the flash drive.
To make an analogy, imagine a piece of paper with a tic-tac-toe board on it. One cell equals a cluster. If you put a cross in it, you will fill it out entirely (that is, you will no longer be able to write any data there). Even if there is still room left in it. For both file systems, the total size of this field is the same - for example, one notebook sheet. In FAT, it fits 9 cells (3 by 3 field). And in NTFS - 49 (field 7 by 7). Because in the second case the clusters (cells) are smaller.
In addition, in NTFS you can configure quotas and set access rights. There is logging, which increases reliability.
If, when copying, you see the warning “The file is too large for the destination file system,” then the drive is set to FAT. To check this:
- Insert the flash drive into the USB port.
- Open My Computer. Your flash drive should be displayed there.
- Right-click on it.
- Select Properties. The information you need will be there.
It’s easy to find out the file type - to do this, go to Media Properties
If "FAT" is indicated, it means that only data up to 4 GB in size can be written to the disk. But what if you downloaded a video and want to watch it on TV? Or do you need to transfer an archive of photos?
You can remove the maximum volume limit. Before copying a large file to a flash drive, change the FS. If the drive is a boot disk, you must leave FAT.
Downloading a movie to a flash drive
First, make sure that the film will fit on the flash drive. To do this, you need to see how much free memory there is on the flash drive, and how much the film weighs. Information about the movie can be obtained from the place where you download it. If the movie has already been downloaded from the Internet, then you just need to select it with the left mouse button, right-click on the selected movie, and select “Properties”. There you will find information about how much the film weighs.
The same thing with a flash drive. In the “My Computer” menu, select the flash drive, select it with the left mouse button, right-click and find out the memory status of the flash drive. The film should not weigh more than the free space on the flash drive. If everything is in order, then we do this:
- After inserting the flash drive into the computer, the flash drive window will appear on the screen either by itself, or the flash drive can be opened through “My Computer” by double-clicking on it with the left key.
- The flash drive window is open, the movie is on the computer. Now select the movie and hold down the left mouse button on it. Without releasing the button, drag the movie onto the flash drive. If you want to send a movie to a specific folder on a flash drive, you must first create it and then open it. Then the movie will be saved in the desired folder. If you want the movie to be saved only on a flash drive, then after selecting it on your computer, right-click on the movie, select “Cut,” move to the flash drive folder, right-click in it and select “Paste.” You can also quickly transfer a movie to a flash drive without dragging it by selecting it, choosing not “Cut”, but “Copy”, and again in the flash drive folder using the right mouse button “Paste”. In this case, the film will be saved both on the computer and on the flash drive.
- Now we are waiting for the film to be copied. A new window will appear in front of you, in which you can watch the movie being copied to the flash drive. The copying speed depends on the operating system installed on your computer and the weight of the film itself. After this window disappears, the film will be copied completely to the flash drive.
- There is a simpler option. If the computer recognizes the flash drive, you just need to select the movie on the computer, right-click on it, select “Send...” and specify the path to the flash drive. The movie will be copied, you will need to wait.
How to download movies for free to a flash drive? The methods we described are absolutely free; they represent standard operations for working with files and folders. You can download films for free on special Internet resources. To find them, enter “download movie (movie name) for free” into your browser search. You can also install free programs on your computer that will allow you to quickly download movies from different sites, for example, from Contact. Now you know how to download a movie to a flash drive.
If you have or will have a flash drive with a capacity of more than 4GB, then this advice will definitely be useful to you! You may have already encountered a situation where, when you try to write to an empty flash drive with a capacity of, for example, 8GB of one file larger than 4GB, the system displays the error “Not enough disk space.” What is the reason? After all, the flash drive is empty and there is plenty of space on it!
And the reason is the file system, which is installed at the manufacturer. I don’t know why, but the manufacturer installs the FAT32 file system, but it does not support files larger than 4GB. To work with files larger than 4GB, the file system of the flash drive must be NTFS - this system allows you to work with files up to 16TB in size.
In order for the NTFS system to appear on the flash drive, it must be formatted accordingly in this system. To do this you need to do the following:
1. Insert the USB flash drive into the computer.
2. Open “My Computer” (key combination “WIN+E”).
3. Select a flash drive.
4. Click on the flash drive with the RIGHT mouse button and select “Format...” from the menu. Just first save all the information from the flash drive on another medium.
5. In Windows 7, everything is simple - you can immediately select NTFS in the “File system” drop-down list, but in Windows XP there is no such option, but you can enable it. Therefore, if you have Windows XP, read the following points. If Windows 7, select NTFS and format. 6. On the “My Computer” desktop icon, right-click and select the “Manage” menu item, or perhaps you can immediately select “Device Manager” in this menu. 7. If there is no “Device Manager” item in the menu, then select it after clicking on the “Management” item. 8. In the “Device Manager” window, click the plus sign on the “Disk devices” item and double-click the LEFT mouse button to open the properties window of the connected flash drive. 9. In the properties window, go to the “Policy” tab and select the “Optimize for execution” option. 10. Click the “OK” button.
11. Remove the flash drive from the computer and insert it again.
12. Repeat steps 2-5. Only now in the “File system” drop-down list you will be able to select NTFS. Now you can easily write a file larger than 4GB to a flash drive. In addition, by formatting the flash drive in NTFS, you increase the chances of data recovery after deletion.
It just so happens that over time, MP3 players have lost quite a lot of importance, since they are easily replaced by any smartphone. The main reason is convenience, because, for example, if you own an iPhone, music can be transferred to the device in completely different ways.
Files larger than 4 GB cannot be transferred to a flash drive. This is easy to fix.
Welcome to the site for recovering deleted files undelete-file.ru, today we will solve the problem of copying files to a memory card or flash drive. Many PC users cannot copy files to a flash drive that are larger than 4 GB. How to be? But everything is quite simple, just split the file into parts or format the flash drive!
How to copy files larger than 4 GB to a flash drive?
Don't think that it is impossible to copy music to a memory card, while the total size of the music files is 6 GB, no, this will just work out... But if you are trying to copy one or more files larger than 4 GB each, then this may not work it will work out. Why? Because if the flash drive is formatted in the fat32 file system and it will not be possible to transfer individual files larger than 4GB. There is a way out, and more than one.
1. Breaking into parts. It is necessary to 'split' this file into several parts. For example, there is an archive with some files, but its size is 4.5 GB, then simply unzip it and copy it or divide it into two parts and upload two archives.
But this method is quite inconvenient. Let’s say we need to copy an 11 GB movie in HD quality to a 32 GB flash drive, but we can’t split it.
2. Formatting a flash drive. In this case, you should format the flash drive in ntfs format, thereby we will remove this limitation on the size of copied files and will be able to transfer files to a memory card of any size!
For those who don’t know how to format a memory card, I’ll explain now.
Formatting a flash drive on Windows 7
Before formatting a flash drive, do not forget to transfer the necessary information from it to your computer in advance. Copied? And if not, then restore files deleted during formatting using any program. Next, I will show an example for Windows OS:
- Go to 'Computer'
- Right-click on the flash drive and select 'Format'
- In the window that appears, select the file system into which you want to format - in our case, ntfs.
- Click 'Quick Format' and the 'Start' button.
- Done, the memory card now has the NTFS file system!
That's it, the limit on files larger than four gigabytes has been lifted! You know the easiest ways to transfer files larger than 4 GB to a memory card.
Urgently tell your friends:
Interesting on the same topic:
PC system requirements for virtual reality games
How to see saved passwords in browsers
Installing Windows 7 from a USB flash drive to an SSD
We look for the right songs and create a playlist on a PC
If you are interested in Russian songs or works by foreign performers, use special services where you can download any compositions for free without registration.
Most music files on the Internet are in MP3 format. It compresses sound, eliminating frequencies that the human ear cannot perceive. But within this format the quality may vary. An indicator of the degree of compression is the bitrate (bits per second).
Near each composition on special sites where you can get music, there is a “Download” button. You must click on it so that the track is automatically saved in the standard “Downloads” folder on your computer. But if you wish, you can change the location of the files.
Downloading songs from the Internet
Often, users puzzle over how to download music from VK or any other social network. However, it is easier to record the desired song on your computer and then download it to a flash drive from specialized resources. The best sites for downloading music on the RuNet are:
- zaycev.net;
- drivemusic.cc;
- mzmuz.ru.
You can download music to your computer or laptop from these resources without prior registration. The presented libraries contain many Russian and foreign songs. However, the functionality of the sites is limited. For example, they cannot be used to cut music from a video or trim the melody to a ringtone.
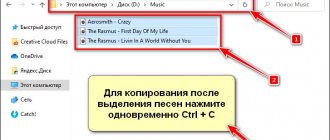
You can download the desired song to your computer or laptop and then immediately transfer it to a flash drive using the search bar:
Enter the appropriate query into the search engine and press Enter.
Click on the site with the required melody.
Click on the “Download mp3” button.
As you can see, everything is very simple. Even removing protection from a flash drive is more difficult than finding the right song and recording it on your computer or laptop.
How to find music by a fragment of melodies on the Internet using applications
When searching for new music, a situation often arises when you know the words of a song and the motive, but the artist is unknown. In this case, special applications that work only on mobile devices can come to the rescue.
An ordinary MP3 player with headphones can serve as a storage device for music.
Voice assistant Alice
Everyone has long known that this assistant has become multifunctional. Now, if you give a command to the voice assistant and say a few lines from a song or sing it, Alice will find the track on the Internet in a matter of minutes. Moreover, using this interface you can immediately download the song by finding it in the browser.
Shazam - will help you search for a passage
It is a handy assistant that is provided for Android and iPhone mobile devices. You can bring the gadget with the program turned on to the playing music, after which an active search will determine the artist and title.
Songs are equally suitable for downloading to USB and SD flash drives
Audio search from Google or Sound Search in Google Play
The resource works strictly with its own database of accumulated music tracks. Record the playing song on a voice recorder, then connect it to the program for listening. After a few seconds, Google will provide an active link to the existing song.
Microflash drives for recording can be used through special adapters or card readers
As for searching for music using a piece of text on a computer, you will need a browser and any search engine. Enter all the text, after which the artist will be found on the site where you can download this track. In addition, you can also use the Alice voice assistant on your PC.
A broken drive board will prevent you from recording music correctly.
Connecting a flash drive
To do this, you need to go to File Explorer on your computer. Depending on the version of Windows, you will have to launch the My Computer, Computer utility, or click on the yellow folder on the taskbar. It displays all connected drives, both built-in and external. Usually you can see three main partitions: C, D, and the optical drive. The letter that is assigned to the laser drive is automatically determined by the system depending on the settings, as well as what other drives are determined by the system. Some people partition their memory into more sections. When you connect your flash drive, it will appear here. In addition, it will automatically be assigned its own letter.
Almost always, the first time you turn on an external drive, the system will display an autorun window in which it will ask what you want to do with this media. You may be offered options to play media files, copy photos, or launch Explorer to view all content. Choose the last option. If this window does not appear, the disk will still be automatically displayed in Windows Explorer.
Find your flash drive in device explorer
If you have autorun activated, then each subsequent time you connect the flash drive to the computer, an explorer window will automatically launch, in which you can see all the stored files. If they are not there, an empty folder will be displayed. In addition, you can see the name of your drive in the lists of all drives. Usually by default it matches the manufacturer's name.
Removing the flash drive
Next comes the moment when you must remove the recorded media from the computer’s USB port. Some people simply pull it out, but you need to do it a little differently. In the main Explorer window, move the cursor to the name of your media, right-click and select “Eject.” A notification will appear in the lower left corner indicating that the hardware can be removed. The flash drive is no longer displayed in Explorer. Now feel free to pull it out of the USB port.
Follow the instructions carefully
About typical problems
We have already figured out a little about how to download music from the Internet to a flash drive, and now a few words about how to fix the most common problems with removable media. If the material does not transfer to the flash drive, then try inserting it into another USB port, as it may be faulty. Next, you need to right-click on the icon of the new equipment that appears and click on “Properties”. You will see whether the device is working normally and how much free space there is. When downloading music, always remember that you can pick up a virus that will infect both the card and the operating system. In any case, the malfunction comes either from the USB port or directly from your flash drive. Everything can be solved by changing the nest or going to a service center.
Where and how to save music
There are several options here. Let's look at each of them. Firstly, you can directly specify in your browser the location where the downloaded material will be saved. Therefore, you can create an empty folder and indicate, for example, in Opera, that you want to save downloads there. But this method is only good when you download only music. If these are programs, games, videos, and all this mixed up, then there is no point in these manipulations. Since downloading music from the Internet to a flash drive is quite simple, let’s say a few words about the second method. Here we need to create a new folder, go to “Downloads” and, using the Ctrl key held down, copy all the music to where we need it. Extremely convenient and fast. It is recommended to use this method, as it is extremely simple.
Article information
This article was produced by our experienced team of editors and researchers, who reviewed it for accuracy and comprehensiveness.
Categories: Computers and laptops
In other languages:
English: Save Files to a USB Flash Drive, Italiano: Salvare Documenti in una Chiave USB, Español: guardar archivos en una memoria USB o lápiz de memoria (pendrive), Français: sauvegarder des fichiers sur un périphérique USB, Deutsch: Dateien auf USB Laufwerken speichern, Português: Salvar Arquivos em um Pendrive, Bahasa Indonesia: Menyimpan File ke dalam USB Flash Drive, Nederlands: Bestanden opslaan op een USB stick, 中文: 将文件保存到优盘中, العربية: حفظ الملفات على ذاكرة تخزين محمولة, ไทย : เซฟไฟล์ลงแฟลชไดรฟ์ USB, Tiếng Việt: Lưu tập tin vào USB, 한국어: USB 저장하는 방법, हिन्दी: यूएसबी फ़्लैश ड्राइव (USB Flash Drive) में फाइल ्स सेव करें (Save Files to a USB Flash Drive), Türkçe: Dosyalar USB Flash Belleğe Nasıl Kaydedilir, 日本語: USBフラッシュドライブにファイルを保存する
This page has been viewed 25,959 times.
Was this article helpful?
Not really
Let's sum it up
Downloading music to removable media is easier than recovering deleted files from a flash drive. Choosing a specific method is a matter of habit. If the user downloads a lot of music, then it’s easier to immediately change the browser settings and no longer face the need to copy.
Thank the author and share the article on social networks.
If you are just starting to explore the Internet and have not yet fully understood all the nuances and subtleties, then this article is just for you. We will talk about how to download music from the Internet to a flash drive. This can be done quite simply; you don’t need anything except, of course, the computer itself with Internet access. And, of course, you can’t do without a memory card either. The first thing you need to do is insert the flash drive into the USB port.
Read also: Turbine oil TP 22 technical characteristics