We have already written several times about the capabilities of the Microsoft Word text editor in general, and in particular about how to create and edit tables in it. The program has quite a lot of tools for these purposes, all of them are conveniently implemented and allow you to easily cope with all the tasks that most users can put forward. One of these is merging cells, and today we will talk about its solution.
Merging cells in Word
When creating a table in Microsoft Word, a group of “Working with Tables” tabs appears on the ribbon (control panel). It includes the “Layout” subtab, the tools of which you and I need to use in order to combine cells.
- Use your mouse to select the cells in the table that you want to merge. These can be either elements of one row or column, or a range of them.
In the “Working with Tables” section that appears, go to the “Layout” tab and in the “Merge” group, select “Merge Cells.”
The part of the table you selected will be merged.
The same action can be done not only using the tools presented in the “Layout” tab of the “Working with Tables” group, but also through the context menu called up by right-clicking on previously selected cells. You need to select the item with the same name as shown above - “Merge Cells”.
Splitting cells
Having learned how to combine the cells of a table created in Word, it will also be useful to have an idea of how to perform the opposite procedure - separating them. The algorithm of actions in this case is almost the same.
- Using the mouse, select the cell (or cells) that you want to split into several. In our example, this is a pair united in the previous part of the article.
In the “Layout” tab, in the “Merge” group of tools already familiar to us, select the “Split Cells” item.
In the small window that will appear in front of you, specify the desired number of rows and/or columns in the selected fragment of the table.
Note: Even one cell can be divided into several parts both horizontally (rows) and vertically (columns).
The cells will be divided according to the parameters you specify.
It’s easy to guess that dividing cells, like the merging we discussed above, can also be done through the context menu. The main thing is to first select the desired range.
How to split a cell into two in Excel?
Only a merged cell can be split into two cells. But an independent one that has not been united is impossible. BUT how to get a table like this:
Let's take a closer look at it on an Excel sheet.
The line does not separate one cell, but shows the boundaries of two cells. The cells above the “split” and below are merged across rows. The first column, third and fourth in this table consist of one column. The second column is of two.
Thus, in order to split the desired cell into two parts, it is necessary to merge adjacent cells. In our example - above and below. We do not merge the cell that needs to be divided.
How to merge cells in Word
While working with tables in the Microsoft Word text editor, various kinds of questions may arise. And in this article we will look at one of them: merging cells in Word. This can be useful if you have column headings and they relate to not one but, say, two or three columns. Or the information in one cell relates to the data of several neighboring ones.
In order not to repeat the same text several times, you can make one from several cells. Then the information will look clear, and you won’t have to re-read the repeated text.
Let's take this example. Let's combine here the rectangles that are in the header and one column on the left, which contains information regarding all other data.
Select the required cells with your mouse. Then go to the tab “Working with tables” - “Layout”, there is a group “Merge”.
Click on the “Merge Cells” button in this group.
After this, from all the selected cells there will be one.
In the same way, we do the merge for other cells.
If your blocks to be combined are not in one row, but in a column, everything is done in the same way as described above. First, select them, then in the “Merge” group, click the desired button.
If you want to combine a certain range, then do the same - select it, for example, two blocks down and three to the right, and press the corresponding button.
You can also remove unnecessary borders using the eraser. To do this, place the cursor in any block, go to the “Working with Tables” - “Design” tab and in the “Drawing Borders” group select the “Eraser” tool. This is if you have Word 2007 or 2010.
In MS Word 2016 or 2013, you need to open the “Layout” tab and in the “Drawing” group you will find “Eraser”.
The cursor will change to a rubber band. Click on the borders you want to remove.
To return to editing the document, press “ESC” on your keyboard and the eraser will disappear.
Many people are also interested in the question: how can you combine cells in Word using hotkeys. Since Word is a text editor, and it is not particularly designed for working with tables, by default there is no keyboard shortcut assigned to this command. But you can assign hotkeys in Word that will be used for this command.
Once everything you need is combined, you can add text in the middle to make it look prettier.
You can also remove borders in the Word table that are not needed. Read more about this by following the link.
In my case, you can also rotate the text in the first cell on the left. This is written about in the article: how to flip text in Word.
As a result, this is what I ended up with. The required cells are aligned and the text in them is logically formatted.
I hope everything worked out for you with the table, and you combined some cells in it.
Table (merging cells by row within two columns)
Good afternoon I didn't find my question in the search. And the question is: how can you merge cells by rows by two columns with a separator? I tried it in Excel with the & function, but somehow it doesn’t quite do it that way.
Example: value value Value value
| 01.04.2013, 15:07 | |
| Consistently merging cells from two columns The situation is this: There are two columns - first names are written in one, surnames are written in the other (and there are many surnames. Complex table. Merging cells We need to make a table like this. For example, there is a table that has 10 rows and 5 columns, but so what. Table in calc, merging of cells disappears I created a table, in each row some cells are merged (in each one large cell. Comparing two columns for cell matches with sorting and replacing cells In general, the task. Imagine there are four columns - two with prices, two with articles. Respectively. | |
| 01.04.2013, 16:34 | 2 |
| Slamzor ,
Without macros, you can do this for a table with two columns (Word 2010):
| |
| 01.04.2013, 20:58 [TS] | 3 |
| Thanks a lot! How the casket just opened. Is it possible to do this without extracting column 5 from the file, but directly inside the table? In the example: column 5 (make one of the two, combining them by row). In the example, the second table is as we would like to see. Dear Script , help me at the same time, put together two tables, I don’t understand why when you delete a paragraph they are layered and not combined by columns. Attachments | |
| 01.04.2013, 23:41 | 4 |
| Slamzor , on the first question. The method that I suggested in message #2 will not work, because... the special character will be inserted throughout the table. So far the only way I see is to use macros. Maybe someone will suggest something else. And I don’t know yet whether it’s possible to do what you want using macros. This happens periodically in the Word program. I attribute this to a glitch in the Word program. I can offer this solution:
Article rating: How to merge columns in a word table Link to main publication Related publications
|
How to merge or split cells in a Word table?
Also articles about working with tables in Word:
You can merge cells in Word in a table, as well as split cells in Word in a table, through the menu on the “Layout” tab, where there are the corresponding items “Merge Cells” and “Split Cells”.
To merge cells in a Word table, you need to select several cells and select the “Merge Cells” menu item on the “Layout” tab, or select the same item from the menu that appears when you right-click on the table.
For these purposes, you can also use the Eraser tool on the Layout tab, which can remove the edges of the table, creating a union of cells.
You can split a cell in a Word table by placing the cursor in the required table cell and selecting “Split Cells” on the “Layout” tab, or after right-clicking on the cell, select the same item in the menu that appears.
After this, the “Cell Splitting” window appears, in which you must specify the number of columns and rows to be created.
Also, to split cells, you can use the “Draw Table” menu item on the “Layout” tab, which will simply allow you to draw the necessary edges in the cell.
How to combine two tables into one in Word
To merge two tables into one, you must do this by dragging the second table onto the first one.
Hover over the table you want to merge until the table handle (plus sign) appears in the top left corner. Click on it and drag the table up until its top row lines up with the bottom row of the table you're merging into.
When you release the mouse button, Word merges the two tables.
Now you know how to easily merge and split tables and table cells in Microsoft Word. You can ask questions in the comments or join our groups on social media. networks: Facebook, Vkontakte.
How to merge cells in Word?
Hello everyone, dear readers! Today, after reading my article, you will learn how to merge cells in Word.
In modern times, Microsoft Word has gained immense popularity. It appears to be one of the most common text editors in the computer environment. In addition to creating texts, this editor also allows you to use tables in documents. Many table users are interested in how to merge cells in a table, and in this article you will learn about it.
Brief description of possible methods
We will provide a list of all merge options for all existing versions of Word. You don't have to figure out which version you have and look for a solution for it. You just need to quickly try the methods on the ready list until you find the one that suits you.
Here are some table merging techniques:
By removing all characters between tables.
By copying and pasting the second table into the last row of the first ( Ctrl+C and Ctrl+V ).
By copying and pasting the second into the first via the Paste as new lines option.
Let's look at them all in order, with detailed instructions and screenshots.
Delete all characters in between
This method is the most common and is described in all manuals. This is especially true of older versions of Word: any tables are joined automatically if you erase everything written between them.
Here's how to do it:
Place the tables one above the other. If there is text between them, cut it out and paste it somewhere else.
Place the cursor on the empty space between the objects.
Press Backspace or Delete, which will eliminate the gap between the objects and automatically merge them.
How to merge cells in Word? — Merger procedure
A menu on a tab called Layout allows you to merge and split table cells in Word. There are special functions for this: “Merge Cells” and “Split Cells”.
To merge cells, select a number of them and select the “Merge Cells” function on the “Layout” tab. You can also access the context menu by selecting the appropriate item after right-clicking on the table itself.
For such operations there is also a special tool called “Eraser”, which can be found in the same “Layout” tab. It allows you to delete table edges and create merged cells.
How to split a table in Word
You can break up the entire table in Word. This can be useful for splitting long tables into two separate tables, mainly to eliminate formatting problems that multi-page tables can sometimes cause.
Select the row where you want to start breaking the table. The selected cell will become the top row of the second table.
Go to the Layout and then click the Split Table .
Now your table has split into two tables.
Separation procedure
To separate cells, use the corresponding “Split Cells” function, located in the same tab mentioned above. First, select the table cell you want to split with your cursor and select the “Split Cells” function. You can also apply the context menu by right-clicking on a cell and selecting the same function from the list provided.
After everything has been done, you will see a window with the title “Splitting Cells”. In this window, specify the number of rows and columns required to create.
In addition, the menu has such a useful function as “Draw Table”, with which you can split cells. It allows you to simply draw the required edges in a cell. The function can be found in the “Layout” tab.
Merge or unmerge cells - Excel
A single cell cannot be split, but you can make it split by merging the cells above it.
Merging cells
Select the cells to merge.
Important: A merged cell displays the contents of only one cell (the top-left cell for left-to-right languages or the top-right cell for right-to-left languages). Data in other merged cells is deleted.
Unmerging cells
Click the down arrow next to the Merge and Center button.
Select From All Cells.
A cell that was not created by merging cannot be split. If you're looking for information about how to spread data from a cell across multiple cells, see Spread the contents of a cell across adjacent columns.
The cell obtained by merging can be divided again into individual cells. If you don't remember where the merged cells are, use the Find command to find them.
By merging several cells, you can create one new, larger cell. This is a great way to do things like label multiple columns.
In the example below, cells A1, B1, and C1 are combined to create the label "Sales for the Month" to describe the information listed in rows 2-7.
Merging cells
Merge two or more cells using the steps below.
Select several adjacent cells that you want to merge.
Important: Remember that only data from the cell in the upper left corner is saved, data from other cells is deleted. To preserve the data from the remaining cells, copy them to another location on the worksheet before merging.
On the Home tab, click the Merge and Center button.
Note that the Merge and Center button is not available when you are editing a cell or if the cells you want to merge are in a table. Cells formatted as a table typically have alternating row fill colors and sometimes filter arrows in the column headers.
To merge cells without centering them, click the arrow next to the Merge and Center button and choose Merge by Row or Merge Cells.
Unmerging cells
If you want to unmerge cells, click the merged cell and select Unmerge Cells from the Merge & Center menu (see image above).
Splitting text across multiple cells
You can take text from one or more cells and distribute it across multiple cells. This action is the reverse of the concatenation operation, where you can combine text from several cells into one.
For example, a column containing full names could be split into a separate column for first names and a separate column for last names as follows.
Follow the steps below to split text into multiple columns.
Select the cell or column that contains the text you want to split.
Note: Select any number of rows, but no more than one column. Also, make sure that there are enough empty columns on the right so that no data will be deleted. Add empty columns if necessary.
Open the Data tab and click the Text by Columns button. The Convert Text to Columns Wizard opens.
Select the Delimited option and click Next.
Select the Space check box and clear the other check boxes. Or check other boxes if the text is separated in a different way (for example, Comma and Space for text in the format “Ignatiev, Victor”). At the bottom of the pop-up window is a data preview area.
Click Next and select a format for the new columns. If necessary, select a format other than the default, such as Text, then click the second column of data in the preview area and select the same format. Repeat this step for all columns in the preview area.
To minimize the pop-up window, click the button to the right of the Destination field.
Anywhere in the workbook, select the cells into which you want to paste the divided data. For example, if you are splitting a full name column into a first name column and a last name column, select the appropriate number of cells in the two adjacent columns.
Click the button to expand the pop-up window again, then click Finish.
By merging several cells, you can create one new, larger cell. This is a great way to create a signature that spans multiple columns. In this example, cells A1, B1, and C1 are combined to create the label "Monthly Sales" to describe the data in rows 2-7.
Merging cells
Click the first cell and press shift, and then click the last cell in the range you want to merge.
Important: Make sure that only one of the cells in the range has data.
Select Home > Merge and Center.
If the & in the center is non-tableable, make sure you are not editing the cell or the cells you want to merge were not in the table.
Tip: To merge cells without center alignment, click the merged cell and select Left, Center, or Right & Center alignment options.
If you change your mind, you can always undo the merge by clicking the merged cell and clicking the Merge in & Center button.
Unmerging cells
To unmerge cells immediately after merging them, press CTRL+Z. Otherwise, do this:
Click the merged cell and click Home > Merge & Center.
When you split cells, the data in the merged cell moves to the left cell.
Using the toolbar
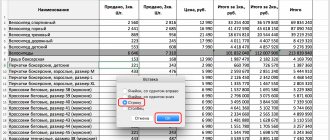
The toolbar contains a merge function - find it and select the range of cells that need to be combined into one element. After selection, click on the function on the toolbar as shown in the figure below.
By clicking the arrow on this function we open the context menu - the first command centers the contents of the element. When you try to combine a range with a value, only the information from the first address is saved, and the program will display a warning about the loss of remaining data. When we click on the “Ok” , we will lose all data, except for those in the first cell.
The following command merges cells by row - if we select three cells in each row and use the Merge by Row , the result will look like this.
The third command merges cells but does not center the content, while also removing data from the remaining cells except the first. Cancellation of the merge is carried out by the last function from this context menu.
Using the context menu
Select the blocks that need to be combined and right-click on them. From the context menu, select Format Cells.
The following dialog box will appear, in which go to the Alignment tab. Check the "Merge cells" box. Here you can set the alignment of the text in the block, or select its orientation. Click OK.
If text was entered into the merged blocks, the program will display the following message: all values will be deleted except the upper left one.
After merging, the word “merge” remains, instead of “let’s merge these cells.”
Using the menu to combine
The latest versions of the program have been updated to include separate tabs, whereas previously we used the classic menu. We call the corresponding functions with small icons located on the toolbar. The lower right corner of the “Alignment Options” contains a button with a cross, clicking on which will bring up a menu with merging.
To merge cells in Excel, you must also first select them, then click on the icon to open the “Alignment” and check the “Merge Cells” . The corresponding fields allow you to set alignment parameters.
Use the button on the ribbon
Select the required blocks, go to the “Home” tab and click on the “Merge and place in the center” button.
The familiar message will appear, all values will be deleted except the top left one - it will be placed in the center.
If you click on the arrow next to the button, an additional menu will appear. Here you can select one of the proposed actions, including canceling the merger.
Using the CONCATENATE function
The fourth way is to combine cells in Excel, saving the data, using the “CONCATENATE” function. We will combine A1 - B1 and A2 - B2.
Let's add an additional column between them. Select B1, on the “Home” tab, click on the arrow next to the “Insert” button and select from the list “Insert columns into sheet”.
Next, select B1, a new column has been inserted into it, and write the following formula to concatenate A1 - C1: = CONCATENATE(A1;" ";C1) . In the quotation marks, enter the separator in the middle: “;” , “:” , “,”, I have a space there.
In the same way we combine A2 - C2. You can simply stretch the formula across the column by pulling the lower right corner of B1.
In order to leave only merged cells in the table, select them and press “Ctrl+C”. Right-click on them and select “Paste Special” – “Values” from the menu.
Thus, we copied only the values of the selected cells; they are now not related to neighboring cells by the formula.
Let's delete column A and C. Select A1:A2, on the “Home” tab, click on the arrow next to the “Delete” button and select “Remove columns from sheet” from the list. We also delete data in C1:C2.
As a result, we received merged cells without data loss.
Word wrapping
In cases where the contents of a cell make it too long, you should place the text in several rows in one cell.
Step 1. Select the required range → Home ribbon → Alignment group of commands → command Wrap text button:
And here is the result:
Step 2. You can click this command again.
| Advice from me | When starting to work with a new table, immediately set the “Text Wrap” mode |
Step 3. Select the entire table ( LM on the crosshairs of the column and row names) → Home ribbon → Alignment group of commands → Wrap text command:
Now you can:
- Merge multiple cells into one
- Find all merged cells
- Set text wrapping by words
Using Macros
The fifth method is to combine blocks in Excel without losing values, using a macro. You can read how to insert a macro into Excel by following the link.
Launch the VBA editor using the key combination “Alt+F11” and create a new module.
Now I paste the following code into the area for entering VBA code. The macro will be called "MergeCell". Save the created macro. If you have Excel 2007 or higher, when saving the document in the “File type” field, select “Excel workbook with macro support”.
Close the VBA editor with the combination “Alt+Q”, after which the Excel document will open.
Now you need to run the created macro. Select the cells in the document that need to be merged. Go to the Developer tab and click on the “Macros” button. In the next window, select the macro with the desired name from the list - “MergeCell”, and click “Run”.
The selected blocks are merged, and the data is preserved. To ensure that text appears normally in a cell, go to the “Home” tab and click on the “Wrap text” button.
I think the methods discussed are enough to combine data or text in Excel cells. At the same time, you can make sure that the data in the merged cells is not deleted.
Finding merged cells
Rarely, but there is a need to search for merged cells. I created another merged cell with a set of characters.
Step 1. Home Ribbon → Editing command group → Find and Replace command → Find command from the drop-down menu:
The Find and Replace dialog box appears.
Step 2. Format command from the Find and Replace dialog box → Merge Cells mode from the Find Format dialog box → OK:
Step 3. Pay attention to the field next to the “Format” command - the word “Sample*” appears there → Find all command:
The Find and Replace dialog box expands and we see at the bottom of the dialog box a list of all merged cells and a hint that 3 merged cells were found, which is true. By clicking on each list item, we highlight the corresponding merged cell.
If you need to switch to another type of search, do not forget to cancel the “Find by format” mode.
Step 4. Home Ribbon → Editing command group → Find and Replace command → Format command → Clear search format command from the drop-down menu: