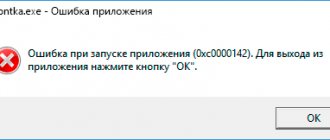
More or less advanced users often use the command line, because through it you can influence most system processes. When using the DISM line, which is present in the seventh and subsequent versions of Windows, error messages may appear from time to time.
This is the norm for any program, but our task is to get rid of the problem in order to execute the necessary command. Error 87 DISM occurs for several reasons, and each case has its own ways to resolve it.
Sometimes users may encounter error 87 in DISM prompt
Let's find out under what circumstances such a message usually appears and how to get rid of it without outside help.
What is DISM error 87
DISM (Deployment Image Servicing and Management) is a tool created by Microsoft to resolve system-related issues. Its use can often be seen in various guides to help solve Windows errors. Unfortunately, some users are having problems using DISM on their systems. DISM Error 87 appears , which prevents the scan from starting. Although DISM exists in older versions of Windows, this phenomenon is usually seen in Windows 10. Since users often make mistakes in writing the commands themselves, fixing the problem is usually quite simple. Of course, there are other reasons that cause the problem such as lack of updates, corrupted files, presence of malware, etc. So, make sure that you try each method from the below instructions until it resolves the error.
Method 4: Repair DISM
Probably, if DISM was critically damaged as a result of user actions, internal errors, or the use of a “crooked” Windows build, it makes sense to restore its functionality. This is not very easy to do and may require creating a bootable USB flash drive. This process in Windows and in the recovery environment was discussed in more detail in the article at the following link.
Read more: Using and restoring System File Integrity Check in Windows
When using an amateur build, we recommend switching to a clean, or even better, licensed version. We are glad that we were able to help you solve the problem. Describe what didn't work for you. Our specialists will try to answer as quickly as possible.
Did this article help you?
RECOMMENDED: Click here to fix Windows errors and optimize system performance.
DISM is a Windows tool used by IT professionals to mount a Windows desktop image and to change Windows features and settings. This stands for Deployment Image and Servicing Management (DISM). This tool is used to fix problems such as system inconsistencies, broken Windows image, problems caused by updates or changes, and errors such as DISM error 87, 112, 11, 50, 2, 3, 87.1726, 1393, 0x800f081f .
The troubleshooter runs the tool from a command prompt by entering DISM.exe and a string of statements or switches.
Here is a list of error messages that come with each error code:
DISM error 87 – The parameter is set incorrectly.
DISM Error 112 – There is not enough disk space.
DISM Error 11 – An attempt was made to load a program with an incorrect format.
DISM Error 50 – The request is not supported.
DISM Error 2 – The system cannot find the specified file.
DISM Error 3 – The system cannot find the specified path.
DISM error 1726 –
The remote procedure call failed.
DISM error 1393 – The disk structure is damaged and unreadable.
Check the correct spelling of the command.
As already mentioned, the most common cause of errors may be incorrect commands. Please note that the entry DISM.exe /Online/Cleanup-image/Scanhealth is incorrect. You must put spaces between each '/' slash, meaning the correct command should look like this:
DISM.exe /Online /Cleanup-image /Scanhealth
or
DISM.exe /Online /Cleanup-image /Restorehealth
If this is not your case and the error persists even after checking the command, then proceed to the next steps below.
Windows 10 won't boot anymore...
Let me make a reservation right away - you shouldn’t have any illusions, because the matter is practically ruinous. If the system was unable to successfully apply the entire arsenal of repair tools, such teams cope “50/50”. Those. according to the “lucky or unlucky” principle. But our conditions are the same: somewhere you need to get a bootable flash drive or disk with the same version, build, language as yours. We still need the same install.wim file. Some may have problems identifying the version; however, if you regularly updated Windows 10 (i.e. every six months), feel free to download the latest copy of the system. To install on disk, use the computer of your friends and neighbors.
- We take out unnecessary flash drives, disconnect unnecessary disks so as not to get in the way
- We start from a bootable flash drive/disk
- Exit to the command line
We launch the Diskpart utility, which will tell us how future DISM commands will see partition letters. Let me remind you that now you should forget about those to which you are accustomed during work. And enter the commands
list disk select disk X
where X is the number of the hard drive on which the problematic Windows 10 lies. If there is only one drive, then the command looks like
select disk 0
We are looking for sections. Now Windows will show us disk volumes, flash drives, cards and DVDs:
list volume
Look: the partition with Windows files where it “died” has the letter D. The disk with loaded install.wim has the letter E. Remember your letters, and we no longer need Diskpart:
exit
Let's create a mount folder with Windows files on the same hard drive where the beaten Windows 10 is (I have D):
mkdir D:\mount
We transfer files from the flash drive here::
dism /mount-Image /ImageFile:E:\sources\install.wim /index:1 /mountdir:D:\mount\ /readonly
Restoring the image:
DISM.exe /Image:D:\offline /Cleanup-image /Restorehealth /Source:D:\mount\windows /LimitAccess
Close the console and reboot into restored Windows 10.
Good luck.
Run Command Prompt as Administrator.
There is a possibility that the command prompt is not opened as an administrator. If so, the console does not have the necessary permissions to run the commands. This is also known as the advanced command line, allowing users to access all the features of the utility. If you are not sure whether to run Command Prompt correctly, follow these steps:
- Type cmd into the search tab next to the Start Menu .
- Right-click and select Run as administrator .
- An interim window will appear asking for permission - just click Yes .
- After opening the console, try entering the DISM command.
If this method still fails to resolve the error, move on to the other solutions provided below.
Solution
Depending on the reason that caused the error, one of the methods to solve the problem is used.
Run cmd with Administrator rights
A user may be confident in their actions and perform functions correctly, but still encounter errors due to lack of administrator rights. To run cmd (short for command line) with administrator rights, you need to do the following:
- Open the Start menu, find and launch the Run utility.
- In the text line, enter the command “cmd”, in the search result that appears, hover the mouse cursor over the command line.
- Right-click and select Run as Administrator.
When performing these actions, requests from the control line will be processed by the system with the necessary administrator rights.
Spelling check
Often error No. 87 occurs due to common errors when writing commands. You need to check the correctness of your input and make sure there are no extra spaces or symbols. Particular attention should be paid to the spelling of the “/” symbols. Each of these characters must be preceded by a space.
An example of the correct command syntax: “DISM.exe / Online / Cleanup-image / Restorehealth.”
Installing the update
If the commands are written correctly and run with administrator rights, but the error still occurs, we can assume that the reason lies in the lack of current updates. This problem primarily affects version 10 of the operating system. In 2017, a special update was released - Fall Creator, designed to correct this error.
If automatic downloading and installation of Windows service packs is disabled on the user's computer, the action to resolve the error will have to be performed manually. Because of this:
- Open the Start menu, find and launch the Run utility.
- In the text line, enter the command “ms-settings: windowsupdate”.
- In the Windows Update window that appears, click the “Check for updates” button.
- Once the download and installation of the service packs are complete, you will need to restart your computer.
If error 87 persists after following these steps, you will also need to update your DISM version. To fix this, you need to search online for an updated version that contains the “Wofadk.sys” file system filter and install it on your computer.
Make sure Windows has all updates downloaded.
Sometimes DISM error 87 can be due to faulty updates. The most recent case occurred in 2022 when Microsoft released a buggy update package. The problem was later resolved in the Fall Creator's Update. Typically, users of a licensed version of Windows have nothing to worry about since their system is always up to date. Therefore, this problem is usually popular among pirated versions of Windows based on older versions. If you have automatic updates turned off, you should install the latest update available in the list. Here's how to do it:
- Click Windows Key and Me at the same time to open Windows Settings.
- Select Update & Security .
- Select Windows Update on the left side and click Check for updates (sometimes you'll see Download button, meaning an update has already been found).
- Wait while Windows finishes searching for new updates.
- Once detected, install new updates and restart your computer.
Now you can try running the utility again. Load the command prompt properly and the DISM command accordingly.
Client OS
By the time Windows 7 was released, the cost of 1GB of hard drives was so low that the WinSxS folder only caused headaches for those with little you-know-what. However, SSDs were already coming onto the scene, and the Windows servicing system didn't fit well with their modest capacity.
Indeed, all modern Clover Trail tablets are equipped with a 64GB disk at best. And in more popular junior models, after subtracting the recovery partition, about 25GB remains, which is not enough for more or less long-term operation of Windows.
In Windows 8, clearing component backups aims to make better use of the space on small tablet drives, while in Windows 8.1, uninstalling previous versions provides a fallback for the worst cases.
Run a scan using System File Checker (SFC).
Another scenario where DISM error 87 could potentially occur is corrupted or missing files. This means that some files responsible for DISM operation are simply missing. To check this, you can run an SFC scan using the command line. Here's how:
- Open Command Prompt by entering cmd in the search box next to the Start Menu button.
- Right-click on Command Prompt and then Run as administrator .
- Once the console opens, type sfc /scannow command and press Enter .
- When the recovery process is complete, restart your computer.
How to fix error 87‘ Invalid parameter ’
This error message also appears when a required service is not running on your computer, so you will not be able to connect to the network and may not be able to install network adapters, thus services such as Plug and Play, Automatic Remote Access Connection Manager Remote access connection manager and telephony.
Error 87 can also occur when you try to copy files to a SharePoint server, but the file itself is restricted.
Another likely cause is hardware errors and/or disk or file errors that are corrupted (or whose data is corrupted).
There are various solutions to fix this problem depending on your situation, but basically this problem can help to verify the ability of drag and drop to copy data or change devices by testing on different drives.
However, error 87 tends to be vague, so you can't narrow it down to one solution, but here are some fixes you can try.
Scan your computer for malware.
Malware is known to cause many problems once it infects a system. It can damage important settings, delete some entries and lead to multiple errors. Keep in mind that even pirated software can pose a threat to your PC configuration. If you suspect that a recently downloaded program is causing the error, try removing it manually. In other cases, we recommend scanning your device for malware. You can do this using an antivirus. One of the highest quality products is Malwarebytes Anti-Malware. You can use it to detect and effectively counter malicious activity. The download button is below.
Code decoding and meaning
According to the documentation, this may mean that the console is unable to launch the game from the disc. Although the description is quite vague, we will try to briefly determine whether this problem applies to your situation.
First, make sure that the curling iron has its own licensed firmware. The problem in the form of error 80010017 can occur due to a hardware failure and the device reading information from the disk.
If you tried to reflash the device yourself, roll back or try a different disk.
Our main task is to determine the object over which we will have to carry out preventive measures.
Run System Restore.
When any attempt to solve the problem is hopeless, the only and best option is to perform a system restore. This is an emergency measure, but it will ensure that your system starts with clean Windows settings and components. This procedure does not affect personal data, which is very good news. All files contained on the disks will remain safe and sound. For this method, you will need to download the official ISO image from the Microsoft website. You can use detailed instructions on the Microsoft Forum.
Additional Tips
Regardless of the type of video card in the AMD or Nvidia system, go to the official website and download the latest driver installer.
Nvidia users have a wonderful GeForce Experience program; it immediately notifies the user when a new driver version is released. At the time of writing, this is version 456.38 dated 09/17/2020.
Next, be sure to install the September updates for Windows. To quickly go and see available updates, open “Start” and type “Windows Update”. The same item can be found in the system settings on the “Options” tab. The latest collection of "Windows Feature Updates, version 2004" fixed many errors when launching games that were due to conflicts, without new updates. This advice applies more to new games, since they are tested on the latest builds of operating systems.
Cleaning and correcting errors in the system registry
In addition to the above, you can install the PC Repair & Optimizer Tool program. The program is compatible with the Windows XP, 7, 8, 10 and even Vista family of systems - Microsoft Gold Certified and is easy to use:
Along with the PC Repair & Optimizer Tool, the CCleaner utility is very popular among users. It also knows how to find and correct errors in the system registry, clean the cache and unnecessary temporary files and garbage. Additionally, it cleans browsers that “eat up” the memory on the hard drive and clog up the RAM.
What does the System Update Readiness Tool do?
Checking resource integrity
Windows command line commands
The System Update Readiness tool checks the integrity of the following resources:
- Files located in the following directories: %SYSTEMROOT%\Servicing\Packages
- %SYSTEMROOT%\WinSxS\Manifests
- HKEY_LOCAL_MACHINE\Components
This list may be updated at any time.
When the System Update Readiness tool detects incorrect manifests, cabinets, or registry data, it can replace the incorrect data with a corrected version.
Logging
The System Update Readiness tool creates a log file that records any issues that the tool finds or fixes. The log file is located here:
- %SYSTEMROOT%\Logs\CBS\CheckSUR.log
- %SYSTEMROOT%\Logs\CBS\CheckSUR.persist.log
Symptoms
Consider the following scenario.
- You have a Windows 10 image.
- Some files have Compact OS compression enabled in Windows.
- You have an earlier version of DISM (that is, the version from Windows 8.1 or an earlier version of Windows).
- You are trying to apply a Windows 10 image using the DISM /Apply-Image command.
In this scenario, the command will fail with error code 87. Additionally, you receive the following error message in the DISM log file:
DISM error DISM WIM Provider: PID=1804 [RestoreReparsePoint:(1332) -> ioctl: setting reparse point tag failed]
C:WindowsassemblyNativeImages_v4.0.30319_64System.Runt0d283adf#9766308db336f6018797df6128270717System.Runtime.WindowsRuntime.ni.dll (HRESULT=0x80070057) – CWimManager::Wim ProviderMsgLogCallback
Creating an installation flash drive with backup
So, Dism++ creates a Windows backup in the format of a WIM file - the same one that is used to store a clean distribution of the system. By replacing the original install.wim file in the installation media with our backup file, renamed install.wim, we can restore Windows according to the type of installation. Only without the final stage of setting up the system and creating a user profile. To do this, you need to create a regular bootable USB flash drive with a clean distribution of your version and edition of Windows. Next, rename the WIM file with the backup to the install.wim file. On the flash drive, go to the “sources” folder, find the source file install.wim in it, and delete it. And in its place we insert install.wim, renamed from our backup.
This method, when applied to EFI Windows systems (installed on GPT disks), has one significant drawback. The fact is that a bootable UEFI flash drive must be formatted into the FAT32 file system. And this does not allow you to record files that weigh more than 4 GB. If the WIM image with a system backup weighs more, and it will weigh more in most cases, when backing up Windows 8.1 and 10, it will not be possible to create a UEFI flash drive in the usual way. But the unusual ones will succeed. To do this, you need to use the free Rufus utility. In it, when setting the parameters for creating a bootable flash drive, you must specify: - GPT partition scheme; - target UEFI system; - NTFS file system.
However, this method will only work if Secure Boot is disabled in the BIOS.
What is DISM?
Fix windows update errors by using the dism or system update readiness tool
Deployment Image Servicing and Management (DISM.exe) is a command-line tool that can be used to service and prepare Windows images, including those used for Windows PE, Windows Recovery Environment (Windows RE) and Windows Setup. DISM can be used to service a Windows image (.wim) or a virtual hard disk (.vhd or .vhdx).
DISM comes built into Windows and is available through the command line or from Windows PowerShell. To learn more about using DISM with PowerShell, see Deployment Imaging Servicing Management (DISM) Cmdlets in Windows PowerShell.
Image Requirements
DISM can be used to mount and service a Windows image from a .wim file, .ffu file, .vhd file, or a .vhdx file and also to update a running operating system. It can be used with older Windows image files (.wim files). However, it cannot be used with Windows images that are more recent than the installed version of DISM.
For a complete technical description of WIM, see the Windows Imaging File Format (WIM) white paper.
DISM can be used to service Windows images starting with Windows 7, Windows Server 2008 R2, and their associated versions of WinPE and WinRE. The commands and options that are available for servicing an image depend on which Windows operating system you are servicing, and whether the image is offline or a currently running operating system.
For a list of the supported platforms and architecture types, see DISM Supported Platforms.
Common Servicing and Management Scenarios
Image servicing and management solutions fall into two main categories:
- Managing the data or information included in the Windows image, such as enumerating or taking an inventory of the components, updates, drivers, or applications that are contained in an image, capturing or splitting an image, appending or deleting images within a .wim file , or mounting an image.
- Servicing the image itself, including adding or removing driver packages and drivers, modifying language settings, enabling or disabling Windows features, and upgrading to a higher edition of Windows.
Limitations
Version compatibility. DISM can be used with target images of older Windows operating systems, but not with target images of operating systems that are more recent than the installed version of DISM. For example, DISM from Windows 10, version 1511 can service Windows 10, version 1511 and version 1507 but not version 1607. To learn more, see DISM Supported Platforms.
Remote installation. Installing packages to a remote computer over a network is not supported.
Answer files. When you specify an answer file (Unattend.xml) for an image, only the settings specified in the configuration pass are applied. All other settings in the answer file are ignored. You can only specify one answer file at a time. For more information, see DISM Unattended Servicing Command-Line Options
Use an answer file to ensure package dependencies. Some packages require other packages to be installed first. Because of this dependency requirement, you should use an answer file if you are installing multiple packages. By applying an answer file by using DISM, multiple packages can be installed in the correct order. This is the preferred method for installing multiple packages.
Package installation order. Packages are installed in the order that they are listed in the command line. In the following example, 1.inf, 2.inf, and 3.inf will be installed in the order in which they are listed in the command line.
Multiple servicing commands are not supported. You can specify multiple drivers (1.inf, 2.inf) or packages, but you cannot specify multiple commands (such as /Add-Driver /Remove-Driver or /Add-Driver /Add-Package) on the same command line.
Wildcards. Wildcards are not supported in DISM command lines.
Packaging a backup into an installation ISO
To create a bootable optical disc, you need an installation ISO. This needs to be taken with a clean distribution kit of the corresponding version and edition of Windows and repackaged, replacing the original install.wim file with the renamed WIM file of our backup. For repackaging we use the UltraISO program. Open the usual Windows installation ISO in it.
In the bottom panel of the program window on the disk we find the WIM file of our backup. Rename it to install.wim.
And drag it to the top panel of UltraISO, into the open “sources” folder.
We confirm the replacement of the original install.wim file with the renamed backup.
Now we can save the repackaged ISO.
To mount an offline image for servicing
- Open a command prompt with administrator privileges.
- To use DISM from an installation of the Windows Assessment and Deployment Kit (Windows ADK), locate the Windows ADK servicing folder and navigate to this directory. By default, DISM is installed at C:\Program Files (x86)\Windows Kits\10.0\Assessment and Deployment Kit\Deployment Tools\ in Windows 10, C:\Program Files (x86)\Windows Kits\8.1\Assessment and Deployment Kit\Deployment Tools\ in Windows 8.1and C:\Program Files (x86)\Windows Kits\8.0\Assessment and Deployment Kit\Deployment Tools\ in Windows 8.
DISM is available in:
- Windows 10
Windows 8.1
- Windows 8
- Windows Server 2016 Technical Preview
- Windows Server 2012 R2
- Windows Server 2012
- Windows Preinstallation Environment (WinPE) for Windows 10
- WinPE 5.0
- WinPE 4.0
- Use the option to retrieve the name or index number for the image that you want to modify. An index or name value is required for most operations that specify an image file.
For example, at the command prompt type:
- Mount the offline Windows image. For example, type:
You can install DISM and other deployment and imaging tools, such as Windows System Image Manager (Windows SIM), on another supported operating system from the Windows ADK. For more information, see DISM Supported Platforms.
Pre-assembly setup
The next step is optional; after completing the installation, you can restart your computer, select the newly installed Windows from the boot menu and configure it from the inside. However, some changes can be made before it starts. Right there in Dism++, open a session for the system installed on the virtual disk and go to the Windows components and settings management toolbar.
With their help, you can disable unnecessary services and components in the assembly, customize the desktop and context menu, apply registry tweaks, and remove unnecessary integrated drivers and updates. It is also possible to install updates from local files or the Internet
We recommend that you pay attention to the following sections:
• Download management. • Optimization. • Applications and features. • Updates.
Be careful at this configuration stage; remove only those components and services whose purpose you know well. This is especially true for drivers; if you mistakenly delete an important driver, the assembly will not be able to install.