Computer users are sometimes faced with a situation where they need to work with old programs that worked successfully on previous versions of Windows. Managing two computers at once is not always convenient. But it is possible to install another edition of the operating system on a work laptop. Parallel operation of two systems can be ensured by a virtual machine for Windows 7 (VM). From this article you can learn:
- what is VM;
- what programs exist for this purpose;
- How to install and configure Windows 7 in a VM.
A second computer is real
Virtual machine is software. With its help, a copy of a real computer is created with:
- hard virtual disks;
- optical software drive;
- analogue of network adapters;
- BIOS, etc.
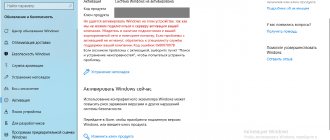
A virtual laptop with its own operating system runs in a separate window and occupies a certain amount of space on the physical hard drive. It looks like this:
The example shows how in a real operating system with Windows 7 Professional installed, the program runs with the virtual Windows XP operating system. And it performs the same actions as on a real device.
Introduction
Oracle VM VirtualBox is a free virtualization application designed to run on a variety of operating systems. Virtualization in this context means that a program allows you to install, run and use different operating systems on one physical device. So, for example, with Oracle VM VirtualBox you can run Linux and Mac on Windows. All virtual machines are isolated from each other, which opens up wide possibilities for using VirtualBox: familiarization with operating systems, testing software, using software that for one reason or another does not work in the main operating system, and much more.
This user guide walks you through the installation process for Oracle VM VirtualBox software and also walks through an example of how to deploy a virtual machine running Windows 7.
1.1. Terms
To understand the contents of the following chapters, it is recommended that you first become familiar with the basic terms:
The host operating system (host OS) is the operating system of the physical computer on which VirtualBox was installed. There are versions of VirtualBox for Windows, Mac OS X, Linux and Solaris host systems. See Section 1.3.
Everything described in this user guide applies in most cases to all operating systems; Differences due to the use of a particular platform will be indicated separately.
A guest operating system (guest OS) is an operating system that runs on a virtual machine. Theoretically, VirtualBox can run any operating system with x86 architecture (DOS, Windows, OS/2, FreeBSD, OpenBSD), however, in order to achieve performance indicators that are closest to the original ones, it is necessary to select the optimal parameters specific to a particular OS. See Section 1.3.
A virtual machine (VM) is a special environment that VirtualBox creates for the guest OS while it is running. In other words, you can run a guest OS in a VM. Typically, the VM takes the form of a dialog box on your computer's desktop, but may also be displayed in full screen or remotely on another computer, depending on which VirtualBox user interface is used.
A VM is a set of parameters that determine its operation and which can be seen in the settings dialog. This set includes hardware settings (how much memory the VM should have, which hard drives and through which file containers VirtualBox should virtualize, images of which CDs should be burned, etc.), as well as information about the state (running whether the VM is currently running, whether it has been saved, whether a snapshot of its state has been taken, etc.). These settings are duplicated in the VirtualBox Manager window and in the VBoxManage command line interface.
1.2. Hardware Requirements
Launching and correct operation of Oracle VM Virtual Box is possible on a computer that meets the following conditions:
Processor : Any x86-compatible Intel or AMD processor, with or without VT-x/AMD-V hardware virtualization support. See Section 3.1.
Free RAM : minimum 1 GB + RAM required to launch and operate the corresponding guest OS. For example, for Windows 7 the recommended memory size is 1024-2048 MB.
Hard disk space : 200 MB for installing VirtualBox + 20 GB for installing VM.
These requirements are approximate and depend on the system requirements of the guest OS being installed.
1.3. Supported Host Operating Systems
VirtualBox runs on the following host operating systems:
- Windows : Windows Vista SP1 and later (32-bit and 64-bit)
- Windows Server 2008 (64-bit)
- Windows Server 2008 R2 (64-bit)
- Windows 7 (32-bit and 64-bit)
- Windows 8 (32-bit and 64-bit)
- Windows 8.1 (32-bit and 64-bit)
- Windows 10 RTM version build 10240 (32-bit and 64-bit)
- Windows Server 2012 (64-bit)
- Windows Server 2012 R2 (64-bit)
- 9 (Mavericks)
Requires Intel hardware. See the Original Oracle VM VirtualBox User's Guide, Chapter 14.
- Linux (32-bit and 64-bit). This also includes: Ubuntu, versions 12.04 to 16.10
- Debian GNU/Linux 7 (“Wheezy”) and 8 (“Jessie”)
- Oracle Enterprise Linux 5, Oracle Linux 6 and 7
- Redhat Enterprise Linux 5, 6 and 7
- Fedora Core / Fedora, versions 6 to 25
- Gentoo Linux
- openSUSE, versions 11.4 to 13.2
VirtualBox can also be run on most systems based on the Linux kernel version 2.6 or 3.x, using the VirtualBox installation wizard or manual installation. See the Original Oracle VM VirtualBox User's Guide, Section 2.3. Officially tested and supported are those versions of Linux for which the corresponding VirtualBox installation package is provided.
Please note that as of VirtualBox 2.1, host systems based on Linux 2.4 are no longer supported.
- Solaris (64-bit) is supported with the limitations listed in the Original Oracle VM VirtualBox User's Guide, Chapter 14. Solaris 11
- Solaris 10 (U10 and above)
Please note that the above list is unofficial. Oracle support for qualified contract customers is limited to the host systems listed. Any component marked as experimental is not supported. Feedback and suggestions regarding these components are welcome.
VM tasks
Almost everyone is faced with a situation where a program downloaded from the network and installed brings with it a trail of unnecessary applications. That is why more advanced users prefer to install the downloaded application in a virtual system and test it both for functionality and for unexpected surprises.
In addition to this, other problems are solved:
- Possibility to test the program.
- Avoid harmful effects from suspicious programs.
- Emulate a second computer network.
- Check the consequences of changing settings in the system.
- Safely perform autosurfing over the network.
- Reduce the likelihood of a real laptop becoming infected with computer viruses.
- Running programs that are incompatible with the real operating system.
Windows Subsystem for Linux 2 (WSL 2)
With Windows Subsystem for Linux, Microsoft brings the Linux environment to Windows 10 desktop and lets you run the GNU/Linux environment—including most tools, utilities, and command-line applications—directly on Windows without modifications, without the overhead of full virtual machines. In the latest versions of Windows 10 Insider Preview, Microsoft released a preview of WSL 2. WSL 2 uses Hyper-V virtualization technology to isolate and virtualize WSL on the back end. This provides not only security benefits, but also huge productivity gains. You can learn more about Windows Subsystem for Linux 2 here.
Most popular emulators
You can find many programs with which you can create a virtual Windows. But it’s best to familiarize yourself with the most popular ones.
VirtualBox
This is the most common free program with which you can emulate the most popular operating systems:
- Windows (with support for different versions).
- MacOS.
- Any operating system from the Linux .
- Interaction with VMs from the paid version of the VMware Workstation .
Windows 7 and the created virtual machine can be easily configured by the average user. The program differs in both performance and stability. In addition, despite its free nature, it has extensive capabilities and a clear interface. It is better adapted for home use than others.
VMware
Also a well-known and popular program. It found its main application in large corporations.
There are two versions of this product:
- Workstation;
- Player.
Workstation version can fully satisfy the user's needs, but it is a paid program. Regular users can use the free Workstation - VMware Player .
The paid version supports work with 32- and 64-x systems, sees USB 3.0, and various operating systems work quite successfully. VMware Workstation is an advanced version of a computer emulator, but due to its cost, it has found its use mainly among large companies, and not among ordinary users.
Microsoft Virtual PC
A similar virtual machine for working in Windows 7. It has wide functionality and a clear, convenient and practical interface. But there is also a significant drawback - it can only work with operating systems of the Windows family. Other operating systems, such as Linux or Mac OS, cannot be run on it.
This brief overview describes three of the most popular virtual machines. Now you can see that for home needs it is best to use the VirtualBox . Next, the procedure for installing and configuring it will be discussed.
Microsoft Hyper-V
Hyper-V Virtual Machine Manager is a built-in component of operating systems of all editions of Windows 7-10, with the exception of Starter and Home editions. If you look at it, it’s no worse and no more complicated than the two discussed above, it’s just that some users don’t know anything about its existence and that’s the only reason they prefer third-party software.
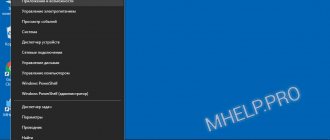
To activate Hyper-V Manager, go to the Applications section of the Windows Control Panel, click “Turn Windows components on or off” and in the window that opens.
Restart your computer, open Search and use it to launch Hyper-V Manager.
- To create a new VM, in the “Actions” manager panel, click “Create” - “Virtual Machine”.
- Give the new virtual machine a name.
- Determine its generation - 1 (old, which includes Windows XP and all 32-bit systems) or 2 (new - 64-bit Windows 7, 8.1 or 10).
- Allocate RAM to the virtual machine. The "Dynamic" checkbox will allow the main OS to use part of the memory that is not used by the guest OS for its needs. This useful feature, by the way, is not available in either Virtualbox or VMware.
- We'll leave network settings for later. Let's leave the default "No connection".
- Next, we determine the size and location of the virtual disk and assign it a name.
- The last step is the guest OS installation options. We indicate the location of the distribution media or iso image file. Or we’ll postpone installing Windows until another time. After clicking the “Finish” button, the virtual machine will be created, and after this the installation of the operating system will begin. Its progress is also no different from installing the OS on a real computer.
A list of all Hyper-V virtual machines appears in the middle of the manager window. To launch any of them, double-click on its name. In the window that opens after this, click the “Start” button.
To enable Hyper-v virtual machines to connect to the Internet, launch Virtual Switch Manager from the Actions panel. Select the network type "External" from the list below and click "Create Virtual Switch". “Internal” and “Private” networks are designed to connect virtual computers to each other, and are not needed by most users.
On the next page you usually don't need to change anything except the connection name if you want. The “External network” drop-down list should indicate the network adapter of the physical computer that is connected to the router or Internet provider cable. Below that, there should be a checkbox next to “Allow the management OS to share the adapter” (i.e., the Internet).
By the way, Hyper-v supports not only operating systems of the Windows family, but also some competitors, in particular, Linux and FreeBSD. A complete list of all platforms compatible with it, as well as the conditions for their use in the Windows environment, are given on the MSDN.microsoft website.
Installing Windows 7 in a VirtualBox virtual machine
The installation process of a virtual operating system can be divided into several stages:
- Install the VirtualBox .
- Download the file with the Windows 7 image for the VM.
- Installation of virtual Windows 7.
Let's consider all these processes separately.
Install VirtualBox
First of all, you need the virtual machine itself. As already mentioned, there are several of them. We are interested in VirtualBox . You can download it from the official website https://www.virtualbox.org. From the proposed list, select VirtualBox 5.1.14 for Windows hosts.
The process of how to install a VirtualBox is described in other articles, but there are a few points:
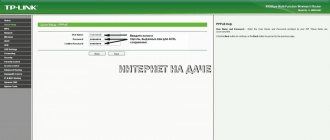
- Correct installation of the virtual machine will begin only as a computer administrator.
- It is quite possible that during the installation process and after its completion, the Internet connection may be lost. If this happens, you need to uncheck the component in the wireless network properties VirtualBox Bridged Networking Driver.
After the Internet connection is restored, you can begin downloading and installing the finished VM file in Windows 7.
Finding a ready VM
Microsoft, in order to test different versions of Internet Explorer (8, 9, 10, 11), has specially prepared several options for downloading VMs with pre-installed Windows versions (7; 8.1; 10) from its website https://developer.microsoft.com/ru- ru/microsoft-edge/tools/vms/. If this link is not available, the browser will automatically redirect to the English version of the site https://developer.microsoft.com/en-us/microsoft-edge/tools/vms/
So, first you need to select a Windows 7 image with any version of IE (8, 9, 10, 11).
From the drop-down list, select the item which virtual machine will undoubtedly be used. In our case it is VirtualBox .
And click on the Download .zip button. The zip file download process will begin.
All that remains is to install and run the virtual machine on Windows 7.
Adjusting virtual Windows 7
The virtual Windows file itself is extracted from the archive “IE10.Win7.For.Windows.VirtualBox.zip”.
After the file is extracted, right-click on it
and from the drop-down list, select “
Open with ”.
In principle, nothing needs to be changed in the import parameters. You can leave it as is and click the Import button.
The configuration process will start. Import Configuration window looks like this:
After the process is completed, the new seven and the VM will appear in the list of the VirtualBox . To launch it, just double-click on the VM itself, or click on the “ Run ” arrow button. The operating system startup process will begin immediately. If you install it for the first time, it will take a little longer, however, the same thing happens when installing a real OS. Once the installer has completed all the necessary steps, a desktop with a working Windows 7 system will appear.
Windows 7 in English and the created virtual machine are ready to launch.
VMware Workstation Pro
VMware Workstation pro is a no less functional product than Vrtualbox, but is designed for professional use and integration with other services of the manufacturer. Not free and quite expensive, but also very popular among home Windows users.
A free version of VMware for personal use also exists. This is VMware Workstation Player, but its low functionality, much inferior even to the non-commercial Vrtualbox, turned the love of our fellow citizens away from it.
The full-fledged VMware Workstation Pro, which we will get acquainted with today, like its competitor, supports a lot of operating systems, including mobile and Mac OS X (by the way, it is compatible with more editions of OS X than Virtualbox), and emulates all major computer devices. It also emulates the BIOS interface, unlike Vrtualbox.
Let's look at the process of creating a virtual machine and starting the installation of Windows 10 on the VMware Workstation Pro platform.
The design of the main program window (which, by the way, changes from version to version) will not allow even a novice user to get confused.
- To create a new virtual machine, click the button of the same name on the “Home” tab.
- In the first window of the VM creation wizard, specify the configuration type. If you need a computer with standard parameters (which are sufficient in 90% of cases), o.
- Next we will indicate the type of OS that we will install on this virtual machine. The program makes it possible to start the installation immediately after creating the VM, without any unnecessary actions on your part. If you agree to this, indicate the path to the image file or media with the system distribution, if not, oh.
- To avoid having to enter your product key, username, and password during Windows installation, enter this information in the next window. You can skip the first point.
- Give the new virtual machine a name and indicate the future location of the operating system folder.
- Determine the virtual disk size. By default, VMware gives Windows 10 a whopping 60GB, but we can increase or decrease this amount. Next, you have to specify how the virtual disk will be saved - in one or more files.
- The parameters of the newly created virtual computer are shown below. If you are not satisfied with something, for example, the size of RAM, click “Hardware settings”.
- Change the desired characteristics, return to the previous window and click “Done”.
- After this, the installation of the operating system will finally start. Your participation will be needed closer to its end - to set up network discovery and check for updates.
- After loading the desktop, the program will automatically install VMware Tools on the new system - the same as the guest OS additions in Virtualbox. After this, the virtual machine is ready to work.
A list of all installed guest operating systems is located on the “My Computer” tab.
Some VMware virtual machine options
Before installing VMware Tools, the guest window, like in Virtualbox, captures the mouse cursor. To return it to the main OS, press Ctrl+Alt.
To get to the BIOS interface of a virtual machine, select it in the list, open the startup menu (the “play” button on the top panel) and click “When you turn on (the machine), enter BIOS mode.”
Set up a virtual system
All VM controls are intuitive. But if you have any questions, you should carefully read the pop-up tips in Russian. You can turn to help for help, where you can find answers to all your questions.
Typically, both the mouse and keyboard only work in the VM and are blocked in real Windows. But it is possible to switch between the two systems using the Right Control host key.
Now that the virtual machine is installed and running, you can configure Windows. The first step is to install software components (drivers) for all virtual devices. This process is quite simple. You need to go to the main menu and in the “ Devices ” line click on “ Install guest OS add-ons ”.
After installation is completed, the VM is rebooted. Now the picture has become clearer, the VM window can be dynamically changed, support for mouse integration will be enabled, and access to the Internet will open.
VirtualBox also has the ability to expand display functions. In this mode, windows that open in the VM will be displayed on the real desktop, and not in a separate program window. This makes it possible to facilitate access to all controls and installed VM programs.
Checking for Virtual PC
If you installed Windows 7 Ultimate, Enterprise or Professional versions, then you have the Virtual PC feature by default. You just need to make sure that the processor supports hardware virtualization. This can be done using the utility from Microsoft Hardware-Assisted Virtualization Detection Tool.
Download the utility and run it. Depending on the results of the processor test, the following messages may appear on the screen.
- Hardware virtualization is supported - you can use a virtual machine without any additional settings.
- Hardware virtualization is not supported - you need to make some changes to the system.
Enabling/disabling virtualization is done in the BIOS settings, so before installing Virtual PC manually, make sure that the option is activated.
The option may be called Intel_Virtualization Technology, AMD-V, Virtualization Extensions, etc. Find this feature in the BIOS and change the value from “Disabled” to “Enabled”.
If after this you cannot start the virtual machine, Windows offers to install a special patch. At this stage, it is important to choose the correct system bit size – x32 or x64.
Shutdown virtual Windows 7
Just like in a real laptop, Windows installed in a VM requires a certain order to be completed. You can complete the job by pressing the button to stop the job. A menu will open offering three options for closing the VM.
“ Save machine state ” - before shutting down, the machine will save all running applications at the time of shutdown. When the VM is turned on again, work in it can continue from the moment it was turned off.
“ Send shutdown signal ” - all applications can be closed, and the machine will turn off automatically.
“ Turn off the machine ” - the same as if a real computer was de-energized.
You may also be interested in:
- VMware vSphere 6 for Technical Writers: Code In the final part of the article, we will focus on additional components that...
- VMware vSphere 6 for Technical Writers: Bolero We continue publishing a series of articles on our blog dedicated to organizing...
- VMware vSphere 6 for Technical Writers: Overture A new series of articles talks about how to organize the work of technical…
- The fastest way to get a custom screenshot We present you an overview of a simple but very useful application. It represents...
Tags:
virtual environments, tools, experience
Windows 3.0
This was a big change from what we had just seen in Windows 1.01. This operating system arrived five years after the first version, offering multitasking and better memory management. It became Redmond's first massive hit, and many will remember the popular Windows 3.11 workgroup version . In this web page we can emulate the operation of Windows 3.0.
Emulate Windows 3.0
On the PJCJs Machine website, you can also emulate the 3.10 version of Windows from within the browser without leaving Google Chrome and with the idea of looking at the big picture to remember what the various windows, menus, and options were like.
Test Windows 3.10
First start
After installing XP Mode, the "seven" must further configure it to create a virtual disk. Therefore, after clicking the “Finish” button, the following window will appear on the screen, in which there will be another license agreement, the terms of which you must accept.
Specify the folder where the virtual disk will be located and create the first user.
Enable security features of the system you are creating. This is not necessary. Click "Start Installation".
The installation process will start; you just have to wait for it to end.
Classic and old games
You may not be interested in emulating previous versions of Windows, but all you want to do is go back in time and play classic games that are impossible (or almost) to find today. In this case, through the Archive.org website we can find names from our childhood or youth. Archive.org has a library of over 10,000 MS-DOS games but you can also browse other collections if you're interested in the games we've already used on Windows. You can filter by publication date, use a search engine to find something specific, or explore the different collections available to users on the web page. For example, we can find the collection "Software Library: Games for Windows 3.x" with more than a thousand titles available that we can use directly from the browser.
The main advantage of these classic or vintage games is that you do not need an emulator or any type of download or specific program, but rather you only search for the one that interests you, want to play and launch. It is played in the browser itself from the Archive.org website, and its only drawback is that you need an Internet connection to enjoy them. Although another "problem" is that your games will not be saved the next time you play. But it's a fun way to revisit those old games you loved.
Windows ME
From the virtual desktop we can open other versions, such as Windows ME. Windows SE ME was released in 2000 and became one of the most criticized. The Millennium Edition, considered by many to be the "worst version of Windows". He wanted to move away from MSDOS and focus on home entertainment . We can remember how it was in this browser emulator, where we can open Outlook Express, open the Control Panel, search in the Recycle Bin...
Test Windows ME in a browser
Windows 95
We all (or almost all) remember it, and it's starting to look like Windows does today, saving the distance. Desktop, Start menu, windows... Since 1995, thanks to many new features, it has already allowed us to have support for USB or FAT32 file format. You can try this on the PCJS.org website, where we will simply have to click a link, wait for the system to boot, and we will be able to navigate through the various menus, just like on any computer of the time. You can open the main menu, explore files...
Windows 95 emulation from PCJS
You can also emulate Windows 95 from the Win95 website , with an identical appearance (how could it be otherwise) than the previous one. You just need to accept the permissions and the emulator will launch, taking us to the operating system screen more than twenty years ago.
Test Windows 95
Windows 1.0
More than thirty years ago, Windows 1.0 was released, and you, reading us, may not have even been born, or had a computer at home, or haven't been able to try one. If you are interested or have used it at the time, you can check how it was using an online emulator, a browser emulator that we can test. without having to install anything or configure the virtual machine. We can do this on the PCJS page to remember what it was like to use that first version. While you can't do everything from this web emulator, you can try out some of the features.
Windows 1.0 was released on November 20, 1985 , almost 30 years ago, being one of the first to feature a graphical user interface aimed at the general public. Windows 1.0 was supported until December 31, 2001.
Try Windows 1.01 Premiere Edition
Windows 1.01
Version 1.01 was the first version released, as the previous one had a serious bug that forced it to be withdrawn. You can also see how it was in this browser emulator where you can try out many of the older versions of Windows. So you can see the main differences between this one and the previous one. As a curiosity, Blue Screen of Death (BSOD) has already appeared when a serious error occurred in the operating system. If we want to relive the feeling that using this operating system gave us, we can access the PCJS emulator directly from the Internet browser. To be true to the era of this system, it simulates a computer with a speed of 4.77 MHz, 256 kilobytes of RAM and a CGA resolution screen . It only enables access to the virtual floppy drive.
Try Windows 1.01