Tablet computers are not very different in functionality from desktop computers and laptops. However, sometimes the question of how to download music from a tablet to a flash drive can cause difficulties. We will show you how to do this quickly. Flash storage is easy to use due to its compactness and accessibility.
How to connect a flash drive to a tablet computer
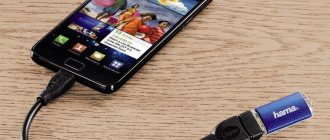
In order to find out how to transfer music to a flash drive from a tablet, we will first figure out how you can connect the device for downloading. The gadget’s configuration does not always provide for the placement of a USB port; most often, the manufacturer installs a MicroUSB mini-port. Connecting a drive for data transfer is performed using two methods:
- via USB-OTG cable
- via a proprietary USB adapter.
To connect flash memory via MicroUSB and transfer music to it, you need to connect the drive itself to the OTG input, and connect the connector to the MicroUSB port. If your device has support for USB Host, then it will be able to recognize the device automatically and the question of how to transfer music from a tablet to a flash drive will be easily solved for you. Note that the OTG cable and the proprietary adapter are no different and are used to use a standard USB port.
If the connection is successful, you will see a message about this on the screen. You can log into the drive through the file manager and view its contents.
Instructions
Using the example of the game "Shadow Fight 2".
- Go to the SD drive and highlight the Android folder.
- The entire game cache is stored in directories called Data
and
Obb
. - Cut out the “Shadow Fight 2” directory from the section called SD Card
/
Android
/
Data
and move this content to the section called
External SD
/
Android
/
Data
. - the SD Card
/
Android
/
Obb
section are subject to exactly the same manipulation , which also need to be transferred to
External SD
/
Android
/
Obb
.
One of the main advantages of the ES Explorer application is that all application and game icons are shown in the section that is responsible for its operation.
Working with the browser
You should tell us how to save downloaded information from the browser to an SD drive.
- Launch the browser.
- Select the section called “Operations”.
- In this menu, find the “Downloads” section.
- Go to “Settings” of downloads.
- In this section, you can change the file download path to any convenient one, including External SD.
For those who like to play (working with cache)
Many users know that all downloaded utilities are installed on the smartphone’s internal storage as standard. And it happens that a downloaded game can take up all the space in memory, which will not allow you to additionally download any application. Such games carry with them an additional cache (the main folder with download files) and most often this folder takes up a lot of space. Knowing how easy it is to copy files from Android to a memory card, you can copy the cache to a flash card, the game will remain functional, and there will be much more space on your smartphone.
Is it possible to connect a flash drive to a tablet via full-size USB or Wi-Fi?
Most similar gadgets are not equipped with such a connector. However, there are a few tablet models with a full-size USB port. It allows you to connect a flash drive directly without using additional cables and adapters. For example, this input is available at:
- Gigabyte S1080
- Lenovo IdeaPad MIIX (Lenovo also has other models with a full-size USB port)
- Acer Iconia Tab W700
- Acer Iconia Tab A211
- Prestigio Multipad Visconte A, etc.
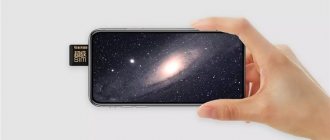
In addition, there are flash drives with Wi-Fi (though there are very few of them). To connect such removable media to the tablet, no cable is required at all. They are connected via a Wi-Fi communication module, which every modern gadget has.
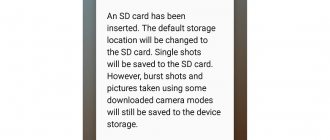
Saving photos
If you want camera pictures to be automatically saved to the SD card, this can be adjusted through the camera settings:
- Switch to shooting mode.
- Go to “Camera Settings”.
- Select the “Memory” section.
- Check the “SD Card” storage mode so that all pictures taken are saved in this section.
How to download music to a tablet
What kind of device can there be without musical compositions? In principle, we have already considered the methods. How can you transfer something to or from a tablet. The principle is the same. Let's look at one more method. How to download music to a tablet in large quantities, although not necessarily in large quantities. Download any torrent client. After entering the program, select your artist in the search. The application, as a rule, will take you to a browser with the result of your search, but for torrent files. Once the download starts, you can go about your business. All music will be played in the background. You can view the download status at any time in the task menu (in Android – top swipe). By going to the program itself, you can limit the speed, pause the download and perform a number of other actions.
Most likely, a large number of people have encountered the need to quickly copy files from a USB flash drive to a tablet running Android. Many users believe that without a computer they cannot copy data and do not know that the ability to connect USB flash drives directly to the tablet is implemented at the operating system level, starting with Android 3.1.
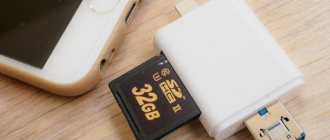
What adapters are needed to connect a USB flash drive to tablets
Due to thickness restrictions, manufacturers cannot build a regular USB connector into a tablet computer. Developers install either a microUSB interface or their own proprietary connector in gadgets. In this case, to connect USB flash drives to tablets, various “adapters” are used. This is what we will look at next.
Connecting a USB flash drive to tablets with a microUSB connector
If your tablet computer has a microUSB connector, you need a USB OTG cable to connect a flash drive. Using a USB OTG adapter is quite simple - you just need to connect the flash drive to the adapter and plug it into the connector on the tablet. When connected to a tablet or smartphone running Android OS, the file manager (File Manager application) is automatically launched, which is available for free download in the Google Play store. Using the file manager, you can perform all the usual actions - create folders, move or copy data. Also, various programs that are installed separately are suitable. Convenient file manager - ES Explorer. You can download it absolutely free from the Google Play store. The path to the files is as follows: mnt –> sda –> sda1.
How to connect a USB flash drive to tablets that do not have a microUSB connector
Some developers install on only branded connectors. For example, such connectors can be seen in Samsung Galaxy Tab models. In this case, you can use an “adapter” that has a USB connector on one end and a 30-pin connector on the other. This solution is no match for the OTG cable, unless of course you take into account its higher cost.
How to connect a flash drive to a Google Nexus 7 tablet
If you own a Google Nexus 7 tablet, the file manager method described above will not work. In this situation, you need to use the paid utility Nexus Media Importer or the free one - StickMount, but with the need to install root rights.
Another useful utility that can be used to work with flash drives is called USB OTG Helper, but it requires superuser rights to work.
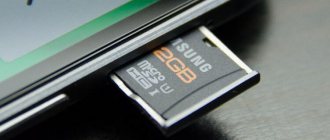
The tablet is our irreplaceable friend and assistant, which we take with us everywhere. Thanks to high-quality cameras, it’s convenient to take photos on a tablet, which over time becomes necessary to transfer from the “Gallery” of the device to an external storage device. Typically, information is copied onto disks (CD/DVD) and flash drives. Flash drives are especially popular - easy to use, compact, silent and affordable. USB flash drive, Micro SD or SD card? It all depends on the type of device from which the information is copied - the last option is used with cameras, the second with smartphones and tablets, and the first is universal.
Working with contacts
Information about saving phone contacts on the device's SD drive will also be useful if you need to make a backup copy of your phone book.
- Go to saved contacts.
- Select the “Operations” section.
- Find the category "Import / Export".
- Next you need to export to an SD drive.
- Select the contacts you are interested in and click on “Export”.
Transfer via "Settings"
On some Samsung models, you can transfer applications to a memory card in the smartphone settings. Let's see how it's done:
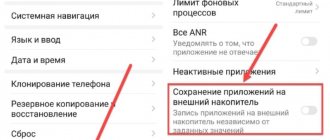
- Go to settings and select the "Applications" section.
- Through the manager, select the software that you want to save on the SD card.
- In the “Memory” section, click “Change”.
- Check the box next to “Memory card”.
- Use Export Classic to Samsung to complete the transfer.
Situations when the gadget does not see an external USB drive
Sometimes the user is faced with a situation where the file manager is selected correctly, the settings are set correctly, and the OTG cable is selected correctly, but the gadget does not detect the presence of a connected external device. The reasons for this may be the following:
- The flash drive is formatted in NTFS format, which the Android operating system installed on some gadgets cannot read. To eliminate this reason, just reformat the flash drive to FAT 32 format and the gadget will detect it
- The USB drive has a capacity that exceeds the readable limit (usually 32 gigabytes. In this case, you need to connect a smaller flash drive with a capacity of 4 to 16 gigabytes and check its readability.
- Tablet system failure, which can occur for any reason. To do this, just turn off the tablet, wait a few minutes and turn on the device again. Some users repeat this procedure several times and reading is restored;
- Low voltage supply, which is supplied to the flash drive through the USB port of the tablet. This defect is usually eliminated by using a smaller flash drive that has lower power consumption.
Problems that arise during the transfer process and how to solve them
The described methods for transferring files from a tablet to a flash drive do not require special knowledge and skills. If you're trying to connect a device, but File Explorer doesn't see it, the problem may be an incorrect connection. In this case, you just need to remove it and connect again.
Some problems may arise if the memory on the flash drive is full. To further follow the steps on how to transfer files from a tablet to a flash drive, you need to remove it, and then proceed to the process of transferring movies and other large files. Or you need to purchase a larger capacity device.
What you need to know about micro SD cards
Many inexpensive Android smartphones have a small amount of internal memory (4 or 8 GB). At the same time, 16 GB is not always enough, because few people limit themselves to a couple of movies and applications. Many users want their gadget to fit as many high-resolution photos and videos as possible, as well as all their favorite music tracks. Luckily, most Android smartphones support microSD cards.
Before purchasing a card, you need to find out what the maximum memory capacity of the gadget is. Flagship models typically come in sizes up to 128GB and above, but many Android smartphones are limited to 32GB. To be honest, this amount of memory is enough for most users.
By inserting a microSD card, you can set a new save path for new apps, photos, videos, audio files and more; change the location where images are saved in the camera settings, as well as songs downloaded in the Google Play Music application. But what about applications that are already downloaded to the internal memory of the smartphone?
How to Transfer Apps to SD Card in Android
Let's make a reservation right away: not all applications can be transferred to a microSD card: some applications have protection that will prevent you from doing this. In other words, users of smartphones with 4 and 8 GB of internal memory, who are accustomed to downloading and installing dozens of applications even with a microSD card, may encounter the problem of lack of memory.
The ability to transfer an application to a memory card is usually determined by the application developer, and sometimes by the device manufacturer.
For example, one of the smartphones on which you can move applications to an SD card. However, these applications will no longer be available if you remove the memory card.
To see if you can move an app to a microSD card, go to Settings, then Apps, and select the one you want. On some Android smartphones, the settings menu may have a different name and appearance, but the application settings should still be there.
The first tab of the application settings menu displays all downloaded applications on the smartphone. The tab on the right shows those stored on the SD card.
To move an app, go to the Downloaded tab and click the app. For example, in the screenshots we chose Clash of Clans.
There will be an option "Move to SD card", click on it. After this, the message “Move” will appear, and at the end of the process the item will change to “Move to internal memory”. Now the application has appeared on the “on SD card” tab.
It's also worth noting that many downloadable free apps are available to move around. And for those who often run out of available memory, we recommend uninstalling apps after use.
How to Move Photos, Videos and Other Files to Android SD Card (Memory Card)
Moreover, you can also move photos, videos, audio and other files quickly and easily using your computer or laptop. To do this, you just need to connect your smartphone to your PC via a USB cable.
Through the computer, you can view the contents of both internal and external memory (will appear as two different devices). To move files on your Mac, you can use Android File Transfer, which displays the internal memory and SD card contents in different tabs.
Here, to move files from internal memory to external ones, you just need to drag them with the mouse to any convenient place, including into the memory of the computer itself. The main thing is not to accidentally capture the files of the android operating system.
File Manager
You can also use a file manager. Many Android smartphones have this app installed by default. If not, you can download a free file manager from Topnet999, however ES Explorer is the most popular among Android users.
At the very top there will be a “Memory” tab - click on it to see all the available memory types on your smartphone. "Sdcard0" denotes the internal memory of the smartphone, and "sdcard1" denotes the external memory. Let's start by moving photos.
First open "sdcard0" and go to the DCIM folder, then to "Camera". Photos taken with your smartphone's camera are stored here. Click on the three dots in the lower right corner and select "Select multiple files." We mark the necessary photos that we want to transfer to the memory card. After that, select "Move", navigate to the desired folder on the microSD card and click "Insert".
This way you can move audio and other files on your smartphone.
Users of Android tablets often have to work with external drives: USB flash drives, memory cards. When your gadget reports that there is not enough free memory space, you insert a flash drive. However, this does not mean that the message will disappear instantly, since it is necessary to distinguish the built-in memory of the device from the memory of the external media. Sometimes these are different repositories, and to work with them you need to have the appropriate knowledge and skills to avoid inconvenience. To do this, the first thing you need to do is practice copying files from your Android tablet to the inserted memory card.
Initial steps when copying
To practice copying, you need some kind of guide. In the case where the explorer built into the operating system is not found, we recommend using Total Commander or ES Explorer. Both of them have rich functionality, and you can download them for free from the Market. Let's use ES Explorer as an example.
- You should know that the name SD Card
is a storage area located directly on the Android device itself, and is often referred to as such in cases where the storage areas are divided into system and application areas. - External or External SD
is a flash memory inserted into a slot, the size of your MicroSD (1 to 32 GB). - A USB drive is a regular USB drive connected using an OTG cable to your gadget.
Using the device described above, you can easily copy or move files.
Let's take a closer look at moving data on an Android device from internal memory to a flash card. By analogy with working on a PC, the entire procedure is performed using a tablet.
Execution Sequence
- Enter the "SD Card" folder and select the desired folders or files by long pressing on the files icon until they are checked.
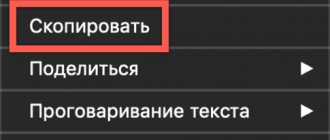
- Then simply “click” the “Copy” icon.
- Swipe right on the screen to return to the initial File Explorer interface.
- Finally, go to “External SD Card” or “USB Drive” and select “Insert” in the desired directory. When the copying process is completed, you will be able to see the added files in the desired location.
If you just need to transfer files to a USB drive rather than copy, where the transferred data is deleted from the device's memory, you should follow the above steps, but in step 2, select the Cut action.
Saving photos
Additionally, we will tell you how to set up automatic saving of photos directly to a memory card in Android.
This can be done in the settings of the camera itself.
- Enter a cell.
- Click Settings.
- Select Memory.
- Check the "SD card" field.
Now all new photos taken will be saved on an external flash drive.
Instructions for transferring programs from the internal memory of Android devices to a removable memory card.
Typically, the memory card in a tablet or phone has one partition with the FAT or FAT32 file system. In order to be able to move and then run a program from a memory card, the card must contain two partitions. One of them will be used as usual for storing data, and the other will be used for programs transferred to the card.
Important!
This is the second of the partitions that will be used to move programs into it. This must be taken into account in further work.
In Android
version 2.2 and higher, the ability to transfer applications to a memory card is already available in the system, but for those who have a tablet or phone with an earlier version of
Android
, and there is no opportunity or desire to update the firmware, there is nothing left to do but use third-party applications.
So, to transfer already installed programs to internal memory, we will need two programs on a memory card. A program for creating and deleting file system partitions and a program for transferring programs to a memory card.
Preparing the map
Let's start with the first program. There are many programs that allow
manage partitions on physical storage media, but we will probably focus on the simplest and most convenient of them. This program.
You can download it from the following link: download
The program works with Windows 2000/XP/Vista
and
Windows 7
.
To work, we need two things - the program itself and a card reader.
Getting started with MiniTool Partition Wizard Home Edition
.
Attention!
Before working with the
MiniTool Partition Wizard Home Edition
, save everything that is written on the memory card, since all data on the card will be destroyed when working with the program.
1. Download and install the program. We take out the memory card from the device and insert it into the card reader. Windows will detect the new drive and display it as a "removable drive." 2. Delete partitions on the memory card. To do this, launch the program. At the bottom of the program window are all the drives that are currently connected to the computer. This is a hard drive, a flash drive, if connected, and our SD card.
The picture shows an example. We see two hard drives of 465 and 74 gigabytes in size and a 3.8 gigabyte SD card with two partitions on it:
Right click on each of the partitions and select the delete
“- delete the section.
Before this step, you must make sure that you have selected the partitions on the memory card and not on the hard drive or other drive!
1. Create a partition for your data. To do this, right-click on the free space on your memory card and select the New
».
2. In the window that opens, in the “ Create as” drop-down menu:
select “
Basic
”, and in the “
File system” menu:
“Select the
FAT
if the partition size will be less than 2 gigabytes.
If you want to create a partition larger than 2 gigabytes, select the FAT32
... Use the slider to set the partition size and click
OK
.
3. Create a section for programs that we will transfer to the memory card. To do this, right-click again on an empty space on the memory card and select the option “ Create”
"
From the Create As:
, select
Primary
, and from
the File System:
, select
FAT32
as the file system.
Use the slider again to set the partition size and click OK
.
4. We apply all changes we make. To do this, click the “ Apply”
" The program will create and format partitions.
Important! Wizard Home Edition
does not make any changes to the memory card until you click "
Apply
".
Until this point, you can cancel operations using the " Cancel
" button or discard all changes completely by clicking "
Cancel
"
Now that the card is ready, you can install it on your tablet or phone and begin the process of transferring programs to it.
Transfer of programs.
To do this, we need to download and install the program on your tablet or phone Link2SD
.
Link to download the program: Link2SD
market.android.com
Attention! To work with the program you will need Root
rights.
How to obtain Root
on a tablet is described in the corresponding thread of our forum.
When you turn on your phone or tablet, the program mounts a second partition on the memory card and makes it available to the operating system.
Working with the program is very simple. After the first launch of the program, a window for selecting the file system type appears on the second partition th Memory card will appear. Select the partition type you created in the first part of our instructions. Then a window will appear asking you to grant root rights to the program, and you need to give them to it. After this, the program will create a mount point for the second card partition in the system and ask you to restart your phone or tablet.
After rebooting the tablet, you can begin transferring applications from the internal memory to the card.
1. Launch the Link2SD
... The tablet displays a list of installed applications.
2. Select the program to transfer to the card. In the window that opens, click “ Create link”
»
3. The following window will open. If we want to transfer temporary files (cache) to the card, check the box next to “ Link davlik-cache file too”
" and click "
OK
"
4. The program will “think” for a while, and if the application is successfully transferred, the message “ application associated with the SD card” will be displayed.
»
5. Click OK
", exit
Link2SD
, and now we can run the moved program.
Applications that have already been moved to the memory card are marked accordingly in the list of Link2SD programs.
Questions and answers:
-Can all programs be transferred to a memory card?
No, some programs can only work correctly when installed in the internal memory of the device.
-Can I cancel the transfer of the program and return it to the internal memory of the device?
Yes, you just need to select it in the list and click Remove Link
»
-What happens if I update a program that has been moved to the card?
When updating a moved program, the application file itself and data files will first be saved to the internal memory of the device, and then the Link2SD
will automatically transfer them to the memory card in the background.
No guidance is required to move the updated application.
— How much space does the program take up on devices with random memory during everyday use?
The program only starts the process of mounting partitions on the memory card, and is not itself located in the device's memory during normal use.
A few notes.
Link2SD program
itself identifies applications that have been moved using Android ope The rating system itself (in
Android versions 2.2 and higher
)
System applications are not transferred to the memory card. Link2SD program
will not give you such an opportunity.
When you connect your device to your computer, Android
The first partition of the
FAT
of the memory card will be disconnected. However, the second partition will remain mounted and you can run programs from it.
Link2SD program
does not move the program folder itself from the internal memory, only the program and the cache files themselves are transferred.
Normal 0 false false false RU X-NONE X-NONE MicrosoftInternetExplorer4 MiniTool Partition Wizard Home Edition
The Android platform differs favorably from iOS in that it provides much more options for managing files. In this article, we will tell you how to move files on Android via computer or directly to your smartphone/tablet using third-party applications.