How to connect Yandex mail
The user has several mail connection methods to choose from:
- Yandex.Mail client.
- POP3 and IMAP protocol in Android OS.
- POP3 and IMAP protocol in third-party applications.
The Yandex.Mail client is an application that is installed separately and configured to work with the Yandex service. This is the easiest way to view, edit and send emails, suitable for novice users. It is also the best option if Yandex is the only email service used.
POP3 and IMAP protocols are used to access email. To work, installing an additional application is not required, since the Android OS has built-in tools. This option is convenient when several services are used, for example, Mail.ru and Rambler. If necessary, the email service easily connects to your main account, such as Gmail.
Using POP3 and IMAP in third-party applications is an alternative in case the standard Android capabilities are not suitable or not satisfactory.
Configuration via protocols
POP3 and IMAP interfaces provide the ability to receive mail on Android in one application from several mailboxes. Each of these protocols has its own characteristics.
- POP3 allows you to receive copies of letters on your phone. Their editing will be reflected only in the phone. In a real mailbox they will be in their original form.
- Thanks to IMAP, you can edit correspondence in your email inbox directly from your phone.
To configure Yandex Mail using protocols, you need to install one of the applications:
| data-lazy-type=”image” data-src=”https://androidkak.ru/wp-content/uploads/2015/10/K-9-Mail..png 300w, https://androidkak.ru/ wp-content/uploads/2015/10/K-9-Mail-150×150..png 120w” sizes=”(max-width: 80px) 100vw, 80px”> |
Networks Very quiet and efficient water cooling system
Introduction It so happened that when the time came for the next upgrade, I purchased almost all the components anew. And what’s left of the existing computer is the good old…
- "Yandex.Zen" - review of a new application with recommendations for news and articles
× 2021-06-22 10:49:19 How to change a hard drive to an Android SSD 2021-06-22 10:49:19 How to change a burnt-out lamp Apple 2021-06-22 10:49:19 How to remove the cooler and how to install the processor and cooler Networks 2021-06-22 10:49:19 Computer socket for connecting UTP twisted pair Wiring rj 45 sockets Internet 2021-06-22 10:49:19 Options for connecting two or more TVs to one antenna Smartphone 2021-06-22 10:49:19 If the tablet does not turn on, how to repair it yourself Modems Circuits for the home, DIY electronics for the house Linux Why do you need to purchase a proxy server? Internet Promotional codes and discount coupons Send Flowers (AMF) Amph costume delivery Modems Conditions for issuing an order on ozone Ozone ordering Windows Coupons and promotional codes from MOYO Attention to customers and unique service Devices Highscreen codes. Coupons and promotional codes. Useful Highscreen Windows DVRs
Businessmen, office workers and even technical workers have found many useful tools that not only simplify the process of carrying out professional activities, but also help them maintain contact with colleagues, customers and partners.
One of the most effective ways to stay in touch is to use email. In Russia, along with the mail service from Goolge, its domestic analogue, Yandex Mail, has gained considerable popularity.
Yandex Mail allows you to receive and send emails, send files as attachments, and also store received or sent documents on a reliable Yandex server. If your Android gadget does not respond at all, then samsung.telemama.ru will help you.
The Android operating system allows you to work with Yandex Mail using two methods:
- Configure using the system’s built-in email client;
- Configure using a special Android application Yandex Mail.
Let's look at each of the presented options separately.
Content
hide 1Built-in client 2Specialized application
How to set up mail using the Yandex.Mail client
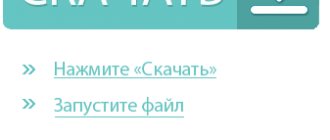
- Download and install the Yandex Mail application for free from our resource or the Google Play store.
- Launch the program, enter your account login and password. If necessary, the client supports the creation of a new account.
- Wait for authorization, and then configure the program according to your personal preferences.
Conclusion
When setting up Yandex mail, it is preferable to use the POP3 and IMAP protocols in the Android OS. This will save storage space and reduce the load on RAM. In case of unsuccessful setup or for a novice user, it is rational to start by using the Yandex.Mail client. If the branded client is not satisfactory, then use third-party applications.
Yandex Mail is one of the most popular email services, along with Gmail and Mail.ru. Therefore, many users are interested in how to set up Yandex mail on Android. In this material we will look at this issue.
How to set up Yandex mail via POP3 and IMAP in Android OS
- Open system settings, where select “Accounts”.
- In the new window, select “Add account”.
- If your device supports POP3 and IMAP, select IMAP.
- Add your email address and click next to set it up automatically. If you need to configure the protocol manually, click the appropriate button.
- Then on the Yandex page, you must enter a password.
- You will be asked to provide data for Gmail, where you need to click “Allow”.
- Specify the synchronization frequency and other parameters.
- After adding an account, synchronize the data, as well as specify additional mail settings.
If you choose to manually enter your information or automatic setup is not supported, please specify the options below.
Manual IMAP configuration
Incoming mail server:
- Email address and password.
- Server – imap.yandex.ru.
- Port – 993.
- SSL security type.
Outgoing mail server:
- SMTP server - smtp.yandex.ru.
- Port – 465.
- Security type – SSL/TLS.
Manual POP3 setup
Incoming mail server:
- Email address and password.
- Server – pop.yandex.ru.
- Port – 995.
- Security type SLL.
If there is no support for SLL protection, you should select the “no” option and port 110.
Outgoing mail server:
- SMTP server - smtp.yandex.ru.
- Port – 465.
- Security type – SSL/TLS.
If there is no support for SLL protection, you should select the “no” option and port 587 or 25.
Official application
Setting up Yandex mail on an Android phone is faster through the official software available in the Play Store. After downloading it and activating it for the first time:
- Select the email address from which you want to receive letters. As an example, we use Yandex.
- Log in using your login, email, phone or social network account.
- Enter your password and click “ Login ”.
- The next page shows the main functions of the software. After completing the preparation of letters, tap on “ Go to mail».
An alternative to the application is the mobile version of mail, which is accessible from any browser.
Inbox tab as the main page of the program . To go from there to software parameters:
- Tap on the menu "More».
- Scroll down the tab and select Settings .
The page is divided into 6 sections, so we will go through each separately.
Accounts
Mailboxes added by the user are collected here. By tapping on the account, the user opens a new window where they configure:
- signature when sending messages, its location;
- account, correct personal data, avatar, contact phone number;
- enable/disable receiving notifications about new SMS;
- downloading letters to marked folders - they are downloaded automatically as they arrive in your mailbox.
Yandex mail settings for Android may differ depending on the selected service (Google, Outlook).
Application
This section is responsible for enabling/disabling in the software:
- dark interface theme - relevant for owners of smartphones with OLED/AMOLED matrices;
- smart replies - having received a message, they respond to it with prepared templates;
- compact mode - hides sender icons, reduces the size of SMS cards;
- Login using a PIN code or fingerprint is an additional level of protection from strangers.
We recommend: The phone reboots itself
Separately configure the swipe action (delete/archive).
Notifications
Includes:
- Do not disturb mode with complete disabling of notifications.
- Setting up notifications: their appearance in the curtain, accompanied by vibration and sound.
The number of available add-ons depends on the smartphone manufacturer.
Translator and voice control
The first section includes automatic translation into the user’s native language, the second section includes voice control, which may not work.
Additionally
The section includes:
- disabling advertising banners;
- deleting accumulated cache;
- feedback from developers;
- information about the application: version, license agreement, privacy policy.
This is where the official software settings end.
About company
But first, let's take a brief look at it itself. It was founded in 2000. Has transnational status. In addition to the search engine, it owns Internet portals and services in a couple of other countries. It is considered the most developed in Russia, Belarus, Turkey and Kazakhstan. Until May 2022, it was also popular in Ukraine.
The search engine is also not lagging behind. It is noticeably inferior to Google, but still remains fourth worldwide in terms of user activity.
In addition to search, Yandex has a lot of services and add-ons. The following remain popular: “Market”, “Traffic”, “Maps”. The largest services are: “Mail”, “Money” and “News”. How does Yandex. register? Mail", the use of this service, and what configuration errors look like, we will consider further.
Connection via email clients
Through clients downloaded or pre-installed in the system, the user is able to quickly view, edit and send emails. Installing such an application on your phone is the easiest option, suitable for most users.
System
This method includes setting up mail from Yandex via POP3 and IMAP in the system account settings.
We'll talk about manually setting up email later.
Gmail
On Android devices, the Gmail application is a system application, present by default on all smartphones with this OS. The mail service works not only with Google addresses - it allows you to set up Outlook, Mail.ru, Yandex and other accounts.
The Gmail application is convenient because it allows you to quickly move between mailboxes and display all emails from all added accounts at once.
Application from Yandex
If Yandex is the only email service you use, then you can use their official client, available in the Google Play Store.
The application only works with @yandex.ru accounts. Other mailboxes will have to be added through Gmail or third-party programs.
Set up a collector or rule for processing letters
You can set up a mail collector from another mailbox and create mail processing rules in the full version of Yandex.Mail.
Note: To switch to the full version of Yandex.Mail, click the button in the upper left corner of the screen, and on the page that opens, click the Full button at the bottom of the page. To return to mobile Yandex.Mail, click the Light version link at the bottom of the page.
Sources used:
- https://androfon.ru/article/nastroyka-yandeks-pochtyi-na-android
- https://smartphonus.com/how-to-set up-Yandex-mail-on-android/
- https://androidkak.ru/nastrojka/kak-nastroit-yandeks-pochtu.html
- https://setphone.ru/rukovodstva/kak-nastroit-yandeks-pochtu-na-android/
- https://yandex.ua/support/m-mail/m-touch/settings.html
SHARE Facebook
- tweet
Previous articleHow to set up an access point for Android. How to set up internet on Android
Next articleHow to stop downloading in Yandex browser