Your photos and videos are precious memories and you don't want to lose them. Here are four mostly free services you can use to automatically back up your photos and videos and access them from anywhere.
If you are not a professional photographer, then your phone is your main camera. It contains highlights of your life or your children's lives, and you don't want to lose these memories. If your phone is lost, stolen or broken, all your photos and videos may go with it. But there are several services, most of which are free, where you can safely store your photos and videos in the cloud. One of the best things about cloud storage is that you can upload these photos or share them easily from anywhere.
What is the cloud and how to use it
The cloud is a special platform where you can upload various files and documents. All information is stored on the company’s servers, and to access it you just need to connect to the Internet . In most cases, using the service in the initial stages is free. That is, you are allocated a certain amount of space that you can occupy with different files.
The main advantage of cloud services is the ability to access downloaded information from anywhere in the world. You don’t need to carry a flash drive with you all the time, because you just need to connect to the Internet and log into your own account. All data in the cloud is safe, as it cannot disappear without user intervention. The same cannot be said about a phone, information from which can be deleted as a result of a system error.
Using the cloud service is easy. The first step is to create an account on one of the platforms, most often by providing an email address and creating a password . Subsequently, you will need to install a mobile application on your smartphone, since it is much more convenient to perform all actions through it. But also no one forbids you to use the online version of the service, that is, the website.
Copy photos from Android to Mac
For Mac, you'll need to download a separate tool to transfer files from Android devices. This app doesn't always work well, so I still recommend using a cloud storage service like Dropbox, or setting up an FTP server or SMB share on your phone using a tool like AndSMB.
These tools can hardly be called simple and modern, but they work. Not everyone wants their files in the cloud, but they don't need to. You copy them there for download. Once the procedure is completed, all files in the remote storage can be deleted.
How to upload photos to the cloud and save data on Android
The principle of saving files in a cloud service depends on the specific platform chosen. Often you can transfer them manually, and also activate automatic synchronization. We invite you to familiarize yourself with each option for uploading information to the cloud.
Automatically
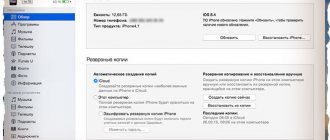
Almost any phone running the Android operating system has Google services installed by default. Among them you can find the Google Drive application, which allows you to save files to cloud storage. The most convenient way is to set up automatic data backup. To do this, first go to the account page:
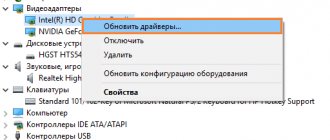
- Open the settings.
- Go to the “ Accounts ” section, and then select “ Google ”.
- We log in to the required account, to which all data will be linked in the future.
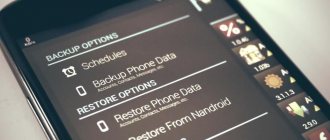
- Go to the “ Backup ” menu.
Now it is advisable to activate automatic photo uploading. The following instructions will help you do this correctly:
- Click on the “ Google Photos ” item.
- Near the line “ Startup and synchronization ” move the slider to the right. As a result, the indicator should change its color to blue, and a menu with settings will appear below.
- If desired, we can configure some parameters. For example, choose the quality of uploaded photos ( with high resolution, you can save an unlimited number of photos ). By default, only photos from the camera are added to the cloud, but you can also specify a specific folder. If the amount of mobile Internet is unlimited, then it is possible to activate the option that allows you to use it to download files.
If you want to set up automatic backup of all data, then activate the “Upload to Google Drive” option.
To view added photos, you can use the proprietary Google Photo application, or use the web version of the service.
Manually
Sometimes you need to transfer one or more photos to cloud storage. This can be done through the standard capabilities of the Android operating system, that is, using services from Google. For example, we need to transfer one very valuable photo to the cloud. How to do this? And this is quite simple to do:
- Go to the gallery or application where all the images are stored.
- Select the desired picture, and then click on the “ Send ” or “ Share ” button that appears.
- Select a service to download. This could be Google Photos or Google Drive. In principle, there is not much difference between them, since these platforms are tied to one account.
- We check the selected account and click on the “ Download ” button.
In the same way, a specific file is transferred to cloud storage. First open Explorer, and then follow the instructions:
- Select a specific file.
- Select “ Send ” or “ Share ”.
- In the window that appears, click on the “ Save to Disk ” icon.
- Enter the file name or leave the existing one. Select the appropriate account and folder.
- Click on the “ Save ” button.
After completing these steps, the download of the selected document will begin immediately.
The speed of uploading files to cloud storage depends on a number of factors, including the Internet used.
To back up your data, follow this path: “Settings” → “Accounts” → “Google” → “Backup”. In the last window, click on the “ Start copying ” button, after specifying the desired account.
The finished copy will be saved to Google Drive.
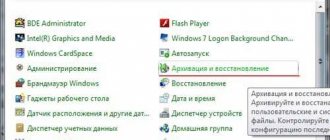
Offline backup to your computer's hard drive
I understand perfectly well that you may be against backing up your important information using any cloud storage. I don’t consider myself one of these skeptics, but some believe that companies can analyze and use their data for their own purposes. I don’t exclude this, so I admit that many will be more comfortable storing a backup on a personal computer, which is always at hand. This option also cannot be written off.
Transferring data via cable. Yes, you can periodically manually reset all your most important data that you work with on your smartphone to your computer, including your latest photos and videos. On Windows you don’t even need additional software for this, but on Mac you need the Android File Transfer application. Otherwise, the process of transferring data to a computer is practically the same:
- connect your smartphone to your computer using a USB cable and select the data exchange option on your mobile device;
- on Windows, open “My Computer” and go to the smartphone storage; on Mac, open Android File Transfer;
- copy the files stored on your smartphone to your computer drive.
If there are too many files, you can also move them to an external drive later. However, do not forget that your computer and any other offline storage can also fail, so you alone are responsible for the continued safety of your files.
Wireless data transfer. To make it easier to transfer files from your smartphone to your computer, you can also use special utilities to synchronize information. An example would be the Syncthing app. It allows you to select a specific folder on your smartphone, which will be automatically transferred to your computer every time its desktop client detects a gadget in its field of view. It can also be convenient.
To restore a backup to a new phone, you just need to transfer to it all the files that you saved on your computer’s hard drive.
Popular cloud storages
Cloud storage has become a popular platform for storing many files and documents. That is why today there are several hundred, if not thousands, of such services. We suggest you familiarize yourself with the most popular of them below.
Google Drive
The Google Drive service was discussed a little above. It is on this platform that all documents and other types of files are saved. For the convenience of working on a smartphone, you do not need to use the web version of the storage. All you need to do is launch the Google Drive application, which is installed by default on phones with the Android operating system.
Initially, all users of the service are provided with 15 GB of free space, but this can be expanded by purchasing a paid package. Among the advantages of this cloud storage is the ability to scan documents through the camera . Of course, the option does not always work perfectly, but its presence will not be superfluous.
You can work with documents directly in the application, without having to download them to your device. To upload files to the cloud, use the following instructions:
- Click on the “ + ” icon located on the main screen of the program.
- Select the format of the downloaded file by clicking on the “ Download ” button. If you wish, you can create a thematic folder where documents of the same type will be uploaded.
- Select one or more files and wait for the download to complete.
You can monitor the download process in your phone's notification panel.
Google Cloud works with well-known document extensions, and even allows you to download APK files of applications.
Yandex.Disk
Yandex Disk is an equally well-known service from a Russian company. To work with it, you need to register a Yandex email in advance. By default, each user is provided with 10 GB of free space, but this can always be increased by participating in promotions and offers on the platform . We also cannot fail to mention the unlimited photo uploading. That is, images downloaded from the phone will not be counted towards the total amount of occupied space.
An interesting feature of the service is the ability to edit photos. The uploaded photo can be rotated, cropped, or sharpened. There are also special effects, including an automatic option to improve the beauty of the eyes. Background downloading works reliably, but when saving large files, minor interface freezes may occur. So, to upload a photo to the cloud, follow these steps:
- Go to the “ Feed ” tab and click on the plus icon.
- To upload a photo from your phone, select “ Picture from gallery ”, and to add files – “ Files from device ”.
- We mark the required document and wait for it to be added to the cloud.
The cloud storage has background loading, so the program can be minimized.
To protect personal data from unauthorized users, we recommend setting a password to enter the application. The following instructions will help you do everything correctly:
- Click on the profile icon located in the left corner of the screen.
- Select “ Settings ”.
- Near the line “ Set PIN ” move the slider to the right. We come up with a strong login password, and if necessary, activate fingerprint authorization.
By the way, how to set a password for applications is described in detail in one of our articles.
Cloud Mail.ru
Mail.ru cloud is another high-quality cloud storage from Russian developers. Initially, the user is provided with 8 GB of free space, which can be expanded in the future by purchasing additional packages. To access the service, you must log in to your Mail.ru account, that is, enter the data from your email account .
The application interface is clear and simple. The side menu contains interesting sections, including a menu with download statistics for a certain period of time. If desired, you can set up shared access, that is, one file can be viewed by several people at the same time. There is also a built-in recycle bin where files deleted from the cloud will be moved, although only for 14 days.
To download files, follow these steps:
- Go to the “ Files ” tab and click on the “ + ” button.
- Select the desired file format.
- Select a specific object and click on the “ Add ” button.
In principle, the functionality of the application is standard. There is background loading, it is possible to set up automatic backup, activate a photo search for a specific person, and so on. If necessary, you can set a password to enter the program:
- Open the side menu and click on the gear icon.
- Go to the “ Protection and Security ” section.
- Check the box “ PIN code protection ”.
- We create a good password, and if desired, set up fingerprint unlocking.
Overall, the Mail.ru cloud is high quality and easy to use.
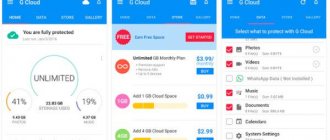
Mega
Mega is a very interesting cloud storage that provides as much as 65 GB of free space. All files are stored in encrypted form, which ensures a high level of security . You can transfer photos to this cloud very quickly using automatic backup or manual copying. The service has its own mobile application that works on almost all Android phones.
To add a photo or other file to the cloud, follow these steps:
- Click on the plus icon located on the main screen of the program.
- Select the location from which the files will be downloaded.
- Select the required file and wait for the procedure to complete.
You can monitor the file downloading in the notification panel of your smartphone.
The application interface is clear, so you won’t have to spend a lot of time understanding it. And the main advantage is the ability to add files to work with them offline.
Number recovery
The phone may be lost or broken. How to return lost numbers in this case? Actually this can be done in 2 ways:
We will consider each option separately.
Method 1. Synchronization with your account
Before you can add numbers from your Google account, you need to connect your mailbox. After this you need:
After this, all data stored in the cloud service will be imported into the mobile device.
Important: the account must be connected to the one on which the previously copied numbers are stored.
The best storage services
To store photos, you can use both the services listed above and other specialized platforms. They will be discussed in detail below.
Google Photos
Google Photos is a highly focused service that allows you to save various images to cloud storage. The platform has its own mobile application, installed by default on every Android . You can add an unlimited number of photos to the cloud, but only high quality ones. With this setting, the algorithm independently compresses the image, but this has virtually no effect on the original resolution.
If you want to add a photo in original quality, then this can also be done. Only in this case the amount of available space will be limited to 15 GB. If you wish, you can create thematic albums in the application, share uploaded pictures with other people, or delete unwanted images. After deleting, all pictures automatically go to the trash, from which they can be restored if necessary.
To automatically add images to cloud storage, we recommend activating the “Auto upload and sync” option.
Dropbox
Dropbox is a reliable platform, or rather a cloud service for working with files. Google Play has a convenient mobile application, so you definitely won’t have to worry about uploading photos through the browser. By the way, this cloud allows you to work not only with images, but also with other types of documents . You can register in the platform using your Google account.
The standard amount of space provided is two gigabytes, but it can be expanded by inviting friends. For each user you add, you will receive 500 MB of additional storage. Many people loved this cloud for the ability to view downloaded files directly from their computer. Moreover, this is implemented not in the web version of the platform, but in a full-fledged program. To upload a photo or other file, follow these steps:
- Click on the plus button located on the main screen of the application.
- Select the file to be downloaded by clicking on the “ Upload files ” button.
- We mark the desired image or document and wait for the download to complete.
If necessary, it is possible to activate automatic backup of images, which will protect them from accidental deletion.
OneDrive
OneDrive is a well-known cloud storage from Microsoft that allows you to save various categories of files. To access the service, you need a special Microsoft account, which is not difficult to create . Initially, the user is provided with only 5 GB of free space, but this can always be expanded for an additional fee. The cloud has its own application that works well on Android phones.
Unlike Google Drive, in OneDrive all photos are included in the occupied space. That is, there is no unlimited space for images. You can view photos uploaded to the cloud not only through the program on your smartphone, but also through the web version of the service on your PC. Remote file management greatly simplifies your work, making it more comfortable.
Initially, we recommend activating automatic downloading of all images by going to the “ Photos ” section and clicking on the “ Enable ” button. In the “ Settings ” tab, you can change the current service settings, for example, add a secret code.
How to prepare a smartphone for sale
If you sell your phone or give it to someone else, you need to sign out of all Google accounts and remove all lock passwords. Android introduced the Device Protection feature back in 2015. It requires you to enter the password of the last Google account used on the device after the device has been erased. Of course, in the event that you did not log out of your account before resetting.
It’s much easier to save everything in the cloud and have it with you at all times than to simply lose it.
While Google says that Device Security shouldn't trigger a password check after a factory reset on most phones, deleting your Google accounts and lock password is the only way to ensure there won't be any problems when you reactivate. More than a dozen smartphones have passed through my hands and I have seen enough of these problems. Especially when someone gave the phone for a test and the previous user did not reset their data. Or, conversely, when in a rush he forgot to log out of his account.
You will find even more useful tips in our Telegram chat. And at the same time you can ask your questions.
To turn off device security, you must first sign out of all Google accounts. Open Settings on your phone, go to Accounts and click Remove Account under each account.
Once done, disable any lock screen passwords you may have. This can be done in the “Security” section, also in the settings.
Appearance of the cloud mail ru
In the mail ru cloud, you can slightly change the appearance of files and folders as you see fit. This can be done by clicking on the “ View ” button at the top right and selecting the type of arrangement you need for your files: list or tile:
You can also organize and sort your files or folders in the cloud in the way that is most convenient for you by clicking on the button in the same right corner:
Advantages of the program
The main advantage is access to the file from any location or device with Internet access, plus reliable data safety in the event of a breakdown of the gadget synchronized with the cloud. Besides:
- easy data transfer between multiple devices - you can forget about wires and Bluetooth;
- the ability to share files and edit them, which can greatly facilitate the work on the project;
- viewing files without having to download them;
- mail.ru storage can be used instead of a memory card for photos and videos from a smartphone.