How to choose the right modem for a laptop
Before choosing a modem, you first need to decide on the tasks that will be assigned to the Internet. Many subsequent choices of specific models will depend on this.
Reception speed
The first criterion that is worth considering is the speed of signal reception and transmission by the modem. Here you should not be guided by the logic “more is better.” First of all, you need to find out the Internet connection speed provided by your provider. The value should approximately match the signal speed of the modem. Since with a lower value the device will not use all the capabilities of the Internet connection, and a larger value will simply be superfluous.
It is worth paying attention to the following modem models in their speed category:
| Modems with speeds up to 3 megabits per second | Devices that achieve data transfer rates of up to 7 megabits per second |
| Huawei E160G | Novatel X950 |
| Asus T-500 | Novatel MC990D |
| Samsung Z810 | Huawei E169G |
| Huawei E220 | BandLuxe 120 |
Price
Having decided on the speed limits of the device you are purchasing, you need to move on to the second component of choosing a modem - price. The devices listed in the table will cost in the region from 1000 to 3000 rubles. It is not recommended to buy modems cheaper than the minimum threshold due to the low quality of the product. Equipment that is more expensive than the indicated amount may have characteristics that will be useful only to individual users and not to the mass consumer.
The remaining criteria, such as, for example, design or material of manufacture, are approximately the same for all modem models and you should choose only according to your own individual preferences
How to reset settings
Now that we have figured out how to turn on the modem and make settings, it is worth paying attention to the reset function. If your device has been previously used, it is better to perform a factory reset. This function will also be relevant if the user has forgotten the password from the control panel. To return the default settings, you must perform the following steps:
- We connect the modem to the power supply.
- We find a recessed button on the device body. Usually .
- Press it for about half a minute.
- Please note: the LEDs on the modem should all blink.
- After this, we wait until the device restarts on its own.
Knowing the intricacies of connecting a modem, you can connect and configure the device yourself, without the help of a wizard.
Algorithm for connecting a modem to a laptop
How to install a Yota 4G LTE modem on a computer: step-by-step instructions
As has already become clear, first of all you need to connect the modem to any working USB port. Then, in automatic mode, the system will begin installing drivers and other software for the correct operation of the device. If everything is successful, an autorun window will open asking you to install other drivers. There is no need to give up on that. Having selected the language and specified the installation path of the files, if possible, all that remains is to wait for the process to complete.
Important! If all previous steps were completed correctly, then the connection is already available for use and the Internet will appear automatically.
Connection via additional equipment
Nowadays, most often people do not use a direct connection to a computer, but rather a router or modem - in this case, the settings will be slightly different.
Rostelecom equipment setup wizard
If you not only signed up for an Internet connection, but also rented equipment from Rostelecom, then along with it you were also given a disk with an equipment setup wizard. This utility allows you to quickly and easily update the router's firmware and configure it for the current connection. Of course, you won’t be able to fine-tune the configuration to suit your needs, but for beginners and non-specialists such a program may be indispensable.
Insert the program disc into the drive and execute the autorun.exe file. The program will be installed on your computer. Now you can launch it.
The setup wizard from Rostelecom has limited functionality, but is quite capable of coping with basic tasks
Select “Full setup of a Universal router” and click “Next”. During setup, the wizard may freeze or ask you to wait a certain time while it collects the necessary data about the equipment. When it asks for the type of home network, select “Router.” During setup, the wizard will install the latest version of your router firmware and determine the optimal configuration for your Internet connection.
Using the utility, you can also set up a Wi-Fi connection. Although “configure” is a strong word, the wizard will simply give you the name of the network and the key to access it. It is currently not possible to change this data in the utility.
Once the setup is complete, the wizard will simply give you a key to connect to Wi-Fi
If you have lost the installer disk, do not despair - the required file can be downloaded from third-party resources. The sagemcom website contains installers for all routers used by Rostelecom. You need to find your router model and version in the list, and then download and run the “Automatic Configuration Program” file.
On the website you will also find operating instructions for all these models.
We strongly recommend scanning files downloaded from third-party resources with an antivirus. There are many cases where attackers, under the guise of a Rostelecom setup wizard, have posted viruses.
Manual setting
You can choose not to use the Hardware Setup Wizard. In this case, you will have to perform all its actions manually.
Setting up an ADSL modem
If you rent a modem from Rostelecom, then first we’ll prepare the computer’s network card for use:
- Connect your computer to the modem using an Ethernet cable.
- On your computer, open Network and Sharing Center.
- Find the Local Area Connection shortcut and right-click. Select Properties from the drop-down menu.
- Click on the IPv4 line so that it is highlighted (the check mark should remain in place). Click Properties.
- Select "Use the following IP" and enter 192.168.1.2 in the IP address field.
- Fill in the Subnet Mask field with the value 255.255.255.0.
- Leave the remaining fields blank and click OK.
Now let's configure the modem itself. To do this, you need to go to the web interface.
The web interface allows you to fine-tune your Internet connection. To get there, open your browser and enter 192.168.0.1 in the address bar. The page will ask you for a username and password - enter admin in both fields (required with a lowercase letter). After this, you will be taken to the Rostelecom web configurator.
When you first open this page, you will be immediately greeted by a Quick Setup Wizard. This is what we need - enter all the data that this program asks you for (namely the login and password issued by the provider). You need to select “Bridge” as the operating mode, set the VPI parameter to 0, and VCI to 35.
Setting up FTTB (ETTH)
FTTB stands for Fiber to the Building, which means “fiber to the building.” If you have a contract for just such a connection, then additional configuration of the equipment is not necessary. It is enough to set up a PPPoE connection on your computer using the algorithm described at the beginning of the article.
Connecting a modem
In most cases, connecting a USB modem to a laptop or desktop computer does not cause any difficulties. You need:
- Insert the operator's SIM card into the modem.
- Connect the modem to a free USB port on your computer or laptop. You can use both USB 2.0 and 3.0. If you have a laptop, you can connect the modem via an extension cord and place it nearby - this way you will reduce the risk of damage to the device.
- Install special software. Included with the modem you will have a CD with proprietary software and drivers. Insert it into the computer drive and install all the offered software using autorun. If the disk is not included in the package, then go to the modem manufacturer’s website, go to the “Downloads” section and download the drivers for your device manually, and then install them.
- Now let's make sure that the drivers are installed correctly. To do this, open “Control Panel” - “Device Manager” and select our modem from the list. You can identify it by its name - it will indicate the manufacturer of the device. Double click on it.
- In the window that opens, click “Poll the modem”. The system will conduct a short test and then notify you of the results. If everything is in order, then you can already use the modem. If the system generates an error, then either the drivers are outdated (try downloading new ones from the manufacturer’s website), or the modem is physically faulty, or it is incompatible with your OS version.
At this point the connection can be established automatically. You will see an Internet connection icon in the tray. But if this does not happen, we will do everything manually. The setup is the same for Windows XP, 7, 8.1 and 10:
- Right-click on the Internet icon (or lack thereof) in the tray and select “Network and Sharing Center.”
- In the window that opens, click “Set up a new connection.”
- We are interested in connecting to the Internet - let's select the first option.
- Next, select “Switched”.
- You will see a window with three fields: “Dial number”, “User name” and “Password”. If you bought a modem from an operator, these fields will already be filled in. If you took the SIM card separately from the USB modem, then you need to fill them with data from the operator. They are usually specified in the contract. The number you dial may also be called an APN. If this data is not in your agreement with the operator, then contact their hotline - they will tell you how to fill out these lines. You can fill in the “Connection name” field at your discretion - for example, “MTS Modem” or something like that.
To see the password, check the box “Display entered characters”
- If there are several users on your computer, then you should check the “Allow other users to use this connection” checkbox. Then other people using a PC will be able to use the Internet from the modem.
- Click "Connect".
Additional settings
To make using the modem comfortable, it is worth making additional settings.
Create a shortcut
To get quick access to the modem settings, disconnect and connect its Internet in two clicks, you can create a connection shortcut. For this:
- Go to the Network and Sharing Center if you have already left it.
- Click Network Connections.
- Find the connection you created in the list. You can recognize it by the name you specified when creating the connection.
- Right-click on it and select “Create Shortcut” from the drop-down menu.
You now have a modem connection icon on your desktop. By right-clicking on it, you can quickly deactivate and activate it if necessary.
Speed Limit
You can select the maximum data transfer speed for the modem. This can be useful when the traffic provided by the operator is limited. For this:
- Right-click on the active connection in the tray or on the shortcut you created earlier.
- Click Status.
- Click the “Properties” button at the bottom of the window that opens.
- On the first line you will see a drop-down list “Highest speed (bit/s)”. Choose a limit that suits you. The maximum value here is limited by the hardware speed of the modem. Therefore, to remove all restrictions, select the last value in the drop-down list.
Installation on a tablet
Not everyone knows that a modem device can be used on a tablet computer. The connection procedure is quite complicated and may not always be successful. First, you should check whether the equipment is compatible with this mode of operation. Most modern tablets only come with a micro USB connector, so you won't be able to directly connect these two gadgets. A special adapter cable can solve this problem. If everything is done correctly, the 4G or 3G indicator should light up on the device’s display. After this, write down the characteristics of the access point. Set the email address - “internet.mts.ru”, telephone number - *99#, as well as the name and code - mts. Now you can use mobile Internet on your device.
Unfortunately, sometimes the tablet sees the modem as unknown equipment or mistakes it for another module. To fix this problem follow the instructions:
- Connect the router to your desktop computer or laptop.
- Download the special program “Hyper Terminal” and run it.
- Select your modem from the list of equipment.
- Enter the command in the utility "ate1".
- Make changes to the gadget's software structure and specify “AT^U2DIAG=0” in the appropriate field.
- After this, the device will not be considered as a removable CD-ROM drive.
- Re-create the APN access point in the tablet.
- Now feel free to consume network traffic.
Settings in the Windows operating system
Now let’s figure out how to connect the Internet on a laptop in the operating system settings.
PPPoE
PPPoE is one of the subtypes of connection using DSL. To configure the Internet using this protocol, you must create a new connection in the Network and Sharing Center.
Next, we install the connection option we are interested in; in Windows it is called “High-speed (with PPPoE)”.
Now all that remains is to set the required user authentication data. To do this, you need to look at the password in the contract, after which you can return to the laptop and enter the user name and password.
Static or dynamic IP
If you have chosen a static IP address, then in order to install the Internet, you (or a specialist from the provider) will need to manually set the subnet parameters, the provider’s gateway address, the DNS address and your IP address on the laptop. This data must be provided by the service provider. And if you have a dynamic IP connected to your laptop, then the setup process will be even simpler: you won’t have to enter the static parameters specified in the contract, all parameters are set automatically.
To set up the Internet in Windows, you need to select the monitor icon in the notification panel, right-click on the mouse or touchpad and select the second item in the drop-down menu (“Network and Sharing Center”). In the menu that appears, look for our network card.
Right-click on your mouse or touchpad and go to the “Properties” menu.
After this, the TCP/IPv4 protocol is configured.
The connection settings will depend on which IP address is used - dynamic or static.
Which of these two types of Internet settings is better to connect for a laptop will depend on several factors.
- The service provider you choose must have the technical ability to provide a static IP address.
- If there is such an opportunity, then you need to study the tariffs for the service of providing a static address and, taking this into account, decide whether it is profitable for you to pay for such an additional option.
- A static IP address can be useful if you plan to use your laptop for business and you need a reliable connection to regularly access the same trusted websites, for example, to make payments. On the other hand, the disadvantage of a static IP address is that your actions on the Internet may be easier for attackers to track, because you access all sites from the same address.
VPN over l2tp pptp
Some service providers provide access to the World Wide Web using a VPN. To set up the Internet, go to the network connection settings and select “connect to a workstation.”
Next, select the option “use my Internet connection.”
All that remains is to set any name for the connection name and enter the data provided by the provider.
Checking for adapter availability
Without an active Wi-Fi adapter, the laptop will not be able to join the wireless network. If your laptop model does not have Wi-Fi, you will need to purchase an adapter separately and connect it. Then you need to enable Wi-Fi in the laptop settings. In addition, of course, you will need an Internet source - for example, a home modem.
Installing the driver
If the laptop does not want to connect to the Wi-Fi network, then the problem probably lies in the lack of a driver. This happens in older versions of Windows; in this case, the required driver will have to be installed manually. In Windows 10, the necessary driver is installed automatically.
To check for driver availability on a laptop running Windows operating system, you need to go to Device Manager. Next, pay attention to what is displayed on the laptop screen on the “Network Adapters” tab. If there is no driver for connecting to Wi-Fi, a picture of the device and an exclamation mark on a yellow background will be displayed.
Connection problems and solutions
There are many reasons why problems with Internet access occur. In most cases, they are related to the work of the provider or a software failure.
ADSL indicator stopped lit
If the indicator is not constantly on, but only flashes periodically, then this is due to the lack of signal on the line. It is recommended to check with your provider to see if any technical work is currently being carried out. If necessary, you should try to reboot the device:
- Find the Reset button on the back of the router.
- Using a sharp object, pinch it for 5-10 seconds.
- Wait until the display goes out completely and turns on again.
There are other possible reasons:
- there are insufficient funds in the personal account;
- damage to the telephone AUX cable;
- splitter failure.
If the reboot option does not help, then you should contact support.
Reset network settings to factory defaults
No connection
The lack of connection may be due to incorrect connection settings. It is recommended to contact your provider to obtain more accurate network parameters.
An express solution to the problem is possible by reconfiguring the modem, removing and reinstalling the drivers.
Low data transfer speed
A low transmission speed over a dedicated ADSL line is possible due to the wireless adapter itself. If the device is not new, then it can only work with outdated standards that provide speeds of up to 10 Mbit/s. The only option is to buy another router.
Low transmission in USB modems may indicate that the device has switched to another network, such as 3G.
It is characterized by a bandwidth of only 3.6 Mbit/s. If the client is in a rural area, then it is possible to contact the operator to recalculate the coverage map.
Checking the operation of drivers in the Device Manager, which can be accessed through the “Run” menu by pressing the WIN+R keys and entering the command devmgmt.msc
Setting up an Internet connection via modem
In order to set up internet in Windows via a modem, you first need to connect it to your computer. Next, you need to install the modem driver on the device. After these manipulations are completed in Windows, you can configure the Internet:
Usually these steps are enough to set up the Internet in Windows, which will work correctly. But if there is no connection, you should check the correctness of the entered data, as well as the modem connection. In order to subsequently further configure, edit or disable the Internet, just click on its designation in the panel below.
If, when connecting to the Internet, it does not work, and in the Windows panel next to the icon there is a yellow restrictive indicator, you need to check all the stages of the connection again. But if you carefully follow all the instructions, the connection should appear immediately after restarting the computer.
Connecting to the computer
Before setting up the modem, you need to connect it to the PC. What you will need for this:
- Splitter. This is a special separator that comes in the form of a small box. There are three connectors on its body. Internet and telephone connections are on the same cable. To ensure that the two types of communication operate at different frequencies and do not interfere with each other, it is necessary to use a splitter.
- Internet cable. It must be connected to a computer and a modem. Alternatively, you can work via Wi-Fi if the device supports wireless network technologies.
Next, the connection procedure will consist of performing the following actions:
- Let's take a splitter.
- We install a telephone line cable into the connector marked “Line”. It can be connected to the operator Rostelecom, Domolink or another company.
- If you have a landline phone at home, connect it to the connector called “Phone”. Use outlets if you need to connect multiple devices.
- We install a telephony cable into the connector marked “Modem” and run it to the modem. Another “ADSL” port is intended for the Internet cable. These are two different connectors and should not be confused.
- We connect the device to the computer in any way. If you choose Wi-Fi, on the PC we look for the desired network and enter the access key.
- To connect via an Ethernet cable, install one end of it into the “LAN” connector, and connect the other end to the connector of the network card.
- We check whether the LED indicators on the device light up. Until the connection is established, the Internet indicator will not light up.
Updating modem drivers
If your connection to the Internet via a modem, which you successfully established in the previous steps, suddenly stops, do not rush to run for a new modem. This problem can be solved by updating the modem drivers. And this is done as follows:
- in the “Control Panel” select “Device Manager”;
- remove the modem software elements, after which the laptop must be rebooted, and the modem must be reconnected;
- If the driver update did not start during the previous steps, you should again visit the “Device Manager”, where in the “Properties” item you can update the drivers manually.
Reset
If your ADSL modem was previously used, it is better to reset its settings to factory settings. This will also be useful if you do not remember the password for the web interface. Different operators have different connection methods. When you change provider (for example, you used Domolink, but moved to a new apartment, which is located in the Rostelecom coverage area), it is easier to configure the device from scratch than to change individual options.
To return settings to default:
- You need to connect the ADSL modem to the electrical network.
- Find a button or hole on its body that says “Reset.”
- If it is a button, press it for 30 seconds. The lights on the device may blink.
- If it's a hole, insert a rod or paper clip into it. Also hold for a few seconds.
- If none of the methods work, hold down the On/Off button and wait until the indicators blink.
After the backup, the device will reboot. You can also reset parameters through the web interface. How to enter it is described in one of the following chapters.
How to turn off the modem?
To turn off your smartphone or USB modem, click on the triangle at the bottom right and select the device icon. Find the name of the modem in the list and click on it. Information appears that the device can be safely removed. In the case of ADSL equipment, you must disable the connection. In the future, simply disconnect the device from the network. If you need to connect a modem to your laptop, you will have to go through all the steps again.
If we are talking about the built-in modem, you can also disable it. To do this, take the following steps:
- Click on the Power Management tab.
- Select the Modem Properties section.
- Check the box next to Allow the computer to turn off this device to save money.
If the required item is missing, try another option. Go to the General section in Modem Properties. There is a function called Using the device. Press it and select Do not use (disable) this device. In the future, the operating system will ignore the built-in hardware.
Removing the USB Modem
Remove the equipment like other USB devices - click on the triangle in the lower right corner of the taskbar. In the menu that opens, select the device icon. Look for the name of the modem in the list and click on it. A message appears indicating that the device is safe to remove.
Connecting a modem is a simple procedure that does not require special knowledge of PCs and network equipment. In most cases, the device works without any problems after installing the software.
Setting up IPTV
Many providers provide Internet and television in one package (for example, the same Rostelecom). A Wi-Fi router is best suited for working with IPTV. But you can also use a regular ADSL modem. If it has several LAN connectors. To configure it, you need to create a bridge.
- Login to the web interface.
- Open the Network - Connections section.
- In the Connection Type list, select Bridge.
- Specify VPI and VCI. If they are paired, two bridges are needed.
- Click "Save".
- Go to the "Advanced" tab.
- Subsection “Grouping of interfaces”.
- “Create group” button.
- Enter any name.
- Move the bridge and some LAN port to the right columns. For example, LAN3.
- Click "Save" and reboot your device.
After this, IPTV will work on the selected connector.
ADSL modems are ideal for working over telephone lines. But to install such devices, you need to understand the parameters. If your DSL does not have a wireless network, you can configure it to connect to your router.
Connecting a laptop as a modem
Above, we looked at options for how to connect the Internet on a laptop via different types of modems. But there are situations when it is necessary to use the receiver as a distributing device. To solve this problem, the equipment must have a built-in WiFi adapter.
Users have several options at their disposal:
- Using the Mobile Hotspot option. This is a basic feature built into Windows 10 (comes with the OS). With its help, you can connect your laptop as a modem and distribute the Internet from it. To launch the option, go to Start, and then go to the Settings section. There, in the window that appears, find and click the Network and Internet shortcut. In the list that opens, select Mobile hotspot. The connection name and password can be left unchanged or you can enter your own data. In the Connection Sharing section, select the Ethernet line or the name of your Internet provider. Next, allow the use of the Internet on other equipment.
- Command line. If you are unable to connect your laptop to the modem, you can use the main equipment as an Internet provider. Open the command line, and then enter the phrase “netsh wlan show drivers” to check the adapter (Yes should appear). The next step is to write “netsh wlan set hostednetwork mode=allow ssid=”network name” key=”security code”” to configure the connection parameters. Use the command “netsh wlan start hostednetwork” to activate the wireless connection, and use “netsh wlan stop hostednetwork” to terminate the connection if required.
- Third party applications. Here you can use one of the many programs, for example, Virtual Router Plus or Connectify Hotspot. With their help, it is easy to connect a laptop as a router.
Wireless connection via Wi-Fi (from router)
Turning on the Internet on a laptop, provided that the Wi-Fi network from the router is configured, is a very simple task. There are several conditions necessary for this.
- Availability of the network name and password for it.
- A laptop with a working Wi-Fi module.
The connection occurs according to the following scenario.
- We turn on the router to the network and wait for the wifi protocol to load.
- We turn on wireless networks on the laptop.
- We open the overview of wireless networks and find the one we need.
- In the menu that opens, enter the password and click the connect button.
Checking for an adapter
The presence of a wireless adapter can be verified by the presence of a picture on the laptop box. If you bought a laptop second-hand without a box, then there will definitely be a duplicate mark on the case about the wireless adapter.
Driver installation
Installing network card drivers on your computer is an important part of connecting to the Internet. Without a network driver, the laptop will not detect the WiFi adapter. The drivers are installed from the disk that comes with the laptop; insert it into the CD drive and follow the instructions of the installation assistant.
Necessary system settings for connection
To set up the Internet, you need to check the automatic receipt of an IP address and DNS server. These settings are located along the path Start Control Panel Network and Sharing Management Connection Properties Internet Protocol Version 4 Properties.
How to connect a modem to a laptop: expert advice
A modem is a fairly popular device these days. It allows you to access the Internet on a portable device anywhere in the world. Despite its simplicity, it requires a number of configurations and software for correct and optimal operation. There is no need to rush through installation and connection, because it is better to spend a couple of minutes reading the instructions than to make everything even worse and more complicated. You should consider all the features of the procedure and advice from specialists, which are as follows:
- Before directly connecting the modem, you must turn on the netbook and wait until the operating system loads completely. Only in this case will it begin to recognize the inserted device;
- Next, you need to remove the cap, which covers the USB modem input interface from dirt and foreign bodies that can damage it and damage it;
- The modem is inserted into any free and working USB port of a personal computer or laptop;
- Wait until the device is detected and its main components are loaded for further work. After the process is completed, a corresponding notification will be displayed;
- In addition to the notification, an AutoRun dialog box will be displayed, in which you need to select the AutoRun exe file and run it;
- Select a convenient installation language, specify the installation path and wait until the programs and drivers are installed;
Important! Further actions involve setting up a connection to the provider, which was fully described in the paragraphs above for the most popular operating systems.
Thus, it was explained how to connect the Internet via a modem to a laptop and how to rid yourself of simple but common mistakes. If you follow the instructions, you can easily install any modem on any laptop, be it HP, Samsung, Asus, DELL.
Possible problems and ways to solve them
Connecting a laptop to a modem via a cable, via Wi-Fi or another way is not difficult. Most of the problems that arise when performing such work are associated with incorrect installation of drivers or errors in hardware configuration. If the work is done correctly, but you cannot access the Internet, you can contact your provider and ask for help. Some companies send representatives to connect a wired modem to a laptop or PC. Often this service is provided for a fee. In the most difficult cases, setup fails due to a malfunction of the equipment itself.
What is a 3G connection from TELE2
High-speed 3G Internet from TELE2 is a compact device for fast access to the network at any time. Mostly in Russia the coverage area is 2 and 3G, but in large cities a faster 4G version is already available.
Equipment set.
- USB gadget manufactured by ZTE Corp.Technology.
- Sim card with connected tariff.
- USB cable.
- Installation drivers.
In the box with the device you will find the modem itself, a cord, a power supply and instructions.
Technical data.
- Works on all operating systems (Linux; Windows 7, 8, 10, XP, Vista; Mac OS).
- Max data transfer speed is 11 Mbit/s.
- Max information reception speed is 21.6 Mbit/s.
- Convenient USB interface.
- Works only with TELE2 cards.
- High-speed network 2G and 3G.
- Battery with a capacity of 1500 Amperes.
IMPORTANT. If there is no 3G connection, the router will operate at speeds of up to 64 Kbps.
Characteristics of Tele2 devices
USB 3G and 4G modems are small devices similar in appearance to Flash drives that help tablets, desktop PCs and laptops connect to high-speed 3G and 4G networks. Both types of devices are equipped with a shock-resistant housing, a user-friendly interface and a protective cover. There is an indicator button on the body. It signals the status of the Internet connection.
Installing the TELE2 Internet gadget
Since such devices appeared, setting up the Internet for the TELE2 modem is not particularly difficult. Almost the entire procedure occurs automatically.
- You need to insert the SIM card into the device itself.
- Then connect it to your computer or laptop.
- Then the system itself will detect the hardware and install drivers.
- Once the installation process is complete, a window will appear to install the software on your computer.
- To understand how to connect a TELE2 modem to a computer, you need to launch the installation program and click “Connect”.
- After all these steps, a connection should appear.
IMPORTANT. After setting up the TELE2 3G modem on your computer, the system must be rebooted.
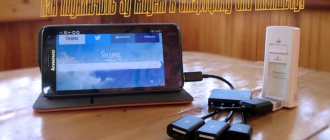
You can also use your smartphone as a router
How to connect and configure a modem
After choosing a model that is suitable in terms of technical characteristics and cost, you need to figure out how to set up a Tele2 modem with the selected tariff plan on your computer or laptop. They work like this:
- connect to a USB connector;
- wait until the computer detects the device (in Explorer it will be displayed as a removable disk);
- wait for the drivers to be installed (search and installation will begin automatically);
- in the window that appears, click the “Finish” button;
- check the connection.
No additional programs are needed for the Tele2 modem with a USB connection, but you may need to restart your laptop or computer.
APN Settings
An automatic procedure is usually used to set the Access Point Parameters (APN). Once the device driver is installed, the initial settings should be installed automatically. However, this does not always happen. One of the reasons may be an incorrectly selected modem model. In such a situation, you need to enter the necessary parameters manually. For Tele2, Internet settings for the modem are done as follows:
- Go to the official website of the company and go to your personal account page.
- Log in to it.
- Enter the required parameters. Internet.tele2.ru is indicated as the access point. Note that a proxy server is not used. You do not need to enter a login or password.
- Confirm entry.
Entering parameters when setting up the Tele2 modem is simple, and any user can perform it with virtually no risk of making a mistake.
Setting up a 3G modem "Tele2"
The 3G standard provides high speed Internet access. In order to fully use it, you need to configure this gadget correctly. You need to do the following:
- Insert the SIM card into the modem.
- Connect the device to the USB connector.
- Enter the settings and select the “Network” and “Options” sections.
- You must indicate that the connection type used is RAS (modem). The remaining parameters will be set automatically.
- You must confirm the entered data and exit.
It is recommended to perform the setup in a 3G coverage area. This way, you can immediately see the result of the work done.
Note! Such a network has much greater coverage than 4G, but the access speed, although high, will be somewhat lower than that of the next generation network.
Setting up a 4G modem "Tele2"
Using the 4G standard provides users with the highest speed Internet connection. When connected, the necessary parameters are usually installed automatically. If this does not happen, then you must enter them manually. To do this you need to do the following:
- You need to connect a 4G modem to your laptop or computer.
- The system will recognize the new device and install the necessary drivers.
- Then you will need to install the Tele2 Connect program.
- After installing it, you need to launch the application and click the “Connect” button. After this, the connection to the Internet will be established.
The connection in this case is similar to that for 3G modems in accordance with the instructions, but there are some peculiarities here. To install the program, use the installation disk. To run the application, you may need to copy Autorun.exe from the installer to your hard drive.
Features of settings on different versions of Windows
In different versions of Windows, the options for installing the Tele 2 modem on a computer do not differ significantly. The parameters are entered in the same way. Differences may occur in the layout and appearance of the various control panel screens.
Content
Many companies are engaged in the production of modems. Currently, models from the following brands are popular: Huawei, ZyXEL Keenetic, ZTE, TP-Link, Asus. All devices have their own specific features and advantages. Manufacturers are constantly releasing new models and improving old ones. In order to start using the device, you need to know how to connect a modem. Not every user knows how to do this correctly. Therefore, today we will talk about how to connect to the modem and configure its settings.
Possible problems
The system for connecting to the Internet using a modem is currently as automated as possible. Companies that develop such equipment are interested in ensuring that the user, by inserting a SIM card into the device and connecting it all to a laptop, immediately receives a connection to the World Wide Web.
Therefore, possible problems only occur when the user or the computer system tries to interrupt this automated process. And in order for the subscriber to avoid possible connection problems, he should make sure that all the latest versions of drivers are installed on the computer and simply do not turn off the system.
Fixing potential problems when connecting a modem to a laptop
On a note! If all the previous steps were completed correctly, the Internet connection will begin automatically after the installation is complete.
However, what if this does not happen? Of course, you can take the path of least resistance and call a specialist, but still, if you know a certain procedure that could correct this problem with the connection, you won’t need to call a specialist. If the connection is not created automatically, then you need to do the following:
- go to “Network connections”;
- click on “Create a new connection”;
- after launching the program that creates connections, you must select “Internet Connection” from the list provided;
- then you need to select the connection setup option yourself (manually);
- using a modem, at the next stage of settings you should select an item that directly concerns the device, as is clear from the name;
- then the program will offer to give a name to the new connection, and subsequently, when checking the Internet access panel, you will always see the name you gave;
- the next point will be to indicate the telephone number provided by the provider for correct connection to the Internet;
- the provider also provides a login and password, which must be entered subsequently;
- The checkboxes next to the items about connecting by default and using registration data in the future should also be left, otherwise this will create problems with subsequent connections;
- In addition to the above, for ease of access you should create a shortcut for the connection on your desktop.
Select “Next” in the New Connection Wizard
Fill in all fields to create an account
If all actions were completed correctly, an indicator will appear in the notification area of the taskbar, which will signal the successful operation of the new connection, which you named as you wanted.
How to use the application
To enter the Internet space, the provider has implemented a special utility “MTS Connect”. This application has the following functionality and characteristics:
- The main window of the program displays the exact balance status at the current time, as well as the amount of available traffic in the billing period.
- If the established limit has come to an end, you can activate renewal services and expand the standard set to the required volume.
- You can receive and send messages in any direction of communication.
- Voice communication management.
- The ability to timely replenish your personal balance using a bank card.
- Monitoring and regulation of data transmission speed.
- The interface is made as simple as possible, all the main controls are displayed on the desktop.
Attention! Not all brands and models of modems support the listed characteristics and capabilities.
To activate the connection, you will need to click on the “Connect” button.
After a few seconds you can consume network resources. The main menu displays:
- SMS – for writing and reading messages.
- Challenges. Making a call or typing USSD commands.
- Settings. Changing device operating parameters.
- Balance. Displays the current account status.
The modem is easy to use.