If you buy a new monitor or connect your computer to the large screen of a modern TV, you may experience a feeling of discomfort associated with icons and fonts that are too small.
Indeed, without having a strong habit, when switching to high-resolution screens, it seems that the letters and buttons (desktop icons) are too small, difficult to distinguish and difficult to read.
And in this case, it makes sense to increase the font size of the operating system.
In addition, increasing the size of letters in Windows 7 can be useful if you have difficulty seeing and do not want to sit at a computer or laptop with glasses.
The simplest increase in the system font will help improve picture quality and simplify work in the operating system in a matter of minutes. But how can you increase the font size in practice?
1. Click on the “Start” button, which is located on the lower left side of the monitor screen. The same results can be obtained by pressing the “Windows” button (with a characteristic icon) on the keyboard of a computer or laptop.
2. Next, find the “Control Panel” menu item and enter it by clicking the mouse.
3. Here we look for the “Design and Personalization” option and click on it.
4. Among other icons, options and links, we will be interested in the “SCREEN” icon. You need to click on it with the mouse.
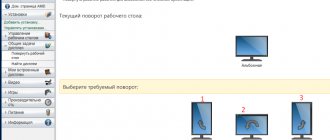
5. In a new Windows 7 window that opens, we are asked to choose among the options:
- Small (meaning font) – 100%
- Medium (font) – 125%
- Large (may not have such a function) – 150%
When the font is enlarged, the system will inform you that individual display blocks may not fit on the screen, but this should not worry us, since with an enlarged font it will still be easier to understand the system than with small and small letters.
Accordingly, select the font size option that we consider suitable and click on the “Apply” button.
In certain builds and versions of Windows 7, in the same window you can find a link (on the right side) called “Other font size”.
This option is not available everywhere, but if it is available, you can use it and set the optimal letter size as a percentage.
Size is determined in dots per inch or percentage, based on the operating system's standard font size (standard 100%).
So, you can experiment with these settings and choose the font size that you find optimal. The main thing is not to forget to confirm the changes using the “Apply” button!
In addition, if you are working with a browser, and not in the operating system itself, you can use the “Zoom” option, which will be easy to find in the “VIEW” menu section. By setting the desired scaling ratio, you will make it easier for you to work with the browser by increasing the font size to the desired value.
Changing the font in Windows 7
Despite the fact that the share of Windows 7 is gradually decreasing as a result of users switching to Windows 10, a certain number of users really like this OS and are in no hurry to upgrade. In this regard, we will tell you about two ways to change the font size in Windows 7: you can do this from the control panel and from the context menu. Let's look at each of them in more detail.
- First, open the control panel. To do this, double-click on “my computer”, after which the corresponding window will appear.
- Select “system properties”. This will take us to the settings window.
You need to open the “control panel...”.
- You can display the item you are interested in on the screen by switching the view to small/large icons.
- After that, find the “screen” category in this list and click on it.
- You will see 3 preset scales in the system, from which you are asked to choose: 100%, 125% and 150%.
- After applying the changes, you will need to restart your computer for them to take effect.
But you don’t have to use these preset scales at all, but create your own within 100-500%.
- You just need in the same place where you selected the scale there is a not very noticeable “different font size” option.
- A scale like a ruler appears, where you need to place the mouse pointer by moving the mouse left and right with the left button held down until you get a font that suits you.
- After clicking OK, you will notice that another option appears with your selected scale.
- Application of the changes is again achieved by restarting the computer. As a result of these actions, the font size throughout the system will be changed.
If you frequently increase or decrease font scaling, it will be faster to do this through the context menu.
- First, right-click on an empty space on the desktop.
- From the list that appears, select “screen resolution”.
- You will be taken to the screen for changing monitor settings, where you need to select “Make text and other elements larger or smaller.”
- You will be taken to the already familiar window for changing the scale, just like using the control panel, only faster.
Another way to change the font size is to use the built-in Windows utility, Magnifier.
- First, of course, you need to launch this application. You can find it in the “start” menu by entering “magnifier” in the “search programs and files” field.
- Left mouse click to open it. A menu will appear as in the screenshot below.
- Using the settings, you can change the scale and other parameters. The area will move following the cursor.
- To enlarge a certain part of the screen, you just need to place the mouse in the place where you need it and you will get a screen enlargement in that place.
The scale here increases from 100 to 1000%. This tool is designed for nearsighted users and can also be used during presentations to highlight a specific piece of eran. The tool works on top of all windows, and therefore can be used not only on the desktop.
Changing the font size in programs and individual OS objects
Users often encounter the need to reduce or increase the font size on the computer screen in programs such as text editors (Word), browsers (Opera, Google Chrome) and others.
In a number of programs, the text size changes both at the time the program is currently running, and for the entire time through the settings. There is no point in describing changing the text size using settings, since this process can vary greatly in different applications. You can easily find information on this subject for a separate program on the Internet.
Fast zoom
Version 56 Version 55 Version 54 Version 53 Version 52 Version 51 Version 50 Version 49 Version 48 Version 47 Version 46 Version 45. First steps in installing and updating navigation Synchronizing and saving chat and sharing.
- Get even more apps.
- Manage preferences and add-ons.
- Solve sluggishness, crashes, error messages and other problems.
Was this article helpful?
Make page scale
Scaling allows you to increase or decrease the size of all web pages, or simply the size of any text displayed on a web page, to improve its readability. This function explains this function.
Enlarging or shrinking a web page
Use the procedures below to zoom in or out on individual websites.
Let's describe the process of changing the size of text with the keyboard and mouse, which is valid for most Windows applications. To reduce the font size on your computer using the keyboard, hold down the Ctrl button and press the minus sign (to increase the font size, the plus sign). This combination is applicable for browsers and is very convenient for laptops.
The most universal way is to hold down the Ctrl key, then without releasing it, scroll the mouse wheel up to increase the text size and down to decrease it. Applicable even in Windows Explorer.
How to use text-only scaling
Key combinations. You can also use the keyboard to zoom in or out on the page without the need for a mouse. Instead of resizing the entire page, you can change the text size only. This way, the zoom controls only affect the size of the text, leaving the images unchanged.
Set minimum text size
- From the top menu, select View, then Zoom.
- Select "Text Zoom Only".
If a web page contains text that is smaller than the minimum, the text font size will be increased to the minimum set.
You can also change the font size on your computer for individual elements of Windows 7, 8. The article on how to change the size of desktop icons describes in detail changing the text size of desktop icons.
In the previous instructions, changing the font in Windows 7, the font style of some and all elements of the OS changed. Follow the link above to learn how to open additional appearance settings.
How to create style or fonts written in windows, folders and menus in windows
If this key does not exist, you must create it as a new one.
Open a new text document and write it down. You can save it anywhere with any name. You can also leave the fonts alone and change them to just bold or italic if you want. Before you follow the procedures in this document, complete the following steps: Restart your computer and try to recreate the problem. Firstly, to solve the stability of the application, you must find the cause of the trigger. Typically, the problem can be attributed to a system or application variable, or in some cases to the file itself.
Not all elements of Windows 7 can change the font size, however, select the element for which you need to set the text size. In the “size” field, click on the current number to select a different value from the list. By doing this with a group of elements, you will make fine tuning.
If the problem does not appear again, it means that the reason for the startup is a specific user profile. If you run the application as a member of any non-administrative group, stability issues may occur. If the problem persists, try running the application as a member of the Administrators group.
To fix any video-related problems, you can download updated drivers from the manufacturer's website. To check if the problem persists, it is recommended to reduce the hardware acceleration of the video driver. To reduce hardware acceleration, follow these steps:
In Windows 8, go to Control Panel, use Small Icons view. Find the "screen" option and select it.
At the bottom of the window you can change the font size of individual elements. In version 8.1, to access these settings, select the option to select the scale for all displays. Next, specify the element and font size. Then click “apply” and wait for the changes to be applied.
Go to the Settings tab. Click the "Advanced" button. Go to the Troubleshoot tab and then reduce the acceleration by moving the slider in the direction. Installing too many fonts can be harmful and affect your computer's performance. Finally, periodically check for corrupted characters or 0kb fonts. Automatic execution services and elements.
Some native services and autostart items may be the source of stability issues, especially antivirus services. In the System Configuration dialog box, click the Startup tab. Click the "Disable All" button. Go to the Services tab.
Windows 8 Text Scaling
Since the system came out after Windows 7, Microsoft did not have time to significantly change the way fonts are enlarged in Windows 8, so this process is similar to the process for Windows 7. The only nuance was that it became possible to change the font size for each element individually, as can be seen in the screenshot below. Enter the required parameters and click the “Apply” button. The new font size will be applied after you restart your PC.
Easy way for Windows 10
Interestingly, in system build 1703, the text scaling feature is no longer available. You can only change the size of all elements at once, and that’s another thing. Therefore, a third-party utility, System Font Size Changer, is used, which does not even need to be installed. Download and run the program. You will be prompted to save the current settings to a reg file, which is best to agree to in order to return to the standard settings if necessary. After this, the window of the application itself will appear, where, by placing a marker on the item and moving the slider, the size of the individual text component changes.
The utility is in English. Here is the translation of the fields:
- title bar — window title;
- palette title - panel captions;
- menu — main menu;
- icon — label names;
- message box - message area;
- tooltip - tooltips;
- bold - makes the text bold. Select the desired values for each element and click the Apply button. The system will notify you that the changes will take effect after a reboot. Therefore, the result will be visible the next time you start Windows.
Windows 10 font sizes
The listed methods suitable for Windows 7 and 8 are also suitable for Windows 10, but in the latest Windows 10 update (version 1809 October 2022 Update) it became possible to change the font without having to change the scale of other system elements, which is much simpler, but to Unfortunately, this applies to the entire text of the system at once, and not to individual elements, as can be applied using scaling. In order to use this method, you need:
- In the “Display” menu at the top, you need to select the required font size (as a percentage of the current one).
- Click “Apply” and after some time the settings will be applied.
After this, the font size of almost all elements of system programs and most third-party programs, for example, in Microsoft Office, will change.
Lower DPI
The DPI parameter is responsible for the readability of text. The lower its value, the more convenient the text is perceived, and if this indicator increases, the font may become virtually unreadable.
1. Open the “Options” menu using the keyboard shortcut Win→I.
2. Click on the “System” section.
3. Go to the first tab “Screen”.
4. Select the device, if the computer uses a pair of monitors, using the “Define” button.
5. Move the slider “Changing the size of text of programs and other elements” to the desired position.
6. Exit the system or reboot it.
If this action did not help solve the problem, you can return all settings to their original settings.
How to make the font smaller on your computer with Windows 10 Creators Update
How to reduce font size on a computer or laptop in Windows 10 Creators Update:
- Launch System Font Size Changer
- Set the circle to the desired value (Title Bar - window titles, Menu - main program menu, Message Box - message windows, Palette Title - panel names, Icon - captions under icons, Tooltip - tooltips)
- Move the slider to the left
- Click Apply and restart your PC to change (increase or decrease) the font size on your Windows 10 computer screen
Changing all fonts through the registry
The method will allow you to change the font on your computer for the entire Windows 7 interface, setting a single design. To get style names, visit the Fonts folder (described at the beginning) or in the control panel, when viewing small icons, select the “fonts” element. Next, having looked at the style, remember its English part of the name and follow these steps.
1. Download the reg file here, unzip it. In the last line of the file, the font is set to Britannic; you can change it if you wish.
2. Right-click the Izmen-Font.reg file and select “edit” from the menu. As a result, the contents of the reg file will open in notepad. In the last line, enter the name of the font, save the changes, close the file.
3. Double-click to launch Izmen-Font.reg. Click "yes" (UAC message), then "yes", OK. This will make changes to the registry.
4. Log out, restart your PC (at your discretion).
If you want to return the default style, then download the reg file here. Follow steps 3, 4 above.
Increasing and decreasing font in Word on Windows 7
How to change the font on a computer with Windows 7 - settings
If the user does not immediately know what size to assign to the font in Word, then this can be done sequentially. You can change the values as follows:
- Select a fragment of the typed text whose size you want to change.
- In the next step, the user must, in the “Home” tab, in the “Font” subsection, tap on the button with a capital letter A to increase the text, and with a smaller letter A to reduce the selected fragment. The font size will be converted every time the user clicks on the button.
There is also a way to change the font to non-standard parameters. The instructions in this case look like this:
- By analogy, select a typed fragment of text, the size of which should be larger than the standard 72 units, using a computer mouse.
- In the “Home” section in the “Font” tool group, next to the font name, there is a window where a certain numerical value is indicated; click on it with the mouse.
- Select this numeric value and press “Delete” or “BackSpace” on the keyboard.
- In an empty window, set a specific value and, to make the text larger, press “Enter”.
The text size will change based on the user-specified values.
Change text size in Word
How to return default fonts to Windows 7
How to change the font on Android - installation and configuration methods
If the installed font does not display correctly, the user is recommended to restore the default Windows 7 font. This can be done in several ways.
The first and easiest option involves resetting the settings through the Start menu. To do this you need to do the following:
- Open Start.
- Go to "Control Panel".
- Next, go to the “Design and Personalization” section.
- Through the “Fonts” item, go to “Font Options”.
- Restore default settings.
- Confirm action.
If you install non-standard fonts or use a specialized application for this, you can configure the default settings using the second option, by restoring the system through “Start”.
If using the previous two methods it was not possible to solve the problem, then you need to go to the third method and make changes to the registry:
- Create a text document.
- Enter the code Windows Registry Editor Version 5.00 into it.
- Save the document with the REG extension and run the file.
- Next, you need to agree to the changes made.
- To restart a computer.
As a rule, in the absolute majority, after this the default font is restored successfully, and all problems associated with distortion of the system text are solved. If this still does not happen, you should restart the operating system itself.
How to increase the font size on a computer in Windows 7?
In Windows 7, font sizes on a computer or laptop screen change slightly differently.
To do this, right-click on an empty space on the desktop and select “Personalization”.
Personalization in Windows 7
In the window that opens, select “Screen” at the bottom left.
Setting up the screen in Windows 7
Here, in the upper left part of the window, select “Other font size (dpi)”.
Opening the font enlargement setting in Windows 7
The “Select scale” window will open, where in the “Scale from normal size” selection window you can select the magnification factor as a percentage.
After selecting the desired value, click the “Apply” button and exit your profile. After logging in again, the size of all elements of the Windows 10 desktop, including the font on the screen, will be increased.
How to make Windows 10 Creators Update font larger? Instructions
Windows 10 Creators Update removed the ability to change font size. Now, to make Windows 10 font larger, you need to download third-party software.
How to increase the font size on your Windows 10 computer screen:
- Download System Font Size Changer
- Run the program (the first time you launch it, you will be prompted to create a file with a .reg extension, which you need to confirm)
- Set the desired value:
- Title Bar - Window titles
- Menu - Main menu of programs
- Message Box - Message boxes
- Palette Title - Panel names
- Icon - Captions under icons
- Tooltip - Tips
- Move the slider to the right to make Windows 10 font larger
- Click Apply and restart your PC
Restoring Basic Settings
1. Using the Win→X menu, open the System Control Panel.
2. Switch to the view of its icons in the “Category” form.
3. Open the “Personalization and Design” applet.
4. Click on the “Fonts” item.
5. In the vertical menu on the left, click “Font Options”.
6. Click on the button called “Restore font settings...”.
All settings related to labels and text in Windows 10 will be returned to standard without predefinitions and the requirement to confirm actions.
How to increase font size on a Windows 7 computer using hotkeys
The Windows 7 operating system is equipped with a large number of built-in tools, but this does not make it difficult to understand and use. Even, on the contrary, owners of the latest operating systems note that they are more complex and confusing. That is why there should not be any difficulties in how to increase the font size in Windows 7.
Variety of fonts for Windows 7
First of all, it is worth considering the easiest method to implement - using hot keys. By resorting to it, you can quickly and easily increase the size of text and various elements.
How to increase font size in Windows 7 using hotkeys
Changing the scale in browsers on Windows 7
Modern users spend a lot of time on the Internet. This is why pages on social networks should be as readable as possible. In each browser, the user has the opportunity to reduce or enlarge text, icons, and pictures.
Yandex
If you wish, you can change the size of displayed icons and text on all sites or individually on one of the pages.
To change the scaling of all pages in Yandex, you must adhere to the following algorithm:
- Open the browser and in the top control panel tap on the button with three horizontal stripes (settings).
- A list of available options will be displayed, from them you need to select the “Sites” line, then the “Page Scale” subsection and assign the optimal value to the parameter.
If you need to change the scale on only one page, then you need to follow other instructions:
- Open your browser and immediately click on the settings icon.
- In the list of built-in tools that appears, you can change the scaling by clicking on plus or minus. There is also a “Expand to full screen” button.
In Yandex. Browser" you can still change the scaling using hotkeys. To increase the text, use the combination of the “Ctrl and +” buttons, and to decrease, respectively, “Ctrl and -”.
For your information! The changes you make are saved in the program, so the next time you use it, the settings will remain the same.
Google Chrome
One of the most popular browsers at the moment is Google Chrome. This is due to optimized and fast operation. To change the image scale, you can use one of several methods.
- Launch the browser on your PC and go to manage settings (the button in the form of three dots is located mainly in the upper right corner).
- The available tools will be displayed, select “Scale” from them and specify the desired size.
Note! You can also use hot keys to speed up your work. To increase the text, use the combination of the “Ctrl and +” buttons, and to decrease, respectively, “Ctrl and -”.
Built-in tools of the operating system and its individual programs make their use as comfortable as possible. The instructions are so simple that even a novice user can handle them.
How to change the font size on a Windows 7 computer by scaling the image
It is important to understand that the quality and size of the image depend on the resolution of the computer screen. The following principle applies: the higher the screen resolution, the smaller the images will be on it (there is a lot of space) and, on the contrary, the lower the resolution, the larger the desktop icons and font will be.
How to Enlarge Font on Windows 10 Computer
In both cases, standard settings may be inconvenient, so you can change the indicators using standard tools.
Note! If the icons, font and any elements on a desktop computer or laptop are too small, then this will inevitably have a negative impact on vision, and a person will get tired faster.
To change the screen resolution, the user needs to right-click on the computer mouse in any empty part of the desktop where shortcuts are not located. A drop-down list will be displayed, where among the available options you need to click on the settings of the graphic editor. The name of the section changes depending on the OS modification, but mainly “Graphical characteristics...” is found.
If the graphics editor settings section is not displayed in the context menu, you can open it through the “Control Panel”. Just click on “Start”, then “Control Panel” and select “Hardware and Sound” from the available options.
Important! If the links are not displayed anyway, then it is likely that the software (drivers) is not installed/updated on the PC.
Difference in HD and 4K expansion
If you managed to find the required section, then the next step is to go to the tab with all the display settings. The required section is located there. To begin with, it is better to try specifying a low resolution. Only through experience can it be possible to select the most optimal parameters.
Using standard Windows tools
If you were unable to increase/decrease the font using the previous method due to the lack of software for the video card, you can change the settings using standard Windows tools.
To do this, you need to right-click on a free space on the desktop and select “Display settings” in the drop-down list that appears (the method is relevant for owners of computers with OS version 7 and higher).
Note! In the “Display” tab you will need to select the “Resolution” line and set the optimal value. To get the most pleasant picture, it is better to experiment with additional parameters.
Changing font size using standard Windows tools
Changing the font size of all Windows objects
The instructions will show you how to increase or decrease the font size on your computer by changing the number of dots per inch, and all other elements will appear larger or smaller. First you need to find the screen settings (described above). In Windows 7, 8 you will have access to a list of sizes in percentages (standard “small”).
After you restart your computer, try to reproduce the problem. If the problem no longer occurs, use an uninstall job to determine which service or runtime is causing the problem. In some cases, certain processes or runtime components may be disabled to prevent conflicts with the operating system.
Pay attention to items with disabilities, as any rehabilitation may cause problems with the system. To delete temporary files, follow these steps: In the window that appears, click “Edit”, select “All”. Some files cannot be deleted if open applications are open.
To enlarge the font on your computer screen, select a larger percentage than the standard one. Next, click the “apply” button and then “exit now”.
You can set custom (your) settings. In seven, click on the left “different font size” (screenshot above). In the figure eight, click “custom size options.”
Changing the font size in programs and individual OS objects
In this case, restart your computer and repeat the steps above to ensure that all programs are closed.
If there is a communication problem between the printer and the application, you may experience an error when creating a new document or opening an existing file. You may have other deficiencies that may be causing sporadic errors or affecting system performance if there is a problem with the default printer. After installation, check if the problem persists. The swap file is used for this purpose. On the other hand, visual effects require resources to work properly and in turn can have an adverse effect on applications installed on the system. Disable themes and visuals to determine if the problem persists. To disable themes, follow these steps:
In the “select scale” window, set a custom percentage of the size by selecting from the preset percentages, or hold down the mouse button on the ruler and drag to the right to increase, to the left to decrease the percentage. Here you can track the pixels per inch value. Maximum value 500%. Be sure to check the WindowsXP style scaling option to avoid problems with text display in older programs.
Click Start, Control Panel, Display. To turn off visual effects, follow these steps: Click Start, Control Panel, System. In the Performance box, click Settings. Go to the Visual Effects tab.
Change the Rule setting to improve performance. Make sure all devices on your system have the latest drivers installed. Graphics tablets, scanners, and other peripherals must be updated with the appropriate device driver and updates issued by the manufacturer.
After selecting the required percentage, click OK, then “apply” and “exit now”.
You can reduce or increase the font on your computer manually through the registry. Launch the seven or eight registry, visit the “Desktop” section (details in the picture). In the right pane, find the “LogPixels” option, double-click to open it. Select the number system “decimal” and set the value in pixels. Next, click OK and restart your PC.
Routine maintenance is critical to keeping your computer running properly. It is recommended to regularly defragment system drives, delete temporary files, and run anti-virus scans. Viruses often have a negative impact on a computer to prevent many applications from functioning properly. It is recommended that you run a virus scan regularly to ensure that the latest virus definition file is being used.
Workspace and application settings. If this happens, we recommend resetting the workspace to improve application performance. Restoring settings to default cancels any setting. As a result, back up your workspace before doing this.
I present a table indicating the ratio of pixels to scale:
If you set the size to a very large size for your screen resolution, then the image may look distorted and blurry. Boot in safe mode and set the size to an acceptable size, or download the registry file here and extract it. Double-click to run the reg file, click “yes” (User Account Control message), then “yes”, and OK. Then restart Windows.
To perform a backup, follow these steps: Click the Export button. Select all options and click Save. Select a directory and name the workspace file. Once exported, the workspace can be restored or imported to another computer by importing the file. If this does not improve application performance, you can reload the exported workspace file so that your custom settings are restored.
The default memory allocation is set to 25%. This value can be increased to 50%, but it is not recommended to exceed this amount. You may also need to change the drives used as swap drives. Nodes with a large capacity of free space are ideal for use as exchange drives. This is important because it improves read and write times if you specify a drive with little or no disk activity. Make sure automatic backup is enabled.
So you know how to reduce or increase the font on a computer using the keyboard of individual components of Windows 7, 8 and programs, and we also looked at changing the text size on the entire screen. Which recommendation to use is up to you.
In this material, we will introduce our readers to fonts in the Windows 7 operating system. The Windows 7 operating system, after installation, has dozens of different fonts in its set. These fonts are used by installed operating system programs. For example, these fonts can be used in the built-in text editor WordPad, as well as in popular programs such as LibreOffice and Adobe Photoshop. After reading this material, you will learn how to install new fonts yourself, and will also be able to change the font in the Windows 7 windows themselves. In addition to the fonts in the seven, we will briefly describe them in Windows 10, and also remember the old XP.
To check this, click Tools, Options, Save. In case of problems with the application, the backup copy of the file can be restored by reopening the application. Reinstalling the application. This prevents other programs from conflicting with the installation. The "Services and Runtime Elements" section of this document. The easiest way to determine if a file is causing any instability is to simply recreate the problem with a new file. If the problem cannot be reproduced using a new document, it means that the file at the source of the problem is corrupted or damaged.
Fixing font related issues
The most common problem that users encounter on a Windows 7 computer is incorrect character encoding. For example, when the encoding is incorrect, strange hieroglyphs may appear instead of normal Russian-language menu items. Below is a Download Master program with this problem.
Most often, this problem in Windows 7 occurs due to the installation of programs that change registry settings. This problem also occurs when installing the English version of Windows 7. The solution to this problem is quite simple. To do this, go to the Control Panel and find the Regional and Language Options add-on. After opening the add-on, you need to go to the “Advanced” tab.
In this tab, in the “Language of programs that do not support Unicode” block, you can see that the language is English. To solve our problem, just select the Russian language and restart the computer.
In Windows 10, this problem is solved in a similar way.
Another problem is the error message: “The Windows Font Cache Service service could not be started.”
This means that the FontCache service has stopped or cannot start due to errors in the registry. This error usually appears when opening a program that uses system fonts, but most often in the Microsoft Office suite. To cure this problem, you need to restore the service startup settings to their original state. You can launch the services panel, where you can find the FontCache we need using the services.msc command in the Run application. Below are windows with settings for the FontCache service.
By restoring the FontCache service settings, the error should disappear. If the problem does not disappear when you restore the service settings, then you need to use the example described below. For this example, you will need a registry file that restores the functionality of the FontCache service. You can download the registry file from the link FontCache.reg. After downloading the file, open it to update the registry settings.
Installing new fonts
Consider installation on Windows 7
.
First of all, we need to find new fonts. The site www.1001fonts.com will help us out with this, where you can find dozens of free fonts
.
For our purpose, we will download a new symbol set called Metal Macabre
.
How to change fonts on your computer. Increasing the size of letters
If this doesn't work, the file may be seriously damaged and there is nothing that can try to open the backup. You may need to do this if apps or extensions you have installed have changed their settings without your knowledge. Saved passwords and favorites are not deleted or edited.
Changes made when restoring settings
With this procedure, the recovery is not general: some settings, such as fonts or accessibility, are not removed. The following settings are reset to their default values.
- Default search engine.
- Extensions and themes.
- Learn more about extensions and themes.
The new settings will be applied to all computers and devices that you accessed under your active profile.
Now let's unpack the archive with Metal Macabre and open the file MetalMacabre.ttf. After this action, the file will open in a special utility for viewing alphanumeric characters.
In this utility you need to click the Install button. This action installs Metal Macabre on the system. You can view the installed Metal Macabre in the shared folder where all the fonts installed in the system are located. You can open this folder in the Control Panel, as well as using the Run
" and fonts commands
Troubleshoot installation issues
Sometimes we need to make a little change, like changing the font, to make it feel better.
All you need to do is follow the steps below. Click this option and you will find some fonts that you can choose from. You will see a sign in the upper right corner. Click it if you want to sketch out a different font. Return to the "Show" option. Here you will find another Font Size option that can change the font size. Notifications in the apps we use can be very useful at the same time, but in some cases quite annoying. If you're working on a document, you don't want to constantly be climbing windows that interfere with your concentration. Open the menu on the left side of the Ease of Access section, select Feedback Options and Audio Feedback.
In this folder, in addition to viewing all installed character sets, you can also delete them. Essentially, in this folder we are deleting a regular file with the extension “.ttf”.
Now let's look at installation on Windows 10
.
For this example, let's take a new font from www.1001fonts.com called The Godfather
.
After downloading and unpacking The Godfather archive, open the file TheGodfather-v2.ttf. After this action, an almost identical utility for installing The Godfather will open.
All further steps to install the new The Godfather character set are similar to installing Metal Macabre in Windows 7, so you can safely click the Install button. The only difference between the Windows 10 utility and Windows 7 is the new option “ Use shortcut
"
By checking this box when installing, for example, TheGodfather-v2.ttf in the folder with fonts, this file will not be copied, but a link to this file will be installed. That is, the file TheGodfather-v2.ttf, for example, located on the desktop will be The Godfather font in Windows 10. After deleting this file, The Godfather will disappear from Windows 10. It is also worth noting that you can delete fonts through the “Fonts ”
panel .
Now let's look at the installation in the already quite old Windows XP
. To do this, download the new Grinched symbol set.
Just like in the previous examples, let's launch a file called Grinched.ttf. After opening the file, a window with a program already familiar to us will appear.
In Windows XP, this utility has an old interface, but its operating principle is the same. Also, the Windows XP utility does not have an “Install” button. To install a new character set in Windows XP, you need to go to the Control Panel and open the Fonts
"
In the add-on that opens, you need to use the file menu to find the “ Install font
” item and open it. In the window that appears, you need to select our previously downloaded Grinched.ttf file.
You can also delete Grinched.ttf through this panel.
Changing system fonts in Windows 7 windows
In the seven, by default, the Segoe UI font is mainly used for all Explorer windows and built-in utilities. In Windows 7 itself, you can change the font and its color in the following eight elements:
- Tooltip;
- Selected menu item;
- Title of the active window;
- Inactive window title;
- Icon;
- Panel name;
- Message window;
- Menu bar.
The process of changing itself is carried out in the “Window Color” window. You can access this window through the desktop context menu. To do this, right-click on the active desktop and go to the “Personalization” item, as shown in the image below.
As intended, this action will take us from the desktop to the personalization panel.
In this panel we are interested in the “Window Color” link, which opens the window we need with the same name. This window is shown below.
As an example, we will replace the standard Segoe UI character set with Times New Roman in the Active Window Title element. We also set Times New Roman to size 12 and made its color red. To check our changes, let's open a standard calculator.
In the image above you can now see the red "Calculator" heading, which uses Times New Roman. In the same way, you can make changes to all other elements from the list described above.
If you try to make such changes in the new Windows 10, you will not succeed. In Windows 10, instead of the “Window Color” window, the user is taken to a panel where you can only change the color of the windows.
Ways to change fonts
Let’s say right away that this article will not consider the ability to change the font inside various programs, for example, Word, but rather its change in the Windows 7 interface, that is, in Explorer windows, on the Desktop and in other graphic elements of the OS. Like many other problems, this problem has two main types of solution: through the internal functionality of the operating system and using third-party applications. We will look at specific methods below.
Method 1: Microangelo On Display
One of the most convenient programs for changing icon fonts on the Desktop is Microangelo On Display.
- After you have downloaded the installer to your computer, run it. The installer will be activated.
The window for accepting the license agreement opens. Switch the radio button to the “I accept the terms in the license agreement” position to agree to the terms and conditions, and click “Next”.
The next window requires you to enter the name of your username. By default, it is pulled from the user OS profile. Therefore, you don’t need to make any changes here, just click “OK”.
Next, a window opens indicating the installation directory. If you have no compelling reason to change the folder where the installer suggests installing the program, then click “Next”.
The installation procedure is in progress.
After it is completed, a message indicating the successful completion of the procedure is displayed in the “Installation Wizard”. Click "Finish".
Next, run the installed Microangelo On Display program. Its main window will open. To change the font of the icons on the “Desktop”, click on the “Icon Text” item.
The section for changing the display of icon signatures opens. First of all, uncheck “Use Windows Default Setting”. This will disable the use of Windows settings to adjust the display of shortcut names. In this case, the fields in this window will become active, that is, available for change. If you decide to return to the standard version of the display, then it will be enough to check the above checkbox again.
To change the font type of elements on the “Desktop” in the “Text” block, click on the “Font” drop-down list. A list of options opens, where you can choose the one that you think is most suitable. All adjustments made are immediately displayed in the preview area on the right side of the window.
Now click on the “Size” drop-down list. Here is a selection of font sizes. Choose the option that suits you.
By checking the “Bold” and “Italic” checkboxes, you can set the text to be displayed in bold or italic, respectively.
In the “Desktop” block, by moving the radio button, you can change the shade of the text.
- For all changes made in the current window to take effect, click “Apply”.
As you can see, with the help of Microangelo On Display it is quite simple and convenient to change the font of graphic elements of the Windows 7 OS. But, unfortunately, the ability to change only applies to objects located on the “Desktop”. In addition, the program does not have a Russian-language interface and its free period of use is only one week, which many users perceive as a significant drawback of this option for solving the problem.
Method 2: Change the font using the Personalization feature
But in order to change the font of graphic elements in Windows 7, it is not at all necessary to install any third-party software solutions, because the operating system assumes solving this problem using built-in tools, namely the “Personalization” function.
- Open your computer's Desktop and right-click on an empty area of it. From the menu that opens, select “Personalization”.
A section for changing the image on the computer opens, which is usually called the “Personalization” window. At the bottom of it, click on the “Window Color” item.
The window color changing section opens. At the very bottom, click on the inscription “Additional design options...”.
The “Window Color and Appearance” window opens. This is where you will directly configure the display of text in Windows 7 elements.
The first three elements are drop-down lists, and the last two are buttons. After you have set all the necessary settings, click “Apply” and “OK”.
Method 3: Adding a new font
It also happens that in the standard list of operating system fonts there is no option that you would like to apply to a specific Windows object. In this case, it is possible to install new fonts in Windows 7.
- First of all, you need to find the file you need with the TTF extension. If you know its specific name, then you can do this on specialized sites that are easy to find through any search engine. Then download this desired font variant to your computer's hard drive. Open Explorer in the directory where the downloaded file is located. Double-click on it with the left mouse button (LMB).
A window will open with an example of displaying the selected font. Click on the “Install” button at the top.
There is another method for adding a new font to Windows 7. You need to move, copy or drag the object with the TTF extension downloaded to the PC to a special folder for storing system fonts. In the OS we are studying, this directory is located at the following address:
The last option is especially important to use if you want to add several fonts at once, since opening and clicking on each element separately is not very convenient.
Method 4: Change through the system registry
You can also change the font through the system registry. Moreover, this is done for all interface elements simultaneously.
It is important to note that before using this method, you need to make sure that the desired font is already installed on your computer and is located in the “Font” folder. If it is not there, then you should install it using any of the options suggested in the previous method. In addition, this method will only work if you have not manually changed the text display settings for elements, that is, the default option should be “Segoe UI”.
- Click Start. Select "All Programs".
Go to the "Standard" catalog.
Click the name “Notepad”.
A Notepad window will open. Enter the following entry there:
Windows Registry Editor Version 5.00 [HKEY_LOCAL_MACHINESOFTWAREMicrosoftWindows NTCurrentVersionFonts] “Segoe UI (TrueType)”=”” “Segoe UI Bold (TrueType)”=”” “Segoe UI Italic (TrueType)”=”” “Segoe UI Bold Italic (TrueType)” ="" "Segoe UI Semibold (TrueType)"="" "Segoe UI Light (TrueType)"="" [HKEY_LOCAL_MACHINESOFTWAREMicrosoftWindows NTCurrentVersionFontSubstitutes] "Segoe UI"="Verdana"
At the end of the code, instead of the word “Verdana”, you can enter the name of another font installed on your PC. It is this parameter that determines how the text will be displayed in system elements.
Next, click “File” and select “Save As...”.
For example, a suitable name would be “smena_font.reg”. After that, click “Save”.
Now you can close Notepad and open Explorer. Go there to the directory where you saved the object with the “.reg” extension. Double-click on it with LMB.
If you need to return to the default settings again, and this also happens quite often, you need to change the entry in the system registry again, following the algorithm indicated below.
- Launch Notepad through the Start button. Enter the following entry into its window:
Windows Registry Editor Version 5.00 [HKEY_LOCAL_MACHINESOFTWAREMicrosoftWindows NTCurrentVersionFonts] “Segoe UI (TrueType)”=”segoeui.ttf” “Segoe UI Bold (TrueType)”=”segoeuib.ttf” “Segoe UI Italic (TrueType)”=”segoeuii.ttf” “Segoe UI Bold Italic (TrueType)”=”segoeuiz.ttf” “Segoe UI Semibold (TrueType)”=”seguisb.ttf” “Segoe UI Light (TrueType)”=”segoeuil.ttf” “Segoe UI Symbol (TrueType) "="seguisym.ttf" [HKEY_LOCAL_MACHINESOFTWAREMicrosoftWindows NTCurrentVersionFontSubstitutes] "Segoe UI"=-
Click "File" and select "Save As...".
In the save window, again put the switch in the “File type” field to the “All files” position. In the “File name” field, enter any name, according to the same criteria that were specified above when describing the creation of the previous registry file, but this name should not duplicate the first one. For example, you can name it “standart.reg”. You can also save an object in any folder. Click "Save".
Now open the directory where this file is located in Explorer and double-click on it.
Enlarge font in browsers
Unfortunately, even if you changed the system font, this, unfortunately, will not have any effect on browsers, where the font will remain small. The font in the browser is enlarged by scaling; to do this, you need to hold down Ctrl and click on + (plus) to increase or - (minus) to decrease the page scale. Also, instead of plus and minus, you can roll your mouse wheel up and down respectively. The main disadvantage of this method is that for each page you will need to change the scale again, that is, the settings will be reset.