Replacing an old Nokia model with a modern smartphone is a joyful event in the life of every person.
However, with the purchase comes certain hassle - how to transfer contacts to a new phone. After all, you don’t want to do it manually, especially if the number of contacts exceeds 100. In this article we will look at the most popular and easiest ways to transfer contacts to the Android operating system. We emphasize that this service does not require any additional costs. All this is done quickly and free of charge. Transfer contacts using PC
In this case, you will need a computer or laptop with Internet access, as well as an old phone with a USB cable.
You should also download Nokia PC Suite in advance. It is freely available, and it will not be difficult to find it on the official website: www.nokia-pc-suite.ru
After installing it, launch the application, and your phone should already be connected to the computer via a USB cable. Next, you need to follow the instructions given below.
Step-by-step instruction:
- After the mobile phone has been identified in Nokia PC Suite, you need to synchronize your contacts. By the way, if this does not happen, it means that the device is operating in external storage mode - through the settings, select the PC Suite mode. Now go to the “Contacts” menu and click “Synchronization”.
This procedure can take from 5 to 30 minutes, depending on the volume. Upon completion of the process, move on to the next point.
- Export. Select all contacts using CTRL-A. Open the File menu and select Export Contacts.
The program will prompt you to specify the path and folder where the data will be saved. Create a separate folder for this. Each contact will be saved in a separate file.
- Treatment. When the export is complete, the folder will contain many files with the extension “.VCF”. Unfortunately, Google Contacts allows you to save them one at a time, but... This is very long, we suggest combining them into one file. To do this, create a folder in the contacts folder and enter the command at the command line: copy /B *.* contacts.vcf. Or download the finished BAT file from this link: https://2file.net/tag/1792. After running the BAT file, one file named “vcf” will appear in the folder.
- Upload to Google Contacts. Open the mailbox created in Google with the account that will be used on the smartphone. Open the “Contacts” tab.
Select the “Import” item.
Click the “Select file” button and in the window that appears, select the file we created “contacts.vcf”
This completes the process of transferring contacts from Nokia to Android using a PC. Contacts will appear automatically in the address book after confirming your account on the device.
Transfer utility
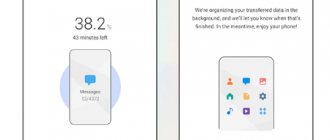
The latest versions of Android OS have a built-in Transfer utility, which greatly simplifies copying contacts from both Nokia and other mobile devices. The utility also allows you to transfer saved SMS and calendar notes.
Instructions:
- Turn on the device and launch the Transfer program.
- We choose the manufacturer Nokia.
- Now select your device model.
- A message will appear on the screen asking you to turn on Bluetooth on your Nokia.
- Click “Next”. The device search has begun.
- Synchronization was successful. Click “Next”, after which we send a request for a new phone.
- Now a message about transferring one of the items will appear on the new smartphone - select “Contacts”.
- When the import is complete, a message window will appear on the screen.
The advantages of this method of transfer include efficiency and convenience. The only drawback is the inability to select a folder for saving contacts.
Transferring contacts via SIM card
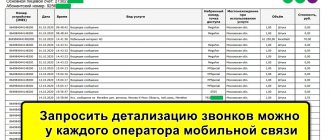
If the above methods do not work, another, but less effective option remains - copy the contacts to the SIM card. Why is this method less effective? Because the capacity of the SIM card allows you to save only 300 contacts, which are the first in the phone book. This can be done by going to the “Settings” section and selecting the “Copy information to SIM card” section. You can also use an SD card for transfer.
As you can see from the instructions, there is nothing complicated about transferring data. Understanding how this or that method works is not difficult. We have given the most popular and simplest methods. We hope that they will help you easily start using your new smartphone.
Import contacts using SIM, SD and Bluetooth
Before considering ways to transfer contacts from phone to phone using special programs and services, we should talk about the simplest solutions (SIM, SD and Bluetooth).
Import contacts to SIM card or SD:
- Select "Contacts";
- Go to the “Import/Export” tab;
- Specify from where and where you want to import contacts (from phone memory to SIM card or SD).
After transferring contacts from your phone book to your SIM card or SD card, remove the card and install it in your new smartphone. Now you can import contacts from SIM or SD into your phone memory.
Speaking about how to transfer contacts from Android to Android, we should also talk about the possibility of using Bluetooth for these purposes.
To transfer contacts via Bluetooth, follow these steps:
- Turn on Bluetooth on both phones;
- On the phone from which you want to transfer contacts, go to Bluetooth settings and find the new device;
- Open your phone book and mark the contacts you want to transfer;
- Now all that remains is to transfer the selected contacts via Bluetooth.
Method 2. Nokia Suite with Android File Transfer
This method is relevant for most Nokia phones, excluding Lumia brands. Nokia Suite and PC Suite are the official software for transferring content (such as contacts, photos, music, calendar, tasks, notes, bookmarks and feeds) between PC and Nokia phones. These apps make it easy to create backups and restore from them. Nokia Suite is designed for the latest non-Lumia phones (eg Asha series). If you have an older device (say, you need to transfer contacts from a Nokia 515 to Android), you should use PC Suite.
In turn, Android Transfer is a professional application for synchronizing and backing up data from phones and tablets on Android. Any content, including text messages (SMS), contacts, applications, music, photos and videos, can be transferred using this program both between Android devices and between such a device and a PC.
Transfer contacts using Google sync
When we first launch a smartphone running Android OS, we are prompted to create a Google account. Few people ignore this recommendation, because many functions are not available without a Google account, for example, you cannot use Google Play. Not many people know, but a Google account is useful not only because it has the Play Store. In fact, having an account means you can use many other useful services and functions. So, you can synchronize Google with your phone book. This method not only allows you to transfer contacts from Android to Android, but also guarantees the safety of information in case of loss of numbers (for example, if you lose your phone).
To sync your phone contacts with Google, follow these steps:
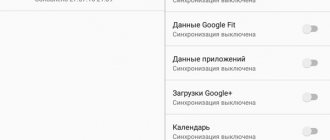
- Go to your phone settings and select the “Accounts” / “Google” section;
- Go to synchronization settings by clicking on the mailbox;
- Check the box next to “Contacts” and wait for the synchronization process to complete.
Now, when you log into your account from another smartphone, all your contacts will be displayed.
Method 7. Alternative options
Other methods of copying data include SMS, sending via email, and using various other services, including paid ones. Speaking of cloud storage, the possibilities are not limited to your Google account; other services are also available.
How to transfer contacts from Nokia to Android via Yandex.Disk? To do this, you need to install the Yandex.Moving application on your old phone, through which the content will be transferred to online storage. Then you need to download a program to work with the cloud storage of this service on your new smartphone or tablet. As soon as this is done, access to the Yandex.Disk content will open from your gadget, and you can download any content. This method is suitable for all older phone models, since the application even supports outdated mobile OS distributions.
In this way, the transfer of contacts can be carried out without any major difficulties. Which method to choose depends on your wishes and device skills. The most reliable method is to use special applications.
How to transfer contacts from android to android via PC
If none of the above methods suits you for some reason, you can transfer contacts from Android to Android using a computer.
To import contacts via PC you will need:
- The smartphone itself from which you plan to transfer contacts;
- Computer or laptop;
- USB cable;
- MOBILedit program (you can download the program for free from the official website https://www.mobiledit.com/).
First of all, you need to download and install the MOBILedit program. As mentioned earlier, the program is distributed free of charge and can be downloaded from the official website of the developers. Immediately after installing the program, you need to copy the contents of the Crack folder to the folder where you installed MOBILedit, as a rule, you need to go to the following path: C:\Program Files\MOBILedit! Enterprise). After this you can run the program. When you first start it, you will be prompted to download the driver database. Select your manufacturer and confirm to download the drivers.
Before transferring contacts from Android to Android, you need to enable USB debugging. To do this, in the smartphone settings, find the “Developer Options” item and check the box next to “USB Debugging”. If you are unable to find the corresponding item, then go to Settings, open the “About device” tab and click on the “Build number” item several times. Now you can begin the procedure for transferring contacts.
To transfer contacts using the MOBILedit program, follow these steps:
- Launch the MOBILedit program and select Phone - Cable connection;
- On your phone, select the connection type PC Sync or just synchronization (the name may differ depending on the model);
- In the left panel of the program, select Phonebook and click Export at the top;
- Specify the file type - csv;
- Select a location to store your contacts, set a name and save;
- Connect the smartphone to the computer to which you want to transfer the numbers (the old one can be disconnected);
- Click Import at the top and locate the previously saved csv contacts file;
- After importing the file with contacts to your phone, the transfer procedure can be considered complete.
In fact, there are many other ways to import contacts from one smartphone to another. There is no point in listing them all, since the methods discussed above will be more than enough. All of them are easy to use and effective. You need to choose only one option that is most suitable for you and transfer your contacts.
Via MOBILedit
This program allows you to fully control any phone via a computer. It is available at this link https://www.mobiledit.com/downloads/.
- Launch the software and connect your Nokia phone
- Go to the Devices tab → Export → Contacts
- Connect your smartphone and select Import → Contacts
The only disadvantage of this method is that the software is paid and requires a key to work.
Transfer contacts from Nokia to Nokia via bluetooth
The method of transferring data between communicators using bluetooth is quite simple. The main thing here is that the filled fields of one model coincide with the available fields of the other.
To begin the transfer process, turn on bluetooth on both devices.
Next, go to one of the menu sections on the device from which the copy will be made (depending on the mobile model):
- in older or budget versions of devices, select “Options” - “Synchronization and Backup” - “Replace phone” - “Copy from here” - “Contacts”, and then a list of available devices with bluetooth enabled appears, select the one you need and click “Copy” ;
- in some modern Nokia models, copying business cards via Bluetooth is carried out using the “Transfer my data” application, which is either installed on the phone or can be downloaded for free from the store;
- In some of the latest touchscreen smartphone models, you can transfer your phone book using the special “Transfer Contacts” menu item.
You don’t know what MDF is and how to open it. Read more in the article on how to open mdf
How to remove advertising in Yandex browser. Described here.
Recommendations for disk defragmentation. Here.
This instruction was created specifically to describe the most possible and popular way to transfer an address book from one Nokia phone to another.
Good luck with your notebook transfer!
Previous: How to Connect Two Monitors to One Computer
Next article: How to find out what motherboard I have
How to do this?
Download the MobileTrans program to your Windows or Mac computer, install and run it. Then simultaneously synchronize your Nokia phone and Android tablet or smartphone with your PC. In the program interface, find menu items for searching for devices.
When both devices are found using the above software, the content that is supported to be transferred from Nokia to Android will be available for selection in the form of a list. So, check the box in front of the word “Contacts” if you want to copy them from Nokia to Android.
Click the "Start Copy" button to begin the data transfer process. Once the process is completed, all contacts from your Nokia phone should be available on Android.
If you want to import content from Nokia Lumia (running on Windows Phone 8, 8.1 or 10 Mobile) using this method, you first need to back up your contacts to your Microsoft account in the cloud. Typically, if you enter the system settings, the data is saved to the cloud automatically.
Transfer contacts to Android from memory card
You can transfer contacts saved in vCard and CSV format to your memory card into the \contacts directory; if it does not exist, then create it yourself. After that, go to the standard Contacts application on your phone, press the Menu button and select the Import/Export option.
In the menu that opens, click on Import from SD card.
Next, a window will open in which you need to select the type of contact to be created - without synchronization (using a phone), or synchronization using a Google account (this option is more preferable).
Unfortunately, the process for importing contacts will be different on each device (for example, an HTC Sense device has its own unique apps).
Upload contacts in vCard and CSV files on different phones.
1. Exporting an address book from a Nokia phone
- Transferring contacts from Nokia phones is done using the PC Suite program. To do this you need:
- Connect your Nokia device to your PC using Nokia PC Suite
- Launch Contacts (Communication Center)
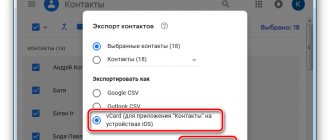
- Select all contacts (you can use CTRL+A) and open the File menu and the Export function
- Select vCard or CSV format, then save your contacts to a file on your computer
After saving the files, you need to download them to your phone using one of the methods described above.
Via Nokia PC Suite
Transferring contact information from both old and new phone models is possible through the PC Nokia Suite program, which is distributed free of charge. The interface is in Russian, so you won’t have any problems with its operation.
And so, the procedure is as follows:
- Download and install the program on your computer. Open it.
- Using a USB cable, connect your Nokia to your computer. If the system asks for confirmation and mode selection, specify PC Suite.
- As soon as the phone is detected (you will see it in the tray), go to the “Contacts” tab in the program and click on the “Contacts synchronization” icon. The entire copying process can be instant or take from 1 to 5 minutes.
- All numbers were synchronized. Now you need to export them. To do this, select all the numbers (CTRL + A), and click on the menu item “File” - “Export contacts”, specify the folder in which you want to save the data file.
- But that is not all. You need to combine all your contacts into one file so you can import it later. To do this, create a text file in a separate directory with a txt extension and open it. Write the following symbols in it: copy /B *.* contacts.vcf .
- Ready? Now save the file and rename its format from txt to bat and run. The system will automatically create a file called contacts.vcf in which all your contact information will be saved.
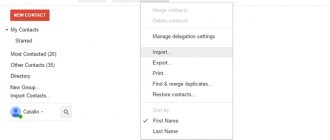
- Now go to your Gmail and find the “Contacts” tab. Open it and on the right side look for the “More” - “Import” tab. Click.
- Specify the path to our newly created file, having previously indicated that we are looking for a file with the cvs extension. Once you do this and confirm, all contacts will be uploaded to Gmail.
- Now log in on your Andro >Through the MOBILedit program
Another interesting program that is updated to this day and supports both old Symbian and Android. The product is paid, but there are many keys for it on the Internet. The interface can be switched to Russian, but in English everything is extremely clear.
- Download the program to your computer from the official website, find the key for it, activate and connect your Nokia phone.
- In the main menu, select “Phone”. In the “Connection Type” tab, specify the USB cable. It can also be done via Bluetooth if you have a module on your computer.
- Next, in the list, select your phone, which will appear after detection, click on the “Phone Book” tab and select “Export” and save the data.
- Now connect the Android phone into which you need to copy the contact information and in the same window select the “Import” tab, specify the path to the file and save.
Exporting an address book from MS Outlook mail
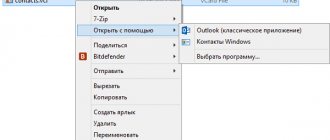
- From the main client menu, open the File menu, and then open Import and Export.
- Then you need to select Export to file and click Next.
- Click on the Value field and click on the Next button.
- From the list of all directories, select the Contacts folder and then click Next.
- Select the folder where you want to save the contacts in the CSV file.
- Assign a name for the file with the exported contacts and confirm by clicking OK.
- Click Next again.
- Click the Ready button.
We load saved contacts using any of the previously described methods.
Almost every device allows you to save contacts to a file.
Using memory and Gmail
If you have a memory card, and almost all models with the S60 system and higher have one, you can perform a backup. Make sure Google synchronization is enabled on your Android device.
- Select Options / Settings / Settings on your Nokia phone
- Find and click on "Backup"
- Next, select Create a Copy → Contacts
- Connect your phone to your computer and find the backup.dat file in the Backup folder
- Copy it to PC
- Open Gmail
- Click on the inscription and select Contacts
- Import from CSV and Import
- Done, as in the previous case, the contacts will appear on the Android smartphone
If the contacts still do not appear, then it is worth checking whether synchronization is enabled on the device.
It is advisable to enable the Synchronize All option in your Google Account settings. It is also worth checking the contact display options - Address Book → Show Contacts → All.
Copy using synchronization
The most convenient and popular ways to transfer contacts from Android to iPhone are synchronization with a Google account and the Move to iOS program. They allow you to copy your phone book and restore all other data.
You can transfer contacts only for the latest versions of iPhone: SE, 5S, 6, 7, 8, X. Apple has stopped supporting the iPhone 5 and 5C generations since iOS 10.3.2. Owners of these phones will be able to copy contacts without synchronization.
Your devices must be fully charged when you sync. There must be enough free space on your iPhone to receive new data.
Synchronization with Outlook and Google services
This method of transferring contacts from Android to iPhone will be relevant when the user did not complete this function during the initial setup. The following algorithm should be performed:
- Open iPhone settings. Go to the “Accounts and Passwords” section.
- Select “Add account”.
- Among the proposed methods, select Outlook.com or Google mail.
- Enter your account login and password. Click “Next”.
- In the window that opens, you will be offered options as to what data should be transferred. Find the “Contacts” section and move the switch to the “On” position. Then click “Save”.
Contacts from the account will be transferred to the iPhone phone book after it is opened. This may take a few minutes.
Read How to copy contacts from Android phone to computer
Move to iOS app
Apple offers its own program with which you can transfer entries from the Android phone book. To use the Move to iOS app, follow these steps:
- Download Move to iOS from the Google Play store. Install the software on your Android device.
- During the initial setup of the iPhone, on the page called “Programs and Data”, select “Transfer data from Android”.
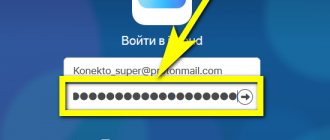
- Special code will be demonstrated. In the future, you will need to enter it on the Android gadget. Let's remember it.
- On the Android device, launch Move to iOS, click “Continue”, accept the terms of the agreement (click on the “I Accept” line at the bottom right) and “Next” in the upper right corner of the window.
- On the Android device, enter the code that was previously demonstrated on the screen of the iOS device. Click “Continue”.
- Select the content you want to copy. There will be 4 methods offered, but you need to select “Google Account”. This will save your contacts. The remaining items can be selected as desired. The process is carried out by checking the boxes next to these items.
- Now we just wait for the contacts to be imported.
There is a chance that additional instructions will be displayed on the iPhone screen. The user needs to follow them.
Combine VCF files into one file for easier installation
If you are a little tech savvy, you can also combine all VCF files into one VCF file and then install one file. To do this, save all VCF files in one folder on your Windows PC.
Now open a command prompt, go to that specific folder (SmartprixBytes in the example below).
Using the copy * .vcf all.vcf command, all VCF files will be merged into one file named “All VCF” and you can import all contacts directly from it.
If you're familiar with the command line, this should be a more convenient way if your Android phone's software doesn't support importing multiple VCF files.
Copy contacts to
The simplest method, known since the days of push-button phones. As a rule, it is used on older models. You can transfer 200 numbers at a time. If you have an extensive phone book, the process will take longer.
Inconveniences are also possible: if a subscriber has several numbers under one name, when copied, they will separate and receive serial numbers. For example, instead of “Vasya”, get “Vasya” (this is a mobile phone) and “Vasya 2” (a work one).
Copying numbers from the phone to the SIM card is done as follows:
- Phonebook - Settings - Copy all contacts to (Export). Wait for the process to complete.
- Move the SIM card to the new device and do the reverse operation: Settings - Import/export - Copy all contacts from .
Why transfer
Why does it even become necessary to transfer business cards?
The reason may be replacing an old mobile phone with a new one, transferring saved subscribers to another person (for example, exchanging customer data between employees), or simply the need to have a backup copy of numbers in case of loss of the mobile phone or its faulty condition.
Memory card
Some phones have the ability to copy data to a memory card.
- Go to Contacts - Settings - Import/Export - Custom Import/Export. Select your phone.
- Click Next. Select "Storage Device".
- Mark the numbers you need or check the “All” box. Click "Copy".
Now all data is duplicated on the memory card. Move it to the new device and do the same operation from “Storage Device” to “Phone”.
Bluetooth
- Go to
Contacts - Context menu (left button) - Import and export - Send.
- Select the required items and click the “Transfer” button.
- In the window that opens, select
Bluetooth, then follow the standard exchange scheme.