First, let's figure out what Miracast is? This technology allows you to transfer media files from one device to another using Wi-Fi standards (Wi-Fi Direct). Most often they use the transfer of images, videos from a phone, tablet or laptop to a TV. Unfortunately, not all TVs have the Smart TV function, and this little thing can slightly turn even an old TV into a technological device.
This is exactly the kind of thing you can see on all similar sites that talk about the Miracast adapter. In fact, to be honest, I would not put this thing at the top of the pedestal. I would call it a kind of “crutch” between the Smart TV set-top box and the TV.
Appearance and functionality
If you look from afar, it looks more like a regular flash drive and takes up little space. This can be chalked up as a plus. The HDMI standard is used as an output. As you probably already know, this port standard was invented specifically for transmitting multimedia data packets.
The most commonly used standard is HDMI 1.4-1.6. It makes no sense to set 2.0, since Miracast can usually transmit the maximum picture resolution in Full HD format or a resolution of 1920 by 1080 pixels or pixels. This is an excellent format with good resolution. But the 4K Ultra HD format or 3840 by 2160 pixels is not supported. And hardware, such a small thing, such a resolution simply wouldn’t work.
To connect, you need to plug it into a free HDMI port. To power the system, it has a Micro USB input on the back. The power cord should be in the box. But be careful, they are usually quite short. That is, if you do not have a USB port on your TV, you will have to connect it through the power supply to an outlet. This is not convenient, and the wire may not be enough.
And now about the functionality. New models must support two standards: Miracast; AirPlay. The first one works with almost all smartphones and phones. And the second one was created at Apple. And works with iPhone and iPad products.
In general, you connect and can duplicate the screen of your phone, tablet, laptop onto the TV screen. There is support for DLNA - that is, you can transfer movies and pictures to the TV over the network, which are located, for example, on the same computer. It, in turn, must be connected to the local network. But for the same Android, additional programs are needed that work with this technology.
What is Miracast
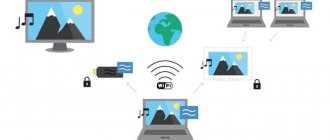
Miracast (MiraScreen) is a technology with which you can easily display the actions taking place on one device on a third-party monitor. For example, display a picture from a phone to a computer or from a computer to a TV. These are not the only combinations; mutual projection is possible between all devices that support Miracast.
With Miracast you can see what's happening on your phone on your laptop screen
The technology was patented in 2012; its predecessor was Wi-Fi Direct technology. Since then, it has been actively implemented in laptops, TVs, mobile Android and IOS devices.
Benefits of Miracast
The main advantage is the possibility of wireless synchronization: you don’t need to route an HDMI cable, look for adapters for it and tinker with the settings; you just need to allow pairing between devices and start enjoying the process.
Moreover, to establish a connection, you do not need a Wi-Fi network; the paired devices are combined and exchange data using another method, creating a personal network channel. This eliminates the problem that would be present with a connection via DLNA technology, which performs all the same functions but uses the home network for synchronization. With this method, any load on the router caused by another user's connection could interrupt or weaken your signal. When sending videos via Miracast, you will not encounter such a problem, because the third wheel will not be able to interfere with your session.
Through Miracast you can copy what is happening on your tablet to your TV
No less important merits of Miracast:
- high image transmission speed, support for IEEE 802.11n standard. When playing games, you will not experience any lag or FPS drops;
- powerful compression that allows you to share a large amount of data in the shortest possible time. For example, broadcasting FullHD video will not cause glitches or resynchronization;
- support for 3D video broadcasting;
- the most simple and understandable control design, the use of technology is within the capabilities of any user;
- a large number of devices that support Miracast.
Flaws
There is only one drawback - the maximum transmission quality is 1920x1200, that is, you will not be able to transmit video in UltraHD. But it’s worth considering that almost no one has devices that support higher resolutions, and they are very expensive. So you will most likely never encounter this limitation.
Selectable characteristics
First of all, you need to look at the processor model and its bit capacity. It is he who will process the information and send it to TVs. Cheap models for 1300 rubles usually start to slow down a little when watching a video in Full HD. More expensive models from 3000 do not suffer from this problem.
It is also worth paying attention to the RAM. It is better to take models from 128 MB. I already talked about the maximum resolution - the technology allows you to view a maximum of 1080p. Almost all of them have support for Wi-Fi 2.4 GHz and the 802n standard. This is the maximum standard for this frequency, with wide coverage and speed. So connecting to the router should go without any problems. Otherwise, they are all the same, so in the end we look at the hardware: percent and RAM.
Wireless HDMI adapter PTVdisplay DA02 or trying to connect your smartphone to the TV
I have repeatedly come across information that you can connect a smartphone or tablet to a TV using such a thing as Airplay/DLNA/Miracast, got interested, bought it, tried it and decided to tell me. In general, this purchase was partly due to the fact that there was a relatively large number of points left in the store account and there was information that by the end of March they could “burn out”, it was a pity to lose and decided to buy something useful along the way.
Actually, I’ll start with what this thing actually represents in a simplified form. A small box in the format of a flash drive, but with an HDMI plug, is plugged into a TV or monitor, if there is USB, then we take power from it, if not, then plus a small power supply. Then we connect it on a smartphone or tablet via WiFi and use it as a second screen. Actually, this is what I needed, you can turn on a movie on your smartphone and watch it on TV, but at the same time have the ability to have full control, blunder
But I will try to tell (and show) all this in more detail in the review, but for now the technical characteristics of this device. CPU: AM8252, Single Core RAM: 128MB, DDR3 ROM: 128MB
Decoder Format: "HD MPEG1/2/4,AVS,H.263,H.264,H.264/AVC,H.265,HD MPEG1/2/4,HD MPEG4,RealVideo8/9/10,RM/RMVB Video format: AVI,DAT,DIVX,MKV,MP4,MPEG1,MPEG2,MPEG4,MPG,RM,RMVB,TS,WMV Audio format: AAC,MP3,OGG,WMA Photo Format: BMP,JPEG Support 5.1 Surround Sound Output: No
5G WiFi: No Power Supply: USB Port Interface: HDMI Language: Multi-language HDMI Version: 1.3
The device comes in a neat white box.
On the back of the package there is information about the availability of an HDMI output with 1080p support, as well as the address of the manufacturer’s website. The delivery set is spartan, the device itself, instructions and power cable. The instructions are colorful, in English, there is a PDF version on the website. Well, the power cable is about one meter long, and although the device only needs power, the cable included is complete. When connected to a computer, it displays a message that an unknown device was found.
As I said at the very beginning, it looks like a flash drive, although full-fledged computers are now being produced in this form factor.
On one of the long sides there is a power connector, on the other the only control is a button. The button is only needed to switch the Airplay/Miracast operating mode; the device turns on automatically.
The housing cover can be moved towards the connector, although this function is not entirely clear to me. If it’s used as protection for the connector, then it’s useless; dust will still get in; if it’s used as an extractor to make it easier to remove from the TV connector, then it’s also unlikely.
I won’t beat around the bush, I’ll go straight inside. To disassemble, you must first remove the cover, and then separate the halves of the case, they are latched.
Inside there is a relatively simple board, although by and large it is a weak microcomputer. On top is the processor (SoC), RAM and WiFi module.
Below are flash memory, power converters and antenna. Yes, so modest, 128MB of RAM and flash memory, processor, WiFi and power
A little more about the filling. 1
.
Processor (SoC) AM8252B, operating at 600 MHz, maximum resolution 1920x1080. And although the processor did not have a heatsink, I did not find it overheating. 2
.
128MB SKhynix RAM 3
.
WiFi module based on the RTL8188 chip manufactured by Realtek. It only works at 2.4 GHz. Although the software indicates the communication frequency, it is quite possible that there are devices with 5 GHz, but not in this case. 4
. Printed WiFi antenna. The connection behaves a little strangely, but more on that towards the end of the review. 5. Flash memory made by Toshiba, quite good. In general, I was a little surprised that branded components were used; I expected to see nameless RAM and Foresee flash. 6. Three converters are grouped next to each other, based on the same chips, on the other side of the board there are three identical chokes, nice and simple.
The first (as well as any other) inclusion. The screen displays: Airplay/Miracast operating mode, I think the difference is clear from the pictures. Device SSID and password for connection. Connection status, displays the connection status of the smartphone to the device and the device to the router. Device IP address and QR code in Airplay mode.
Connecting a smartphone or tablet running Android (which is what the device was used for). The connection is made in Miracast mode. There are two options here, either you won’t be able to do this at all or everything will be extremely simple. The fact is that the connection requires WiFi support for the monitor, but not all smartphones have it. For example, my Doogee X5 Max does not have it, neither does the Cubot rainbow, but the Vernee Thor has it and works great.
And so, the connection is made in five clicks, go to the settings menu. 1. Go to the menu - Screen. 2. Find in the list - WiFi monitor 3. In the upper right corner, enable this operating mode 4. Click on the line that appears with the name of the device. We wait 10 seconds for connection, that’s it.
For some phones, this mode may be called Broadcast; also, if the phone or tablet supports FullHD (Vernee thor only 720p), then the broadcast resolution setting will be available. Please note that as the resolution increases, the device will be more demanding in terms of communication quality.
On the TV screen you will then receive a copy of the screen of your smartphone/tablet. Don’t be alarmed if it’s vertical, the image on TV completely matches the screen of your device; if you move your smartphone to a horizontal position, the same thing will happen on the TV.
I carried out the first part of the tests on a TV converted from a monitor, because its resolution is somewhat different from the usual FullHD and, in addition, the image from the smartphone almost does not fit into the screen. but it shows quite well.
There are also no problems with the video, everything is fine. Moreover, I tried the video playback option from YouTube. Those. the video was played online, and then sent to the TV via the same WiFi, the lag was about 0.2-0.3 seconds, depending on the distance.
A small demo video showing the process of connection, operation and disconnection.
Although I didn’t need to connect the tablet under Windows, curiosity got the better of me and I decided to try it too, there are a little more possibilities here, but the connection is also more complicated.
DLNA mode first. We open the list of available access points and find PTV-xxxxxxx there, connect, the connection password is on the TV screen.
After this, Playback Device will appear in the list of devices. The barcode scanner is not mine, I found it by accident when I tried to look for the device in a different way, apparently one of my neighbors has it :)))))
Extended information about the device.
If you now go to the address indicated on the TV screen, you will get to the device settings menu. The language was initially set to English, but it can be switched to Russian without any problems, and the translation is not in the “Aliexpress style”.
Since the device can work as part of a network, there is a menu for connecting to the router. Since initially I was only interested in Android, I didn’t use this function, but if you’re interested, I can check it out.
The default boot mode is where you select the mode in which the device will start. In order not to have to press a button on the device, you can immediately select the desired mode and every time you turn it on, this will be done automatically.
Available permissions. The mode was initially set to 720p, later I switched to 1080p.
But I found it not very convenient to use in DLNA mode, although if you use the device only to watch videos, it will work. Right click on the video file and select – Transfer to device.
The player will start on the computer, and the movie itself will be displayed on the TV.
There are also options for video streaming mode, but to be honest, I couldn’t figure them out.
I was more interested in the possibility of simply connecting the TV as a second monitor; there are also instructions for this on the manufacturer’s website. In short, we first switch the device to Miracast mode, in which case the WiFi connection will be disconnected, then we start searching for new equipment.
Click on the device name and a connection window will appear. In general, a password should have been entered here, but I can’t remember if I entered it.
All. Now your TV is connected as a projector, then there are standard settings options as with an additional monitor.
I completely forgot an important feature; when testing the operation of the computer, the device was connected to the monitor via an HDMI-VGA adapter, this can be seen in the screenshot. Those. This device can also be used with TVs that only have a VGA connector, but for this work you will have to use a converter, although initially I didn’t think it would work like that.
Available operating modes: 1. Clone, on the TV screen the same as on the computer screen 2. Extended screen, on the second screen a continuation of the main one (or vice versa). 3, 4. Only the first or only the second screen.
In clone mode there is a slight difficulty: the image is displayed on an additional screen in a resolution of about 1280x720, but what’s worse is that it is displayed “pixel by pixel”, i.e. Doesn't take up the entire screen area. But I tried it with a regular monitor, not a TV. The TV will most likely stretch to fill the entire screen. The resolution of the tablet is 1920x1200.
In extended desktop mode, the image is displayed on an additional monitor in normal resolution, in this case 1920x1080. Those. the device completely “emulates” a second monitor, but without a cable.
Now a little about the bad, the quality of communication. The device behaved strangely. At first I tried it in conjunction with the Vernee Thor smartphone, the connection worked perfectly within 5-7 meters, but I didn’t test it further. When working with a tablet it was also not bad, but the range was shorter, although the resolution was noticeably higher. But when I tried to watch a video from another smartphone, a problem appeared: literally 1-1.5 meters away, the connection deteriorated greatly, the image scattered into squares and was very slow. The operating mode was 1080p.
The device is noticeably warm during operation. What’s interesting is that it’s not the processor that heats up more, but the part in the area of the power converters and WiFi module.
That's all, then a summary and some details. Advantages
Extremely simple connection to Android devices. Good image quality. Ability to work in several modes - Airplay/DLNA/Miracast. Quite informative website of the manufacturer.
Flaws
Not a very large communication range and highly dependent on resolution and device. No password prompt when connecting to a smartphone.
My opinion. The device itself is interesting; when testing it with the Vernee Thor smartphone, I got high-quality performance and a relatively large communication range. I would like to say that I was satisfied with everything, but the problem is that, out of ignorance, I did not first clarify the possibility of working with my Doogee X5 MAX. It turned out that not all smartphones can work with this device, which is a pity. I was pleased with the ease of setup, connecting in literally a few clicks, but this is also a disadvantage, because a neighbor can also connect to your device just as easily. But I see only one minus, not a very large communication radius, especially depending on the resolution of the output video. True, the second part of the tests took place after disassembly, but the same Vernee Thor worked the same before and after it. There is indeed a delay when outputting video, so some games will not be comfortable to play, but this didn’t bother me much, because I downloaded it only for video.
I bought the device for $8.62 ($10.99 minus points), since the store is currently running all sorts of promotions, the current price without points is $9.99, I could have waited a little and bought it for $7, but then I didn’t know that there would be a discount.
That’s it, I’m waiting for comments, advice and questions
How to connect and configure the receiver
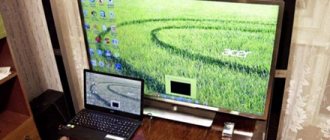
- We insert the receiver into the HDMI port. We take a USB cable from the box and insert one end into the module, and the other into the USB input on the TV. You can see the picture at the very top of the article.
- Turn on the TV and go to the “Input” menu. We need to select exactly the HDMI port to which we connected the flash drive. You can switch all ports.
- After, you should see the device menu. At the very top, in the “SSID” field, the name of the wireless network of this module is written, and the password is indicated to the right. Now just take your phone, tablet and connect to this network.
- After that, open any browser and enter the IP adapter. It is also listed in the menu just below and starts with the numbers “192.168”.
- Find the section for connecting to your home Wi-Fi network. Usually has a wave icon. Just click on it. Select the home router network from the list and enter its password.
- Also, don't forget to specify the Airplay mode (if supported) or Miracast. The first is required for Apple products, and the second for other devices.
Miracast does not work and there is no “Connect to a wireless display” option
In older versions of Windows 10, when the system “understood” that Miracast was not supported, it displayed the message “The PC or mobile device does not support Miracast, so wireless projection from it is not possible.”
In new versions, there is simply no “Connect to a wireless display” item in the “Project” menu, which is opened by the Win + P key combination.
Most likely, there is no Miracast support at the Wi-Fi adapter level. For example, I have no way to connect to a wireless display through the Wi-Fi module built into my laptop. The laptop, however, is not new. Somewhere around 2012-13. And after connecting the TP-Link TL-WN725N V2 Wi-Fi adapter, everything works.
For this function to work, you need support on the side of the Wi-Fi adapter and graphics adapter (video card). Both at the hardware and driver level. This is easy to check.
Launch a command prompt and run the netsh wlan show driver .
The results will contain the line “Wireless display supported:” With the factory (old) Wi-Fi module on the laptop, I have the following result:
As you can see, there is no support. The graphics driver supports it, but Wi-Fi does not.
And here is the result of testing with another Wi-Fi adapter:
And with this configuration everything works great.
What can be done:
- Update the Wi-Fi adapter driver. It's unlikely, but it might work. Here are the instructions: updating (installing) the Wi-Fi driver in Windows 10.
- If, according to the test results, the problem is only in Wi-Fi, then you can replace the Wi-Fi adapter itself. But I noticed that the specifications simply do not indicate whether there is support for a wireless display or not. On the TP-Link TL-WN725N second hardware version (V2) everything works. But I'm sure there are a large number of other adapters that support Miracast. Need to find.
- You may find it easier to connect your TV via an HDMI cable.
Let's consider another problem.
Failed to connect to wireless display
The computer finds the TV, we select it, it takes a long time to connect and the error “Failed to connect” appears. Or the computer does not see the TV and it does not appear in the list of available devices.
I also got this error several times. It's difficult to say what this is connected with. Be sure to try connecting again.
- Restart your computer and turn off the TV's power for a couple of minutes.
- This may be due to a bad signal. If possible, reduce the distance between the computer and the TV. Check if Miracast (or something like that) is active on your TV.
- Update the Wi-Fi adapter driver. I provided a link to the instructions above.
- If possible, try connecting to another TV that can also work as a wireless display.
Update: Evgeniy shared a solution in the comments, which, as it turned out, helped not only him. The problem was the following: the computer found the TV, as shown in the instructions above. But when I tried to connect, the screen blinked on the TV and an error appeared: “Connection request from . failed. You can try again from your mobile device."
Is it worth taking it at all?
As I already said, this “thing” is a more stripped-down version of the same Smart TV set-top box. Its functionality is limited, and you can find a lot of dissatisfied customers on the Internet due to slowdowns when watching videos. I would recommend the adapter for those people who travel a lot. Then you can easily connect it to your TV and temporarily turn it into some kind of “Smart”.
For the home, it’s even hard for me to imagine why this adapter is needed. Possibly to connect your phone and display the screen during the game. But modern set-top boxes support this technology without any problems.
I can’t say anything about DLNA, since I didn’t use it with this adapter. But when transferring large files, most likely the hardware simply won’t hold up. You must understand that this small flash drive cannot a priori have strong hardware, and it costs quite a lot. There are models that cost up to 3,500 rubles. For that amount you can buy a full-fledged set-top box with full functionality.
Still, I advise you to take a separate set-top box or even a new TV. The attachment is a more economical option. If your family uses Apple products, then it is better to take Apple TV. This box also supports AirPlay, DLNA and much more.
But I told you my opinion. Please write in the comments - why did you decide to buy a Miracast adapter for your TV? It would also be useful to listen to the opinions of users of this flash drive.
What to do if you have problems with Miracast
The Miracast connection sometimes breaks, takes a long time or takes forever to establish. There can be two reasons: the receiver is damaged or the drivers are not installed. In the first case, you will have to replace the module, in the second, you need to manually install or update the drivers. You need to complete the following steps on your computer:
- To do this, go to the website of the company from which the Miracast receiver is made and find the latest drivers for your operating system. Open Device Manager.
Open the device manager
- Find the Miracast adapter in the list and click on the “Update Drivers” button. Select manual search and specify the path to the previously downloaded file. Complete the installation process and try syncing again.
Installing the latest Miracast drivers
On your TV, in the Miracst section, you need to find the Upgrade function and use it. Please note that the TV must be connected to the Wi-Fi network at this moment.
Click on the Upgrade button to update Miracast
MiraScreen and AnyCast adapter for TV, monitor, projector
I specially ordered a MiraScreen adapter from Aliexpress to check everything and tell you how it works. There are simply unrealistic quantities of these adapters on sale. On different processors, firmware, different shapes, etc.
I bought this one:
This adapter is in the form of a regular flash drive (slightly larger). The adapter itself plugs into the HDMI port of the TV. The power and antenna are connected separately to the adapter. Power can be connected directly to the USB port of the TV. Or through a regular adapter into a power outlet (if the TV does not have USB).
On your TV, just select the HDMI input into which the MiraScreen adapter is connected. The menu looks something like this:
Using the button on the adapter, you can switch the operating mode (if you press this button and hold it, the settings will be reset).