4.6/5 — (110 votes)
The failure of wireless headphones is no less distressing than the failure of a telephone. How to fix headphones, if these are expensive Airpods, and the owner does not have even minimal skills in repairing equipment, then it is better to immediately contact professionals at a service center for repairs. But if the headphones (Head Set) are not truly wireless and the problem is not serious, it is possible to repair the headphones yourself.
Causes of headphone malfunction
TWS – True Wireless Stereo truly wireless stereo.
Head Set headphone models, unlike TWS, have wires in their design.
The wire broke
For example, wireless vacuum headphones (IEMs, plugs) JBL E25BT are connected to the phone via Bluetooth, but the headphones are connected to each other by a cable, since the chain contains a battery and a control unit.
Each time, throwing this bundle behind the back of the head and attaching it to clothing with a clip, the user exposes the cable to mechanical stress and, despite the fabric braid, the wires at the connections may break.
Conductors in ordinary polyvinyl chloride insulation, when stretched, can break in the middle of the connecting cable, and the break may not be noticeable.
Broken speaker in headphones
A problem often arises when the sound signal in one of the headphones disappears, but there is no external damage to the cable.
This can happen due to the separation of one or even two wires from the speaker inside the body of the plug itself.
And also due to poor-quality soldering of thin conductors to the dynamic emitter at the manufacturing plant.
Less often, the speakers of wireless headphones fail due to power overload (again, a manufacturing defect).
In this case, the coil inside the emitter itself burns out, and repairs require replacing the speaker with an identical one.
Membrane damage
The malfunction is determined by a crackling or rattling sound in one of the headphones while listening to a track.
Most dynamic emitters built into earbuds and vacuum headphones have a structural membrane protection - a metal cap with holes that covers the speaker housing.
Therefore, it is almost impossible to mechanically harm the thinnest diffuser through the audio channel of the headset.
However, with inexpensive headphones that are not protected from moisture and dust, dirt may get on the surface of the membrane, which leads to sound distortion, and the intermediate mesh, clogged with earwax, reduces the sound volume.
Damage to the membrane can be considered when the coil peels off from it.
This malfunction cannot be repaired: as in the previous case, the dynamic emitter must be replaced.
You don't have to buy a new one to replace the speaker. You can use a working emitter from other headphones that have failed for another reason.
Volume control malfunction
On wireless headphones, instead of a dismountable (unscrew 2 screws) volume control with a wheel, there is a full-fledged control panel.
It allows you not only to turn on and off music playback, adjust the volume, but also answer incoming phone calls.
The user will not be able to repair such an electronic device. But it’s still worth inspecting the control unit.
The case is most often held on by latches and can be easily disassembled with a knife.
One or more loose wires may be found inside.
Repairing the microphone on portable headphones
If the user normally hears the interlocutor using wireless headphones as a headset, but the other cannot hear him, we can confidently say that the microphone is broken.
This part cannot be repaired, so it is easier to replace it in a workshop.
However, if the subscriber still hears weak-sounding speech, the problem may be that the input hole for the microphone is dirty.
For example, in the same JBL E25BT headphones, the microphone itself is weak in the control panel housing.
If you repeatedly press the buttons with unclean hands, the microphone hole may become clogged.
Therefore, before contacting a service center, it is worth disassembling the control unit and carefully cleaning it with a cotton swab soaked in alcohol.
Useful tips.
To make your new equipment last as long as possible, try following these tips:
- Keep device connectors clean.
- The headset must be stored in neat condition. This will avoid cable breakage.
- It is not recommended to use the device in sub-zero weather.
- Places prone to rupture can be strengthened with cambric or electrical tape.
It is important to remember that if one earphone does not work, the fault may be due to a manufacturing defect. Therefore, when purchasing, keep the receipt and warranty card. Taking good care of the headset will allow you to use it for a long period of time. If you are not confident in your abilities when trying to repair equipment malfunction, you should contact qualified specialists.
207 problems found
Manufacturer, category, tag
Problems by manufacturer
Problems by category
By models 23
Headphones JBL T110BT
Hello. Headphones JBLT110 BT WHT, the microphone does not work during video calls and the interlocutor cannot hear me. Although initially everything worked, c.
Headphones JBL TUNE160BT
Hello. When I make a call, the headphones start to make noise, and I can accept the call, but the headphones continue to make noise, neither I nor I.
Good evening. Suddenly my headphones began to play the sound quietly and that was it. They weren’t damaged, please tell me why then.
Headphones JBL TUNE110BT
Good afternoon, however, the phone sees them, but does not connect, but they worked fine. Please advise what to do?
Headphones JBL T450BT
Good afternoon. I connect the headphones to the laptop and it shows that there is pairing, and the sound comes from the speakers. I pull out the charging cord and that's it.
Headphones JBL TUNE110BT
Good afternoon. I lost my JBL TUNE110 BT headphones and found others. I want to know the IDs of my previous ones and find out these ones. Please tell me how it is.
Headphones JBL T110BT
Good evening friends. My JBL T110 headphones don't work. The sound doesn't come out at all (if you press the 3.6 horn hard, it comes from the left.
Headphones JBL T110BT
Good afternoon At some point, the right earphone began to play music quietly, and the warranty period had not yet passed. Sent under warranty.
How to fix headphones without a soldering iron?
When a connecting wire breaks, good craftsmen make do with only a knife, a lighter, or electrical tape.
But sometimes, in order for the headphones to start working, you don’t need to take out a soldering iron or any other tool at all.
To pair your device and wireless headphones, Bluetooth must be activated on your smartphone or other transmitting device, and the wireless headphones must be turned on, charged, and within range of the transmitting signal.
Driver Update
Wireless headphones stop working due to the fact that the phone does not recognize the headset after a firmware update. In this case, there are 2 options:
- return to the old firmware version;
- installation of a new one at the service center.
There may also be a problem when connecting headphones to a computer.
It may not detect them because Bluetooth drivers are not installed or require updating.
After reinstallation, the headphones will begin to work without the use of tools or a soldering iron.
Why doesn't one wireless earphone work?
There are several reasons that can cause this problem, first of all you need to find out what happened.
1. Just not charged, poor contact in the charging case.
2. Contamination of the liner.
3. Flooding with water.
4. Low battery.
5. Incorrect settings.
6. The device simply does not support this type of connection, this often happens with smartphones, but everything works fine on a computer.
7. Desync has occurred.
8. It is set to work only when the earbud is in the ear.
Important! If you do not have TWS headphones, but, for example, on-ear headphones connected by a headband, then most likely the problem is mechanical in nature. Therefore, most often it is best to contact a specialist who can disassemble your gadget and tell you exactly what the problem is.
Looking for damage
The main reason why wireless headphones malfunction is still damage to the connecting cable.
Therefore, if there are no visible traces of impacts (chips, scratches) on the housing of the headset, control unit or battery, then the first thing that needs to be done is to carry out a careful, detailed inspection of the cord.
It is possible that there are fractures, bends or breaks in the places where it connects to the headphones, control unit or battery case.
To do this, turn on the charged headphones to play a music track, carefully probe and bend the cable along its entire length.
If the cord is deformed at the site of the supposed break, the sound in one or two headphones will be interrupted or, conversely, appear.
Connecting to an Android Phone
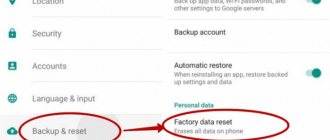
The most popular option for using headphones is to turn on the phone and rejoice. But not everything is so simple; the first connection will take a little trouble. The screenshots presented will be taken on a Xiaomi Redmi Note 9 Pro device (Android 10, MIUI 12), but even on the fourth version of Android everything was about the same. We just look and look for analogues.
This needs to be done quickly, because... The detection period on the headphones may end. If something happens, simply turn the headphones off/on again or activate the detection mode on them (depending on the model).
- Turn on the headphones and activate the detection mode. On my JBL T460BT, all you need to do is turn them on, and a flashing blue indicator indicates that the device is ready to pair.
- On your phone, go to the “Settings - Bluetooth” section.
- We look at the “Available Devices” section and look for our headphones among them. If anything, feel free to update this page.
- We choose our headphones. The pairing procedure begins. Your interface may be different, in my case I click on the “Accept” button.
- Headphones are connected and you can use them.
How to repair vacuum headphones or earbuds?
To repair any wireless headphones you will need:
- multimeter;
- low-power soldering iron (25-40 W);
- flux and solder (rosin and tin);
- side cutters;
- sharp knife;
- lighter;
- insulating tape;
- heat shrink tubes of different diameters;
- a piece of multi-core cable;
- Super glue.
How to find a gap?
If you cannot visually determine which section of the cable in your wireless headphones is broken, you need to use a multimeter.
A multimeter (tester, avometer) is a combined device that combines the functions of an ammeter, voltmeter, and ohmmeter.
Testing with a multimeter: the basics of the repair procedure
Let's take the same JBL E25BT wireless headphones.
There is no sound in the right earphone. This can happen due to frequent mechanical stress on the nearby control panel.
Carefully, using a knife, disassemble the housings of the vacuum plug and control unit.
In the earphone itself, 2 wires of different colors should be soldered to the speaker, and wires of the same color coming out from the other side of the cable should be soldered to the control board.
With such disassembly, you can immediately detect fallen wires due to poor-quality factory soldering, and also check whether the speaker is working properly.
On the multimeter, the switch knob is set to the “continuity” position.
When the probes are connected to each other, a sound signal should be heard, and a zero will appear on the display instead of one.
To ring the headphones, one of the probes touches the soldering point of a wire of a certain color on the headphone, and the other probe touches its soldering point on the control board.
If the conductor is intact, its resistance is zero and an audible signal will sound. And the second wire in the cable is also checked.
If both wires are intact, you should ring the speaker itself or look for the cause in the control unit.
When one or two wires are broken, this section of cable is replaced with a new one.
If the location of the cable damage can be determined visually or by palpation, it can be repaired without disassembling the Bluetooth headphones, control unit, or battery.
The repair is done in the following order.
An alternative way to pair headphones with each other
If the above method did not help and your earbuds still do not pair, then do the following:
- Turn off Bluetooth on your phone;
- Reset your earbuds (for example, as described above);
- Place them back into the charging box and wait a minute;
- Now take out the right earbud first and turn it on;
- Then take the left wireless earbud out of the case and turn it on;
- Simultaneously double-click the multi-function button of the right and left earbuds;
- You will hear a beep when they are synchronized and will be able to use their capabilities.
Removing the cable braid
The cable at the point of damage is cut with side cutters.
To make it easier to work with wires inside the cable, the braid at both ends is exposed by 1.5 cm using a sharp knife.
In the case of the JBL E25BT wireless headphones, it is double: on top of the polyvinyl chloride is a layer of fabric insulation that protects it from cracking in the winter.
To prevent fringe from appearing on the top braid during subsequent actions, it is advisable to edge it with narrow tape.
After completion of the work, the place where the cable is repaired can be secured and protected from tearing with insulating tape, but it is better to do this using a piece (4-5 cm) of heat-shrink tube of a suitable diameter, having first put it on one of the ends of the cut cable.
Reasons for lack of pairing
Sometimes it happens that the headphones do not pair with each other or with a smartphone. There may be several reasons for the problem:
- one or both earbuds are discharged;
- the Bluetooth module can be disabled on one wireless earphone or both elements; some models have buttons to enable it;
- desynchronization of sound reproduction is caused by incorrect synchronization;
- elements are located far from each other;
- interference from a nearby powerful Wi-Fi router;
- obstacle from the settings curves left over from the previous failure.
Preparing the cable ends
Regardless of the number of cores inside the cable, they all have different colors, which allows assembly without testing each conductor.
Moreover, in some headphones, each wire has its own polyvinyl chloride insulation, but in most, the stranded copper conductors are coated with varnish of a certain color.
The common wire is coated with a colorless varnish, so it has a “copper” color.
Cleaning off the varnish with a lighter
For future tinning, clean the ends of the wires coming out of the two ends of the cable by 5-7 mm from the insulating varnish coating.
Many people use a lighter to strip wires.
This can be done carefully using a soldering iron and an aspirin tablet.
The ends of the wires are placed on the tablet and pressed with a heated soldering iron.
Under the influence of temperature and acid, the varnish burns out, and oxides are removed from the surface of the copper conductor.
Solder and fasten
Tin the cleaned tip of each wire.
To do this, a layer of flux is applied to it (heated with a soldering iron, dipped in rosin), and then a layer of solder (tinned with tin from the soldering iron tip).
Before soldering wires of the same color together, on one of them a centimeter-long piece of thin heat-shrinkable tube is put on each wire (the common wire can be skipped).
We isolate the wiring
Stranded conductors are so thin that it makes no sense to twist them together before or after tinning.
Veins of the same color are alternately soldered together with an overlap.
After each soldering, the heat-shrinkable tube is moved to this place so that it insulates the exposed section of the conductor, and it is heated with a lighter until it shrinks completely.
We check the quality of repairs
Connect charged headphones via Bluetooth to the device and turn on the track to listen.
If the repair is done correctly, you will hear clear, interference-free sound in the headphones and proceed to the final stage.
It is acceptable to secure the junction of two pieces of cables with insulating tape, but if the user followed the advice and put it on the cord
piece of heat-shrinkable tubing, then proceed in the following order:
- quickly apply superglue to the edges of the braid (after removing the tape) and the soldered wires;
- carefully move the piece of tube so that it sits on the braid on both sides of the connection;
- heat until completely shrinked using a lighter.
How to fix the desync problem?
In addition to the method described above, there are several other operations that will help synchronize headphones:
- Cancel pairing. One of the common mistakes is trying to connect a device without first synchronizing it. To solve the problem, you need the gadget to “forget” pairing. Go to the Bluetooth device manager, find the paired headphones in the list and cancel the connection using the “Forget device” button.
- Reset settings manually. There are no special buttons on the case? You will need to take out both headphones from there and press the power button. Pressing should continue for about a minute. The LED signal will first light up, then start flashing and go off.
- Reset settings manually in the case. If the previous method did not work, repeat these steps, but do not remove the headphones from the case.
- Reset settings using the case. If the charger has a special button, then the gadget must be placed inside the case. By analogy with the previous method, you then need to press the power button for at least 60 seconds.
Break near the earphone
The most difficult step is disassembling the housing of a broken earphone.
Since the halves of the plug (droplet) or liner are attached to each other using glue, they can be separated with a sharp knife.
To do this, use a blade to make a small depression along the length of the entire seam, and alternately press the knife on one or the other half of the body.
Some craftsmen suggest splitting the headphone housing by clamping it in a vice.
If you squeeze the earphone with the jaws of a vice in the plane of the glued joint, then a crack will appear due to deformation, and the case itself will break into two halves.
This method can only work if high-quality primary recycled plastic is used to make the earphone, otherwise the case will crack in any other places, and case repair will be added to the soldering of wires.
The wire inside the earphone is secured by tying a knot or a metal bracket, which does not allow it to go beyond the cable channel.
After unsoldering the remaining wire from the speaker and removing it from the housing itself, repairs are carried out in the following order:
- from the end of the cable going to the earphone, the braid is exposed by 1-1.5 cm;
- the ends of the wires (5-7 mm) are cleared of varnish and tinned;
- the cable is pulled through the cable channel of the rear half of the earphone;
- tie a knot at the end of the cable or clamp a safety plate;
- the ends of the wires are soldered to the speaker;
- glue the body halves together.
Connecting to a computer or laptop
Windows 10 as an example Fans of the “seven” can see the link in the first section of this article. Other fans of strange systems, and especially Windows XP, are left alone and try to configure their headphones using shamanic tambourines.
- We enable detection of our headphones. And again - in my case the blue light should start blinking. In your case, the readiness for pairing may be different (see the instructions or search for the exact name of your model).
- Turn on Bluetooth on your computer/laptop. I usually have it turned off, so I list it as a separate item. Ideally, the following icon should appear in the tray:
- Right-click on it and select “Show Bluetooth devices.” You can also get there through the standard “Options” menu or by searching for the word Bluetooth. I'm just showing one of the options:
- We make sure that our device is not here, so go to “Add Bluetooth or other device”:
- Bluetooth.
- We choose our headphones.
- We make the connection. Ideally, everything is ready. It will also be displayed in the very first window of Bluetooth devices.
Channel blockage
Since the earplugs are inserted directly into the ear canal, the ear pad and mesh located at the output of the earphone sound channel become contaminated with earwax and other secretions, causing the volume and sound quality to deteriorate.
The ear pads are easy to remove and wash, but when you try to clean the mesh from the outside, you can push dirt inside the earphone.
Together with the cleaning liquid, sulfur particles will clog the speaker holes or get onto the membrane, which will degrade the sound quality.
Therefore, disassemble the earphone and wash the half of the case with the mesh in alcohol.
There was a wheezing
If the device begins to work poorly, producing extraneous sounds when playing music or text, the cable is probably to blame. Often, wiring can wear out, become damaged during operation, or break due to exposure to pets or aggressive chemicals. In this situation, it is recommended to replace the wires and install new ones.
If the equipment continues to wheeze, there may be an arc failure in the core or the amplifier chip is not functioning properly. If the user understands electronics well, then he can carry out the entire complex of work independently. If not, take the product to the craftsmen.
Another reason for headset wheezing is the incorrect position of the ANC system microphones. If they have fallen off or are functioning in the wrong position, additional noise may be sent to the controller when they come into contact with the body. When the equipment is under warranty, it is better for the seller to fix the problem.
If not, you should take the headphones apart and check how the microphones are positioned. If the position is incorrect, carefully install them in the desired position. If the equipment turns on and works, it means the process was completed correctly.
Which headphones make no sense to repair?
You can try to repair any headphones yourself.
Even if it turns out that the cause of the malfunction is more serious than a cable break or speaker failure, the user will know about it and will not pay the same amount in the workshop for a simple repair as for replacing the same control panel.
But it’s not worth returning outdated wireless headphones for repair; it will cost half the price of what was paid when purchasing them. It's better to buy new ones.
Connection problems
There are specific problems with each manufacturer's products. The principles of connection, use and troubleshooting are the same for all Bluetooth devices.
There are some of the most common defects. Among them:
- The headset does not turn on or off;
- unexpected connection or disconnection from a source;
- The Bluetooth module conflicts between devices;
- new renovation required;
- Ability to work only next to the main device (phone, PC, tablet).
Diagnostics and repair
The first thing the user needs to do before starting repairs is to conduct diagnostics and determine why one earphone broke and the other did not. To do this, you need to connect the headphones to your phone or other sound source, turn on music or video and start checking the cable. On a non-working earphone, you need to carefully probe and bend the wire along its entire length - if sound appears, then the cable needs to be repaired . Otherwise, twist the plug and gently press on it. If sound appears, the problem is in this node.
Advice! If the wire on the headphones is detachable, you can check the functionality of the gadget with a different cable. If after replacement the music does not appear, this means that the problem is in the speakers. To verify this, you need to connect the cable to other headphones. There is a high probability that sound will appear.
For headphones where the wire does not disconnect, the user will need a multimeter. On the device you need to select a mode to check the sound, and then connect the wires correctly: black to COM, red to mA. Now you need to carefully make neat cuts near the non-working earphone and plug, and then attach the probes to them. If the cable is intact, the multimeter will notify you of this with a corresponding signal. Then the problem lies in the speakers. If the device is silent, you need to make a cut in the middle and then ring each half of the cable. On one of them, the multimeter will emit a beep, which means that the part being tested is intact. The second one needs to be divided in half again, find the intact and faulty parts, etc. Actions must be continued until a faulty section a couple of centimeters long is detected.
After diagnostics, you should begin to repair the detected fault, be it a damaged cable, connector or speaker. If the user has a soldering iron and the skills to use it, then it is recommended to prepare this device.
Cable repair
Once the faulty piece of cable has been identified, repairs should begin. It is necessary to cut off the damaged area and then remove the top insulation to get to the inner cores. You can connect them using a soldering iron (this method is more reliable) or, if the user does not have the appropriate experience, twist them.
Advice! To cover the exposed wires after completing the work, you can use electrical tape, but it is much more convenient to work with heat shrink. These are small tubes that are placed over exposed wiring and then, when heated, shrink and tightly enclose the wire.
To connect cut pieces of cable, they need to be stripped of their insulation and then twisted or soldered in pairs (according to color). To solder, you need to melt a small amount of solder, connect the wires and wait a little until it hardens. If the user wishes to do without a soldering iron, he can make a twist by connecting the cable together and braiding it in the form of a pigtail. Then you need to put heat shrink on the bare area and heat it with a hairdryer so that it narrows and tightly grips the wire.
On a note! In cases where the headphones are equipped with a detachable cable (for example, large full-size Sennheiser), you can simply replace the damaged cable with a new one.
Replacing the plug
To replace a faulty plug, you will need to first buy a new part. It is better to choose a metal element with a stereo signal measuring 3.5 mm - a universal diameter that today is suitable for any gadget, be it an iPhone, Samsung or a smartphone from a Chinese manufacturer .
You can separate the old plug in several ways: unscrew it from the cable or cut it off. It is better to choose the second method and, stepping back a couple of centimeters from the plug, remove it along with a piece of cable. As a rule, breakdown occurs in this place due to regular kinks. Next, you need to remove the insulation from the cable and cores and connect them to the contacts on the new plug, pressing them tightly with pliers. If there is a grounded cable (bare or two-color insulated), it is attached to the sleeve. Next, the wires need to be soldered to the contacts, pre-treated with sandpaper - this makes the fastening more reliable. After the work is completed, you need to put the cap on the plug.
Important! The wires under the cover should not touch each other, otherwise there will be no sound.
Speaker repair
If during diagnostics it is discovered that the problem is in the dynamics, the headphones will need to be disassembled to get to the faulty unit. This can be done in various ways depending on the type of device. You can find a disassembly diagram on the Internet by the model name.
- As a rule, on expensive full-size headphones, for example, Sennheiser HD418, you will need to unscrew the screws hidden under the pads.
- Smaller devices (such as a headset for a computer) are connected using latches. To disassemble them, you will need to use a slotted screwdriver or other flat tool.
- Small in-ear headphones for phones are usually glued together. To disassemble them, you need to squeeze them in a vice - they open into two parts at the junction.
Typically, one or more wires are broken inside the speaker. As a rule, they are tied inside to eliminate the possibility of damage due to careless handling. It is necessary to cut the wire at the input to the speaker, remove the insulation, make a safety knot again and solder it.
If the wires are intact and in their places, this means the speaker itself is faulty.
Important! A new speaker is expensive, so replacing it is only advisable for high-quality premium headphones. In this case, it is recommended to contact a service center, where they are guaranteed to supply a suitable model and carefully fix the breakdown.
If the user decides to replace it himself, he needs to cut the rubber seal, remove the speaker and carefully install a new one, avoiding touching the membrane. If you bought a smaller speaker than the old one, you can fix it with a few drops of glue. Vacuum headphones are more difficult to repair; you will need to look for a disassembled diagram on the Internet.
Features for models with volume control and microphone
Headphones with a microphone and volume control have almost the same structure as regular devices, so their setup and repair are carried out in the same way. So, if the user needs to restore a damaged section of the cable by stripping the insulation, he will find not three, but four wires - grounding, two for headphones and one for the microphone. They are connected in the same way by twisting or soldering, as described above.
Features for wireless models
Wireless headphones are characterized by malfunctions typical of wired devices, as well as breakdowns associated with the structural features of these devices. Additionally, there may be such problems.
- The meshes of wireless gadgets become clogged with sulfur without proper care. To avoid this, you need to clean them regularly.
- Wireless headphones operate from a built-in battery or from batteries. When the batteries are discharged, the headset does not function correctly, for example, one of the headphones stops playing. The problem may also be an incorrectly installed battery, but in this case the equipment does not work at all.
- Another possible reason is a Bluetooth headset that is not worn correctly. Some models can only work in a certain position due to the location of the antenna.
- Incorrect connection of a wireless device or incorrectly set speaker balance can also lead to the disconnection of the left or right earphone.
Depending on the type of failure, you need to clean the headphone meshes from wax, charge or remove and reinstall the batteries, read the instructions and put on the headset correctly, reconnect the equipment, set the settings correctly on your phone or PC.