Synchronizing your laptop and TV will allow you to view content on the big screen. Connecting a regular laptop running Windows OS to a TV is not difficult. However, we are talking about a device from Apple. Therefore, the synchronization process will be significantly different. Few users know how to connect a MacBook to a TV.
Now let’s analyze the specifics of connecting Apple laptops to TV. The proposed options are suitable for MacBook Air and devices of other models. Follow the instructions carefully to ensure the image appears on a large screen. Many users encounter certain problems - we will analyze them and also offer effective solutions.
How to connect TV and MacBook
Technically, Apple laptops are almost no different from regular laptops, so the available methods of connecting to a TV for this device can be divided into two large groups: wired and wireless. Wired methods are limited to an HDMI connection, while wireless connections are only possible through the AppleTV set-top box using AirPlay technology. Let's consider these methods in order.
Method 1: HDMI
The most accessible method for most users is to use an HDMI connection. It is implemented through a special cable, which differs for different MacBook models. For example, in the case of the latest MacBook models, where some connectors have been removed for the sake of portability, an additional USB-C adapter, official or third-party, may be required.
Older models will require a Mini DisplayPort adapter.
Once you receive the adapter, proceed to the following instructions.
- Connect the cable and adapter to the corresponding connectors on the laptop and TV.
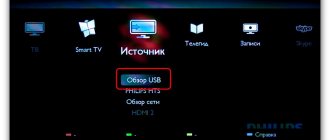
- Use your TV's remote control to select the image source, in our case HDMI.
The procedure differs for different TV models - usually the instructions for the device indicate the procedure for selecting a source. Go to MacBook. First, open System Preferences through the Apple menu.
Go to the "Extension" tab. It offers three image output options:
- “Video replay” – what happens on the MacBook display is simply duplicated on the TV screen. To enable this option, check the appropriate box.
“Extension” - the TV is simply used as a second monitor: for example, you can open a web browser on the built-in screen of a MacBook, and a video player or image viewer on the TV. This option is activated automatically if you uncheck o;
- “Output to the first or second monitor” - the name of the function speaks for itself: in this case, the image is either on the built-in monitor or on a connected TV, at the user’s choice. To launch this feature, in the main window of the Monitor tool, drag the white bar to the very top.
Go to the “Output” tab in the snap-in and select your TV in it.
Done - now you can use the selected solution to work on your laptop.
Method 2: AirPlay
AirPlay technology is an exclusive feature of the Apple TV set-top box, which allows you to connect other equipment from the Cupertino company to TVs: be it a MacBook, iPhone or iPad.
- First of all, make sure that the set-top boxes and MacBook are connected to the same Wi-Fi network.
- Turn on your Apple TV, then choose Settings > AirPlay from the Apps menu and make sure it's turned on.
Now let's move on to the MacBook. Open the Apple menu - System Preferences - Displays. Use the AirPlay Monitor drop-down menu and select Apple TV. Then click on the video replay icon.
Solving possible problems
Often, when connecting a MacBook to a TV, two very annoying problems arise. Let's look at them and suggest methods for solving them.
There are black bars on the TV after connecting. The appearance of black bars is an obvious sign of problems with scaling. Eliminating them is quite simple.
- Open System Preferences and go to Accessibility.
Now the image scale can be adjusted using the specified key combinations.
The MacBook goes into sleep mode and the TV turns off image reception. One of the most annoying problems. You can solve it as follows:
- Launch the Terminal application - it is located in the Utilities folder.
Done - now the sleep mode is completely disabled and will no longer disturb you.
Conclusion
We looked at methods for connecting a MacBook to TVs. As you can see, for all of them you cannot do without purchasing additional accessories.
Thank the author and share the article on social networks.
Dear friends, today you will learn how to connect a MacBook to a TV. There is probably no need to explain what functions a TV can perform, but we will still look at this component in this block. Then we will talk about connection methods, and in the next block we will look at them in detail. So, what will such a connection give us?
As you can see, there are a lot of advantages that connecting a MacBook to a TV can provide. Of course, these are not all the possibilities provided. That is, the above is generalized information, which, in turn, can be shared. For example, screen mirroring will allow you to also play games on the main monitor while your favorite show is on or music is playing on another one. Now let's look at three ways to connect Mac laptops to your TV.
- Via a standard HDMI cable. That is, in this case you will need an HDMI cable, which can be purchased separately in specialized stores. You can also buy it on the official Apple website or from official resellers.
- Via wireless Wi-Fi connection if you have an Apple TV device. Here it is already clear that you need an Apple TV set-top box to work.
- You can display the image from the MacBook screen on some services on a Smart TV monitor.
Here you can immediately decide on the type of connection: if you have a TV set-top box from the Apple company, then go straight to the second method in the next block. If you have a Smart TV and you only need to display some data (for example, YouTube videos), then move on to the third method. If you don’t have any of the above, but you still want to do this, then the cheapest option would be to purchase an HDMI cable. Be sure to check at home how long the cord you will need so that you don’t have to worry about it in the store.
Actions after connection
If your Mac doesn't recognize your connected HDTV, display, or other connected HDMI device, follow these steps:
- Turn off your HDMI device while leaving your Mac on.
- Disconnect the HDMI cable from your Mac, then reconnect it.
- Turn on your HDMI device.
If the image on your HDTV or display extends beyond the screen, go to Displays settings and adjust the image size using the Compress Scan slider. You can open the Monitors settings section in one of the following ways.
- Choose Apple menu > System Preferences and choose Displays.
- Press Shift + Command + A to open the Applications folder. Then double-click System Preferences and select the Monitors option.
- If your keyboard has brightness controls, press Option+Brightness Up or Option+Brightness Down.
If you're not getting audio from your Mac to your HDMI device, try the following:
- Choose Apple menu > System Preferences and choose Sound. Make sure your HDMI device is selected in the Output panel.
- If your device is connected via a Mini DisplayPort adapter, make sure your Mac supports Mini DisplayPort audio.
- When connecting a device to your Mac mini, disconnect any audio devices from the audio output port.
How to connect a MacBook to a TV?
- Connect the cable with one side to the MacBook's HDMI input and the other side to a TV with a similar output.
- On the TV remote control, press the Source button and use the navigation keys to select HDMI, where the type of connected device will be indicated (depending on the TV model).
- In the MacBook screen settings, set the necessary ones for your monitor: duplicating, expanding, or displaying the image on one of the selected monitors. Let's take a closer look at each of these options:
- Duplication is when everything that happens on the laptop screen is repeated on a large TV monitor.
- Expansion - the desktop is enlarged, that is, you can move the window of some program to the second display, and work, for example, in a text editor on the first screen.
- Output to the first or second monitor - here, perhaps, everything is clear from the name: the image is shown only on the monitor that you choose.
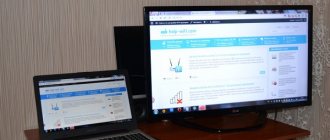
Connecting a MacBook to a Monitor via HDMI
AirPlay
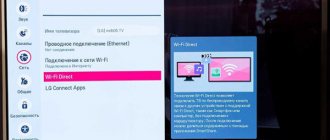
So, how to connect your MacBook to your TV via Wi-Fi? That's what AirPlay is for. This feature is only available to owners of an Apple TV set-top box, therefore, if you do not have it, the service will automatically become unavailable to you. AirPlay lets you do the following:
- Stream video from the Safari browser or Quick Time Player.
- Use the TV as a monitor, as in the case of connecting via HDMI.
All you have to do is turn on your Apple TV, then select your TV from the AirPlay status menu in the menu bar. This function is disabled there. As you can see, there is nothing complicated. Just press a few keys and all the necessary content is transferred to the big screen. Please note that to use AirPlay comfortably, you need access to high-speed Internet.
Apple TV set-top box
Smart TV
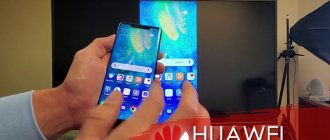
iPhone users probably know (and if they don’t know, they’ll find out now) that when watching a video, for example, on YouTube, an icon for broadcasting the video appears. This icon appears when both your Smart TV and Apple device are connected to the same Wi-Fi network. Then you press it, select TV and the video is transferred to the big screen. In the same way, you can try to watch videos from the Internet from a Macbook.
Samsung Smart TV
Possible problems
What should I do if the output image is too small or there are black bars? The best option is to scale the screen. Not all content stretches to fill the entire screen automatically. Therefore, after setting up the connection, the user will be faced with the fact that a black frame appears on the sides.
Similar problems appear during the streaming of various movies and TV series. The image quality will also be unsatisfactory. This is due to the low resolution. If you use VLC or Quick Time players, then everything can be solved by playing content in 1.5x or 2x resolution. Therefore, you can do without screen scaling, if such functions are available to you.
First, you should activate the screen scaling option, if you have not done so first:
- Open the laptop operating system settings.
- Go to the "Accessibility" section.
- Switch to the "Zoom" tab.
- Activate zoom features.
- Save your changes.
Be sure to check the box next to “Smooth image”. This allows you to reduce pixelation parameters during upscaling. However, this may cause the picture to become excessively blurry. Therefore, it is also better to avoid significant scaling. Otherwise, the image will lose its naturalness.
To start playing content, launch the player. Move the mouse cursor to the center of the video. You can now use the zoom feature to minimize the black bars on the sides, as well as the top and bottom. This work can also be done with gestures. Swipe the “Control” key, and then change the picture by lifting two fingers up or down – zoom in and out, respectively.
The quality of the broadcast image should increase significantly. It is impossible to solve the problem of low resolution 100%. However, getting rid of black stripes is absolutely possible. In some situations, changing the zoom factor in the browser can also work if the content is played online.
There is nothing difficult about synchronizing an Apple laptop and a TV. To set up image broadcasting, you need to follow the instructions provided. Using additional steps, you can eliminate problems associated with sound playback and poor quality images.