A variety of problems often arise with charging wireless TWS Bluetooth headphones. The right or left earphone does not charge, the case from the headphones does not charge, the indicators behave differently, etc. Moreover, this is a problem not only with cheap Chinese Bluetooth headphones such as i7s, i9s, i10, i11, i12, i30 and etc., but also expensive, top models. More than once I have heard that the AirPods earphone (first/second generation, or AirPods Pro) or the case itself do not charge. There are also a lot of questions about problems with charging headphones from Xiaomi (mainly Redmi AirDots and Earbuds), JBL, Samsung, Huawei, Motorola, Xiaomi QCY and others. These instructions are suitable for all separate wireless headphones.
The fact is that the TWS headphone format itself turned out to be a little complicated from the technical side. The case is charged, the headphones are charged from the case, the headphones are connected to the case using contacts, the batteries in these headphones are very compact. There are as many as three batteries in one set of headphones. And all this should work stably and correctly. Very often one of the components fails or simply stops working. And if you take apart some cheap headphones, you can see how poorly and poorly made everything is. I'm not even talking about the quality of the parts and batteries themselves.
I will divide the article into two parts: in the first, we will look at solutions related to charging headphones from the case, and in the second, with charging the case itself.
Why don't wireless headphones charge from the case?
I personally encountered similar problems several times, analyzed a large number of cases that are on the Internet (articles, forums, videos), gleaned a lot of information from comments on this site and am ready to share solutions that should solve the problem with charging your wireless Bluetooth headphones. I will show most of the solutions using the example of specific headphones, but almost all solutions are universal. Even if your headphones are different from those in my photo, that’s okay. Do everything according to the instructions.
How can you tell if the headphones are not charging or if they are charging?
There are a huge number of different models on the market from different manufacturers. Both the indicators on the headphones and the case behave differently depending on the model. But in most cases it works like this:
- The indicator on the earphone lights up red (or flashes) – the earphone is charging.
- The indicator lights up white or blue – the headphones are fully charged.
This is how it works on Xiaomi, JBL, Chinese headphones i10, i11, i12, etc. - If the indicator does not light up or does not change after installation in the case, the headphones are not charging.
It may remain lit, flashing, or not lit at all (as if the earphone is turned off or connected to a device). That is, the earphone does not react in any way to installation in the charging case and pressing the button (hold for 3-5 seconds).
Perhaps the reason is not charging
This is a very important point! Much more often than from problems with charging TWS, users suffer from desynchronization. In this case, one earphone also stops working, the indicator on this earphone does not behave as usual, etc. In any case, I recommend that you first try turning on the earphone, resetting the settings and resynchronizing.
In order not to load this article with unnecessary information, I leave links to two very detailed instructions:
- One wireless earphone does not work, stopped playing
- How to reset and sync wireless headphones with each other?
And a separate article if you have a problem with AirPods: connecting AirPods to iPhone: doesn’t see, doesn’t connect, one earphone doesn’t work
Be sure to try this!
Charge the case
I think you've already done this. If not, be sure to connect the case to charging. There is almost always an indicator on the case that starts to light or blink when charging is in progress. If you connect the cable, insert it into the adapter, plug it into a power outlet and there is no reaction, the case does not charge, then try using a different cable and/or power adapter. Connect power from the computer's USB port. See solutions in the last chapter of this article.
Checking the contacts on the headphones and case
How many cases are there when, for example, after purchasing headphones, people simply do not pay attention to the fact that there is a protective film on the contacts. The headphones run out and are no longer charged from the case because of this film (it is barely noticeable). People even contact service about this, but they just needed to remove the protective film on the contacts. Very often this situation happens with Xiaomi Mi True Wireless Earbuds basic and Xiaomi Redmi AirDots. This is what it looks like:
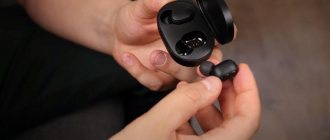
Check the contacts on the headphones themselves and the case. It often happens that the contact in the case simply gets stuck. After which there is no contact between the case and the earphone and it does not charge. Clean the contacts on your headphones. You can try to lightly press the earphone to the contacts.
If one of the contacts is stuck, it is lower than the others, then try to gently move it with a needle or toothpick. Perhaps it will straighten out and the earphone will charge.
There may be a different type of contact. On I7s, for example, there is contact with a thin needle inside. AirPods and high-quality fakes have a separate contact at the bottom of the earphone. It is imperative to check that no debris has gotten into the case itself or into the hole on the earphone.
If something gets there, you can try to blow out the hole, or remove the debris with a needle.
On the Samsung Gear IconX, for example, there is a problem where the earphone does not charge due to the seal (for large ears, which comes included). The indicator flashes and charging does not occur. You just need to remove this seal, or put on a smaller seal. And the JBL earphone did not charge due to poor contact. And there the guy just put a small piece of foil and everything worked. So-so solution, but it works.
If you have any working, non-standard solutions, share them in the comments!
Press the button and put the earphone in the case
A very unusual solution that has already saved a huge number of AirDots and Earbuds headphones. I wrote about it in the article Xiaomi Redmi AirDots and Earbuds: the left/right earphone does not work, they do not synchronize, do not connect, the case/earbud does not charge. You can read the reviews in the comments. Perhaps this solution can be applied to other headphones.
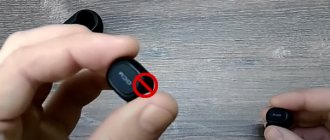
Everything is very simple. We take an earphone that is not charging and does not respond to anything and put it in the case while simultaneously holding down the button on it. Press the button, keep it pressed and put it in the case.
It doesn't always work out the first time. It's okay, try again.
One earphone is broken
Unfortunately, this happens very often. One Bluetooth earphone may simply break. Moreover, most of these devices are, to put it mildly, of poor quality. Well, what kind of headphones can there be for $4 (that’s how much I bought the I7s for).
It is not uncommon for the contact between the board and the contact that is used to connect the earphone to the case to come off.
It happens that inside the headphone the wiring from the battery or speaker simply falls off. Anything can break. If you have the desire and some experience, you can try to carefully disassemble the earphone and take a look. Especially if you are already planning to throw them away. If some wiring comes off there, you can solder it.
Update: another interesting solution
Problems with charging occur due to the fact that the earphone discharges to what is called zero. And after that he simply does not charge. You need to somehow start this earphone, give it a push, and perhaps it will start charging. This method has been tested on Samsung Galaxy Buds. I have not yet had the opportunity to test it on other headphones.
You can most often find out that the earphone is not charging by looking at the indicator. As soon as we put the earphone in the case, it immediately seems to be charging, and then (after a couple of seconds) it stops charging. Indicates that it is charged, or the indicator goes out altogether. We do this:
- Fully charge the case.
- Take the working earphone out of the case and put it aside for now.
- We put the earphone that does not take charge in the case and look at the indicator. As soon as it stops charging, we lift it to break the contact and lower it back into the case. Our task is to keep it in charging mode all the time (even if only for a few seconds).
- You may have to repeat this (raise and lower the earphone) 20 times. Maybe 40. It’s different for everyone. But it's worth a try.
Causes
The first thing you should understand is why Xiaomi AirDots wireless headphones do not charge and, accordingly, you cannot use the capabilities of the device. This happens for the following reasons:
- The USB cable or case is faulty. This could be a damaged wire or a dirty connector. As a result, there is no contact, and Xiaomi wireless headphones are not charged from the case.
- Buying a fake. A common cause of problems that arise is the purchase of a non-original product (by the way, it is easy to distinguish it). At the same time, the user faces many difficulties, for example, low sound quality, constant interruptions or themes. That EarBuds or other wireless devices do not charge.
- No contact connection due to poor connection. Often the problem is related to magnets that do not attract the ear pads well.
- Malfunction. During operation, the device may be hit or water may enter it. So damage is one of the reasons why Xiaomi wireless headphones do not charge even after being charged for a long time.
- Marriage. Mechanical defects from the manufacturer cannot be ruled out, so devices must be checked upon purchase and returned immediately if defects are identified.
One earphone quickly discharges and turns off
There is another very popular problem that I myself encountered on the original AirPods and on the Chinese i30 headphones. Everything seems to be charging and working as it should, but one of the headphones discharges very quickly and turns itself off. This is my right earpiece. It works for just a few minutes and turns itself off. It turns out that one earphone sits down faster than the other. It works longer on AirPods, but the right earbud drains much faster than the left. It is impossible to use such headphones.
This is a hardware problem. That is, settings, resetting parameters and other similar methods cannot fix it. Need repairs, replacement of a non-working earphone (right or left), or purchase of new headphones. If there is a warranty, be sure to contact the service center or seller. They must repair them, replace them, return the money.
If the earphone is dismountable, then you can find the battery yourself, disassemble the headphones and replace it (resolder it). But there are a lot of nuances here. Can you do it yourself, can you find a battery, etc.
In most cases this doesn't make any sense. It's easier to buy new headphones. Just like with my first generation AirPods. You can only change the right earbud, since the left one still seems to hold a charge. But where is the guarantee that the left earphone will not break in a month, because they are already four years old. But the battery in AirPods cannot be replaced; they are non-separable, if I understand correctly.
Troubleshooting
If the audio device does not see the headphones, you need to check if they are charged. The wireless headset runs on an installed battery; certain models work without charging for up to 50 hours, some only 4-5 hours.
Read also: How to remember where you put something
Disconnect the headphones; as a rule, when turned on, the indicator on the device body lights up. Recharge your device. We must not forget that certain models require only 1 hour to fully recharge, while some need to be recharged for more than 5 hours.
The case does not charge from the headphones
It may vary on different models, but when the case is charging, the red indicator on it usually blinks. When charged, the indicator just lights up. If you connect the power but there is no reaction from the headphones and the case, then most likely it is not charging.
If there are problems with charging the case (aka box, case), then the first thing you need to do is replace the cable and power source. Connect the case via another adapter (from a phone, tablet). Get another cable. Typically a Micro-USB cable is used. I think you definitely have several of these cables in your home. If you need Lightning for charging (used on good copies), then you can even use the original cable from Apple.
Make sure the connector is fully inserted into the charging case. Be sure to try connecting power from the USB port of your computer or laptop.
Disassembling the case and checking contacts
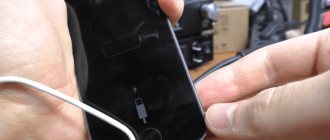
If you have already checked and tried everything, but still nothing works, then you can hide the case and see if there are any problems inside. Maybe some wire is torn off, or something else. We do everything at our own peril and risk!
They are very easy to understand. You just need to pry one part with some sharp object. It is advisable to use a special plastic spatula to avoid damaging the housing.
Inside it looks something like this (using the example of Xiaomi Earbuds):
At the same time, you can check the contacts through which the headphones are connected.
And this is what a disassembled case of Chinese wireless headphones for $4 looks like.
If everything is in order there, the wires are not torn off, then the problem is either in the board or something with the battery. If you have a special tester, you can ring the contacts and measure the voltage in the battery. Perhaps it will be possible to figure out something and find the reason.
How to connect i12 TWS to mobile phone
To connect the i12 TWS wireless headphones to the phone, we must take them out of the case. This model perfectly “understands” what space it is in. As soon as you pick up the headset, it will automatically go into pairing mode. And on the case you will see a flashing indicator.
Take your smartphone and open its settings:
- Select the Bluetooth section here to set up the connection;
- Find the headphone model in the list by name - i12 TWS;
- Select it and confirm the connection.
Now you can control your music using a button on the body of your wireless earbuds. Click on it once and the player will start playing. If you press again, playback will stop. The Chinese device even allows you to call Siri, a virtual assistant. To do this, you need to press the button and hold it for about 2-3 seconds. Use any charged earphone.
And also adjust the volume without manipulating your smartphone. By pressing the left i12 quickly 2 times on the body, the sound volume will decrease. If you press the touchpad on the right earbud 2 times, the volume will increase.
This way you don't have to take your phone out of your pocket to adjust the volume. Change it directly on the headphones.
This may be useful: How to distinguish original Airpods from fake ones.
Is it possible to completely discharge the battery?
Technically, there is nothing wrong with completely discharging a Li-Ion battery. If you don't do this constantly, everything will work fine and the battery will last you a long time. However, if you are going to stop using a smartphone or other device with a built-in battery for some time, it is better to charge it to 50 percent. This will be the most gentle mode for the battery. By the way, Apple also warns about this on its website.
In any case, although batteries have their own characteristics and limitations, it is quite difficult to ruin them before you want to change the device. And replacing the battery is not that expensive. Even those few thousand rubles that they will take from a branded service become a very small amount if they are spread over three years.
Checking AirPods contacts and charging ports
Do you clean your AirPods regularly? Many headphone owners don't do this, which can lead to slower charging or no charging at all.
As with any electronic device, external connectors can collect dust and dirt. Dirt accumulates on the charging contacts and prevents the device from charging.
Tools to Clean AirPods Contacts
You will need a soft-bristled toothbrush, a clean microfiber, and an interdental brush.
First, look at the charging contacts on your AirPods case. Clean the connector using a soft-bristled toothbrush.
Use a soft-bristled toothbrush to clean the charging port on the case.
Once you have cleaned the outer contact on the case, check and clean the inner contacts using an interdental brush.
Read also: 6 best gaming laptops of 2022
Clean the internal contacts on the headphone body
Use 70% isopropyl alcohol and a clean microfiber cloth to clean the headphone charging port. Do not pour liquid into it.
Check and clean the ends of the headphones to remove dirt from the contacts
Use a soft toothbrush to get inside the charging ports
After cleaning, put the headphones in the case and charge for 15 minutes. Check for a charging icon on your iPhone.
In most cases, problems are solved after cleaning the dirt.
Connecting wires without a soldering iron
If the user wants to do without a soldering iron to repair torn headphones, he can use solder paste, solder, or make a reliable twist.
Solder
You can fasten wires with solder without the help of a soldering iron. For this you need a small metal container. You need to put a small amount of solder in it and also add rosin. Now you should light the stove, place the dishes on it and melt its contents.
Next, you need to lower wires of the same color one by one into the solder and run them along a wooden block so that the substance is distributed evenly. You can perform the same steps and remove excess solder using a simple rag. Next, the wires are connected together, after which you need to wait until the material hardens. After this, the exposed sections of the wire must be insulated using heat shrink tubing or electrical tape.
In the same way, you can solder a wire if it breaks at the plug or near the earphone. In this case, you need to pour crushed solder and a little rosin onto a flat surface (contacts), and then heat it so that the substance melts. After this, the material is evenly distributed with any convenient object and the prepared wire with applied solder is applied to it.
Another convenient way to solder two wires together without a soldering iron is to use foil. The action diagram is as follows. It is necessary to remove the top braid from the cable, and then remove the insulation from the contacts (usually varnish with thread). Next, you need to cut strips from the foil along the width of the exposed wires. They are used to make grooves into which contacts twisted in pairs are placed separately. Solder and rosin are poured on top of them and distributed evenly along the surface. Now you need to wrap the foil tightly around the wire so that there are no gaps, and heat until the solder melts
Next, the foil is removed, and the wires are tightly compressed with pliers, but this must be done carefully so as not to damage them. Excess solder can be easily removed with fine sandpaper
Solder paste
Solder paste is more often used than regular solder to repair broken wires without a soldering iron. This process is faster and easier than working with solder and rosin.
To repair headphone wires, you need to coat the exposed contacts with paste, connect them together and heat them over an open fire or in any other way. With this connection, soldering occurs deep between the wires, so its strength is significantly higher than when using solid solder.
Twist
Twisting the cable is the simplest solution. You need to take two identical wires with a length of 2 to 4 cm, connect them together and braid them, after which you need to put a heat-shrinkable tube on top or wrap electrical tape. The connection should be very strong, but do not tug the cable too much during operation. If everything is done correctly, the headphones will last for a long time.
Membrane damage
As a rule, this is a problem with large models that are often subjected to mechanical stress. Drops may cause the speaker membrane to become deformed or cracked. If you determine that the problem is not with the cable connection, then perhaps the problem area is the membrane.
Unfortunately, you can correct only slight deformations in the form of concavities on your own. As a rule, light pressure is enough for the membrane to regain its shape. But if it is cracked, the headphones need to be repaired by professionals (if they are expensive enough). There is no point in taking budget models to a service center - new ones are easier and cheaper to buy.