Navitel maps are a popular navigation solution that is built into many navigators. Over time, the role of individual devices for building routes was replaced by mobile phones, where the official application of the same developer is also available. With its help, you can find the best path to a specific address without connecting to the network, as well as learn more about the city’s road network.
You can download both the navigator program and maps for it. Some functions are free, but access to detailed data about some regions is provided only with a paid subscription, which can be purchased through tools compatible with Google Play Market: bank cards, PayPal and SMS payment. Even more payment options are presented on the Navitel website: Yandex.Money and QIWI e-wallets are supported there, however, a detailed description of the benefits of the full tariff does not fall within the scope of this article. And if you don’t know how to install Navitel maps on Android, but you need this software on your smartphone, we suggest you read our instructions.
Installation
First you need to go to the manufacturer's website. You can use any other tracker, since users post many links and files to this resource. It is important to remember that Navitel maps of the slightly outdated third version will not fit the updated fifth version of the navigator. This is because newer versions carry much more weight (due to the greater amount of information they contain).
So, next you need to select the necessary maps: for all of Russia, or for individual regions. The new options are suitable for all operating systems on which the Navitel navigator operates: Android, Symbian, Windows Mobile. The folder with maps is located the same on all systems.
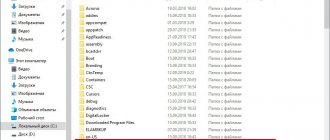
If they were downloaded in an archive, then the next step is to unpack them to any location. To do this, you need to connect the device to a computer or laptop. Through Explorer you need to find a special folder, it is called NavitelContent/Maps. All maps that were downloaded earlier should be copied to this directory. If desired, they can be sorted into separate folders.
Benefits of the official version
When the program is installed, it needs to be registered on the official website. This application has a shareware status. After successful registration on the site, paid, more advanced versions will become available, which will always be up-to-date. The official paid program supports all maps that the user has downloaded. In addition, it is constantly updated. Its cost is low, only about 600 rubles.
To install the program from the official website, you need to specify the device type and operating system in the download parameters. Once the application is downloaded, you just need to launch it and it will start working on its own.
Depending on the type of device, the installation process may vary. More detailed instructions can be found on the official website.
Settings
After the necessary files have been downloaded, you should launch the program. Ideally, she will independently discover the maps and compile an atlas. If this does not happen, you should go to “Menu” - “Settings” - “Maps” - “Open atlas”. Here you need to select the options that will be needed and click the “Create atlas” button.
As you can see, installing Navitel cards is not a long and complicated process. And you can do it even easier. Maps can be updated automatically. To do this, you just need to enter the menu, select “Settings”, then “Map”, click “Check for updates”. After the program connects to the server, you will receive a notification about a possible map update. All you have to do from the list is select the ones you need, then click “Install”. When the maps are updated, the atlas will also be updated automatically.
Application Licensing
So, within 7 days you can use the application for free. If you plan to continue using it in the future, you need to buy a license. This can be done in two ways:
- through the Navitel website;
- in the installed application.
When purchasing through the site, register and go to the Navitel purchase page:
- Select a package.
- Then fill in “Buyer Details” and select “Payment Method”.
- You will receive a key that activates the cards according to the selected package.
- Go to the Navitel application on Android in the section: “Menu” - “My Navitel” - “Buy cards” - (select your option) - “Activate” - “Enter the license key”.
- To purchase a card license in the application, select “Buy”.
After purchasing a license, you can add a device with Navitel in your personal account. This will simplify the licensing task and help activate cards on the device automatically.
Important! The resource administration does not recommend using repacks of the Navitel application. Hacked programs may contain malicious code that will damage your Android device or transfer your personal data to third parties.
Introductory part
First and foremost! The maps posted by us are not official maps for Navitel Navigator, do not require registration, and are not intended to work in the atlas along with official maps from Navitel.
Therefore, it is not recommended to place them in the folder of official maps that you purchased along with the program, or that come with your navigator! The consequences of this will be the appearance of duplicate objects during the search, as well as the probable refusal of the program to plot any route other than in a straight line!
However, some of the maps we have posted are quite friendly with each other, and they can be used in one atlas. You can find out whether the cards are agreed upon or not, either experimentally or by asking on our forum.
If you need a map of all of Russia (for a long trip, for example), but you don’t have the desire or time to find out whether all the cards you need work with each other, you can use one of two options:
1. Atlas of the Commonwealth of Independent Projects. Created from alternate maps of different regions, tested to work well with each other. Attention! Maps included in the atlas may be older than those posted separately.
2. Atlas of Russia from data from the OpenStreetMap project. Some regions on it may not be very detailed, but this is the best option for a long trip route, since the map was originally created as a single whole. Due to the large size of the map, due to possible problems with indexing and slowdowns during work, it is recommended to leave maps of only the necessary regions in the atlas.
So, we're done with the theoretical part, let's move on to practice.
Completely manual update
Most navigators are updated only in “manual mode” - using releases distributed on CDs, memory cards or via the Internet. Reflashing can be carried out both independently (usually by owners of portable navigators) and at specialized services, if we are talking about standard car navigation.
Pros: in operation, such devices are completely autonomous and do not depend on mobile communications and the Internet: satellites are visible from any part of the globe, and maps are contained in the memory of navigators. Since there is no need to load information from outside, the speed and reliability of the device depend only on the built-in satellite receiver and processor.
Cons: You need to regularly check and install updates to the program and maps. Often both are paid services. Before traveling to another city or country, you should take care of the appropriate map.
Do you use plastic or virtual cards?
PlasticVirtual
Installing maps on Navitel Navigator
Next, we’ll look at how to install Navitel Navigator itself and load maps of certain countries and cities into it.
Step 1: Install the application
Before installation, make sure that your phone has at least 200 megabytes of available memory. After that, follow the link below and click on the “Install” button.
To open Navitel Navigator, tap on the icon that appears on the desktop of your smartphone. Confirm the request to gain access to various data on your phone, after which the application will be ready for use.
Where to find the program
You can download the application from Google Play. To do this, just enter the name of the service in the browser search engine.
If installation is intended to be installed on a navigator in a car, then the saved file can first be placed on a flash drive, and then manually downloaded to the device itself by inserting a USB drive into it. In order to install the program, the navigator can be connected directly to the computer. You just need to create a folder for maps in the root partition on the disk that opens.
In addition to Google tools, any version of the program can be downloaded immediately from the official website. They will provide a trial version.
If you have a Samsung
Korean Samsung also has its own proprietary application for data transfer. It’s called Smart Switch and is already preinstalled on all modern smartphones of the company, but you can download the program, if one of your phones was not produced by Koreans, from the Google Play Store.
The program interface also does not raise any questions even for a beginner. From the very beginning, you are taken to the transfer direction selection screen, after which you are asked to indicate the type of old device (Galaxy or Android, iPhone/iPad or, what the hell, Windows Phone).
After that, specify the connection type (cable or wireless), select the necessary data to transfer and begin the procedure. Moreover, the most convenient thing about this method is the ability to transfer data via cable, which significantly speeds up the transfer process.
How to transfer data from Android to Android: 7 methods for different devices
Transferring data from an old Android smartphone is much easier than many people think. Let's figure out how to do this.
After purchasing an Android smartphone, we are faced with the full problem of transferring data from the old smartphone to the new one. Fortunately, it concerns not only ordinary users, but also manufacturers who are directly interested in making such a transition as painless as possible.
In today's article we will look at several simple and quick ways to transfer data from Android to Android, some of which are provided by the manufacturer of your new gadget, others by Google itself, and others depend only on you.
If you have Huawei
If your old or new smartphone was produced by the Chinese Huawei, then you will not be able to transfer data through your Google account. But this is not to say that this will make the transfer process much more complicated.
You need to download and install the Phone Clone application on both smartphones. First, run the app on your old device and give it all the necessary permissions. After this, you will be asked to scan the QR code on your new smartphone. Launch the program on your new gadget, receive the corresponding QR code and synchronize your smartphones with each other.
After that, select the data that you want to copy to the new smartphone and start the transfer process.
As you can see, there is nothing complicated in working with Phone Clone, although the method itself is only suitable for transferring data to a Huawei smartphone.
If you have Xiaomi
This synchronization method is in many ways similar to working through a Google account, only instead of the latter, the Mi Cloud is used. To work with it, log into your Mi account from both smartphones, select the data you want to copy from your old device and start the synchronization process.
The main disadvantage of Mi Cloud compared to Google is that you are only given 5 GB of cloud storage for backups and data recovery. And, given that Xiaomi smartphones also support synchronization through a Google account, there is simply no point in using the Xiaomi cloud service.