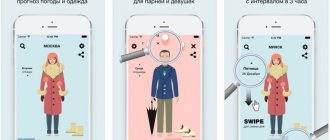
I was surprised to discover that not all users know how to properly configure the standard Weather application on the iPhone, despite the fact that the program has a minimum of settings in its arsenal. In today’s article, we’ll look at how to teach your iPhone to show the weather automatically, depending on your location, and look at a few more useful features.
You can select the required application for your device in the improved iOS application catalog. Applications are distributed by rating and categories, which makes searching easier.
How to enable automatic weather detection on iPhone
1. Go to settings, then privacy section
2. Select Location Services and click on “weather”
3. Of course, the “never” option is of little interest to us, so I’ll explain why the “always” option is superior to “when using the program.” If you constantly use the geolocation services program, you will always have the most up-to-date weather forecast, but the battery life of the device will be reduced. If the second point is activated, the forecast data will be updated only after the launch of “Weather”.
At the same time, there is always the opportunity to add cities whose weather interests you.
Internet connection failures
If a weather app won't load or won't show the temperature in a certain location, it could be due to a poor internet connection. As we already said, this application uses third-party data received through this connection. Make sure you are connected to a Wi-Fi network and that it has good speed. If you have mobile data, check your speed as well. In any case, it's a good idea to try searching the web using Safari to make sure everything is ok. If there is a problem with your Internet, you should contact your company to help you resolve the issue.
How to add a city to the weather app on iPhone
1. Open the application 2. Click on the list icon in the lower right corner of the screen
3. Now click on the plus and enter the city, airport or zip code
4. Select the desired option and see it in the general list
5. Detailed information about the weather in a specific city can be found by clicking on the corresponding name and scrolling through the list of parameters.
In this way, you can “drive in” up to 20 cities, a very convenient function, especially for travelers. By the way, deleting unnecessary cities is even easier.
Weather widget glitches
With the arrival of iOS 14, the version that brought new features to the widget, there were some problems with the Weather app specifically. Usually the error is that the data is not displayed or the widget appears completely black. If you have already checked for updates and restarted your iPhone as mentioned in the previous points, you can try deleting the widget and putting it back . Thus, the problem is usually solved almost always, but if not, you will have to wait for an iOS update or, in the worst case, format the iPhone and set up without a backup. In the latter case, you should know that you will lose all your settings, although you can keep a number of data, such as photos, calendars or notes, which sync with iCloud (you can check this in Settings > your name > iCloud).
Eligibility for the program
You'll only receive notifications for rain, snow, hail, or sleet through the Weather app on iOS in a limited number of regions. In its official iOS 15 features page, Apple said that only users in Ireland, the UK and the US will be able to receive notifications about upcoming precipitation on their iPhone.
This means that if you live somewhere other than the above-mentioned countries, you will not be able to receive precipitation notifications on your iPhone. The only way to check whether it will rain or snow in your area if you are in an unsupported region is to open the weather app and swipe the weather map for your preferred location.
We expect this to change as future iOS 15 betas become available, and we may see a longer list of supported regions by the time Apple releases stable iOS 15 to the masses.
Moisture ingress
Usually, after moisture gets in, other problems appear: the screen turns off or turns completely white. However, the display can also become multi-colored - water will paint the screen in all the colors of the rainbow.
What to do in this situation:
- Turn off your phone immediately. Do not turn on the phone to check if it works, do not connect the charger.
- Remove covers, protective glass and other accessories.
- Disassemble the device, collect moisture with napkins, and place it to dry in a draft.
- The most effective way would be to dry the phone in a special way. You can read about this on our website here.
Submerging your phone in rice will only help if your iPhone has only had a superficial swim and has not been completely submerged in water. You need to leave your smartphone in rice for a long time; the moisture will not be absorbed within 1-2 hours.
Drying in rice
Do not dry your phone in direct sunlight, on heaters or radiators. It is also not recommended to use a hair dryer - the air flow will drive water around the body. The right decision would be to contact a service center: specialists will disassemble the smartphone, remove moisture and clean the components from corrosion.
Reset inaccurate screen time estimates
One solution to resolve Screen Time errors is to reset Screen Time, which causes Screen Time to start being calculated all over again.
Please note that this will cause you to lose all previous Screen Time data. Some users report that Screen Time quickly goes awry again anyway, so if storing Screen Time data is important to you, this may not be the best solution as it is a temporary solution for some users.
- Open the Settings app and go to Screen Time.
- Scroll down and select Turn off Screen Time.
- Toggle "Turn on Screen Time" back to the "on" position.
This will reset all screen time data and app and website time calculations on the screen, as well as usage data and all other device usage data.
For some users, this completely solves the problem, while for others, the problem soon returns again and the screen time returns to the erroneous data message.
Since this is likely a bug, keep an eye on future software updates for iOS and iPadOS system software, as the bug will almost certainly be fixed in the next update.
Are you having trouble with erroneous screen time displays for apps and web pages? Did the solutions mentioned above fix the problem for you? Have you found another solution? Tell us about your experience in the comments.
What is the air quality index?
The Air Quality Index (AQI) is a numerical measure of the regional outdoor air quality in your area. Each country has its own way of determining air quality.
For example, the Air Quality Index in the United States is defined by the EPA as a composite scale from 0 to 500 that combines information on five different pollutants (ground-level ozone, particle pollution, carbon monoxide, sulfur dioxide and nitrogen dioxide) into one index.
The US AQI is divided into six categories, each with a different color. An AQI above 100 means the air quality is hazardous for vulnerable groups. As the AQI rises, the number of people affected by poor air quality increases.
color
|
Countries such as the United Kingdom, Germany, and India each use their own Air Quality Index methodology, but the color codes are similar to those in the United States. There are too many options in AQI systems to list them all here, so be sure to research your area's AQI to understand exactly how it works.
Regardless of the country, the purpose of each ACI is the same: to allow you to quickly see whether the air in your area is safe to breathe.
Incorrect assembly
If stripes appear after replacing the battery, display, touchscreen or other phone components, this may be due to:
- Replacement of not all failed components.
- Incorrect assembly of the device. The case uses screws of different sizes; if you mix up their location, you can easily break through other components.
As with other hardware problems, it is better not to try to fix the problem yourself, but to go straight to a service center. Otherwise, you can bring the phone to such a state that the white stripes on the screen seem like a minor malfunction.
Video lessons we have selected for you:
What to do if the weather widget does not work in iOS?
Many iPhone users have reported to Apple support that the weather widget does not work on iOS. Before we try some drastic solutions, let's start with simple fixes so that you don't lose your data.
Removing and adding a weather widget
A weather widget can work when you remove it from the list and re-add the same widget to your phone.
Step 1: Swipe the screen to go to the lock screen.
Step 2: Now you need to scroll down to the end and click on Edit.
Step 3: Next, make sure the weather widget is added. If you haven't added it yet, click on the "+" to the left of it.
Step 4: Now click on “Done” at the top to confirm.
Note. If you've already added a Weather widget, tap the red button to remove it, then tap Done to confirm. After that, reboot your device and add the widget again.
Step 5: Then reboot your device. Simply press and hold the ON/OFF button and the Home button until the Apple logo appears on the screen.
To hard reset your iPhone 7/7 Plus, press and hold the Volume Down button and the ON/OFF button at the same time. For iPhone X, press the volume up, then down and hold the power button for ten seconds.
After your device restarts, go to the lock screen to check whether the Weather widget has started working or not.
Allow weather to use both Wi-Fi and cellular data
To ensure the weather always appears, you'll also need to allow Weather to use both Wi-Fi and cellular data. Go to Settings > Cellular, scroll down to Weather and tap it, then select Wi-Fi & Cellular Data.
Then restart your phone and check if the widget is updated.
Enable "Background weather app refresh"
Let's make the Weather app update its data in the background. This can help the application run smoothly. Open the Settings app → General → Make sure Refresh Content is turned on, and then turn on the switch next to the Weather app.
Then reboot your device. Once your iPhone restarts, check if the widget is working.
Allow the Weather app to always access your location
When you allow the Weather app to always access your location, the weather will always be updated. But if you select "While using the app", it only updates when you open the app. So be sure to select "Always".
To see the updated weather, you need to set your settings to “Always access your location”, do this by following the steps below.
Step 1: Open Settings → Privacy app.
Step 2: Click Location Services.
Step 3: Tap on “Weather” and select “Always.”
Then reboot your device. Once your iPhone restarts, check if the widget is updated.
Uninstall the application and reinstall it
If the weather widget is still not working properly, it's time to uninstall the app and install it again. Just touch and hold the app and when it starts to vibrate, press the X and then confirm.
Go to the Apple store and install the weather app again.
Update to the latest version of iOS
The last easy solution if the weather widget isn't working is to update your iPhone to the latest version of iOS. To do this, go to Settings > General > Software Update to check for iOS update. If a software update is available, download and install it on your iPhone.
Your phone will restart automatically and your weather widget should start working.
Reset location and privacy
Weather widget still not updating? Try resetting location and privacy, but use this as a last resort. Also make a backup copy just in case.
Step 1: Tap Settings → General.
Step 2: Click Reset.
Step 3: Now click on “Reset Location & Privacy” and confirm.
After this, your phone will reboot. Once your iPhone restarts, check to see if the widget is visible.
Reset all settings
I am sure the methods mentioned above will help you. However, if this is not the case and the weather widget is still not updated, then I cannot stand aside and not help you. If you are unable to fix this problem, then it is time to take a firm decision and try to reset all the settings completely, which means you must restore the factory default.
When you reset your iOS device to factory settings, all your Wi-Fi logins and passwords will be deleted. But your data and media will remain safe. (Be sure to make a backup).
Step 1: Open the Settings app on your iOS device → General.
Step 2: Click Reset.
Step 3: Click "Reset all settings" and confirm your choice.
Afterwards the phone will reboot and the widget should work.
Weather programs in the App Store
The app store offers a wide variety of utilities that provide information on precipitation. If it seems that another application produces more refined and high-quality data, you can always replace the standard Apple application with something else. The difference lies in the servers from which the data is taken, plus, setting up such utilities is usually no more difficult than a standard weather application.