All modern phones, some all-in-one PCs and laptops use a touch screen. We have made an online check that does not require installation on your phone, tablet or computer. An online touchscreen test allows you to find out if there are false (or phantom) sensor activations, dead zones on the screen where there is no sensitivity to pressure when pressed with a finger or stylus. Testing the touch screen will also help when purchasing a device to check its functionality when third-party programs cannot be installed.
Start touchscreen testOpens in full screen
Why calibrate your touch screen
Touch screens on Android devices occasionally require the user to calibrate or make other adjustments. Touch screen failures will most likely be caused by hardware problems that cannot be fixed: screen damage, chips, or sensor failure. However, calibration should not be ruled out as it may be useful in some circumstances.
- Calibration is recommended after the gadget has been dropped, dropped into water or otherwise damaged, as well as after replacing the screen.
- Calibration will help adjust the sensitivity of the touchscreen, especially if it is being affected by something else.
- Some types of screen protectors affect the responsiveness of the touch screen. This is a problem that calibration can improve.
- It makes sense to calibrate older devices where the technology is not as advanced and calibration may have a more noticeable impact.
In other words, touchscreen calibration certainly won't hurt, no matter how old the phone is, and older devices will likely benefit even more from calibration.
Testing the touchscreen
Dead pixels on your phone are not the only problem with touch screens. The touchscreen, thanks to which the screen reacts to touch, can also “hurt”. Damage to this part of the device occurs due to unscrupulous manufacturing (more often found among unpopular small manufacturers of inexpensive equipment), impacts, poor-quality repairs, cracks and
squeezing the screen, using the gadget in extreme temperatures, getting into water.
A touchscreen is a device's touch screen, touching which is detected by the controller and causes the phone to react to the touch.
If you have any questions, please let us know Ask a Question
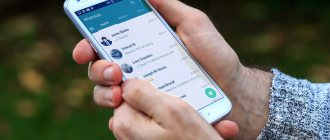
You can usually check the operation by pressing different parts of the phone and observing the reaction. The operation of the touchscreen and the smoothness of movements are well demonstrated by the use of gestures such as:
- Continuous message input. (The keyboard function is not available on all devices; in the Messages application, go to the keyboard settings; if the option is supported, you will immediately see how to connect it);
- Pull-out “curtains” with settings and shortcut keys;
- Receive, reject a call (On many devices you need to drag the icon from one part of the monitor to another)
- Browser scrolling.
If using gestures something did not work out the first time, or the responsiveness of the screen was not smooth, the touchscreen is most likely damaged.
Calibration Applications
On the Internet, in particular on Google Play, there are a huge number of services to solve this problem. They are easy to download and use, and are guaranteed to give the desired results. Let's look at some of them.
Touchscreen Calibration
Calibration consists of 6 tests and allows you to find out how sensitive the touchscreen sensor is.
- Download the Touchscreen Calibration app
- After installing the application, launch it.
- Tap the big blue “Calibrate” button.
- Follow the instructions provided by the utility.
- Perform actions on the gray rectangle (tap, swipe, zoom and other gestures).
- The Accuracy status as a percentage indicates the accuracy of the calibration.
- Passed tests are marked with green rectangles.
- At the end of the process, the program will issue a notification that calibration is complete.
- Reboot your phone to complete calibration.
Power Bubble
It has a clear interface and a number of additional features. The advantages of the application include:
- free;
- compatible with both tablets and phones;
- ability to disable advertising content;
- good graphics;
- ease of use;
- ability to lock display orientation (horizontal or vertical);
- using full screen mode;
- ability to load the program onto an external memory card.
To calibrate your Android sensor using Power Bubble, just follow a few simple steps:
- Run the program.
- Through the settings, fix the orientation of the gadget screen. You can select automatic mode, then the application will perform this task independently.
- Perform level calibration. To do this, place the device in a horizontal position and press the calibration button (on the left of the display). “Calidbration” and “Wait” will be displayed.
- When the degree value is zero, you can begin tuning.
Quick TuneUp
- Download the program to the device.
- Launch it.
- Click on “Display Calibration”.
- Wait for the process to complete and reboot the device.
There are other utilities recommended for display calibration.
TouchScreenTune
Allows you not only to optimize the operation of the touch screen, but also to increase its sensitivity and response speed. Benefits of the application:
- The program is free to download.
- Increases the sensitivity of the touchscreen in the presence of a protective film.
- When using the stylus, you can set the mode to completely ignore hand touches.
- Allows you to create shortcuts for quick activation.
Clinometer
A professional utility designed for iPhone or iPodTouch. Has the following advantages:
- Provides full screen mode.
- It has advanced two-way calibration, which allows you to adjust the gadget even on an uneven surface.
- Free.
Browsing through solid colors
One of the most common methods. You need to download multi-colored pictures to your phone and look carefully to see if there are dark or, conversely, white sectors in them. I'm not a fan of downloading junk onto your phone, so I suggest looking at the tone data online.
For example, let’s go to Yandex Images and enter “Solid colors”, after that we’ll check them carefully.
But this method does not allow you to stretch the color across the entire screen; you need to download the colors to your phone and view them. You can also select, for example, “Green color” in Yandex pictures and start scrolling through different shades of green, at the same time checking for bad sectors. This is also a useful feature.
Calibration via settings
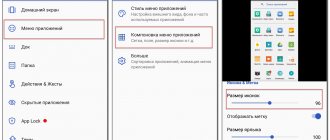
Many touch gadgets have built-in services for customizing the touchscreen. As a rule, they are located directly in the settings menu. To use these utilities, you need:
- Enter the “Settings” menu.
- Open the “Phone Settings” tab.
- Click on the line “Calibration”.
- A cross with a dot inside will appear on the device display. To complete the process, you need to click on this point three times.
As a result of these manipulations, the gadget will remember the touches. However, it is better to check the functioning of the sensor: when you touch any symbol on the display, it is the one that should be displayed.
Monteon service
This service is a complete resource that allows you to test screen calibration. Using the service, you can test various phone screen settings. It will be possible to test using flicker, clarity, gradient, and color rendition of the screen. Let's move on to Monteon.
To start testing, click on the “Start” button.
- You will have to log into Monteon through a browser. So we clicked the button and we got a set of different vertical colors. We review them carefully;
- You can choose a special grid with black color to make it clearer where the dead pixel is located, and whether there is one at all;
- At the bottom there is a context menu, using which you can select a specific function;
- To select different shades, such as gradients, you just need to swipe from left to right (or vice versa) and carefully look through all the shades of colors.
Monteon is an excellent service for testing for bad sectors. Although, in my opinion, it is more convenient for computers than for smartphones. But, if you try, you can view the phone screen quite carefully, using various functions, from flickering to dynamic texts and so on.
Is your PC broken and you are no longer able to work on it normally? It's not a problem. You need to contact our computer repair center. We will diagnose and fix the problem. It is important for us that your PC continues to function perfectly, and that nothing distracts you from doing what you love: Our offer: 1 Free visit of a specialist; 2 Free computer analysis at your home; 3 We provide a warranty after repairs of up to three years; 4 We issue a check with a warranty card. All you have to do is leave a request and we will give you a 15% discount
Setting up the display using the engineering menu
Many devices from the most famous manufacturers contain a special engineering menu. It can be used to make various settings. To call such a menu, you need to enter a certain combination of numbers and symbols. For each specific model it is different, for example:
- Samsung – *#*#4636#*#* or *#*#8255#*#*
- HTC – *#*#3424#*#* or *#*#4636#*#* or *#*#8255#*#*
- Sony – *#*#7378423#*#*
- Huawei – *#*#2846579#*#* or *#*#2846579159#*#*
- Fly, Philips, Alcatel – *#*#3646633#*#*
As a rule, the engineering menu is written in English. After activating it, you should:
- Enter the Hardware Testing item.
- Find the Sensor tab, and in it Sensor Calibration.
- In the window that appears, click the Clear calibration button. This action will reset the previous sensor settings.
- Perform calibration by clicking on Do Calibration.
- Leave the menu by selecting the “Back” command.
If you couldn’t call the engineering menu or you don’t know the code that activates it in this gadget model, you can use programs designed for this to calibrate the Android screen.
How many dead pixels are allowed on a phone?
The acceptable number of broken pixels again varies depending on the price category of the product and its manufacturer. Responsible companies do not allow such malfunctions. Devices equipped with OLED displays may have one dead pixel. Matrices from manufacturers Panasonic, Philips, Samsung, LG, Sony may have 0.3% of the total number of damaged pixels. A dead pixel on a phone is a warranty case if several faulty diodes are located within 1 square centimeter.
Possible calibration problems
If using any of the above methods does not produce results, experts advise choosing another utility, of which there are a very large number on the Internet. You can also perform a normal reboot and see how the device behaves.
The worst possible scenario is that problems with the touchscreen are not due to incorrect settings, but due to more serious reasons, for example, a manufacturing defect or hardware failure. In this case, to properly solve the problem, it is recommended to contact the manufacturer’s service center consultants.
It should be remembered that in most cases, for ideal operation of the sensor, in addition to calibration, it is necessary to check and adjust the sensitivity parameters.
Checking the main camera
Click on "Mega Cam" to check your main camera. Use the volume buttons to zoom in or out, then tap the camera button at the bottom of the screen to take a photo. Please note that by default the flash is on and your test photo will also be saved to your gallery. When you are finished testing the camera, press the Back button to exit to the main diagnostic screen.
Why don't we notice flicker?
The effect that causes us to not notice flicker is called the flicker fusion threshold. Human vision is designed in such a way that if you make a picture flicker at a frequency of about 60 Hz, the brain simply stops perceiving it as flickering.
This, by the way, was successfully used in cinema on the threshold of its discovery. During the screening of films of those times, the film was played at a speed of 24 frames per second. At the moment of changing frames, so that people would not notice the moment of rewinding on film and the video would be smoother, filmmakers artificially blocked the light after each frame. But this led to another drawback - the picture began to flicker.
To level out this effect, it was decided to overlap the image twice - not only during frame changes, but also in the middle of each frame. As a result, the brain practically ceased to perceive flicker.
Display Tester
This application offers a complete screen testing kit: detailed information about the mobile device's display, touch count, checking for damaged pixels and much more, right down to graphics drivers.
However, the free version contains some limitations and to access all the features you need to buy the PRO version.
Display Tester
Price: Free
How display brightness decreases
Technically, reducing screen brightness can be achieved in two ways. The first is to reduce the voltage supplied to the LEDs. It is logical that the less voltage is applied to the screen, the dimmer it becomes. But due to some features of OLED displays, this greatly affects the picture quality. The so-called “murah” effect occurs. This word is borrowed from Japanese and means “unevenness.”
On displays that only use this dimming method, you may notice that when displaying black or a gray gradient, some corner or area near the edge of the screen appears brighter or darker than other areas.
In order to avoid this negative effect, manufacturers have come up with a second way to adjust the brightness - to apply voltage not constantly, but at intervals.
This was achieved thanks to pulse width modulation, or PWM for short. The voltage to a PWM display is supplied in bursts at a specific frequency and pulse width. The number of pulses per period of time, or frequency, is a constant value and on most OLED displays it is set by the manufacturer from 100 to 400 Hz. But the pulse width or the so-called Duty Cycle can be changed to adjust the brightness. This indicator is measured as a percentage.
If, for example, you reduce the duty cycle to 50%, then the backlight of each pixel will work for half of the working interval, and turn off the rest of the time. The human eye, not noticing the flicker, actually perceives it as a decrease in brightness by 50%. But it turns out that this method has a “other side of the coin” - the lower the brightness, the more the display flickers and the more harmful it is for vision.
Front-camera
To check the front camera, simply click on the "Front cam" button to get started. This will activate the front camera and allow you to take selfies as usual. Remember that any test photos you take will be automatically saved to your phone's gallery, so be sure to delete them if they are purely for testing purposes. When you're done testing your selfie camera, tap the back button twice to return to the main testing page.
Sensors
Clicking on the "Sensor" button will open a test page for a variety of sensors, namely: accelerometer, proximity sensor, barometer, ambient light sensor, gyroscope, magnetic sensor, HRM and fingerprint scanner . I'll cover all eight of these submenus in separate sections below.
Accelerometer
Accelerometers are very important sensors that are used to determine the orientation of the phone, primarily to measure the linear acceleration of movement. To test its functionality, click "Image Test" to test landscape-portrait transitions, or "Graph" to measure how well the sensor detects motion by shaking the device up and down.
Proximity sensor
This checks your device's proximity sensor, which is responsible for turning off the screen when your phone is placed in front of your face during a phone call to prevent accidental touches. To test this feature, simply cover the top of the phone with your hand. The screen should now turn green if the proximity sensor is working, then remove your hand so the screen turns white and move on to the next test.
Barometer
This sensor is primarily responsible for tracking altitude and helps give more accurate GPS readings. Testing this feature is simple - just click on Barometer Self Test to run an automatic test that will instantly tell you whether it's working or not.
MultiTouch Visualizer 2
A simple touch test. Unlike many similar applications, MultiTouch Visualizer 2 clearly intercepts any touch. When the definition areas overlap and the points coincide along the location axis, there are no freezes. Interaction with the sensor takes place on a hardware basis, so you don’t have to look at the artificial limitation - the application reads as many touches as the device’s touchscreen allows. Among the additional functions, MultiTouch Visualizer 2 can determine the distance between two touch points and the length of the zoom pinch. Although the application is not new, it is very reliable, and it is distributed completely free of charge, even without annoying advertising banners.
Pros:
Source