The built-in memory in smartphones is not always enough for use, which is especially true for owners of inexpensive models with storage capacities of 8, 16 and 32 gigabytes. Many devices have the ability to expand free space using a MicroSD card, which can be purchased separately. We have previously told you how to install applications directly onto an SD card, and in this material we describe how to activate a memory card on your phone and what is needed for this.
If at the time of reading this article you have not yet purchased a memory card, you should immediately draw attention to the fact that some phone manufacturers are introducing the same slot for memory and SIM cards. This means that certain devices can work with two SIMs or only one, but together with a memory card. An example of such a model is the ZTE Blade 20 Smart, but the list of all such devices is not limited to one product.
How to make sure that applications are saved to the memory card?
In the event that you need to move applications to an SD memory card, use the instructions below: Open the menu, select “Settings” and then “Applications” and move any application to the SD card. To do this, simply click on the application and click on the “Move to SD card” button.
Interesting materials:
What to do if the computer asks you to press Ctrl Alt Del? What should I do if my computer asks me to format my external hard drive? What to do if your computer is slow? What to do if the computer reboots itself? What to do if the computer gets very hot and turns off? What should I do if my computer turns off automatically? What to do if the computer turns off by itself? What should I do if my computer turns off while playing? What to do if your computer freezes during the update? What to do if the computer freezes when rebooting?
If the smartphone does not see the memory card
Quite often, people complain that their Samsung phone does not recognize the memory card. Our expert is ready to provide several ways to solve the problem.
Hermann
Expert in the field of digital technologies and the activities of mobile operators. I am engaged in constant monitoring of industry changes in Russia and abroad.
Ask a Question
Question to the expert
Why doesn't Samsung see the card?
Usually the problem occurs because the user selects an SD drive that is too large (128 GB or more). And budget Samsung devices only support 64 GB cards.
I installed a suitable card, but the phone still does not recognize it. What to do?
If even in this case, Samsung does not detect the drive, then it needs to be converted to a specific format. Moreover, the operation must be performed on a PC. Connect the flash drive and click the “Format” button, selecting FAT32 as the format.
Why did the phone stop seeing the map after a few months?
This is a problem that is the fault of the drive manufacturer. Usually a similar situation occurs among those who buy cards from basement brands. It is best to choose memory cards from Samsung, SanDisk, Transcend and Kingston.
4.6/5 — (32 votes)
Which memory cards are suitable for an Android phone?
Buying a memory card is a responsible task for every user. Often people do not pay attention to the type of drive and its capabilities, which causes recognition problems.
Be that as it may, first you need to understand whether the smartphone supports the installation of memory cards. Modern models have a special slot for storage devices, which is combined with the SIM card tray. Most often, a flash drive acts as a replacement for one SIM card, but sometimes the carriage is full (2+1).
External storage, similar to SIM cards, is a card that has different form factors:
- SD is the first type of such card that continues to be used in photographic equipment;
- MiniSD is a format created for mobile phones, but is not popular now;
- MicroSD is the most popular type and is suitable for almost any Android smartphone with a memory card slot.
Mid-budget and flagship devices from Huawei (Honor) use a combination slot that only supports cards of its own NanoCard format.
As a rule, users do not have problems choosing a form factor. When choosing MicroSD, the buyer will not go wrong in 99% of cases. But what happens next is more interesting, since the cards differ in volume. Often, users take cards with the maximum amount of memory, thereby making a mistake. Budget devices do not support MicroSD over 64-128 gigabytes, which causes problems with recognition. You can find out the maximum card size that your phone supports from the included instructions or on the manufacturer’s website in the characteristics section.
The next point is the drive class. The speed of writing and reading data depends on it:
- Class 2 – 2 Mb/s;
- Class 4 – 4 Mb/s;
- 6th grade – 6 Mb/s;
- 10th grade – 10 Mb/s;
- UHS (class 1) – 10 Mb/s;
- UHS (3 class) – 30 Mb/s.
Classes 1-10 are supported on all smartphones without exception. But with the more modern UHS standard, everything is a little more complicated. Problems may again arise for owners of budget devices. This point must be clarified in the characteristics of the phone.
Important installation guidelines
At first glance, the SIM installation process is simple and allows you to complete the job without outside help
But there are a number of points that are important to consider:
- Before inserting the SIM card, turn off your Samsung. Theoretically, work can be done with the smartphone turned on, but it is better not to allow this mode. In the case of hot swapping, conflicts and errors are possible, which are best avoided.
- When dismantling and installing the card holder, try not to put pressure on the tray, because it is quite fragile and can be damaged. If you insert it into the connector correctly, there should be no difficulties.
- If the SIM does not fit, it must be cut to Nano dimensions or replaced by the operator. The first option is risky, because during the cutting process you can snag the microcircuit. In this case, the SIM card will become inoperative. It is better to contact your mobile operator and ask them to issue a new SIM version of the required size.
The reduction in SIM size is easy to explain. In this way, the manufacturer is trying to get additional space for more important elements (processor, battery, etc.).
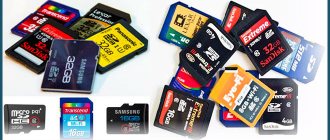
Types of memory cards
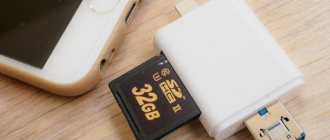
In appearance, memory cards come in only one type. Do not confuse a memory card with an adapter. The adapter is used to connect a memory card to computers; it does not contain information. The adapter looks like a memory card, but is much larger and wider. In one of the parts of the adapter there is a connector where you can insert a card, and then use the adapter to connect it to the computer.
Memory cards differ only in manufacturer, speed and type. Now almost all cards for smartphones are produced as MicroSD. There are also more advanced types SDHC, SDXC and so on. The main feature when choosing a memory card is its class. It is indicated on the card itself as a number from 2 to 16 (possibly higher) in a circle. The bigger, the better. The number means the number of megabytes transferred per second. For example, the number 2 means 2 MB/sec, the number 16 means 16 MB/sec. The best option is considered to be 10, this class is moderately fast and relatively inexpensive.
How to view the contents of an external USB drive through a file manager
Third-party programs are more convenient than internal ones and have wider functionality. Examples of successful applications:
- X-Plore File Manager is a free Russified program with a simple interface. There are no unnecessary options that slow down your work. To detect a flash drive, you need to open Settings and Allow access.
- Total Commander for Android - available: copying, moving, deleting without recycle bin, playing media files. To obtain additional functions, you need to install specific plugins.
- ES Explorer - automatically supports playback from NTFS flash drives. In addition to the main function - organizing files and folders - there is access to cloud storage and the ability to manage applications.
Total Commander and X-Plore allow you to enable NTFS support if you have the paid Microsoft exFAT/NTFS for USB utility.
A common advantage of third-party managers over built-in ones is uninterrupted contact of media connected via a cable with memory cards. Information from the phone to the USB drive and back is transferred freely, and the built-in file manager sometimes ignores memory cards.
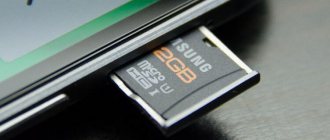
Connecting a flash drive to a smartphone or tablet
First, you should make sure that the device supports the OTG function. Phones running Android 4.0 and above are all equipped with this technology. Smartphones running earlier versions may not have the USB OTG feature. In order to make sure that this parameter is available on your device, you can use the special application “USB OTG Checker”. After installation and opening, the program will immediately show whether the device is compatible with USB OTG. Also, additionally, the utility will display basic information about the smartphone.
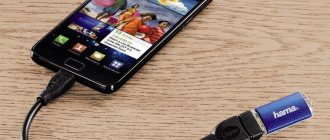
To connect a USB drive to the gadget you will need an OTG cable. On one side of such an adapter there is a connector for a phone, on the other - for connecting to a flash drive. There are also USB devices that can be connected to the gadget without using a special OTG adapter. These flash drives have a connector suitable for a smartphone.
To connect a USB drive to your phone, you need to connect it to an OTG adapter by inserting the external device into the appropriate port, and then connect the adapter to the gadget with the required connector. After this, the corresponding icon and a message about connecting the flash drive will appear in the notification line. Clicking on it will take you to the default file manager installed on your phone. You can open external media directly there and start working with its contents.
In the phone settings (the “Storage” block) there is a “USB storage” section. It displays information about the memory capacity of the flash drive, as well as the amount of free space at a given time. In the same block, you can safely disconnect the flash drive - the “Remove USB drive” panel, and clear all data on the USB device.
Attention! If the connected drive is not used for a long time, it will be automatically disabled and it will become impossible to view its contents. The corresponding icon disappears in the notification bar, and the flash drive will no longer be displayed in the file manager. To resume working with a USB drive, you must first disconnect the OTG adapter from the Android, and then reconnect the drive.
After finishing working with the flash drive, it is not necessary to disconnect the OTG adapter from the smartphone by removing the connector from the gadget. To disconnect external media, you can click on the “Eject” button located in the message about connecting external media. This notification is constantly located in the top line as long as the flash drive is used on the smartphone. The message will disappear as soon as the media is disconnected from Android.
Stage 1: Initial setup
In “pure” Android 10, the process of initially configuring a memory card is as follows:
Attention! Following the instructions below involves formatting the SD card, so before starting the procedure, make sure that there is no important or valuable data on it!
- After installing the card, a notification will appear in the device’s curtain asking you to configure it, tap on it.
- The configuration tool will open. The system will offer you to choose from two options: combining with internal storage or installing as a removable drive. The first option is recommended for phones or tablets with small amounts of internal memory (16 GB or less), while the second is suitable for all other cases.
- Regardless of the option chosen, you will be prompted to format the card, agree to this.
- After the formatting process, you will receive a message indicating that the device is ready for use.
This completes the initial setup of the memory card.
How to install a memory card in your phone
Having purchased a memory card, you can proceed to install it. First, let's look at the instructions for old and cheap devices:
- Remove the back cover.
- Open the slot latch (on some models the slot is located under the battery).
- Insert a memory card.
- Snap the slot and install the cover.
This installation method was relevant until 2016. Since 2022, almost all models except the cheapest ones come without a removable battery and cover. Therefore, the card compartment has to be placed in a separate tray. In this case, the following instruction works:
- Insert a paperclip into the special hole.
- Take out the tray.
- Install MicroSD.
- Close the compartment.
As a rule, the same tray is used to install memory cards as for SIM cards. But in rare cases, 2 different compartments may be used.
When switching from an old device, many buyers are unable to install a flash drive. Firstly, it is difficult to get used to the fact that the slot is now located in a retractable block. Secondly, when you try to place a card, it keeps falling out of your hands. Therefore, you need to act as carefully as possible, otherwise you risk losing the miniature drive.
What you need to connect a USB drive
Flash drives can be easily connected to Android smartphones when the device supports USB Host. This feature is enabled by default in Android models younger than 4-5 generations. To connect you will need one of 2 things:
- OTG cable with micro USB, mini USB, USB Type-C connectors and a second connector directly for an external drive;
- Double-sided flash memory with USB and micro or USB-C.
The USB-C connector and USB Type-C adapters are suitable for laptops, desktop computers and mobile devices (including tablets). It’s good when the flash drive has the FAT32 file system, but sometimes NTFS is enough.
Features and limitations of using an SD card
There are a few things you should be aware of before you start using a flash drive in this way.
- After conversion, all data, except for some applications and system updates, will be placed on the SD drive.
- When connected to a computer, only this part of the memory will be available for interaction.
A detailed overview of all types and types of Internet connections
In fact, all actions are performed only with a flash drive; the actual internal storage of the phone is not available for interaction and is practically not used at all. Firstly, this means that when you remove the drive, almost all your data, photos and applications will be lost. Secondly, if the volume of the flash drive is less than the actual storage capacity of the smartphone, then the amount of available memory will decrease, not increase.
Solving some problems
During the process of setting up or using a memory card in Android, certain failures may occur. Let's look at the most common ones.
The device does not recognize the inserted SD
The most common problem is that the card is inserted, but the phone or tablet does not see it. There are many solutions that are described in a separate material at the link below.
Read more: What to do if your smartphone or tablet does not see the SD card
The message “SD card is damaged” appears
The second probable failure is that instead of a notification about the setup, the user receives a message that the external drive is damaged. This is a rather serious problem, but you can fix it yourself.
Read more: How to fix the “SD card is damaged” error
We are glad that we were able to help you solve the problem. In addition to this article, there are 12,719 more instructions on the site. Add the Lumpics.ru website to your bookmarks (CTRL+D) and we will definitely be useful to you. Thank the author and share the article on social networks.
Describe what didn't work for you. Our specialists will try to answer as quickly as possible.
Method 1: Transfer the application
Considering the information mentioned in the important information block, you can save the application to microSD on Samsung by transferring the already installed one. In the current firmware version this is done as follows:
Important! To avoid problems, be sure to back up the data of the program you are moving!
- Open “Settings” – “Applications”.
- In the list of programs, find the one you want to move to the SD card and tap on it.
- Use the “Memory” items.
Here tap “Edit”.
- Select "Memory Card".
- Click "Move" and wait until the procedure is completed.
Important! After the transfer, it is not recommended to remove the memory card from the phone, as this will affect the performance of the moved application!
If the app's Settings page doesn't show the transfer option, go to the troubleshooting section below.
Use an SD card
How to move additional files
How to move files to SD cards using internal memory format
Note: Not all extras can be moved to an SD card.
- Open your phone's Settings app.
- Tap Apps.
- Tap the app you want to move to your SD card.
- Tap Storage.
- Under “Storage used,” tap Change.
- Pick your SD card.
- Follow the on-screen steps.
How to move files to SD cards in portable memory format
Step 1: Copy files to an SD card
- Open your phone's Settings app.
- Tap Storage & USB.
- Tap Internal storage.
- Pick the type of file to move to your SD card.
- Touch and hold the files you want to move.
- Tap More Copy to…
- Under “Save to,” pick your SD card.
- Pick where you want to save the files.
- Tap Copy.
Step 2: Delete files from internal storage
- Open the Adjustment add-on.
- Click Memory and USB.
- Click Internal memory.
- Select the type of files you need to delete.
- Click and paste files that need to be deleted.
- Click icon.
How to look at the memory, files and add-ons on the SD card
SD cards formatted as internal storage
- Open your phone's Settings app.
- Tap Storage & USB.
- On the list, tap your SD card.
- You'll see how much space is used and how much is free. To see which files or apps are using space, tap a category.
SD cards formatted as portable storage
- Swipe down to see your notifications.
- On your SD card's notification, tap Explore.
Erase
- Open your phone's Settings app.
- Tap Storage & USB.
- Pick your SD card.
- Tap More Settings Format.
- To erase all data on the SD card, including any music or photos saved on it, tap Erase & format.
Eject & remove
Important: First remove the SD card and turn it on, otherwise you may lose files. If you remove the SD card, you will not be able to access any additional data. To update them to the robot, insert and press the SD card again.
- Check to see if your phone has an SD card slot.
- Turn off the phone.
- Place the phone aside, remove the SD card tray or remove the back cover. If necessary, lift the lock that is holding the SD card.
- Remove the SD card from the slot. Once you have lifted the bolt, lower it.
- Insert the SD card tray or attach the back cover.
Stage 2: Setup for File Upload
If you have chosen to operate the SD card as a removable storage device, you will probably be wondering whether it is possible to configure it to download files. This option is available, but you need to do it for each application that requires the use of a memory card. Let's use Google Chrome as an example.
- Launch Chrome, then click on the button with 3 dots to open a menu in which select “Settings”.
- Go to the Downloaded Files section.
- Next, tap on the “Location of downloaded files” item, select the “SD card” option in the pop-up menu and click “Finish”.
- After returning to the previous screen, look again at the “Location of downloaded files” option - the Chrome folder should be listed there in the Android / data section in the root of the external drive.
In the usual way, changing this directory to any other will not work due to restrictions that exist in Android.
Format the card using ADB for use as internal storage
The function is not available on some devices, but it is possible to connect a flash drive as storage in another way. However, it is worth noting that this method is very labor-intensive and can cause harm to the device, so if you are not confident in your abilities, then it is better not to do this yourself.
To use this method, you will need to perform many steps. You need to download from the website and install the Android SDK, then download and install the drivers for the device from the official website, and you also need to enable “USB debugging mode” on the device.
Next, you need to go to the adb console and enter the commands presented below:
- adb shell
- sm list-disks (after execution, an id will be issued in the form disk:ХХХ,ХХ should be written down and entered in the next line)
- sm partition disk:ХХХ,ХХ private
Then you will need to turn off the phone, go to settings and press sd, select the menu and click “Transfer data”. That's it, the actions are finished.