Few people know about this, but in terms of basic functions security Android smartphones almost as good as iPhones. They support a search mechanism in case of loss, and their Google account protects them from strangers. In general, linking to an account is a mandatory requirement for most Android devices. It prevents unauthorized device activation by blocking the devices themselves at the system level. That's why forget your Google account password means almost losing control of your smartphone. Fortunately, there is a way out of even this situation.
Forgot your Google account password? It's OK. It can be reset
Protecting your Google account after resetting your phone
As we have already mentioned, with the version of OS Android 5.1 (Lollipop), which was released at the end of 2014, it introduced the so-called “FRP” (Factory Reset Protection) into the functionality of the Android OS. Now, after resetting the phone to factory settings, the system will require the email and password for the previous Google account that was on the device before it was reset.
Thus, Google tried to protect the phone from thieves who steal phones en masse and reset them to factory settings in order to delete all previous user data. Such a “clean” device is then sold to a new, unsuspecting owner.
In some cases, the owner of the phone himself resets the phone to factory settings, but does not remember the login information for his Google account, since he registered it a long time ago. In this case, he is faced with the question of how to bypass FRP protection from Google after resetting the settings.
There are several different ways to bypass Google FRP. All of them directly depend on the brand and model of your phone, Android OS version and other factors. The method that is suitable for Samsung phones may not be effective on Xiaomi, and vice versa. All these methods are one way or another published on the network, where they are studied by Google specialists, and with the next updates they close the existing holes that allow you to bypass FRP. However, there are currently several effective methods available, and we will describe them in detail below.
If you can't recover data from Android
Paid applications will help you find lost information on your smartphone. The DiskDigger utility scans the device's internal memory and recovers data. The program is downloaded from the Google Play store
After installation and analysis, the user is presented with a list of files that the software found.
Professional data extraction after a reset is carried out by service centers. A popular paid service at a repair shop allows you to recover lost information. The gadget is taken to a specialist in the first hours after the problem appears.
4.4/5 — (29 votes)
Most important: how to delete your Google account?
Before we move on to describing ways to bypass FRP protection, we will show you how to delete your Google account on your phone in the usual way. When you use the manipulations described below to gain access to your phone’s settings, delete your Google user account. Then, by rebooting your smartphone, you can create your account and use the device in the standard way.
To delete a user account on Google, do the following:
- Go to your phone's settings;
- Select “Accounts and Archiving” (or “Accounts”) there;
- Next, select “Account Management”;
- In the list of opened accounts, find your Google account and tap on it;
- Next, click on the “Delete account” button and confirm the deletion.
Now you know what to do when you access your phone's settings. Knowing this, proceed to the methods for bypassing Google blocking, which we describe below.
You don't remember your login
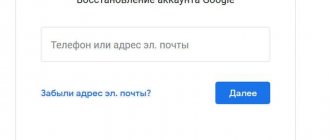
If you were the one who filled out your profile when you bought a new phone, then you probably use the same name for your own mailbox. You can also remember it in Google Account Recovery. For this:
- In the first login troubleshooting window, note that the user has forgotten the name used during registration;
- Choose a reset method - using a backup mailbox or a phone number linked to Google;
- Enter the first and last name you wrote down during registration.
After filling out the captcha, you can send a message. If the data is entered correctly, the recovery should complete without problems.
Sources used:
www.mobileoc.ru, it-doc.info, softdroid.net, konekto.ru, googlechro-me.ru, recoverit.ru, lifehacki.ru
Method using account verification code
This method uses a special code to go to the settings menu and bypass the FRP lock. Do the following:
- Insert the SIM card into a locked smartphone;
- Dial your phone number from another phone;
- Answer the call;
- In the menu that opens, click on “Add call” - “Add”;
- The dialing keypad will be displayed;
- Enter the combination *#*#4636#*#* there
- If you did everything correctly, the settings menu should appear;
- Select "Backup and Reset" and disable the "Copy data" and "Recovery" option;
- Perform a factory reset and reboot your device.
How to recover other data
Cloud storage "Photos" in Android stores images and video files on a remote Google server. The sequence of user actions is as follows:
- Open the Google Photos application on the gadget.
- Go to the “Bin” section.
- In the list, check the files and folders that need to be restored.
- Press the “Start” button.
After the process is completed, the data will appear on the device in directories under the old names. The procedure can be carried out on a PC from a browser. The principle of retrieving photos and videos from cloud storage is similar to the mobile version. After synchronizing with your phone, the information will be restored.
Method using the QuickShortcutMaker utility
This method has helped a huge number of users, so we recommend using its functionality to bypass Google’s protection. It uses a third-party application “QuickShortcutMaker”, which allows you to bypass Google protection.
Do the following:
- Turn on your smartphone, select your Wi-Fi network and connect to it;
- In the email input field, type any few letters and select them by clicking;
- In the menu that opens, tap on the button with three dots and select “ASSIST” (support or help);
- A Google Now window will open and offer assistance. Decline by clicking on “No, thanks”;
- A Google search will be displayed, which will allow us to navigate to the phone menu. In this search bar, type Chrome
- The Chrome icon will appear, tap on it;
- The Chrome browser will launch. Use it to download the QuickShortcutMaker.apk file from the website;
- Go back to the search bar and type “Downloads” there;
- Tap on the result found;
- After opening the downloads folder, find the QuickShortcutMaker.apk file there and run it;
- You will be prompted to install an application from unknown sources. Go to your phone's settings and allow this installation;
- After installing the file, click on “Open”;
- In the application interface, in its search, enter “Google Account Manager” (Google Accounts);
- Next, find the item “Type E-Mail and Password”;
- Then click on “Try”;
- In the window that opens, tap on the button in the form of three dots in the right corner, and select the “Login through browser” option;
- The browser will launch. Log in to the account for which you know the password, or that you created;
- Confirm your entry and reboot your gadget;
- The old smartphone account will be replaced with a new one. All you have to do is go through the basic steps of setting up the device, and you will be taken to the desktop;
- Now, if you wish, you can reset your smartphone and connect your device to your Google account.
All current ways to bypass Google account verification
If the owner of a smartphone is faced with the need to unlock the gadget after resetting the settings to factory specifications, provided that there are no documents for the device, you will have to use unofficial methods of bypassing the Google FRP account, which will be discussed further.
There are several options to bypass the “technological” protection of the FRP format on a smartphone, simple and complex in implementation, and each of them has a right to exist. What exactly “works” in a particular situation is difficult. The owner of the smartphone will have to try methods one by one to achieve the desired result and “reanimate” the functionality of the gadget, with the possibility of its further use.
Unlocking using a memory card
One of the easiest to do is bypass FRP using a regular memory card. The process is not expensive; to implement it, it is necessary that the owner of the smartphone has a memory card, and the reset procedure itself is possible due to the appearance of a message on the smartphone screen about connecting the drive. Such a notification guarantees the possibility of implementation in the device settings when performing the following manipulations in turn:
- You need to insert a flash drive into a working gadget.
- In the notification that appears on the device screen, click on the “OK” button to get to the system settings.
- In the list that opens, select the “Application Data” item, where go to the “Settings” section, which must be activated with the “Launch” button.
- Next, through the “Restore and reset” option, you need to select “Reset DRM” and delete the keys. If the procedure is completed correctly, the notification “Licenses successfully removed” will appear on the screen.
- After this, you will need to return once again to the previous “Restore and Reset” menu, where all that remains is to reset your smartphone.
- After an automatic restart, the gadget will already be “free” from FRP protection, which will allow you to continue using it and create a new security account or operate the device without FRP.
Reset FRP Lock using SIM Card
If the first option for some reason did not give the desired result, then you can use the following method to restore the device’s functionality by resetting FRP Lock using an active SIM card. This method of resetting the “anti-theft” lock assumes that the owner of the gadget has the opportunity to call from another phone to a locked smartphone. The account bypass procedure has the following regulations:
- Call a blocked phone and accept the call, then create a new call with the technical code *#*#4636#*#*. After this, the system will automatically move the user to the advanced settings menu.
- By clicking the "Back" arrow in the upper left corner of the screen, move to the settings section of the standard category.
- Through “Restore and Reset” or the “Backup and Restore” section, disable the “Data Backup” option, and also reset the settings.
- Wait until the device turns on after rebooting and register a new account, with the possibility of further safe use of the smartphone.
Bypass blocking through Wi-Fi settings
An equally effective and easy-to-use way to reset an anti-theft password from Google is to bypass FRP Lock using Wi-Fi. The process consists of performing the following manipulations when the unit is turned on:
- Go to the page where the default Wi-Fi connection is selected and activate any of the available networks.
- A field for entering a password will appear on the screen, by clicking on which you can call up the “keyboard”.
- Next, you will need to activate voice input by pressing the spacebar, clicking on the Swype manual, the comma, or the numeric keypad icon. The choice of voice input method depends on the type of keyboard.
- When you enable voice input, you don’t need to say anything, just wait until the window with an error message appears on the screen.
- To reset your Google FRP account lock, you just need to go to “Settings” and carry out the manipulations described in the previous options for restoring the functionality of a locked gadget. The transition is made by clicking on the small icon located next to the error message, where you select the Google Now item in the submenu that opens, followed by a refusal in the manipulation confirmation window, which will open a search bar in which you just need to write the word “Settings” and start the process.
- To free the gadget from locking passwords, then you need to select “Delete account” through the “Recovery and reset” item in the settings menu that opens, and confirm the command with the “Reset” button, after which the smartphone or tablet will be free of anti-theft passwords.
Using the SP Flash Tool
As you can see, the above methods of bypassing smartphone locks through a Google account are simple to implement and can be implemented by any user. However, not all workarounds are easy to implement. For example, the following option for combating anti-theft passwords is not suitable for all users, and is recommended as a workaround only for “advanced” gadget owners. Professional bypass of FRP Lock can be done using the SP Flash Tool software application, which is designed for flashing smartphones running on chips from Mediatek. To perform the manipulation, you need to download and install the SP Flash Tool on your PC, download the firmware for Android that matches the one installed on your smartphone, unzip it to be able to access the scatter file necessary to perform the bypass. Further manipulations are performed according to the following instructions:
- Open the scatter file on your computer using any text editor.
- Using the “Find” option, find the FRP.
- To work, you need the values written in the columns opposite the phrase Linear start addr and the Partition size parameter; you will need to copy them.
- Close scatter.
- Further work is performed in the SP Flash Tool program. In the program you will need to go to the Format tab, where you fill in all the fields one by one. A checkbox is placed opposite the Manual Format Flash inscription, which will allow you to perform manual formatting, the EMMC_USER parameter is written in the Region column, and the previously copied content from the Linear start addr and Partition size columns is set in the Begin Address and Format Length lines, respectively.
- To complete the process, just connect the switched off gadget to the PC and start the process of clearing the phone from being locked with the Start button.
At the end of the cleaning process, you can disconnect the device from the PC and safely turn it on: the lock from the phone will be completely removed.
Unlocking using PassFab Android Unlocker
If you do not have sufficient skills or are simply afraid to perform such manipulations, there is an easier way to unlock FRP Lock, and it also involves using a computer and specialized software.
We are talking about the PassFab Android Unlocker program, which can not only bypass FRP Lock account blocking, but also unlock the smartphone screen, regardless of the locking method used - PIN code, fingerprint or pattern password.
As for unlocking Google account protection, there is a limitation: the function only works with Samsung phones, but with almost all models, from quite old ones to S10+. It is these phones that the methods described above often fail to cope with. Removing a screen lock is a more universal mechanism, capable of functioning with a fairly extensive list of phone brands.
The system requirements of the PassFab Android Unlocker utility are minimal:
- Windows OS starting from XP (32/64-bit);
- CPU frequency – from 1 GHz;
- minimum OP volume is 256 KB, recommended – 1 GB;
- To install the program you need about 200 MB of free disk space.
As you can see, even a very weak computer is suitable for using the program, that is, there is no need to focus on this aspect.
So, let's look at the step-by-step algorithm for unlocking Google FRP Lock on Samsung smartphones/tablets:
- We charge the smartphone (at least 50%).
- Download a trial version of the utility or buy a fully functional one on the official website.
- After downloading, run the installer and follow the instructions.
- Let's launch the program.
- Select the large button “Remove Google account lock (FRP)” on the main screen.
- We connect the phone to the computer using the “correct” USB cable designed for two-way data exchange. You need to connect to the connector located on the back of the computer (rear).
- If everything is done correctly, the following screen will appear asking you to select the Android version on your mobile device;
- If you do not know the OS version on your smartphone, click the corresponding inscription, highlighted in green;
- Note that the unlocking algorithm is different for Android 7/8 and other versions of the operating system. Having selected the OS, click on the “Send message” button;
- We wait until the message is sent. We pick up Samsung, a window will appear on it, in which we press the “View” button;
- You will be redirected to the Galaxy Store - on this page you need to agree to the terms of service by clicking the appropriate button;
- Next you will be prompted to go to the browser. We agree by clicking the “Open” button;
- In the browser, go to PassFab.com/FRP-settings;
- On the settings page, select PIN code;
- Select the “Do not require” selector and click “Next”;
- Enter a simple PIN code and click the “Continue” button;
- Click “Next” again, and then the “Back” button until we return to the Wi-Fi settings page;
- Reconnect Wi-Fi, exit the settings wizard;
- Enter the newly set PIN code and click “Continue”;
- The Google Account login page appears. Click the “Skip” button;
- Reboot the smartphone.
That's it, your Google FRP is unlocked, as PassFab Android Unlocker will report:
Method using APK Tool functionality
One way to bypass Google account verification is to use a small APK utility. Its use may cause some difficulties, since installing an application on a DRM-protected phone is a complex process that has its own distinctive features on different devices. To use this method, you will need an OTG cable with which the USB drive will be connected to the phone.
For this method you will need an OTG cable
The process using the APK file is as follows:
- Select the appropriate APK version. For example, you can try one of the following options - FRPHijacker Tool (for Samsung phones), DG Unlocker Tool, FRP Bypass APK, GSM Flasher ADB Tool;
- Download the selected application to a USB drive - this will make it easier to bypass the utility;
- Connect the USB drive to the phone using an OTG cable - one end to the smartphone, the other to the flash drive. If the connection is successful, a notification about connecting a new drive will be displayed;
- Install APK from USB drive;
- After this, you can access the Android settings, and you can disable the Google account verification feature
Using Adb Run
You can bypass Google account verification using this wonderful PC program in all respects. After downloading (download - clouds.androidp1.ru) and installing it, the owner of a phone with FRP must:
- Connect the phone, wait for initialization and launch the program, then select Reboot Android from the list of available options by entering the number 2 in the text line and pressing Enter.
- Next, follow the same path to the Reboot Bootloader command and go to Fastboot menu.
- Select input mode Manual.
- What to do if you lost your Pyaterochka card, Help me out? How to get a new one
- And run Manual mode Fastboot.
- In the command line that appears, enter fastboot oem clean_frp and apply the command by pressing Enter again.
- Wait for the notification of successful completion and reboot the phone into normal mode using the “On/Off” button.
- If after entering the command nothing happened, apply a chain of additional ones: in the same field, enter fastboot erase persistent .
- Apply and wait for the request to be processed.
- Then - fastboot erase frp .
- And fastboot erase config .
- Once the process is completed, reboot Android.
In this way, the phone owner is almost guaranteed to be able to remove notifications about the need to confirm a Google account; if the method does not work, you need to move on to the next one, more complex, but also effective.
Method using a SIM card
Another way to bypass Google account verification after resetting the settings on Android is the method using the phone's SIM card. Do the following:
- Remove the SIM card from your smartphone and turn on the device;
- Skip the notification about the absence of a SIM card and select the interface language;
- In a form where you need to provide a phone number or email address, hold the @ button for a few seconds;
- In the settings menu that opens, select the “Android keyboard Settings” option;
- By pressing “Back” and “Home” you can launch the Google search engine (it will appear on the main screen of your device);
- Enter “Settings” in the search bar and go to this section;
- Disable automatic recovery options and saving backups;
- Reset your smartphone again (by doing a hard reset).
WiFi
The second option for entering “Settings” at the account confirmation stage involves the following user actions:
- Connect to your own wireless network, then select any other one displayed on the screen.
- And enter any combination of characters in the password field.
- Now the owner of an Android phone will have the opportunity to go back to the list of running processes - and proceed further exactly as written in the previous section.
Method to Bypass FRP Without Internet Access
An alternative way to bypass Google protection after resetting your phone is the following:
- Insert the SIM card into the phone blocked by Google protection and dial your phone number from another phone;
- Answer the call, then select the “Add new contact” option;
- In the form that opens, enter any number of numbers;
- Click on the “Save” button, select Google, and create a new Google account;
- Reboot your smartphone.
Authorization during a call
Another way to remove the request to confirm your Google account is to link another account to your phone directly during an incoming call. This can be done in a couple of minutes - faster than going through the IMEI recovery procedure. To bypass the request, the user will need:
- Call a “locked” phone, accept the call and, without hanging up, go to the “Contacts” menu.
- Click on the “Add” button.
- Select create a new account.
- Specify its type - it’s easy to guess that it will be a Google profile.
- Enter the login and password for your work account in the appropriate fields - or create a new one, not forgetting to save the authorization data.
Important: at the stage of creating an account or logging into an existing call, you can end it by pressing “Reset” on the smartphone from which it was made.
Method using SMS or email
The next method also uses the combination of numbers we have already mentioned, but has a slightly different operating principle. Do the following:
- Connect your smartphone to Wi-Fi;
- Try entering your email address and select the “Send via SMS” option;
- In the window that opens, type any message and send it to number 112;
- You will receive an error message when sending a notification. A call button will be displayed next to the notification;
- Touch this button and enter the code *#*#4636#*#*
- When you make a call, the system will redirect you to settings;
- Next, perform a hard reset of the device.
Help from a friend
Before moving on to studying methods that are quite complicated for inexperienced users, we recommend using the simplest of them and contacting the seller or the person from whom you received your Android phone. Ask him for a Google login to log into your device, and if he provides it to you, delete your Google account after successfully logging into your smartphone.
All you have to do is create your own account, link it to your email address and fully use the functionality of the gadget.
How to bypass FRP protection (relevant for Samsung devices)
This method was proposed by English-speaking users and works best on Samsung devices. Do the following:
- Start your phone;
- When you get to the Wi-Fi connection option, tap the text field, but don't enter the Wi-Fi password yet;
- The keyboard will appear. Press and hold the spacebar, and in the menu that opens, select “English (US) Google Keyboard”;
- Enter your Wi-Fi password and connect to your network;
- Follow the instructions until you reach a page that asks you to enter your Google account information;
- Tap the text field and enter your email there;
- Next, press and hold the “@” symbol;
- When the menu appears, select "Google Keyboard Settings";
- Then click on the three dots button and select “Help & Feedback”;
- Click on any help article and a web page will open;
- Long press on any word to highlight it, then select “Web Search” from the menu and then “Google App”;
- Find Settings, where a gear icon should appear. Select it and then click on “Backup and Reset”;
- Select "Factory Data Reset";
- Follow the instructions to go through the setup process again. When you reach the Google account verification page, you will have the option to skip this step entirely.
Special Applications
There are several utilities that allow you to restore and configure data after a factory reset.
FoneLab
This software is installed on your computer.
Resuscitation instructions:
- Start the program.
- Connecting your phone to your computer via a USB cable.
- Selecting the backup mode and the required device.
- Placing marks next to the data to be saved. Click OK.
- Disconnecting the device and performing a reset.
- Reboot the phone and reconnect to the PC.
- Selecting the “Data Recovery” section in the program.
- Selecting the required archive.
- Click on the “Next” button and wait for the procedure to complete.
Android Data Recovery
A “strong” program that allows you to search and retrieve lost data on phones, even factory ones.
Algorithm of actions:
- Launching and installing software on a PC.
- Connecting the gadget to the computer.
- Activating developer mode on your phone.
- Enable USB debugging.
- "Scan".
- Check the boxes for information to be returned to the phone.
- Click on the “Recover” element.
- Ready!
In the article, we learned that there are two ways to restore and configure information: third-party programs for restoring data and retrieving information from Google cloud storage. For the second method, you need to make a preliminary backup copy before resetting the settings to factory settings. Choose the most convenient one and leave a comment.
Method using a third-party program for Windows OS
If you are looking for a simpler solution to bypass Google account verification, a program for Windows OS called “Tenorshare 4uKey for Android” will help you. This product can easily eliminate the verification of your device after resetting your phone to factory settings. The program is paid, a monthly license costs about $30.
The procedure for using the program is as follows:
- Download, install and run the program;
- Connect your gadget using a USB cable to your PC;
- From the home screen, select the “Remove Google Lock” (FRP) option;
- Next, click on “Start”;
- Next, select the brand of your phone and its model, then click on “Next”;
- Next, follow the instructions on the PC screen to put your gadget into Recovery Mode;
- Then enter PDA Info (displayed on your smartphone screen), your country and operator. Next, click on “Next” and confirm the PDA Info data you entered by clicking on “Confirm”;
- Follow the onscreen instructions to put your device into Download Mode;
- The required unlock file will be downloaded to the phone from the PC and the necessary changes will be made;
- Next, follow the on-screen prompts to put your phone into Recovery Mode;
- While in the recovery menu, use the volume keys to set the cursor to the “Wipe data/factory reset” option and press the power button to select the option, and then to “Yes – delete all user data” to confirm the choice;
- Next, in the recovery menu, place the cursor on the “Wipe cache partition” option and confirm the choice by pressing the “Power” button;
- Once all operations are completed, follow the on-screen instructions to put your device into Download Mode;
- The previous Google account on the device will be deleted. Then you can use your phone as usual.
Official way
If Google account confirmation is required by a phone that was given or purchased second-hand, the easiest way to remove intrusive messages and register your profile on the device is to contact the donor or seller and ask him to enter or send him a login and password. Having entered them in the primary settings window, the user can then go to “Settings” and delete the previous owner’s Google account, and then link his own - this is easier than disabling application optimization when turning on Android.
Tip: if several profiles were attached to your smartphone, it is strongly recommended to erase them all - this will avoid leakage of confidential data, and in addition, will eliminate messages about actions performed by the account owner.
If you have your own phone and, after an incorrect reset, refuses to accept your credentials, you should make sure that they are entered correctly and proceed to the other methods listed below.
In addition, the user can take the device to a service center and entrust the matter to specialists - however, bypassing Google account verification is no more difficult than clearing the cache on the phone, and in order not to waste time, it is better to perform the described manipulations on your own.
Why does the message “Sign in to one of the accounts of the owner of this device” appear in Android?
The innovation in Android is called the FRP Lock system. Its principle is based on a seemingly simple algorithm. When a user changes any data on his account with which he logs into the device, the message “Log in to one of the accounts of the owner of this device” appears. It tells the user that data from the old account is needed. If the user has forgotten them or changed the password or login, the device will not allow login. This blocking lasts for a day. The simplest solution in this situation is to wait 24 hours and try to log into your Google account with the changed data.
- How to sync all your contacts with your Google account on Android and iOS devices
The same blocking appears if you have created a new account and try to log in with it. This is done by people who simply cannot remember the data from their old profile. A similar blocking exists on Apple devices. Apparently the Android developers liked it, and they decided to implement it in their system.
Bypass lock using standard Android keyboard
If the previous method did not help you and you were unable to log in, you can try another way. Reboot your device and return to the step that requires you to log into one of the profiles.
- Focus your selection on the data entry window so that the virtual keyboard appears.
- Long press the "dog" or "at" (@) symbol.
- A gear sign should appear, select it and tap on Android Keyboard.
- You need to go back and find the “Task Manager” item here. Select it.
- After your actions, a Google search bar should appear. Select "Settings" and click on us in the results that appear.
- We go, as in the previous method, to the “DRM licenses” section and delete them all.
After this, instead of deleting your account, you can choose to reset your device settings to default. In this case, you will not need to re-enter your account information or create a new one.
We recommend: Android Accessibility Suite, what is this program and is it needed?
Resetting DRM licenses
What kind of “game” this is - I told you here. I won’t repeat myself and go too deep into the theory. I note that this method should be used only when the first two options did not work. By the way, this will not work on all models. But on the Huawei Honor A5 (my wife has one) everything worked out.
You should stock up on an OTG cable so that you can connect a USB flash drive to your mobile gadget. Again, not all devices support this functionality. Further steps are shown in the video instructions below.
I’ll warn you right away that after connecting the drive to the smartphone, it may take a long time until the media is fully detected.