For most users of modern Android devices, a smartphone serves not only as a means of accessing the Internet and communicating with friends, but also as an alarm clock. This function has a lot of internal settings that allow you to change the call time, enable automatic repeat, soft wake-up and, of course, select a melody from the local library. During today's instructions, we will talk about the process of installing standard melodies and your own music on an alarm clock, using several methods at once.
Setting a melody for an alarm clock
To set a melody for an alarm clock, there are currently several methods, which come down to both standard system tools and third-party applications. We will try to pay attention to both cases, but with the greatest emphasis on the built-in functions. In addition, we suggest that you familiarize yourself with alarm clock applications in more detail in a separate review at the following link and, if necessary, use them as an alternative, since the programs have basically similar settings.
Method 1: Sleep as Android
With support for most versions of Android, compatibility with smartwatches and many other functions for controlling alarms and various timers, this application is one of the most popular of its kind. At the same time, here, as well as in Google’s Clock, you can set custom songs as a wake-up signal.
- After downloading and launching, use the gear icon in the upper right corner of the start screen. In the options that open, you must select “Alarm clock”.
Now tap the “Ringtone (Default)” line and select an entry. Unlike most analogues and standard “Watches”, many stylized options are initially presented here.
You can select custom audio files using the “Your music” block at the bottom of the page. This is where all the songs found on the device are located, whether they are standard signals or full-fledged MP3s from the local library.
To select specific music, tap on the folder icon in the upper right corner of the screen and use the file manager to find the song.
Individual alarms
- In addition to all timers at once, you can select music for individual options. To do this, on the home page, click “Set alarm” and select the desired item.
To change in the “Melody” block, tap on the item of the same name and select a song by analogy with the instructions above. The main difference in this case comes down to the possibility of turning on the silence mode.
As you can see, the application is quite easy to use and allows you to change the signal in a few steps. The effectiveness of the software is also emphasized by the high rating on the official page in the Play Market and many positive reviews.
Method 2: Standard “Clock”
The Clock application, as a rule, is installed by default on smartphones with the fifth and higher versions of the Android operating system and serves as the main tool for working with various timers. With its help, you can control the operation of the alarm clock in detail, clearly planning the time of the signal. As with other similar software, there are options for changing music from the standard library or custom media files.
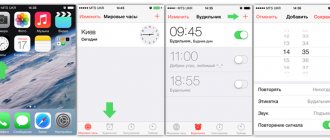
- To begin, open the Clock using the appropriate icon in the application menu. If for some reason they are not available on your phone by default, you can download them from the official page in the Play Store.
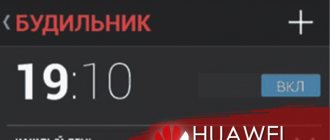
After launching, use the panel at the top of the screen to go to the “Alarm Clock” tab and here use the button with the “+” icon. This will open a window with the basic settings of the future wake-up timer.
Having set the desired time and clicking the “OK” button, you will see that a new entry will appear on the “Alarms” page. Now, to go to more detailed settings, tap on the arrow icon under the clock and select all the necessary settings.
Here you need to click on the line labeled “Default” next to the bell icon. The same applies to all standard options.
The next step will present a modest library of standard signals, each of which can be selected and listened to by touching the corresponding line. Additionally, Clock works with Google Play Music, making it much easier to add audio recordings.
To add custom music, click on the “Add” button in the “Your sound signals” block and use the file manager to search for the desired recording in the smartphone’s memory. It's best to convert your audio to a compatible MP3 format beforehand, as the app only recognizes some extensions.
To select music, just touch the line, after which it will appear on the “Alarm clock” page in the “Your sound signals” block and will be automatically selected. You can complete the setup by simply using the “Back” arrow in the page header.
When you review the settings for a specific option again, the song in the melody line will change to the previously selected music. At this point, the change procedure can be considered complete.
Unfortunately, through the global “Settings” of the application, you can only change the basic parameters, while you won’t be able to change the standard melody for all alarms at once.
Among the advantages of the program, especially noticeable is the stability of operation on all supported devices, regardless of the manufacturer, guaranteeing clear signal activation at the set time. In addition to this, the application synchronizes with other Google services like Assistant and can be used as a tool for setting up Wear OS smartwatches.
Method 3: Phone Settings
On most modern Android devices, the system “Settings” also contains options that allow you to change the alarm melody. We will consider only one version of the operating system of the seventh version, but you should keep in mind that on different phones the items may either be absent altogether or have a different location.
- Expand the classic "Settings" application and in the "Device" block, select "Sound". Here, in turn, you need to click on the line “Default alarm”.
In the application block for this parameter, select any file manager and find the desired file in the phone’s memory. To select, tap on the line with the name of the composition.
If you want to select one of the standard melodies, you should open the parameters using “Multimedia Storage” and in the window that appears, decide on the option. The Android library is quite modest in terms of variety and therefore it is still better to add custom audio.
If the change is successful, the name of the selected music will appear under the “Alarm” line. Now you can close “Settings” and check its functionality by setting a test alarm.
This approach allows you to set music for the alarm clock in a minimum number of steps, using a familiar program for working with files. In addition, if you change the music in this way, the “Clock” application and other analogues, when choosing the “Default” melody, will use exactly the option you have chosen, thereby significantly helping to make a global change.
Method 4: Changing the melody
This method within the framework of this article is just an addition to the previous methods and, possibly, an auxiliary tool for some third-party applications. It consists of replacing the standard alarm clock melodies with the desired music in the system folder of the operating system. This will allow you to use custom compositions through “Settings”, where there is no option to select media through the file manager.
- First of all, study the article on adding root rights on your phone and then install an application that can process system files. The recommended option is ES File Explorer with the Root Explorer feature enabled.
Read more: How to get root rights on Android From the main menu, expand the “Local Storage” block and go to the place where the alarm clock song you need is stored. The song can be in any format, but it is best to use MP3 or OGG.
Touch and hold an audio recording until the secondary menu appears on the screen. After that, click the “Copy” or “Cut” button.
In this mode, through the application menu, go to the “Device” section and select the “System” folder. Then go to the following path: /system/media/audio/alarms.
Note: You can optionally copy the folder with standard alarm sounds to another location so that you can make a backup recovery if necessary.
While in the Alarms directory, use the Paste button on the bottom panel to add the previously copied music. The procedure will take some time.
Now, among the standard ringtones, select the one you want to replace, remember or copy the name, including the extension, and click “Delete”. In our case, “Barium.ogg” will be replaced.
Once you're done deleting, select the recently added music again and click the Rename button. In the text field, add the name of the deleted melody, including the format, so that it turns out the same as in our example.
Click "OK" to save and wait until the procedure is completed. After this, your composition will be displayed as one of the standard ringtones and can be installed through any application or “Media Storage” in the “Settings” of the smartphone.
The only difficulty, as you can see, is the need to obtain root rights to access the system folder through the file manager. Otherwise, there are practically no problems with the method, even if the file format is changed during renaming, and not using special applications.
Where is it located and how to set the alarm clock on Samsung
To set an alarm on Samsung, go to its settings in 2 ways:
- tapping on the clock widget on the desktop;
- by swiping up from the bottom of the screen and tapping on the “Clock” application.
A new window will open with a list of signals. The preliminary setup looks like this:
- to turn on the bell, activate the toggle switch opposite the set time;
- Click on the illuminated dial to expand the settings menu;
- in the block above, set the time when the bell should sound. Just below, mark the days for sound notification.
Next comes a block of auxiliary add-ons, some of which allow you to disable or change:
- “Alarm name” – enter the name of the alarm clock here;
- “Alarm sound” – determines the composition that will play when the alarm is activated. Go to “Ring Sound” to change the ringtone, use the slider to change the music volume level;
- “Vibration” – indicates whether the vibration motor will work at the time of the call. The vibration type can be changed in the same way as an audio track;
- “Pause” – here you specify how often and how many times the notification will play.
When finished with the settings, click on the “Save” button to return to the previous menu.
When you need to set more than 1 calls, find “Clock” again and in the window that opens, tap on the “+” icon. Next, use the instructions described above.
Why doesn't the alarm go off?
The reasons why the notification does not work are hidden in the excess of temporary files in the “Clock”. In this case, it is recommended:
- open “Settings” and go to “Applications”;
- expand “Manager” or “All applications”;
- click on the ellipsis or “Options”, turn on “Show system applications”;
- in the list that appears, tap on “Clock”;
- go to “Memory” or “Persistent Storage”;
- Tap on “Clear data” and “Erase cache”.
After surgery, set a new alarm.
Other options:
- the notification did not work due to a firmware update;
- An application for cleaning files or an antivirus is installed on the device, blocking the operation of the watch;
- Normal or super energy-saving mode is enabled: it disables unimportant processes to save battery;
- The ringer volume on your smartphone is set to minimum - go to the melody selection item and turn the slider to maximum.
The user only has to check each of these points manually. It is important to note that if the phone is turned off, the call will work.
How to set a melody for an alarm clock on Android?
To begin with, it is worth considering the standard option of changing the melody, which most mobile phones have. In order to set a song as an alarm clock, you need to follow these steps:
- Open the menu and tap on the “Clock” shortcut in the list of applications.
- At the bottom or top of the screen, as a rule, on the left side there is an alarm clock icon, which you need to click on.
- In the list (if you have more than one task), you need to select the line you need with the alarm clock; clicking on it will take you to the parameters.
- Here, among other items, you should be interested in the options “Alarm melody”, “Alarm sound” or something like that.
- After this, a window with a file manager will open, where you can set music for the alarm clock on Android by selecting the melody you need in the presented directories (Music, Music, Ringtons, etc.).
Some, especially smart firmwares, do not launch the file manager, but immediately display the entire list of tracks that is in the phone’s memory.
If your gadget displays only standard sounds and you can’t set a melody for the alarm clock on Android, then you should try the following options. But if you want to put a melody on a contact, instructions can be found on the website: https://www.syl.ru/article/309665/kak-postavit-melodiyu-na-kontakt-na-android-sovetyi-rekomendatsii-instruktsii.
How to change the alarm sound on Samsung
After a system update on the Samsung Galaxy A50, A51 or J2 Core, some settings are rolled back, which means you will have to change the language of the system synthesizer in the smartphone. To find and configure it:
- go to “Settings”. Scroll down the list and open “General Settings”;
- select "Language and input";
- tap on “Text to Speech”;
- Click on “Preferred Module” and install “Samsung TTS Module”;
- returning to the previous menu, click on the gear next to “Preferred module”;
- in the list, select “Install voice data”;
- A list of language packs will appear. Find Russian among them and tap on it to start downloading to your device;
- return to the previous window. Install “Russian” with one click. Click on the gear next to the language to set the voice to male or female;
- now return to the desktop and open the menu with alarm settings;
- select the installed alarm and in the settings click on “Alarm sound”;
- then click on “Ring Sound”;
- From below, turn off and then turn on the “Time Voice” function;
- go back to settings and click “Save”.
Adding a track to the default list
To complete this task, you will need any more or less intelligent file manager that can work with directories and copy files. This procedure can also be performed when connecting a mobile gadget to a PC via a USB cable.
First, you need to make sure whether there is a Media folder on your Android device. If there is none, then you need to create it, just like the following subdirectories. The correct path looks like this: MediaAudioAlarms.
And upload your melodies to the last directory. After completing the procedure, all the music files that you transferred to the Alarms folder should appear in the basic list of alarm calls. Setting the melody is described above.
Possible problems
Sometimes there may be a format compatibility issue. Such difficulties very often arise on Nexuses and LG phones. Almost all audio content comes with the MP3 extension, but some firmware refuses to accept it; they only work with the specific OGG format.
To solve the problem you will need any audio converter. There are just a ton of them on the Internet and on Google Play, so there shouldn’t be any problems with choosing. The main thing is that the converter supports the OGG extension. It must be indicated in the description of the application.
Conversion
Among other software, we can note the excellent Format Factory program. It is effective, supports all known formats with extensions, and also has a lot of positive reviews from users.
Next, you need to convert the MP3 audio file to OGG format. This is a non-resource-intensive and relatively quick procedure. After completing the conversion, you need to copy the resulting file with the OGG extension to the Alarms folder on your Android device.
The further procedure for changing the alarm melody is no different from others. Here you also open “Clock”, “Alarm Clock”, select the desired line with time, go to the parameters and then click on your favorite track in the list presented.
Also, sometimes there are problems with the Cyrillic alphabet, and the audio file is displayed incorrectly or is not visible at all. In this case, it is enough to rename the track in the same manager, eliminating the Russian spelling.
An alarm clock is a very convenient utility on our Android smartphones, but sometimes its sound is very annoying. But the morning begins not with coffee, but with an alarm clock, so it directly affects our general mood during the day.
It is very difficult for manufacturers to please all users at once, so the smartphone either has a lot of standard alarm ringtones installed, or the user himself will have to install it. We will discuss exactly how to set your own melody on an alarm clock in this article.
Page navigation:
Where can I find a good ringtone?
If you have trouble finding it, you can use popular sites with pirated music and find 30-60 second melodies there, which are perfect as an alarm clock. Cutaways from some musicians' choruses usually work very well. They are very easy to find, loud, clear and don't last long.
If you want to set some song you like as an alarm clock, then use the functionality of the Video Audio Converter program. In it you can cut music from a video, trim part of a track and generally do a lot of interesting manipulations with sound.
How to change alarm ringtone on Samsung Galaxy M12
The user can add any song as a sound signal. By default, the standard sound is already selected (not everyone will like it). To change it, you need:
- Open the alarm clock (built-in or third-party).
- Go to the "Settings" section.
- In the “Default Melody” tab, select the signal you like.
The Samsung Galaxy M12 smartphone gives you the right to change the sound for both one and all alarms. The general settings section is responsible for simultaneously changing reminders, and by clicking on the set alarm time you can go to the parameters of a specific alarm clock.
How to change the default ringtone?
If you don’t have your own track, try choosing the standard alarm ringtones already on your phone, which the manufacturer has prepared in advance.
To do this, you need to open the “Clock” application on your smartphone, go to the “Alarm Clock” tab and, while creating or editing one of the alarm clock entries, select the menu with the image of a bell. This is what it looks like in the screenshot:
After clicking, a large list of standard ringtones will appear. You can select any of them, and it will start playing, and after pressing the “Back” button, the last one you listened to will be saved.
Thus, you can easily set a standard ringtone on your Android smartphone. But what if a normal ringtone was never found, what to do? You should add yours! And for this there are two ways, about each of which read in more detail below.
How to turn on alarm clock on Samsung Galaxy M12
Samsung Galaxy M12 has a built-in alarm clock, which is equipped with all Android devices. At the same time, no one limits the smartphone owner from using special programs to set a sound signal.
Standard means
The phone's home screen displays a clock. You need to click on them to set the alarm.
To add a new reminder, you need to click on the “+” button and then set the required time. Click the check mark as confirmation.
If the alarm clock is already in the list, you can turn it on by moving the slider to the active position. You can also change the settings by clicking on the reminder time.
Applications
There are many programs that can wake up any owner of the Samsung Galaxy M12. You can even find a voice alarm clock on Google Play to enhance your wake-up effect. There are also apps. Which track sleep phases and wake a person independently. To get acquainted with the details, you need to study the description of each individual program on its page in the Play Market.
Such applications work on a principle similar to built-in tools. However, to set up a reminder, you need to click not on the clock widget, but launch the program yourself. The same applies to additional functions that are present in individual utilities.
Method 1 – Using the Clock app
The method is very primitive and does not work very well, but it is as simple and clear as possible. Please note that it may not work on your smartphone due to certain circumstances. For example, if the wrong version of the Android operating system is installed (older or the firmware does not support this method).
To change the alarm melody on Android, follow these instructions:
- First, open the Clock app. Next, go to the “Alarm Clock” tab. Open an already created or create a new alarm clock and click on the menu with a bell (exactly the same menu from the previous subtitle of our review, there is a screenshot that matches this description).
- In the menu with a selection of standard ringtones, find the “+ Add” button. This is what it looks like in the screenshot:
From the side menu, select the environment from which you want to get the media file. That is, the space where the desired melody is stored. This can be built-in memory, a memory card, or any other cloud available on the device at the moment. In the case as in the screenshot, the environment is called “Mi A1” - this is the name of the smartphone’s built-in memory. It is in it that the file I need is located, but this item may differ for you due to the different number and names of environments.
Now all that remains is to find the desired file among the list of folders and open it.
After opening, it will automatically be added to the list of available ringtones where the “+ Add” button was previously. At the same time, the “+ Add” button itself does not disappear anywhere, and you can still add tracks so that in the future you can easily switch between them without opening the explorer and only changing the ringtone in the alarm setting.